Deploy Bold BI Azure web app using the ARM template
To deploy the Bold BI Azure web app using the ARM template, follow these steps:
-
Log in to the Azure Portal.
-
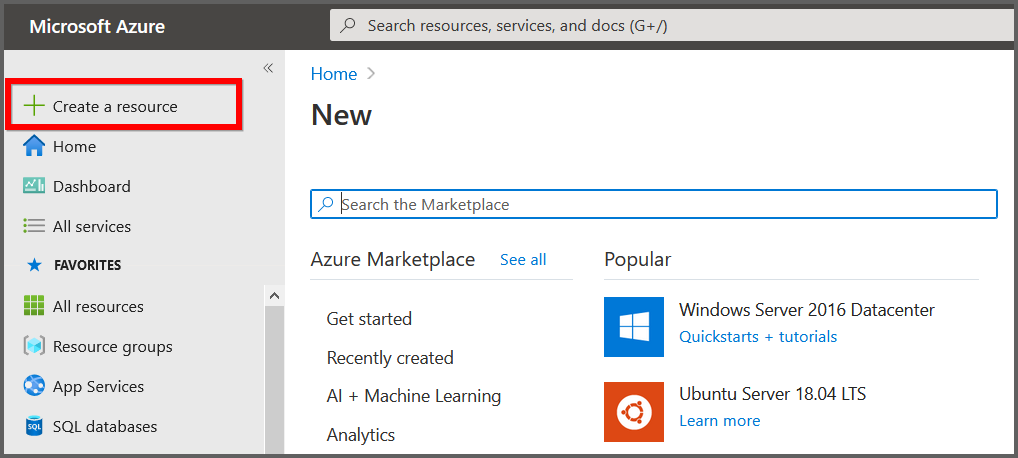
Click on New in the left menu.
-
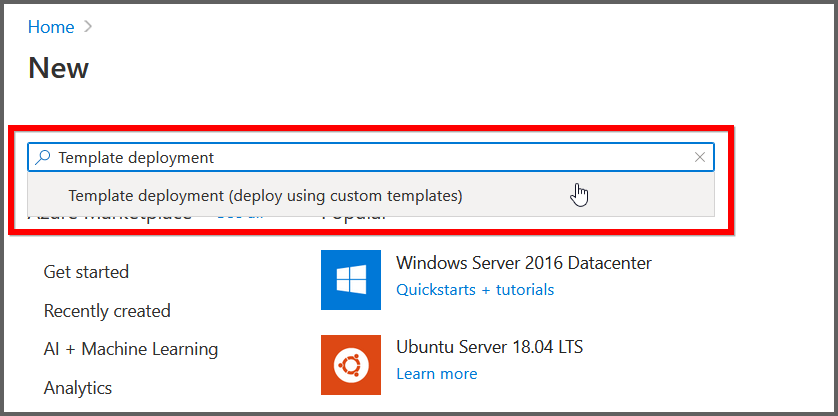
Search for Template deployment in the marketplace and select it.
-
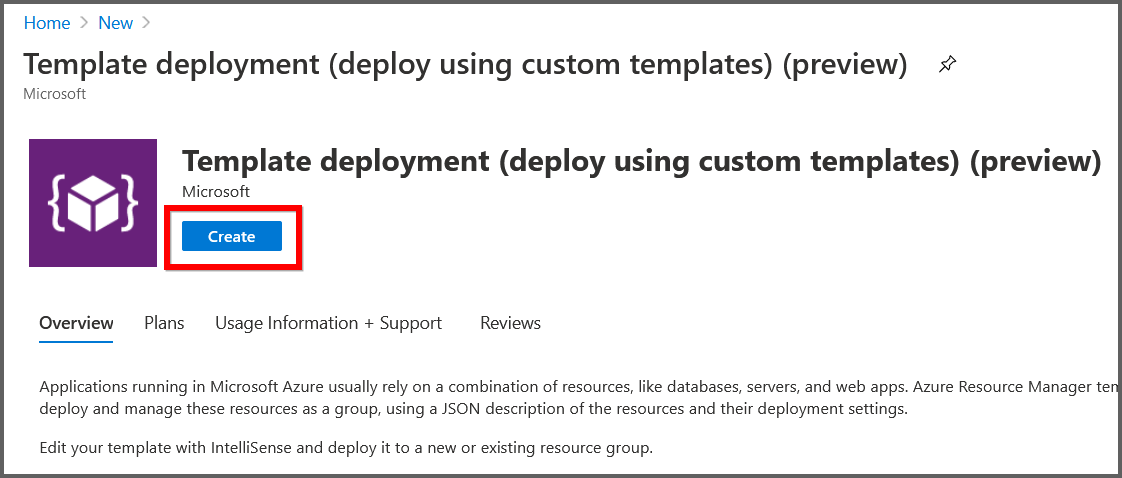
Click on create.
-
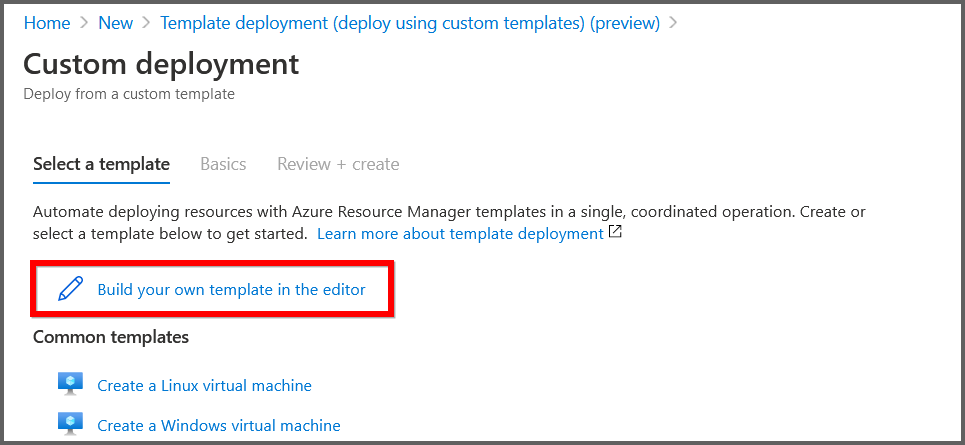
In the Custom deployment window, select Build your own template in the editor.
-
Download the ARM template file.
-
Copy the contents of the template file and replace them in the Edit template window. Then save.

-
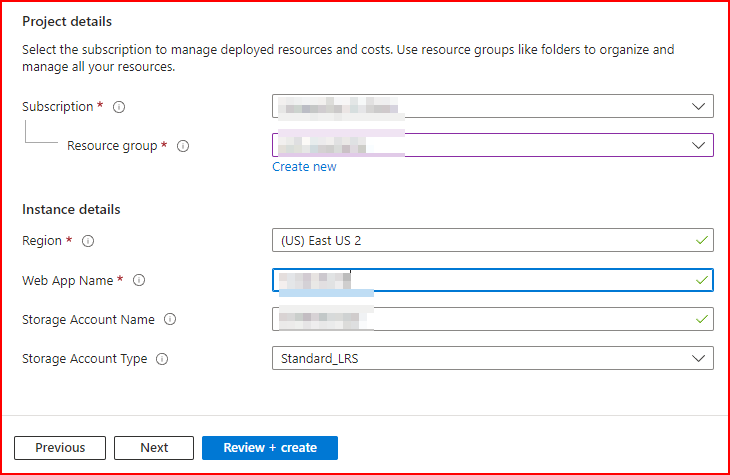
Fill out the form with the following parameters to complete the deployment. Provide values for all fields (especially admin and database details) if you want auto-deployment mode — this configures Bold BI fully during deployment (database connection + admin user) without manual startup steps afterward. Licensing can still require manual activation if not provided.
Mandatory (always required)
- Subscription — Choose your Azure subscription.Learn more
- Resource group — Select or create a resource group to organize your resources.Learn more
- Region — Choose the Azure region for deployment. Recommended: East US
- Web App Name — Enter a unique name for the Bold BI App URL (3-24 characters, lowercase letters and numbers only). If taken, deployment fails — choose another.
- App Service Plan Size — Select the App Service SKU.
Available values:
P1V3_2Core_8GB_DEVP2V3_4Core_16GB_PRODP3V3_8Core_32GB_PROD
- Storage Account Name — Unique name (3-24 characters, lowercase letters and numbers only). Optional for File storage, mandatory for Blob storage.
- Storage Account Type — Choose the type (e.g.,
Standard_LRS). Optional for File storage, mandatory for Blob storage.Learn more
Required for auto-deployment mode (provide these to enable full automatic configuration of database connection and admin user — without manual steps after deployment)
- User Email — Initial administrator email
- User Password — Admin password
(The password must meet the following requirements: at least 6 characters, including 1 uppercase letter, 1 lowercase letter, 1 numeric character, and 1 special character) - Database Server Type —
mssql,postgresql,mysql, ororacle - Database Host — Database server hostname or endpoint
- Database User — Database username
- Database Password — Database password
Optional / Additional database parameters (only needed in specific cases)
- Database Port — Database port (optional; defaults based on server type)
- Postgres Maintenance Database — For PostgreSQL DB Servers, this is an optional parameter. The system will use the database name
postgresby default. If your database server uses a different default database, please provide it here. - Database Name — Existing database name (if omitted, Bold BI creates
bold_services) - Database Additional Parameters — If your database server requires additional connection string parameters, include them here. Connection string parameters can be found in the official document:MySQL,PostgreSQL,MS SQL,Oracle
- Use Single Tenant Db —
trueorfalse(default:false)
Optional licensing & activation (not required for deployment; defaults allow trial/manual activation post-deployment)
- Unlock Key — Bold BI license key
Optional branding & UI settings (if not provided, defaults are used)
- Site Name — Organization name (default: Bold BI Enterprise Dashboards)
- Site Identifier — URL site identifier (default: site1)
- Main Logo — URL for header logo (png, jpg, jpeg, svg)
- Login Logo — URL for login page logo (png, jpg, jpeg, svg)
- Email Logo — URL for email template logo (png, jpg, jpeg, svg)
- Fav Icon — URL for browser favicon (png, jpg, jpeg, svg)
- Ai Logo — URL for AI-related logo (png, jpg, jpeg, svg)
- Powered By Logo — URL for footer “Powered by” logo (png, jpg, jpeg, svg)
- Show Powered By Syncfusion —
trueorfalse(default:false) - Show Copyright Info —
trueorfalse(default:false)
Click the agreement checkbox and click Review + create to start the deployment.
-
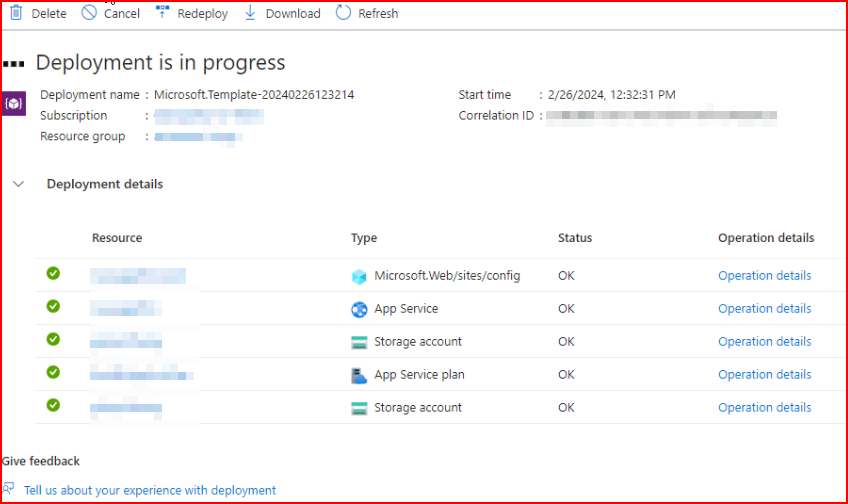
The deployment of the Bold BI Azure App service (web app) will begin, and you can track the progress of the deployment by looking for a green check mark at each successful stage.
-
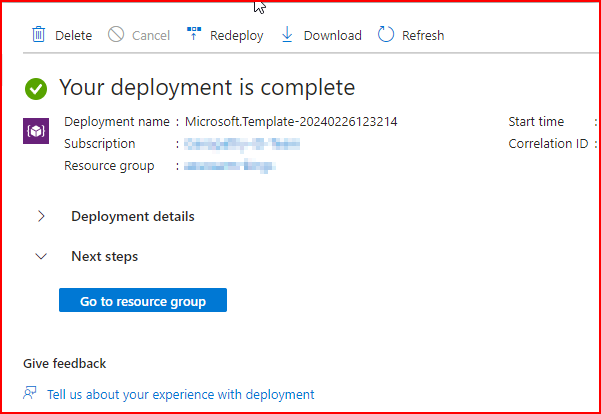
If the deployment of Bold BI is successfully completed, proceed to Step 12.
-
If deployment fails, check the error details and select the Redeploy option to deploy Bold BI again (refer to Step 8 to fill in the details). Ensure successful deployment with Step 9.
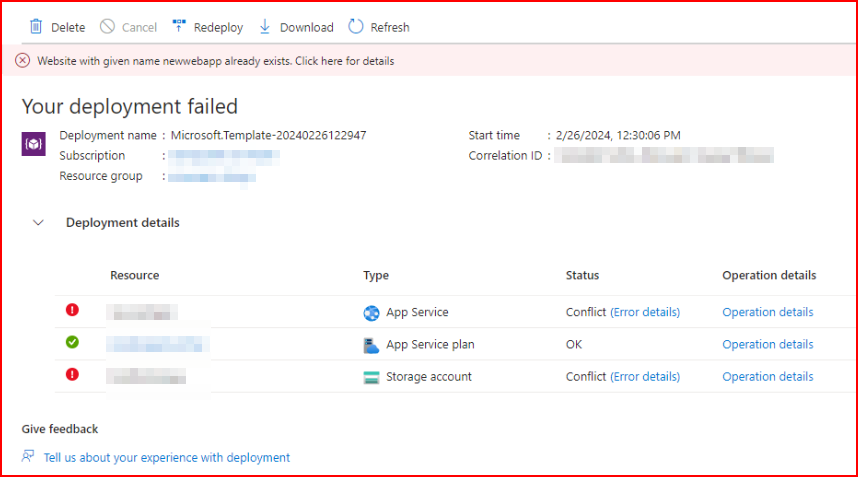
NOTE:
1. When redeploying, ensure that you provide a unique Web App name and Storage Account name.
2. If the failed App Service/Storage account/App Service Plan is still present in the resource group, please remove it before proceeding with redeployment. -
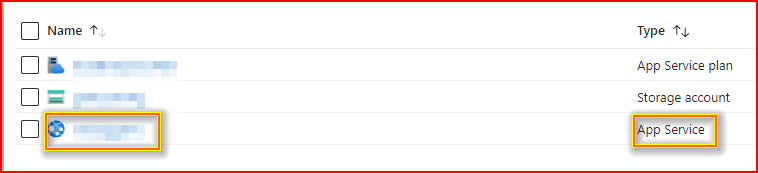
Click on Go to resource group. Then, select App Service.
-
On the overview page, copy the Default Domain and paste the URL into your browser. Wait for some time for it to load completely before proceeding with the Bold BI application startup.

-
An app service plan has been created for the web app, which will default to Basic – B1. You can learn more about app service plans. The Bold BI web app does not support Free or Shared app service plans. Instead, it supports Basic, Standard, and Premium App Service plans in Azure. The Basic plan is the minimum recommended App Service plan for running the application. For improved performance, you can scale up the App Service plan from Basic to Standard or Premium plans. Below, you can find documentation links on how to scale up and scale out the App Service plan.