Upgrade to the latest version
Follow these steps to upgrade the Bold BI Azure App service to the latest version:
NOTE: Upgrading to the latest version does not require a license key. However, our services will retrieve the license in the backend after upgrading to the latest version.
-
Log in to the Azure Portal and select the Bold BI Azure App Service in Microsoft Azure Services.
-
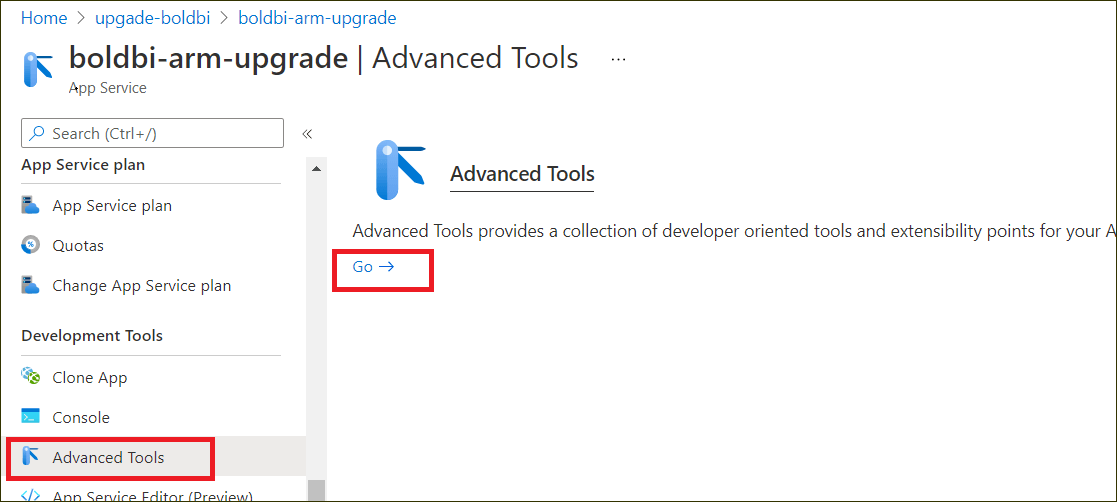
Choose Advanced Tools in the left panel of the Bold BI Azure App service and then click Go. This will open the KUDU console.
-
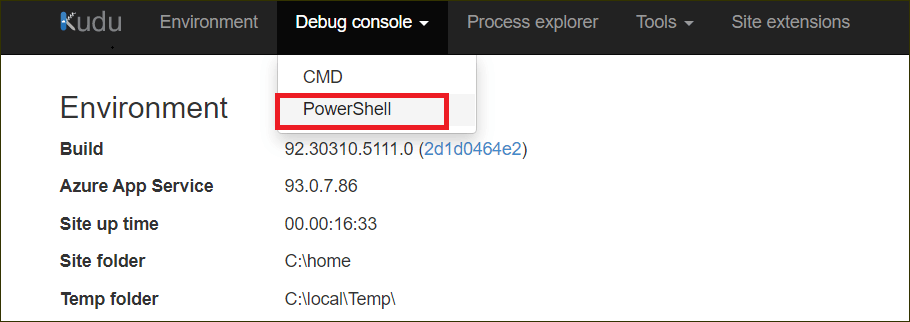
In the KUDU console, click Debug Console and choose PowerShell.
-
In PowerShell, navigate to the path
C:\home\site\repository\.git.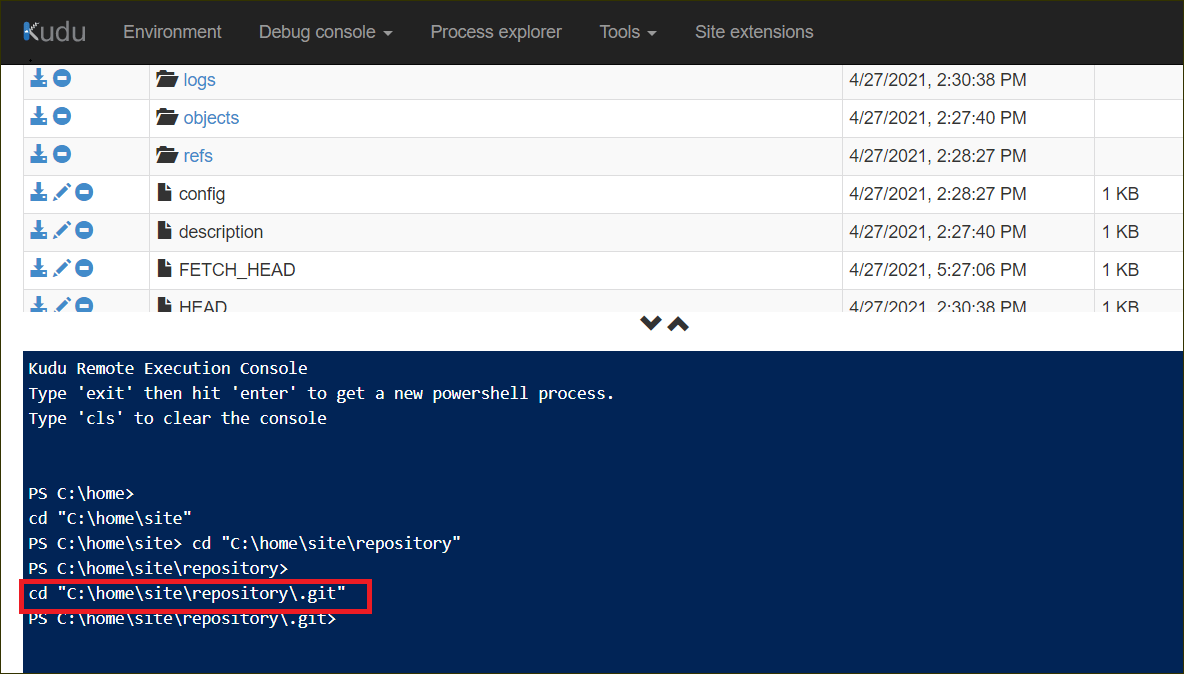
-
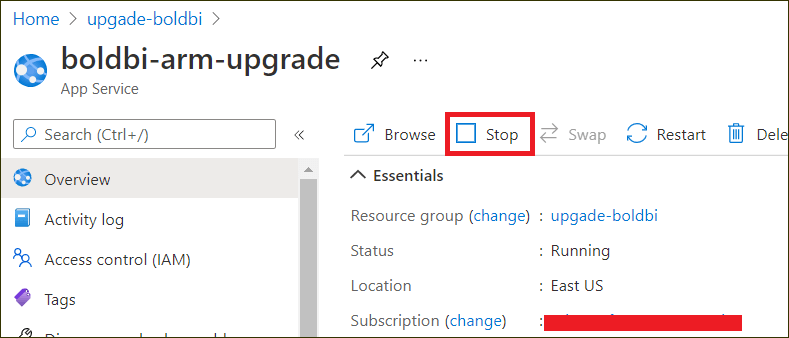
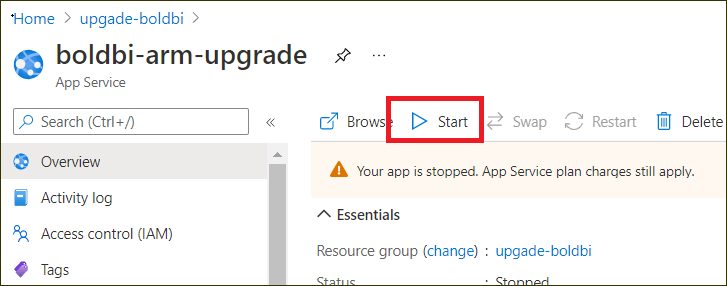
In the Overview section, click Stop.
-
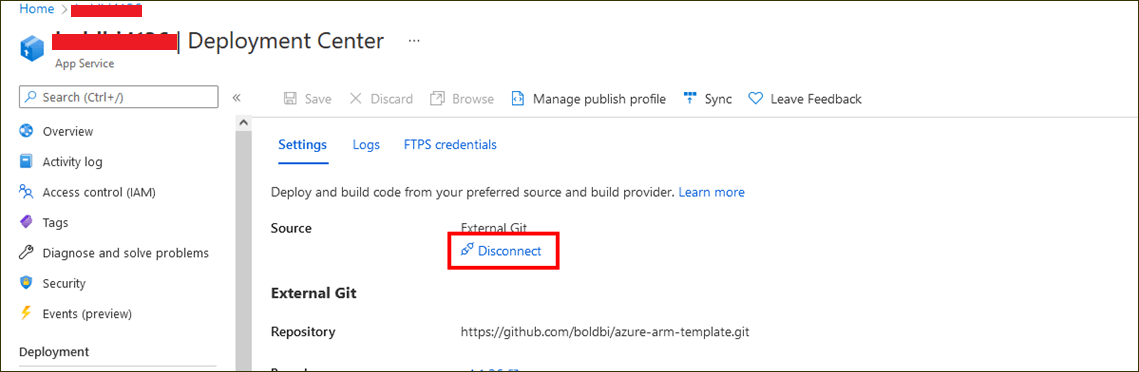
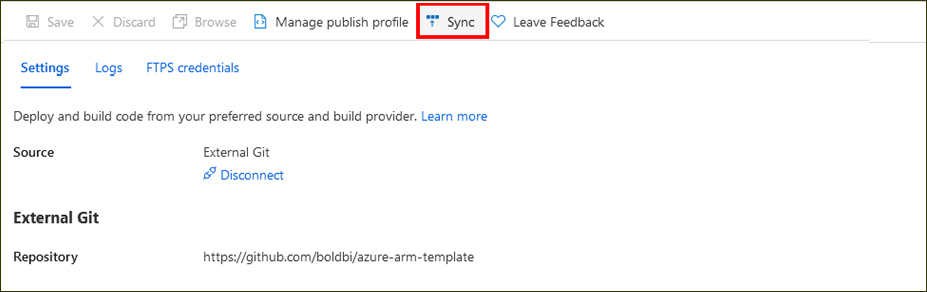
Go to the deployment center and click Disconnect. This will open the deployment option.
-
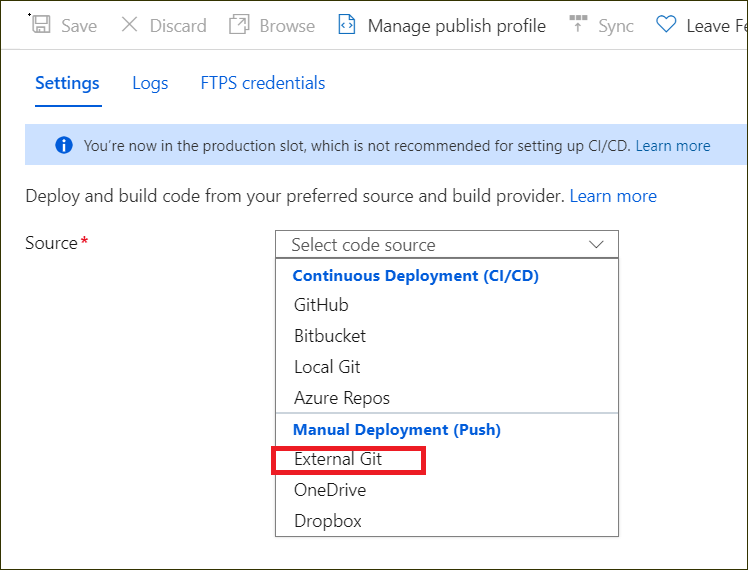
Select the External Git in the source option.
-
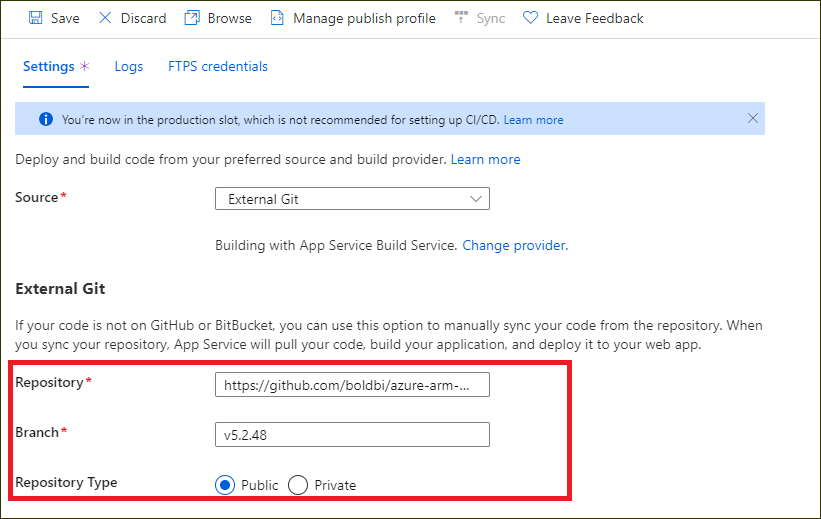
In the External Git, fill out the following information:
Repository - URL
Branch - latest
Repository Type - Public
-
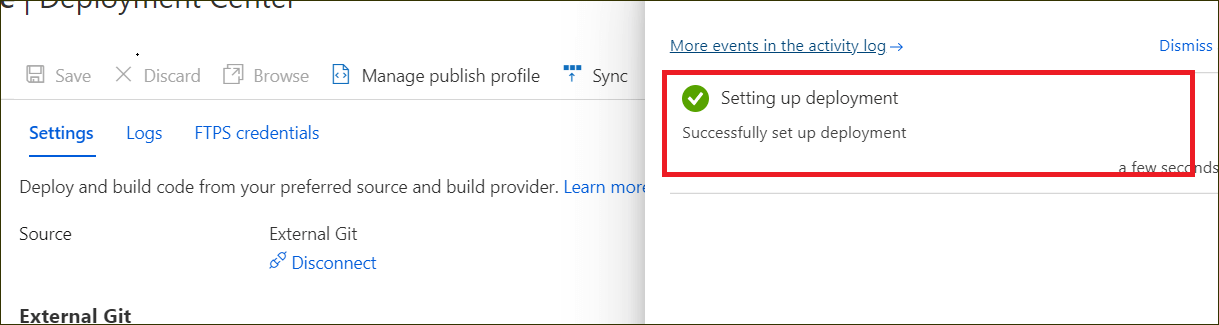
Next, click Save. The Successfully set up deployment notification will be shown in the notification blade.

-
After completing the deployment setup, click Sync in the deployment center blade.

-
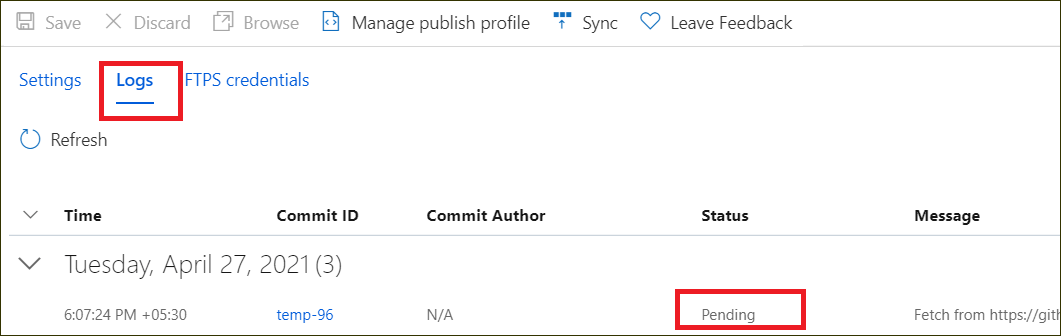
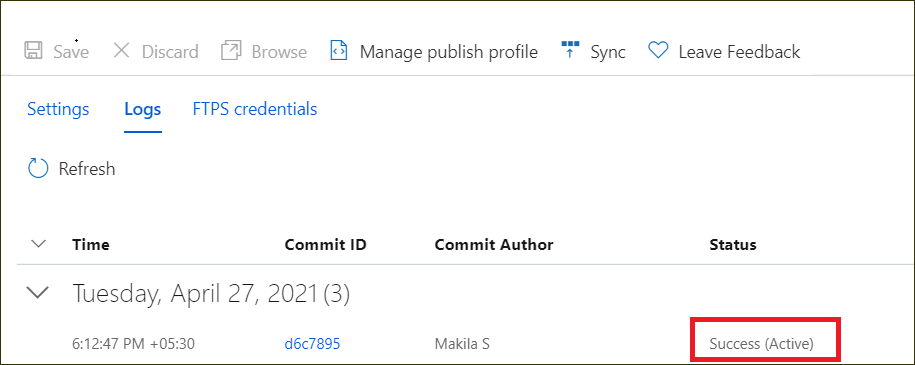
The synchronization progress will be shown in the deployment options blade.
-
Please wait until the synchronization is completed.
-
Then, click Start in the Overview section to start the Bold BI Azure App service.
-
Breaking Changes: This step is applicable only for upgrading Azure App Service from version 9.x to latest.
-
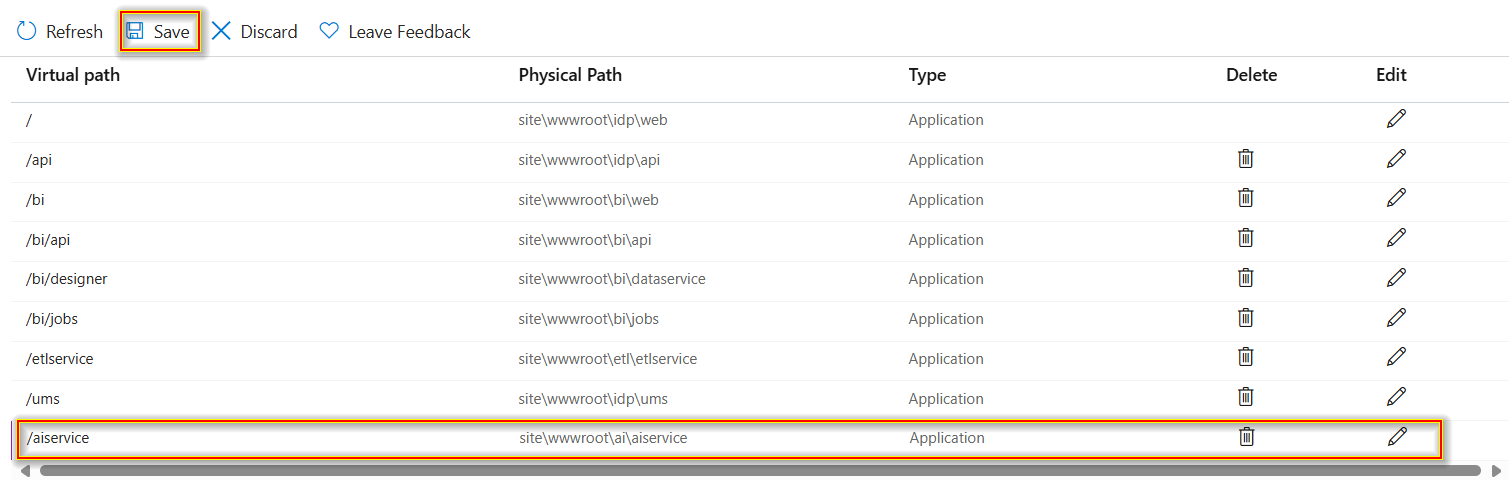
In your Web app, navigate to Settings —> Configuration —> Path Mapping.

-
Click on the New virtual application or directory option and add the below Physical Path in Path Mappings and Save the settings.
Virtual Path Physical Path /aiservice site\wwwroot\ai\aiservice 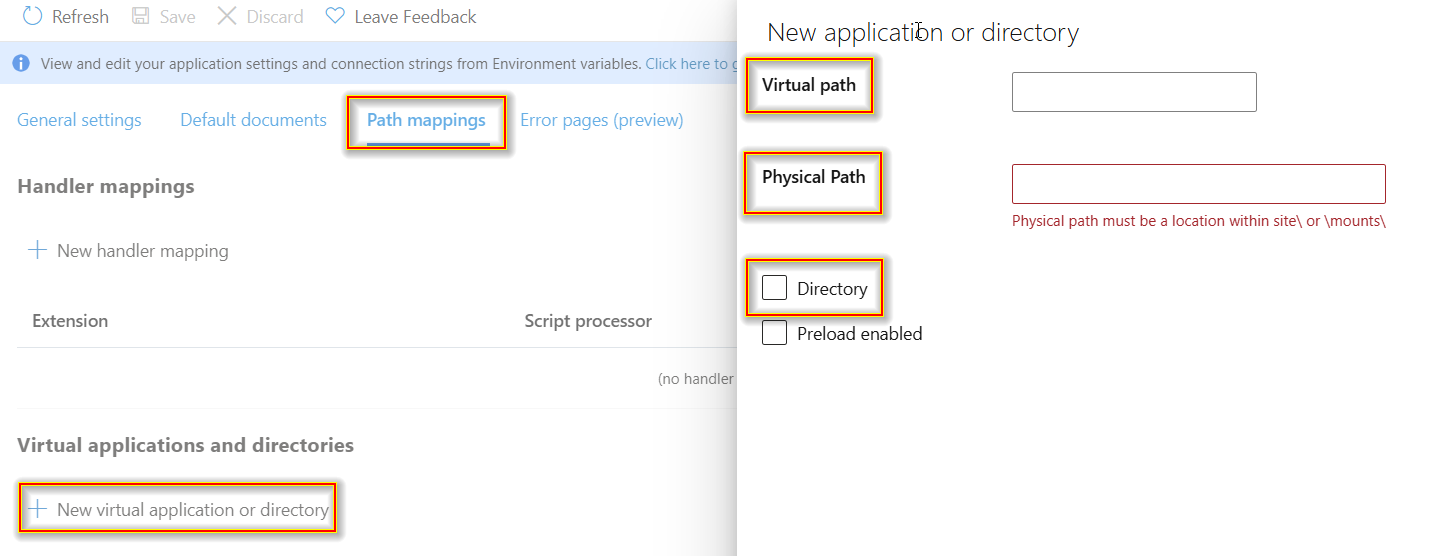
-
-
Refer to this guide on Integrating Bold Data Hub with Bold BI. This article provides step-by-step instructions to ensure a successful integration of Bold Data Hub with Bold BI.