Manage Webhooks in Bold BI Application
Webhooks are user-defined HTTP callbacks that deliver real-time data to other applications when specific events occur. Bold BI supports webhook notifications for Time-Driven dashboard export and Alert-Driven dashboard export.
Create Webhook
This section explains how to create a webhook in the Bold BI embedded application.
Steps to add a webhook
-
Click the
Add Webhookbutton at the top right of the Webhooks section of the profile page.
-
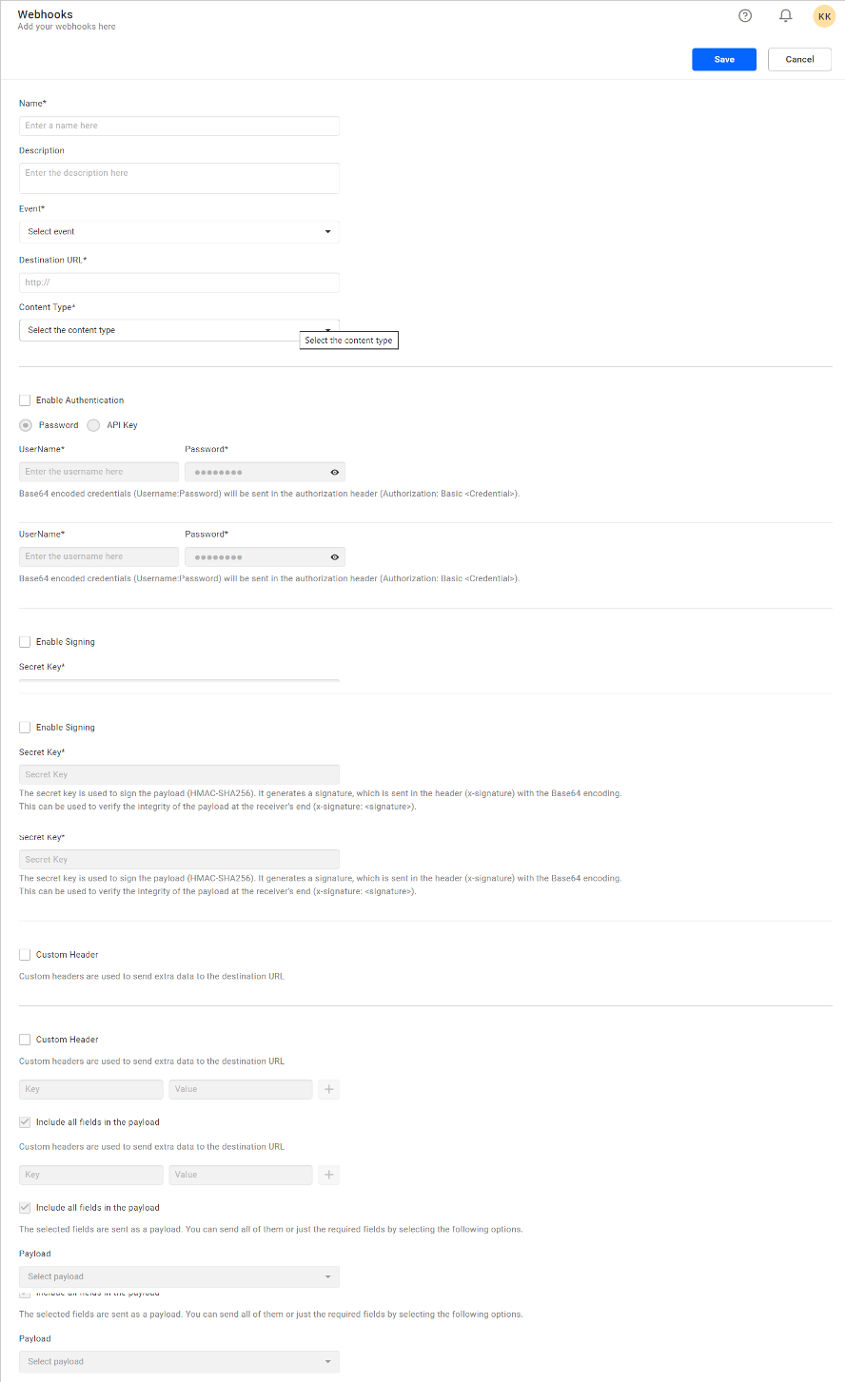
Provide the required webhook details on the
Add Webhookpage:- Provide a suitable
Namefor the webhook andDescription. - Select the event to trigger the webhook. For more details, see Events.
- Select the content type in the format in which you want to send the data.
- Enter the webhook endpoints where the webhook data will be received.
- Enable authentication to verify the webhook sent by Bold BI. This is optional. For more details, see Webhook authentication.
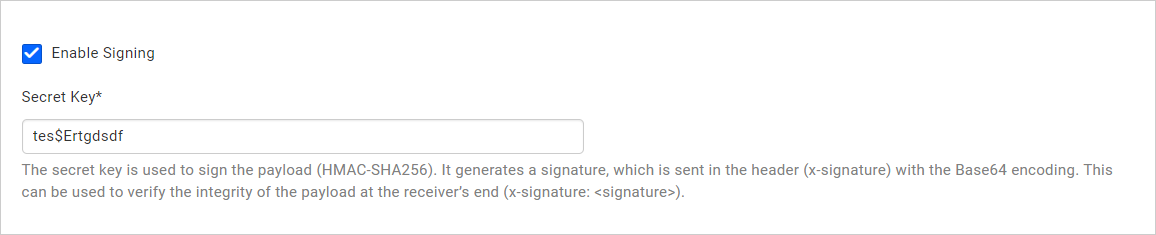
- Enable signing to verify the integrity of the payload at the receiver end. This is optional. For more details, see Webhook Signing.
- Select the payload of an event to send in webhook data. For more details, see Payload.
- Provide a suitable
-
After providing the webhook details, click the
Savebutton at the bottom of the page to add the webhook to Bold BI Embedded.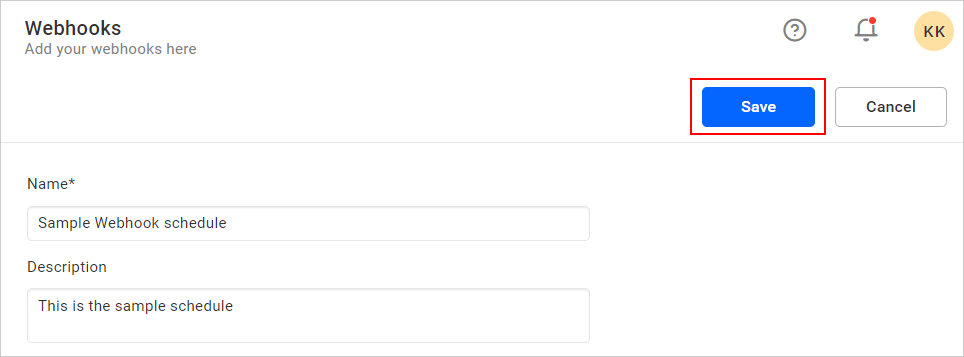
Edit Webhook
You can edit created webhooks in the Webhooks section of the profile page, as well as in the Integrations section of the admin page.
Steps to edit a webhook
-
Click the
Actionsbutton in the webhook grid context menu and selectEditto edit the webhook.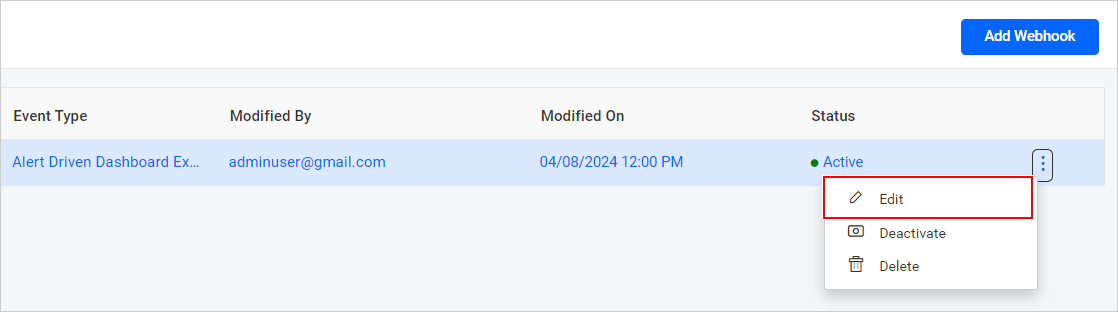
-
Modify the webhook details on the
Edit Webhookpage. -
After providing the webhook details, click the
Savebutton to update the webhook.
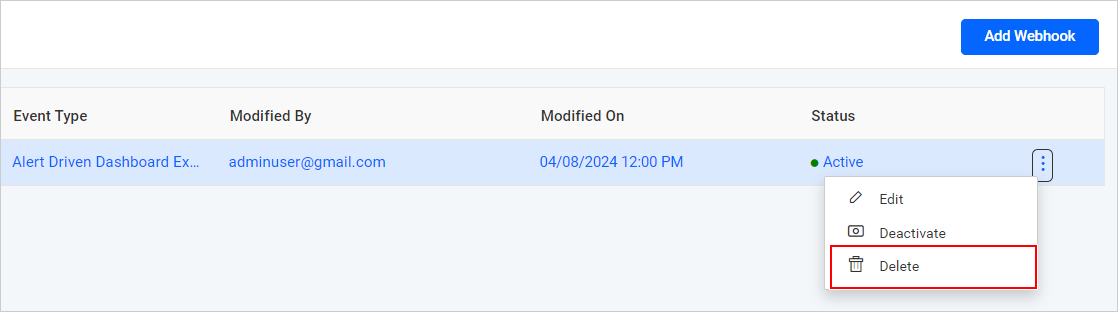
Delete Webhook
Webhooks can be deleted from Bold BI when they are no longer required.
Click the Actions button in the webhook grid context menu and select Delete to delete the webhook.
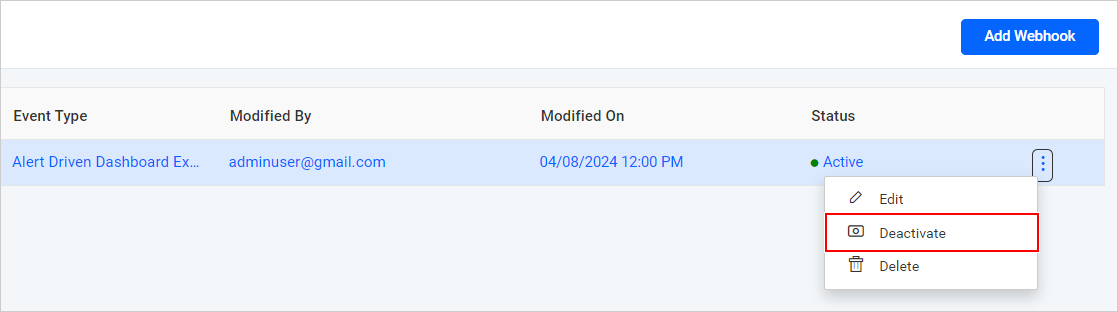
Deactivate Webhook
If you want to temporarily stop a webhook without deleting it permanently, you can deactivate the webhook.
Click the Actions button in the webhook grid context menu and select Deactivate to deactivate the webhook.
Webhook Events, Headers, and Payload
Events
A webhook in Bold BI is triggered only for the two events listed below. You can create a webhook for the following events:
- Time-Driven Dashboard Export
- Alert-Driven Dashboard Export
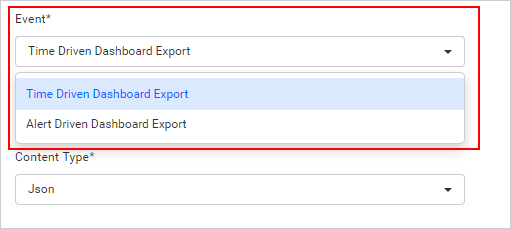
Time-Driven Dashboard Export
A webhook for Time-Driven Dashboard Export can only be configured for normal schedule exports in Bold BI.
Alert-Driven Dashboard Export
A webhook for Alert-Driven Dashboard Export can only be configured for data alert exports in Bold BI.
Headers
System and custom headers are sent along with webhook data to the specified webhook endpoints. When creating a webhook, you have the option to include your own custom headers.
System headers
By default, the headers listed below are sent with each webhook request:
| Header Key | Header Value |
| Host | <webhook-endpoint> |
| AcceptEncoding | gzip;q=1.0,deflate;q=0.6,identity;q=0.3 |
| Accept-Charset | utf-8, iso-8859-1; q=0.5, *; q=0.1 |
| User-Agent | BoldBI |
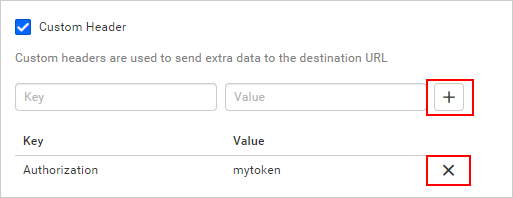
Custom headers
Custom headers are used to send additional information to the destination URL. Follow the steps below to add a custom header:
- Enter the key and value of the header, then click the
Addicon to add it to the header record. - To remove the header, click the
Removeicon.
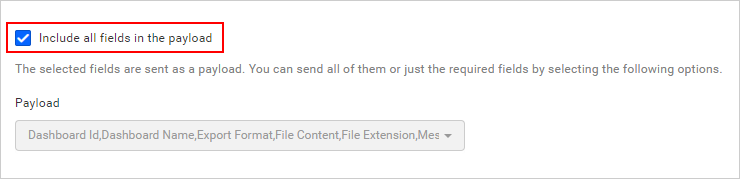
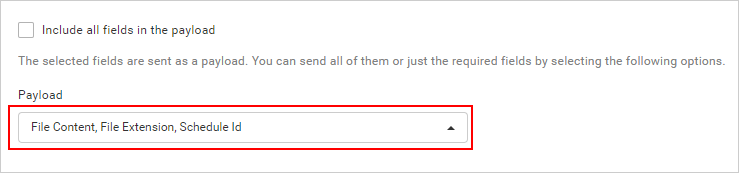
Payload
The data of the selected event will be sent as a payload. You can send all of it or only the required data by selecting the following options.
When this option is enabled, all data will be sent in the payload.
If you selected a specific payload, only the selected data will be sent in the payload.
Webhook Security
The URL for the webhook is publicly available and can be easily accessed by attackers. Therefore, it is crucial to ensure that the request comes from a known sender. An attacker could intercept the webhook request and tamper with the data if this verification is not performed. Several options are provided for securing webhook data.
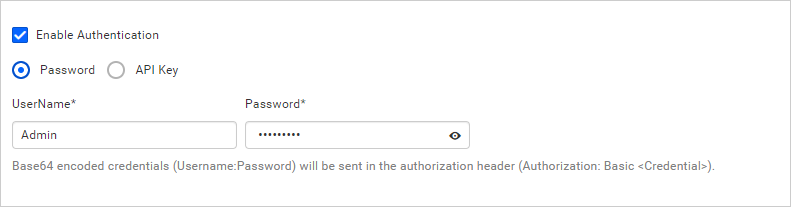
Webhook authentication
Enable authentication when creating a webhook to securely send webhook data and verify whether it is sent from Bold BI. Although it is optional, it is recommended to enable authentication.
The following are the two methods for authenticating the webhook URL:
Password
When creating a webhook, you can use password authentication (Basic Auth) to provide the username and password. The credentials (Username:Password) will be Base64 encoded and sent in the Authorization header (Authorization: Basic
API Key
When creating a webhook, you can use API authentication (Basic Auth) to provide the API key. The API key will be Base64 encoded and sent in the Authorization header (Authorization: Basic

Webhook Signing
When creating a webhook, you can use request signature authentication to provide the secret key. This secret key is used to sign the payload (HMAC-SHA256), generate a Base64 encoded signature, and send it in the header (x-signature). This can be used to validate the payload integrity at the receiver end (X-Signature: