
Manage Dashboard Views
This section explains how to open, add, update, share, delete Dashboard Views, and create schedules with Dashboard Views in Bold BI. Dashboard Views that are accessible to the user, depending on the user’s permission, are displayed on the Dashboards page.

Open Dashboard Views
Dashboard Views are opened in our embedded Dashboard Viewer itself as Dashboards.
Add Dashboard Views
- If a user has
Readaccess to a dashboard, they can create a Dashboard View in that dashboard. - A user with only
Readaccess to an existing shared Dashboard View can open it and create a new view using theSave Asoption, but cannot update or delete the existing view. - A user with
Read, Writeaccess to an existing Dashboard View can update the current view or use theSave Asoption to create a new view. - A user with
Read, Write, Deleteaccess can update and delete the Dashboard View. - The creator of a Dashboard View retains permission to share it. Shared users are granted
Readaccess to the view. DelegatedRead, WriteorRead, Write, Deletepermissions do not grant sharing permission.
Steps to add a Dashboard View
-
Filters applied in the dashboards are summarized in the
Filter Overviewsection underApplied Filters.To save the filters, click on the
Saveicon. A popup will open to type the name for the Dashboard View and submit it.

-
The views can be set as default while saving them by enabling the
Mark as Defaultoption in the save view dialog. Learn more about Default Views. -
Saved Dashboard Views are shown in the Dashboard Views panel by clicking the
Viewsicon.

-
Click on the
saved viewsshown in the Dashboard Views panel to display the filters applied in that view as an accordion.
NOTE:
- The
Read,Read, Write, andRead, Write, Deletepermissions for Dashboard Views are assigned from Manage Permissions.- Refer to this link to configure and save the
Interaction WidgetstoDashboard Views.
Dashboard View Permission
The access mode determines the actions available for an existing Dashboard View:
| Access mode | Dashboard View actions |
| Read | List, open, and apply saved filters. Save, update, and delete actions are unavailable; Save As remains available where supported. |
| Read, Write | List, open, apply the saved filters, and update the current view. Delete is not available. |
| Read, Write, Delete | List, open, apply the saved filters, update the current view, and delete the view. |
When an editable view is selected and its filters are changed, both Save and Save As are available. For a read-only view, Save is unavailable and Save As remains available to an authenticated user who can read the dashboard. Selecting a view refreshes these actions according to the effective permission for that view.
NOTE: Dashboard View permissions do not change the existing restrictions for mobile, slideshow, usage analytics, or embedding modes that do not support saved Dashboard View actions.
Dashboard View Permission Scopes
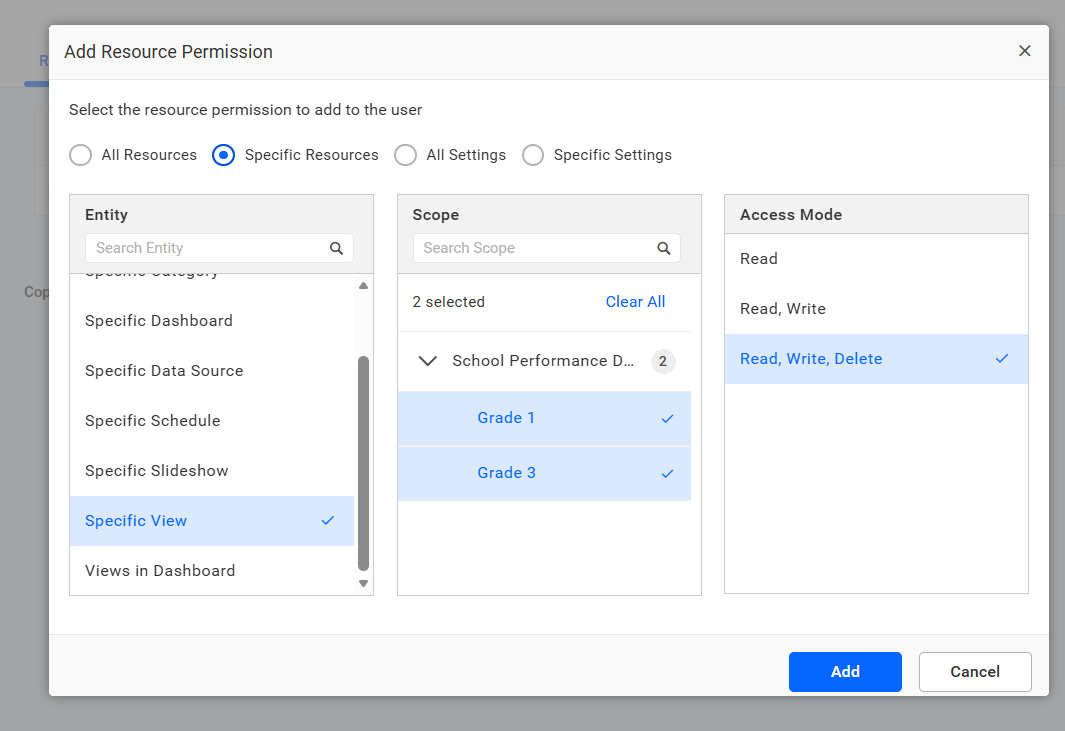
The following scopes are available when adding Dashboard View permissions:
- All Views – applies to every active Dashboard View in the site. No scope selection is required.
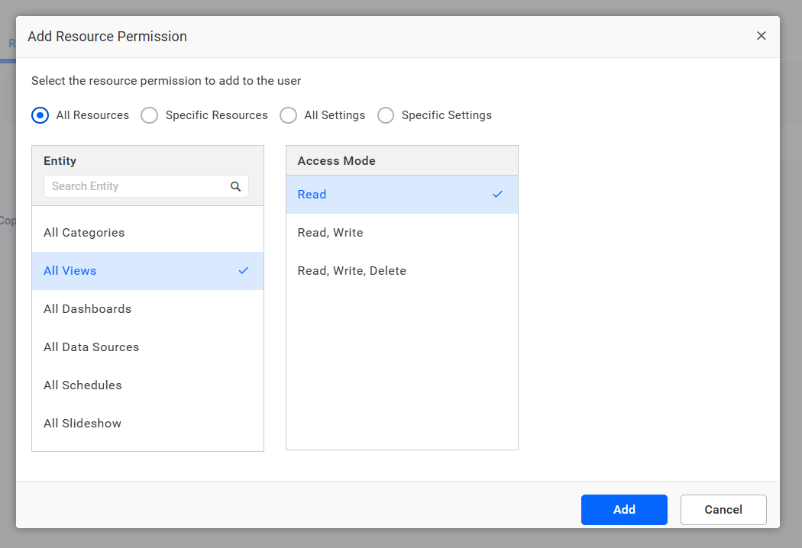
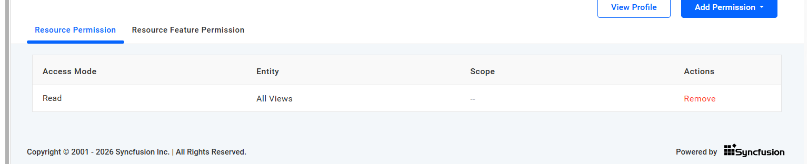
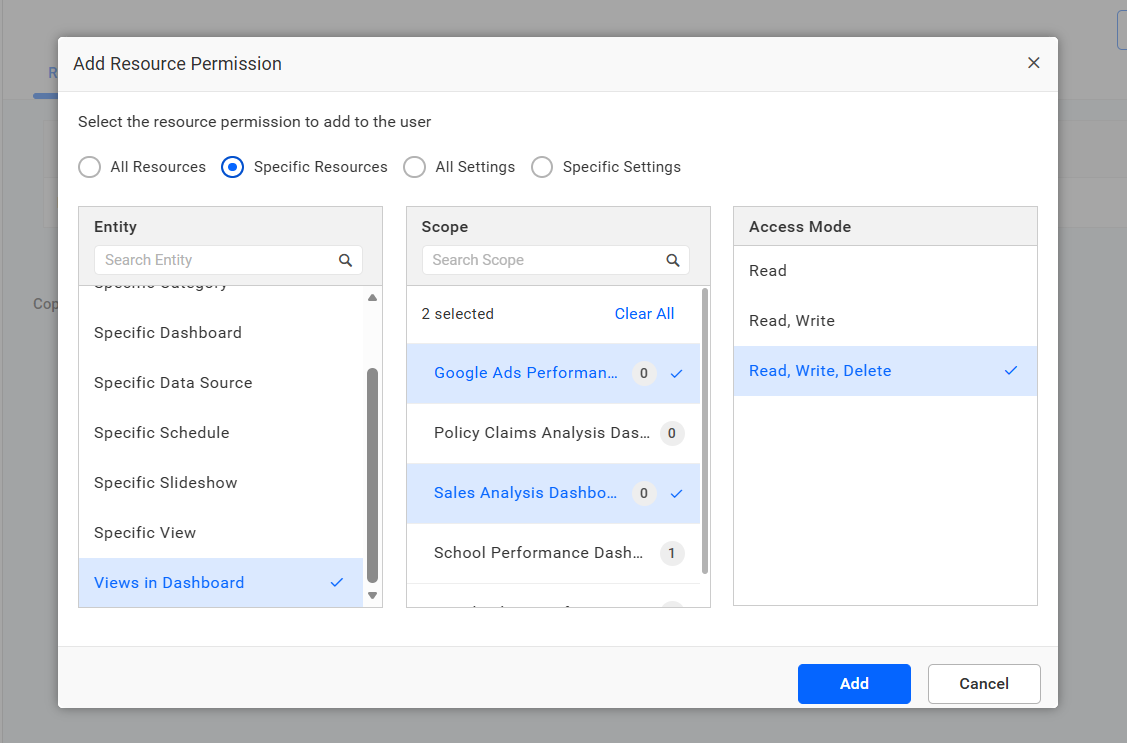
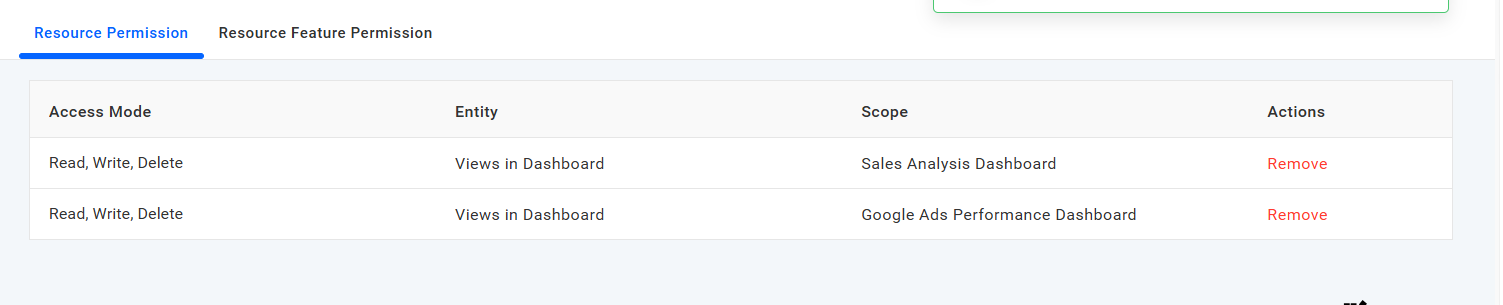
- Views in Dashboard – applies to every active Dashboard View under the selected dashboard. Select one or more dashboards from the dashboard tree. This scope applies only to Dashboard Views within dashboards that the user has access to.
- Specific View – applies only to the selected Dashboard Views. Expand a dashboard in the dashboard tree and select one or more views. The user must have access to the parent dashboards of the selected views.

Create a Schedule with Dashboard Views
Dashboard Views can be scheduled to export content based on time intervals or when certain threshold conditions are met. For more information on utilizing Dashboard Views in dashboard export scheduling, please refer [here] (/managing-resources/manage-schedules/)
Share Dashboard Views
Dashboard Views can be shared by the user who created the view. Sharing grants access to the Dashboard View based on the assigned Dashboard View permissions. Users must also have the required access to the parent Dashboard to open and use the view.
Steps to share a Dashboard View
-
Click on the
Share Permissionsoption in the Dashboard Views list.
-
Type the username or group name with whom you want to share the
Dashboard View.
-
After selecting the users or groups, click on
Share.
NOTE: Only the user who created the Dashboard View can share it with other Bold BI users.
Remove Permission
Only the user who created the Dashboard View can remove the shared Dashboard View permissions.
-
Click the
Manage Accessbutton to see the users or groups and their permissions.
-
Then, remove the permissions using the
Removeoption in theActionscolumn of each permission.
Make Public
Dashboard Views can be marked as public to allow anyone to access it.
Click the change button to select the access permission.

After selecting the access permission, click the Change button.

Delete Dashboard Views
Choose the Delete option to remove the Dashboard View from Bold BI.

Set a default view for the dashboard
The Dashboard View can be set as the default view in two ways: while saving the view or from the views list for the dashboard by following these steps:
-
Select any view from the list of available Dashboard Views and click
Set as Defaultoption.
-
If the dashboard has no default views yet and you click the
Set as Defaultoption, then the respective view will be set as the default view for the dashboard and a success message will be displayed.
-
If a default view already exists for the dashboard, a confirmation dialog box will be opened and proceed with
Yes.
-
After setting the Dashboard View as the default for the dashboard, the text
(default)will be appended with the respective view in the views listing panel.
NOTE: To set a Dashboard View as the default view for the dashboard, the
Default viewoption inDashboard settingsmust be enabled. Learn more about Default Views.
Remove a default view for the dashboard
The default view of the dashboard can be removed to view the dashboard with its initial view by following these steps:
-
Click
Remove as Defaultoption.
-
Proceed with
Yesin the opened dialog box.