Manage Users in the Bold BI
This section explains how to add, edit, activate, deactivate, delete users, and manage permissions and assign users to groups in Bold BI.
Users can only be added, edited, or deleted by users belonging to the System Administrator group.
Add new users
New users can be added to Bold BI individually or in bulk using CSV import.
Add individual users
To add individual users, click on New User and then select Add User from the User Management page.
The Add User dialog will be displayed as shown in the image below.

Fill out the form with the email address, username, first name, and last name (optional), then click on Add.
NOTE: An email address is mandatory only in the Email required mode. Users created with passwords in the Bold BI application will be considered local users.
A new account will be created for the user, and an account activation email will be sent to the email address with an activation link to activate the Bold BI account.
The activation link sent to the user will be valid for 2 days. If the user has not activated within 2 days, a new activation link can be sent from the user edit page. Please refer to the Activate Users section for more details.
The account will remain inactive until the user activates the account from the activation email.
Add individual users with password
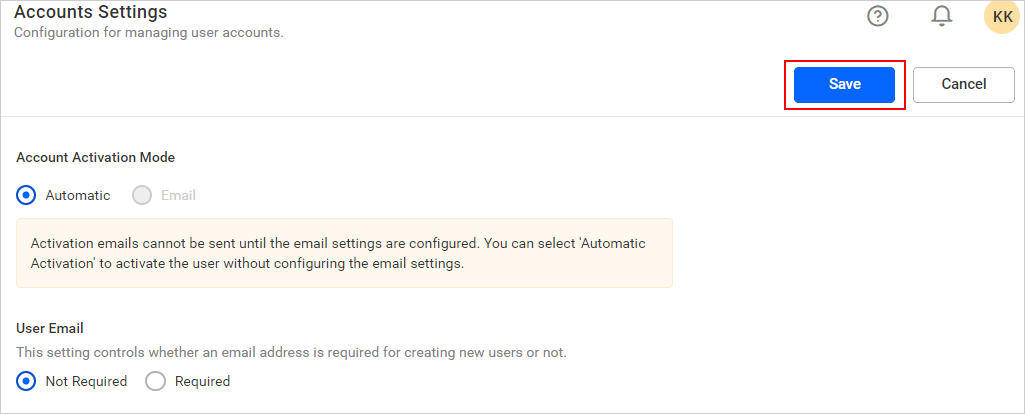
To add users with a password, you must set the Account Activation Mode to Automatic in the Accounts settings page.
Next, click on New User and then Add User from the User Management page.
The Add User dialog box will be displayed as shown in the following image.
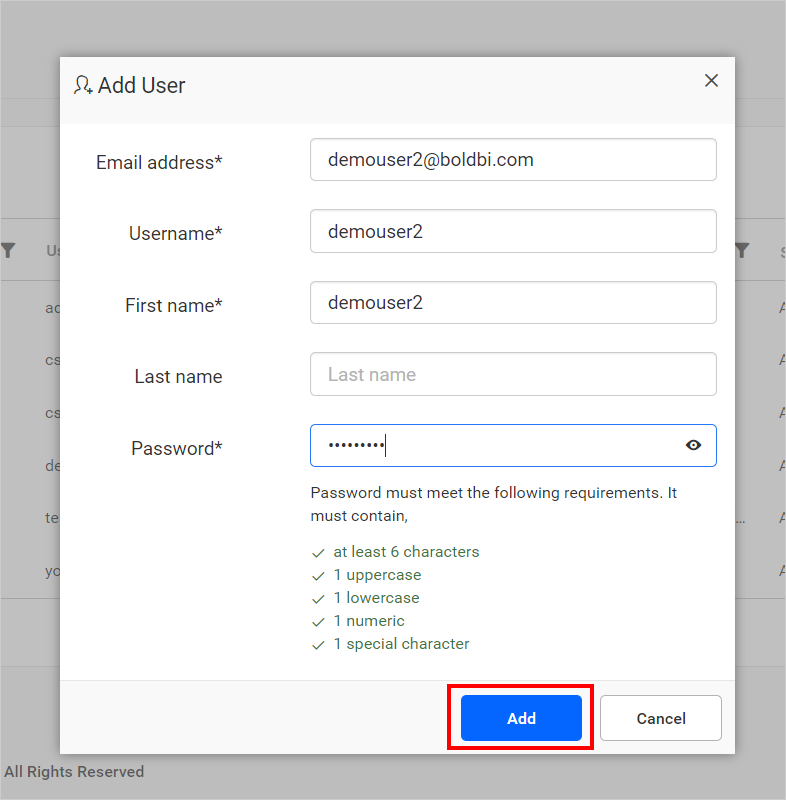
The password must meet the following requirements:
It must contains,
- At least 6 characters
- 1 uppercase
- 1 lowercase
- 1 numeric
- 1 special character
Add existing UMS user
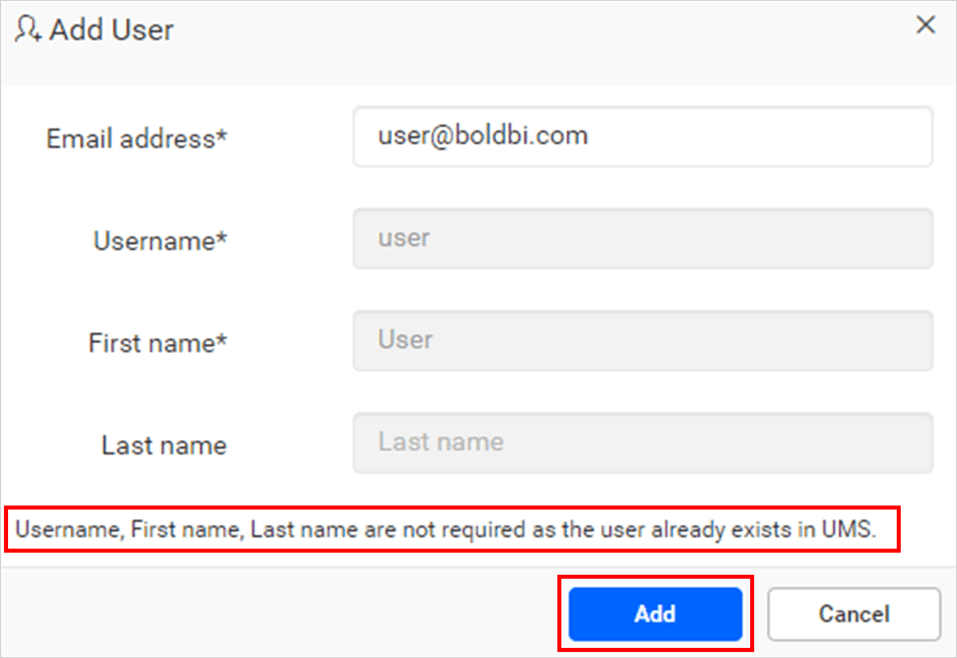
Add an existing UMS user by using the Add User dialog to add them to the site.
If you enter the email address of a user already present in UMS, the remaining fields will be automatically filled in and disabled.
Verify the user information and click Add.
To know how to add user in UMS refer here
Import users from CSV
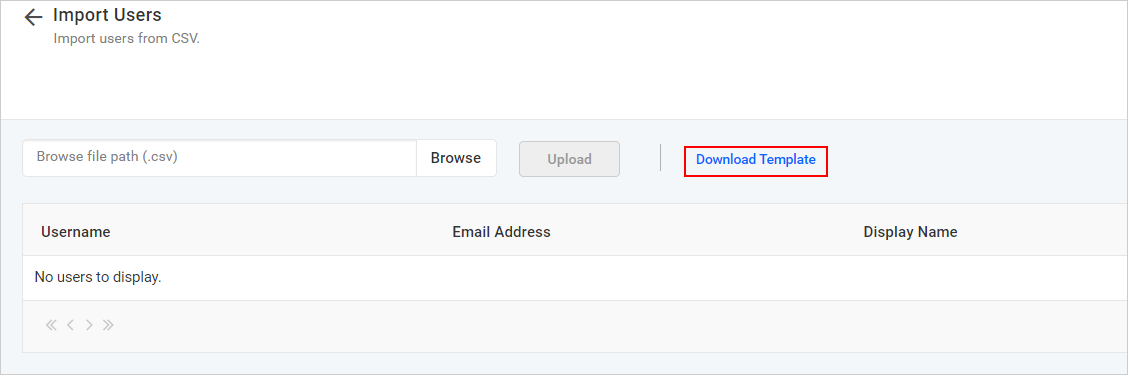
To automate the process of adding a large number of users to Bold BI, download the CSV template file and add the users to it, then import the file.
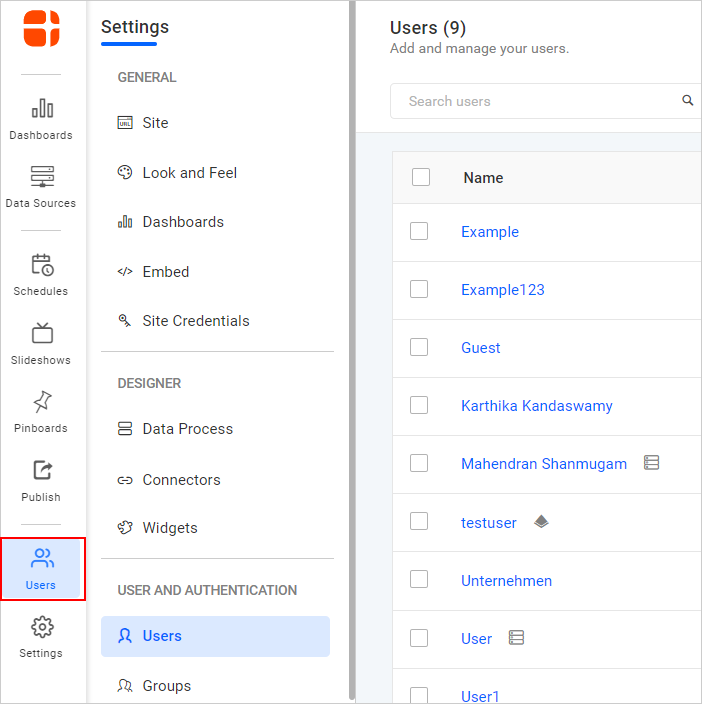
Navigate to the user management page by clicking the User Management dropdown under the Admin menu.
NOTE: This section will explain how to import users from a CSV file, which can be downloaded from the following location in the Bold BI application. Users created with passwords in the Bold BI application will be considered local users.
Add users from CSV file
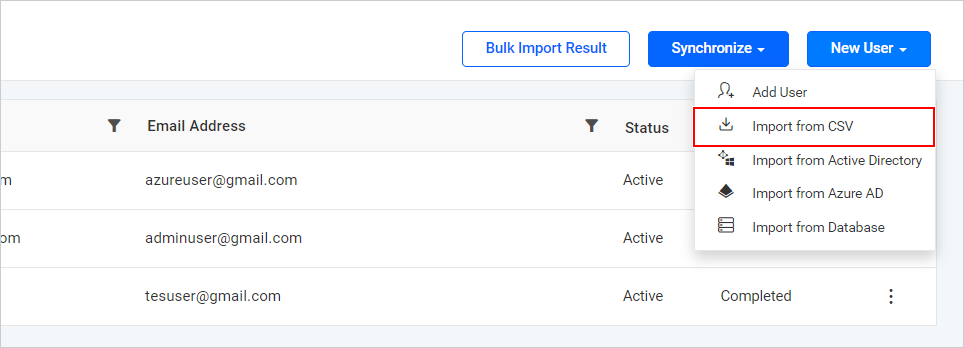
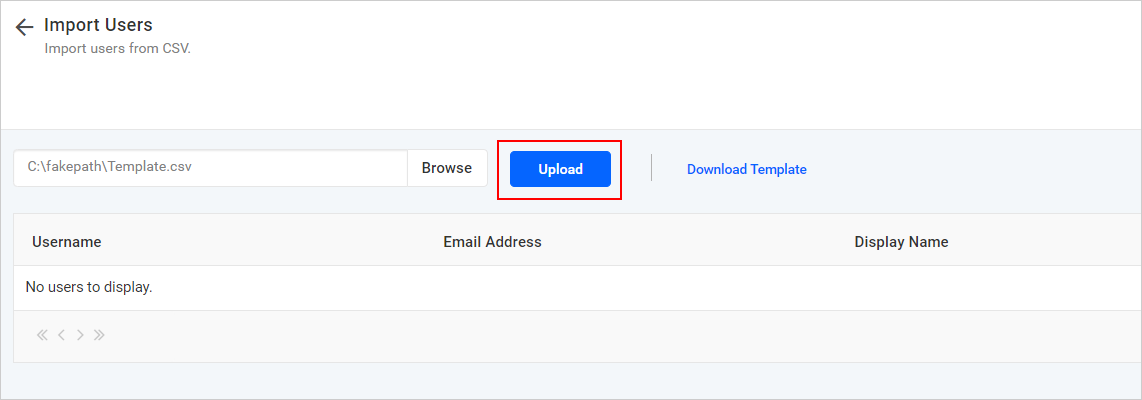
In the New User section, click on Import from CSV.
CSV file Requirements
The first row in the CSV template should represent the column headings. Bold BI assumes that the data from the second line in the file represents the user.
The following columns are considered mandatory in the downloaded CSV file:
- Username
- Email address (It is mandatory only in Email required mode.)
- Full Name
- Password (It is mandatory only in Automatic activation mode.)
Follow the steps below to add users using the CSV template:
-
Download the CSV template.
-
Add users to the CSV file.
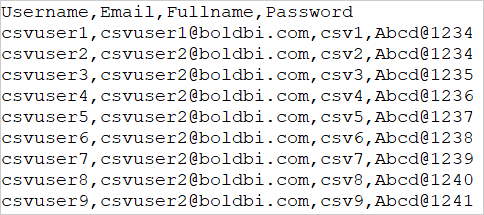
  Username,Email,Fullname,Password
  csvuser1,[email protected],csv1,Abcd@1234
  csvuser2,[email protected],csv2,Abcd@1234
  csvuser3,[email protected],csv3,Abcd@1235
  csvuser4,[email protected],csv4,Abcd@1236
  csvuser5,[email protected],csv5,Abcd@1237
  csvuser6,[email protected],csv6,Abcd@1238
  csvuser7,[email protected],csv7,Abcd@1239
  csvuser8,[email protected],csv8,Abcd@1240
  csvuser9,[email protected],csv9,Abcd@1241
-
Save the CSV file and upload it.
-
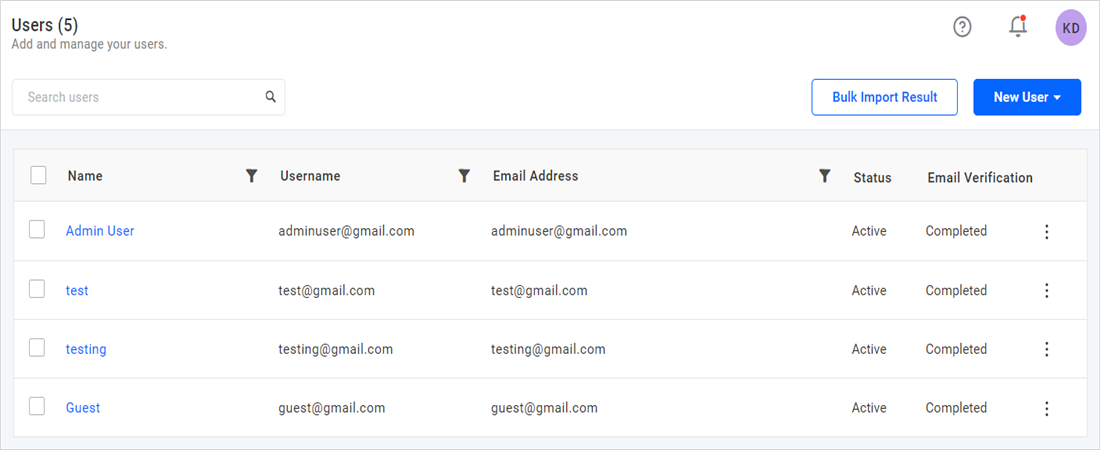
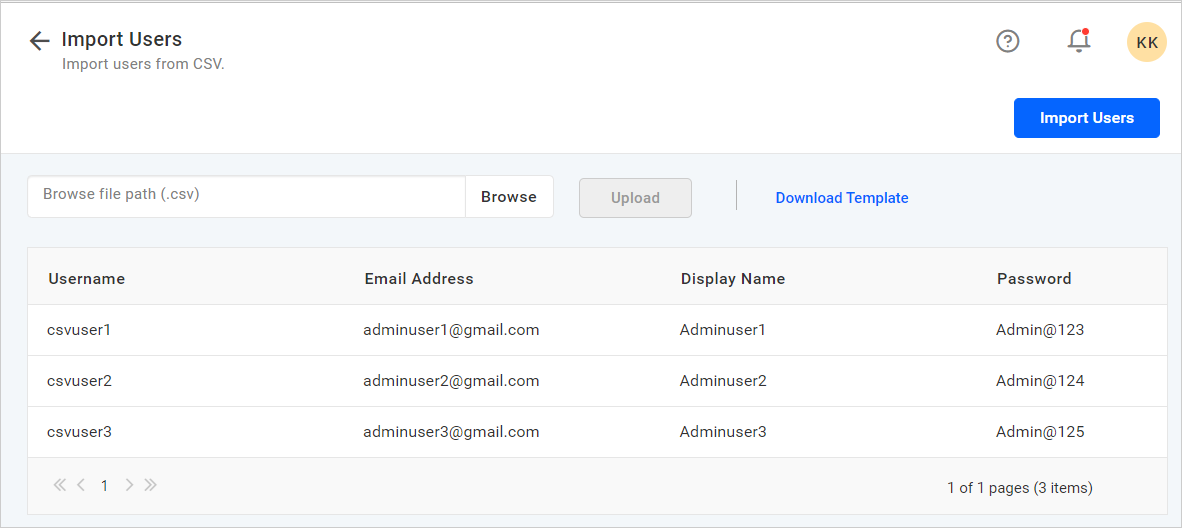
Once the file is uploaded, the user details will be displayed in the grid as shown in the image below.
-
Click on
Import Usersto import the users from the CSV file.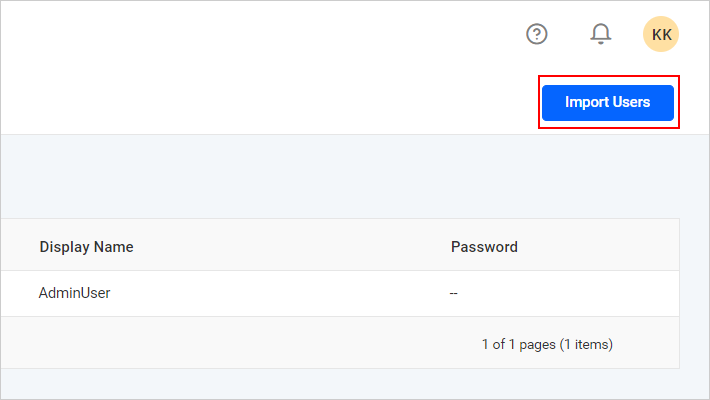
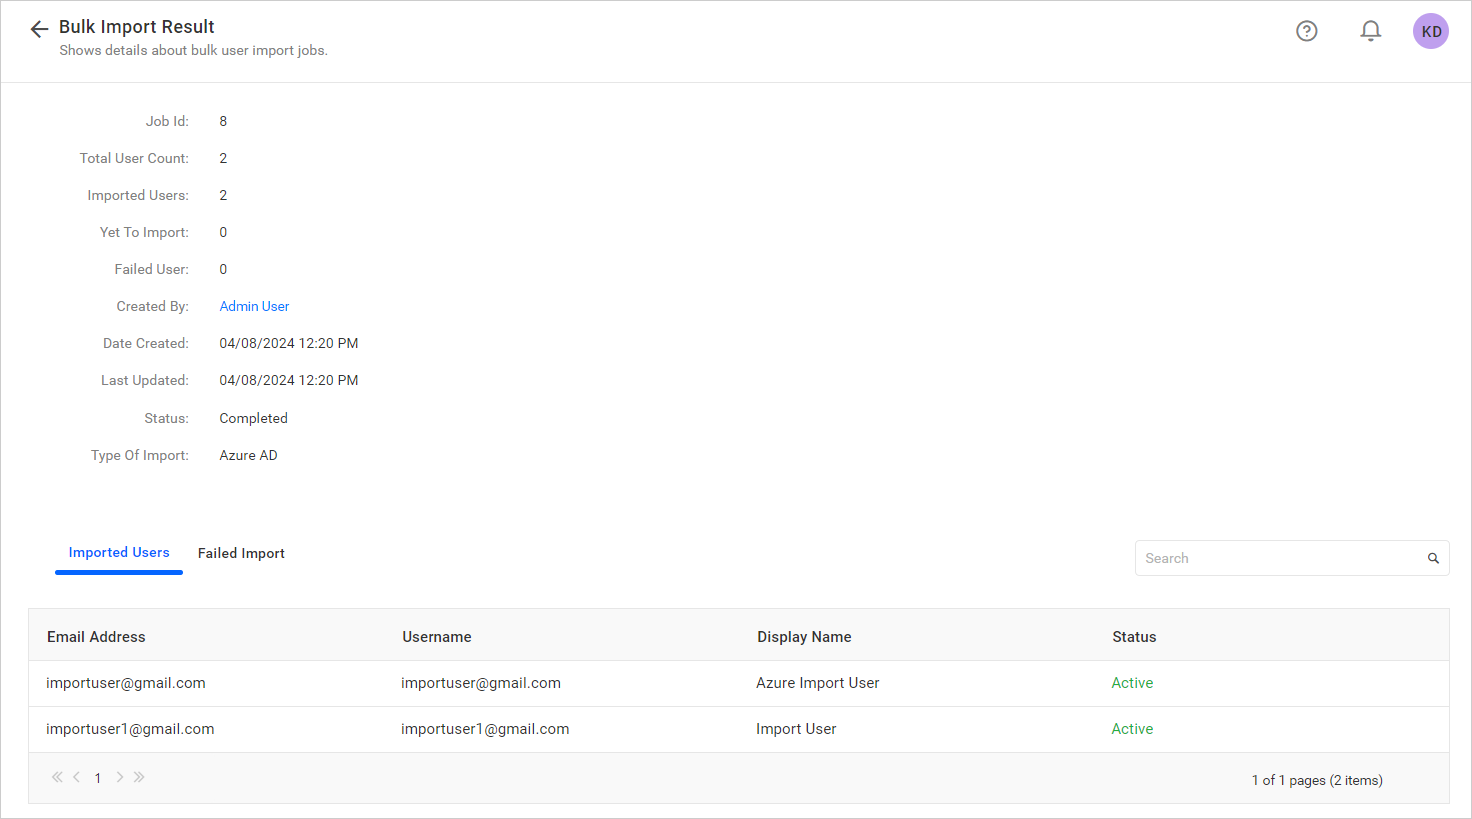
Bold BI will import the selected users in the background as a job, and a confirmation dialog will appear as shown in the figure below.
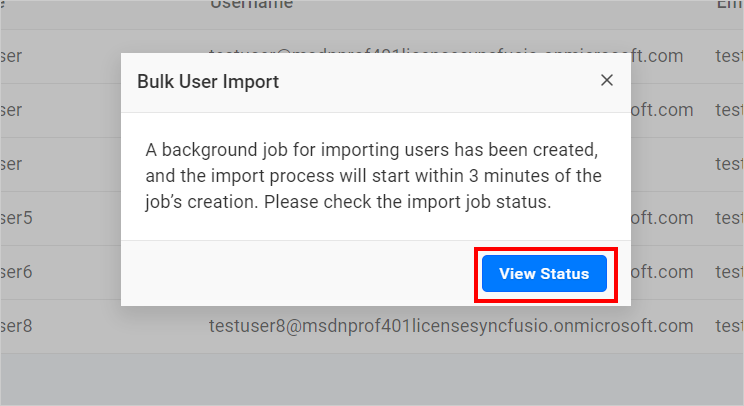
You can check the status of the current import by clicking on the View Status button in the confirmation dialog. This will take you to the bulk import job details page where you can view the details of the current import job. Learn more about the Bulk Import Result page.
Adding Custom Attributes During CSV User Import
When importing the users in addition to the standard user details such as Username, Email, Display Name, and Password, administrators can now include custom attributes for each user in the CSV template.
When adding attributes to the CSV template, please adhere to the following guidelines:
- Column Naming: Attribute column names must start with the word “Attribute”.
- Naming Convention: After “Attribute”, any combination of characters or numbers can be used (e.g., Attribute1, AttributeA, AttributeCustom).
- Key-Value Format: Each attribute should follow the key=value format (e.g., role=admin, department=sales).
NOTE: A maximum of 10 custom attributes can be added for each user during import. Duplicate attributes will be added only once.
Example CSV Format with Attributes
Here is an example of how the CSV format should look when including custom attributes:
| UserName | DisplayName | Password | AttributeRole | AttributeDept | |
|---|---|---|---|---|---|
| [email protected] | [email protected] | Test User | Test@12345 | role=Admin | department=sales |
Edit users
User profile details can be edited from the user’s edit page, as shown in the image below.
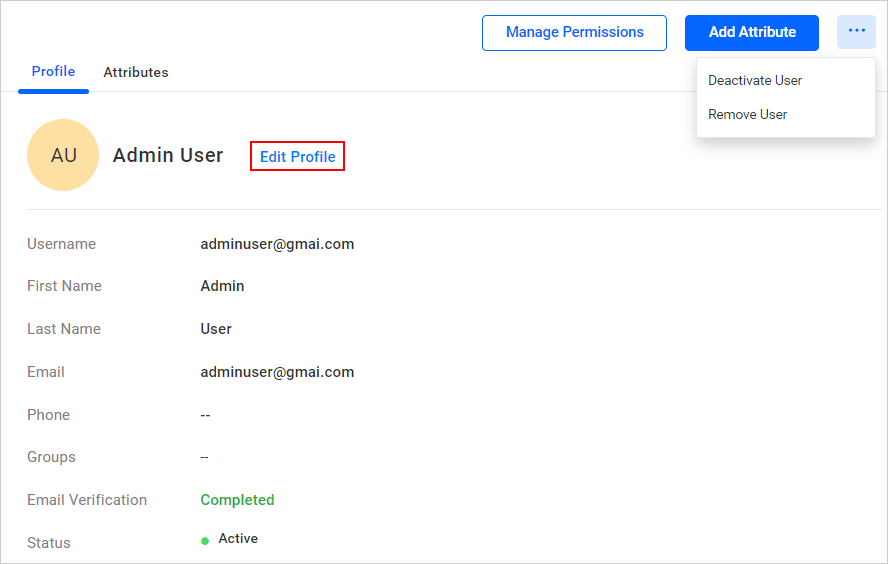
The username, first name, last name, email, phone number, and login password for the user can be edited by users belonging to the System Administrator group.
Remove User
Users can be removed from the Bold BI site when they are no longer required. This can be done from the user management page or the edit user page. Even if a user is removed from the site, they will still be available in the UMS.
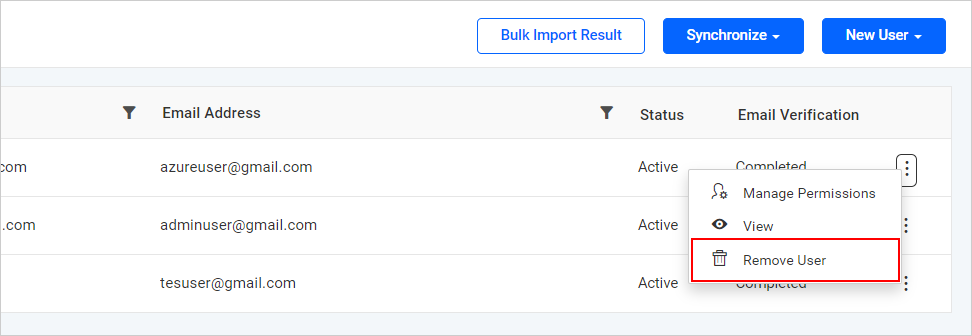
From user management page
Click on the Remove User icon to remove the user from the user management page.
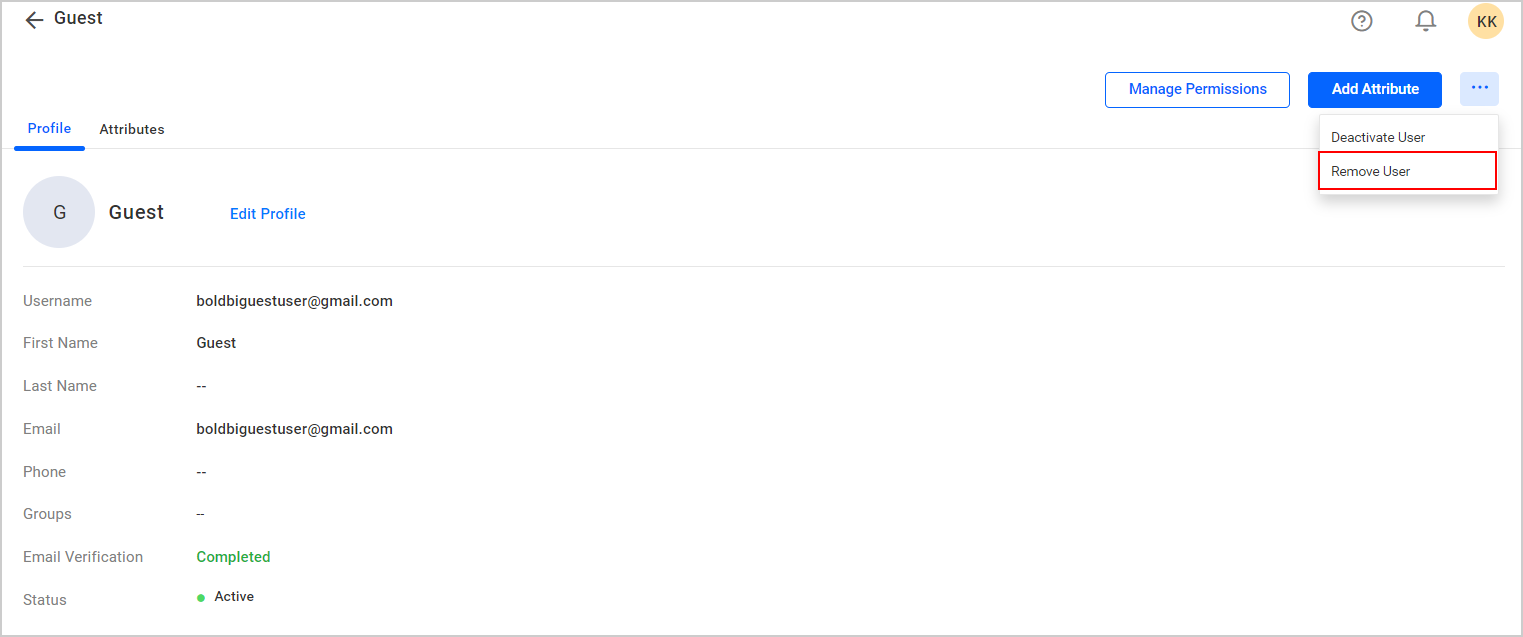
From user edit page
Click on Remove User from the menu as shown in the image to remove the user from the user management page.
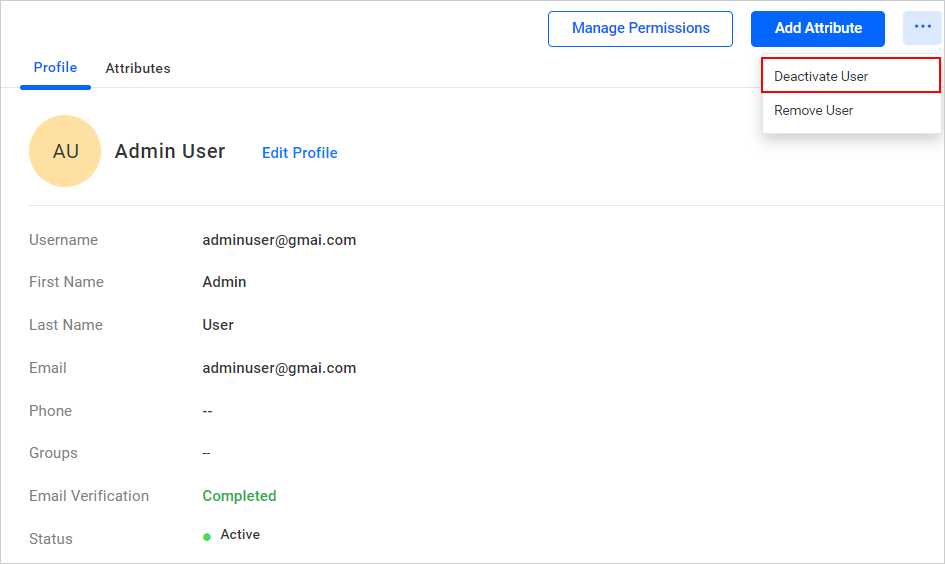
Deactivate users
Users can be deactivated at any time. Once deactivated, the user will not be able to log into Bold BI.
Click on Deactivate User from the menu as shown in the image.
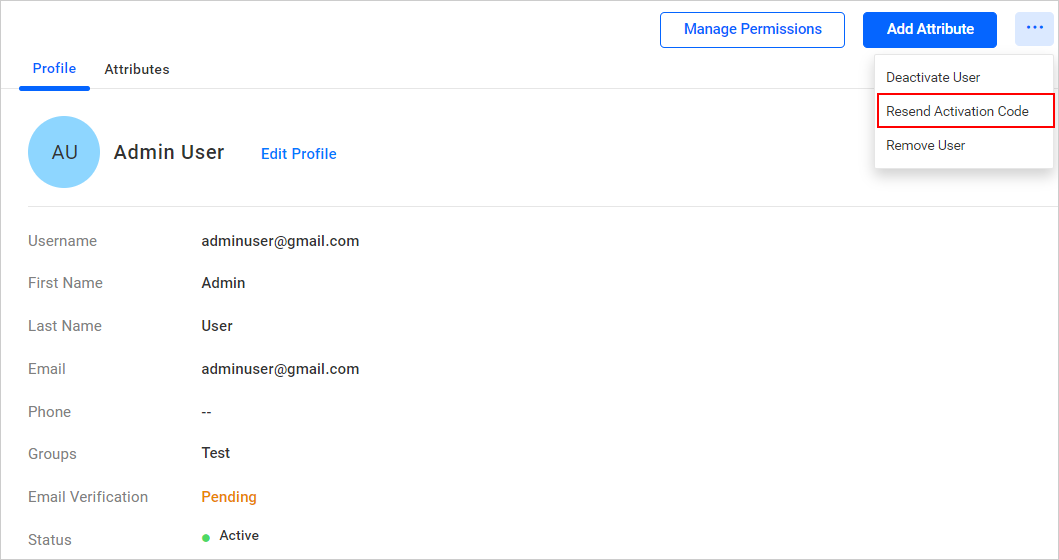
Activate users
Inactive users can be activated by clicking on the Resend Activation Code button on the user edit page.
This will send an account activation email to the user with an activation link to activate the account. This activation link will only be valid for 2 days.
If the user has not received the activation email within 2 days or has missed activating the account, the System Administrator must resend the activation email to the user.
Change Password
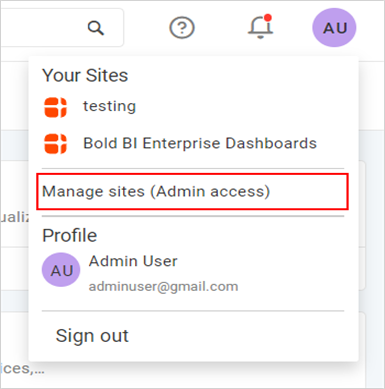
To change a password, the administrator can follow these steps on the Tenant management site:
-
Go to the UMS site by clicking on the profile.
-
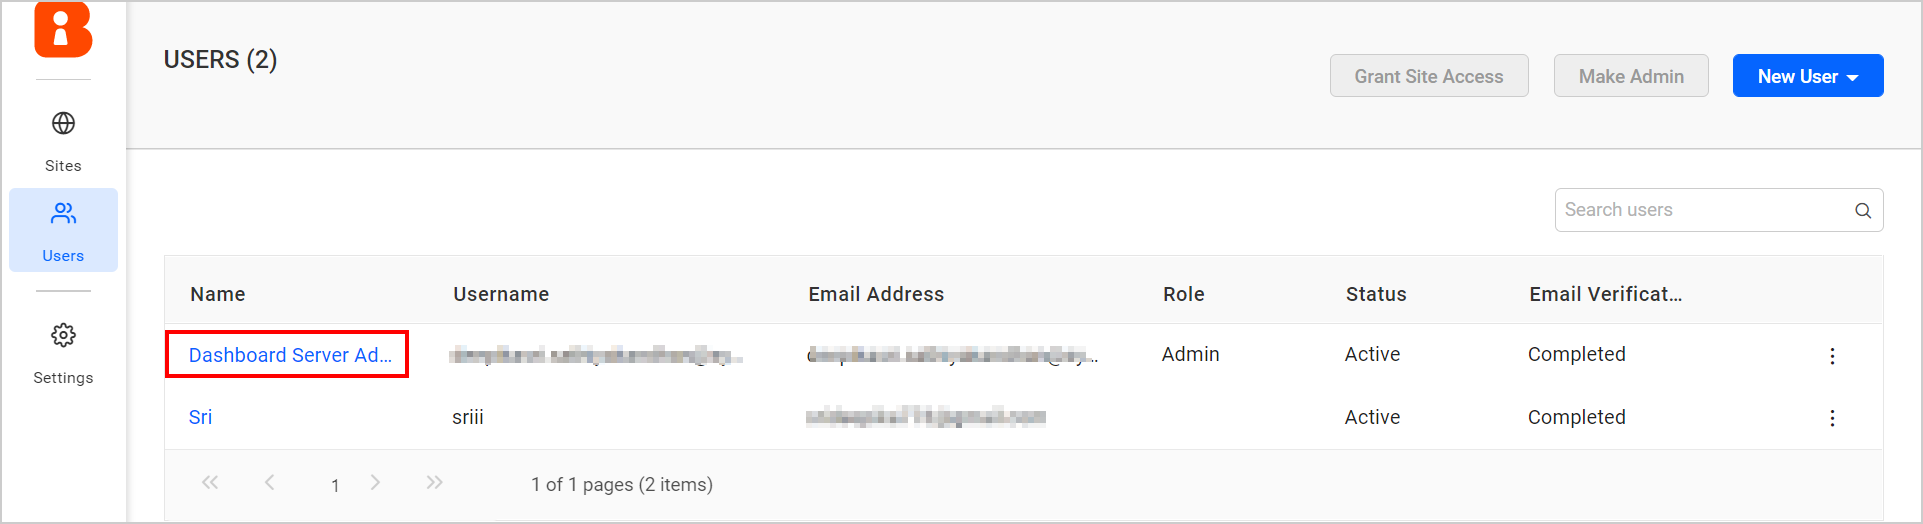
Click on the
Usersoption to manage users.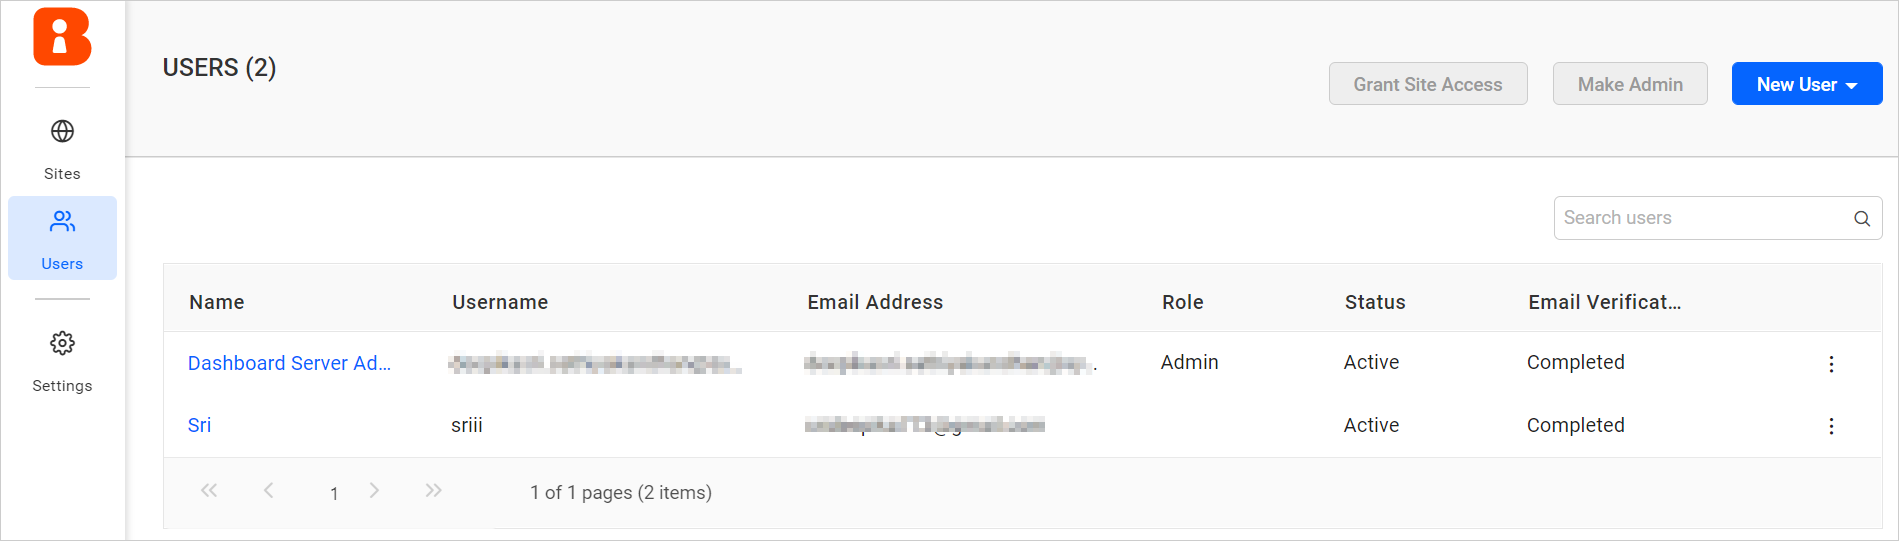
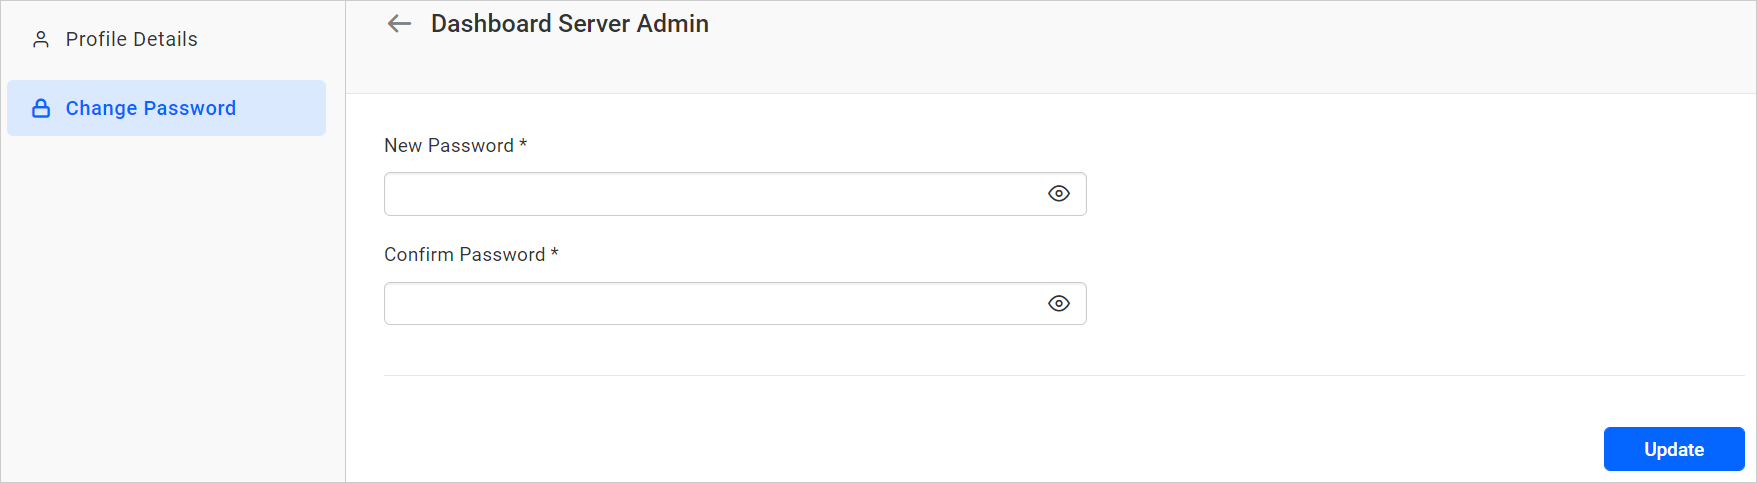
-
Click on the name of the user to change the password. Enter the new password and click the update button.
Manage permissions
The Manage Permissions page for the user can be accessed from any of the following pages:
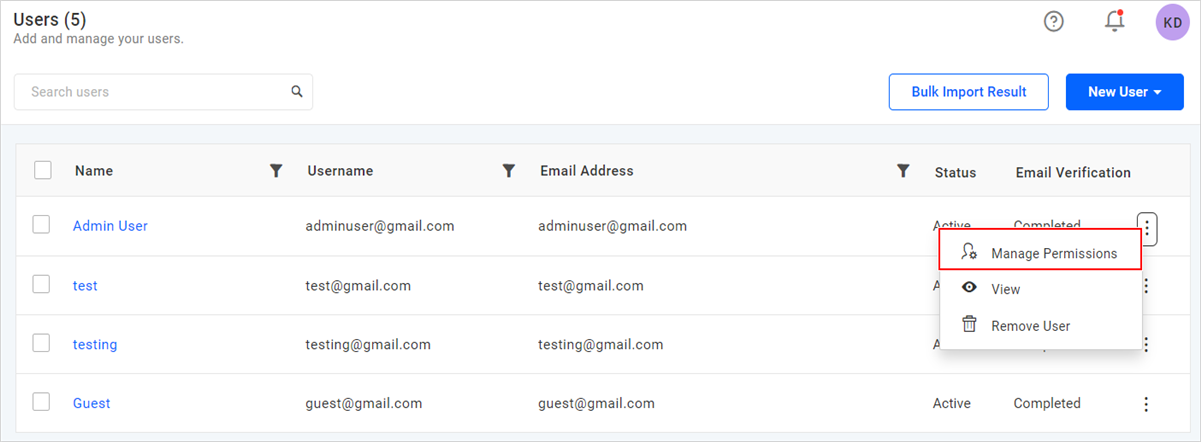
- Click on
Actionsin the user management grid context menu and select theManage Permissionsoption.
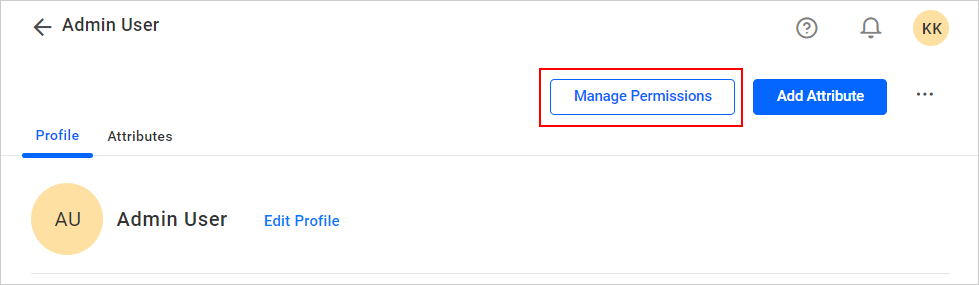
- Click on the user’s name on the user listing page to navigate to the user profile page, then click on
Manage Permissionson the user profile page.
In the Manage Permissions grid, you can find the permissions assigned directly to the user as well as the permissions that the user inherited from the assigned groups.
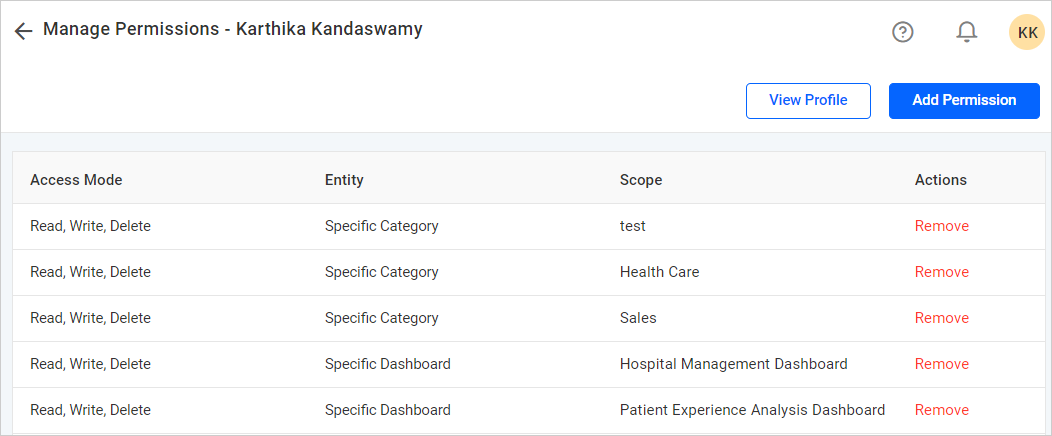
Click on Add Permission to add permissions to the user.
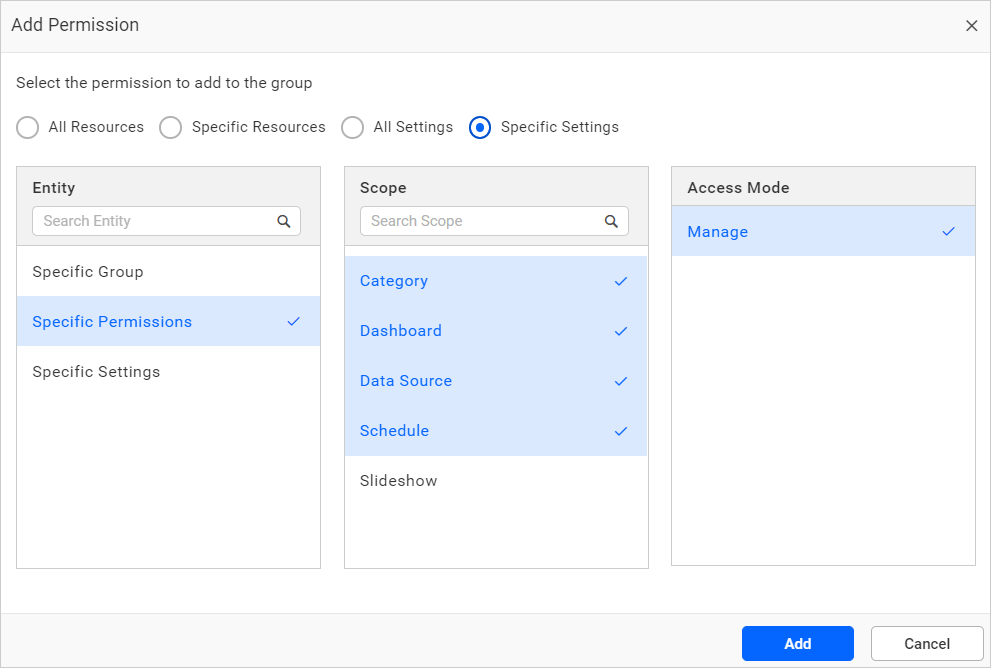
Steps to add permission to the user
- Select the entity.
- Select the scope if the entity is not of the
All ResourceorAll Settingsitem type. - Select the access mode.
- Click on
Addto add the specified permission to the user.
You can also select multiple scopes and entities to assign multiple permissions. For more information on how to add and manage permissions, please visit the Manage Permissions page.
Assign users to group
-
Users can be assigned to one or multiple groups from the user management page.
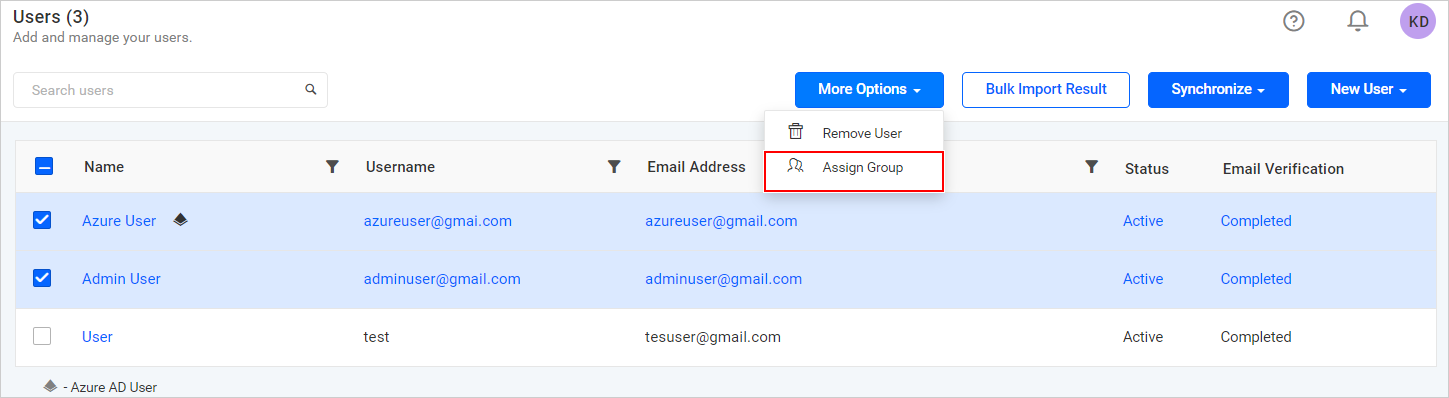
-
Users can be assigned to an existing group.

-
Users imported from the third-party provider cannot be added to a group imported from the same provider. If you want to map the user with the group, add the user to the group in your user directory provider and synchronize the changes.

-
A new group can also be created at this time and the selected users can be assigned to the new group.
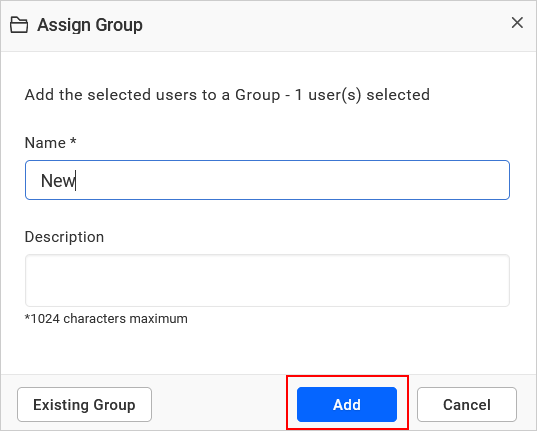
NOTE: All users in the group will have the permissions assigned to the group.