Amazon Cognito support for SSO authentication
The Bold BI application supports the addition of users using the Amazon Cognito provider. By importing them, you can share the dashboards and email exported dashboards to them.
NOTE: This feature is available in Bold BI Embedded Analytics but not in Cloud Analytics Server.
How to register the Bold BI application in Amazon Cognito
This section explains how to perform Single Sign-On for users in Amazon Cognito using the Bold BI application.
NOTE: This configuration needs to be done on the Amazon Cognito website.
Prerequisites
- An admin account in Amazon Cognito.
- An user pool in Amazon Cognito.
- Install Bold BI application.
Steps to register the Bold BI application
-
Please login to the Amazon Cognito website using an admin account. Once logged in, search for the word
Cognitoand click onUser Pool.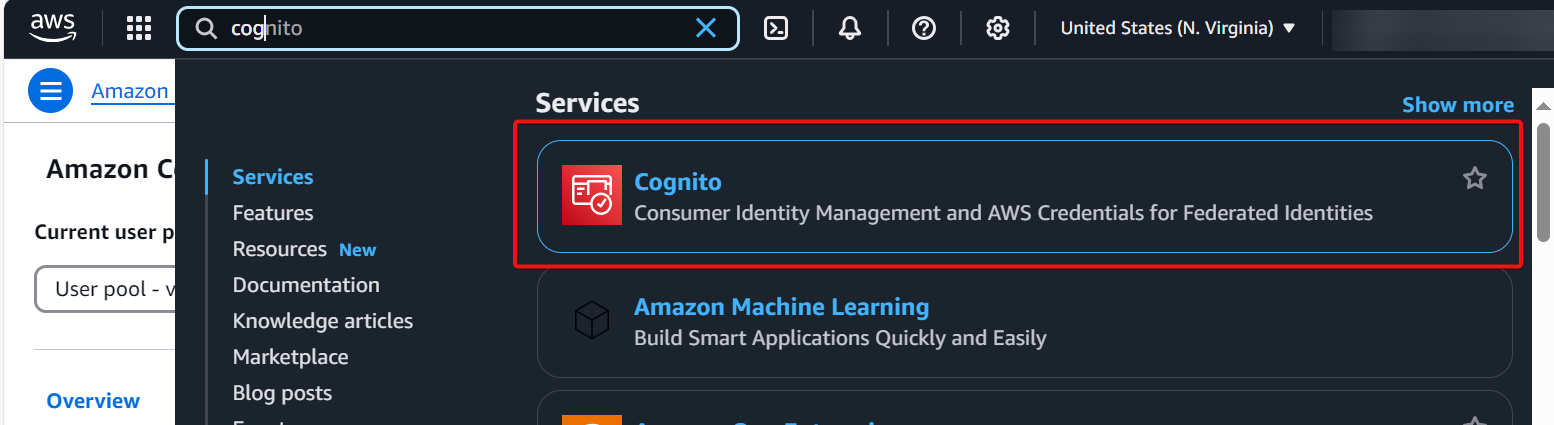

-
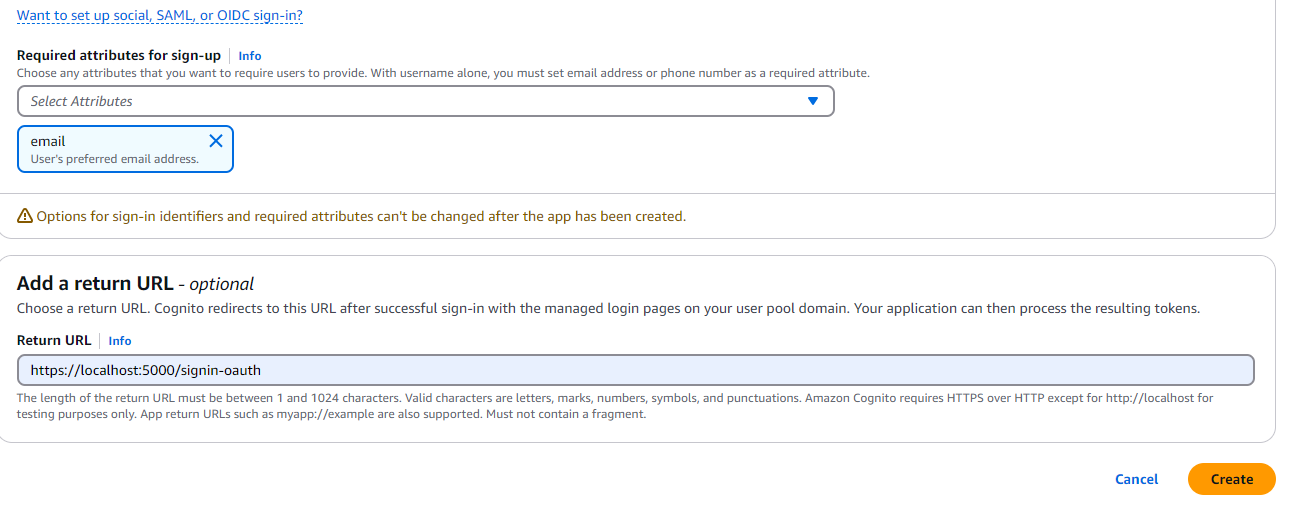
Create a new
User Poolas shown in the image below. Make sure to provide the Redirect URL exactly as it appears in the authentication settings page of Bold BI.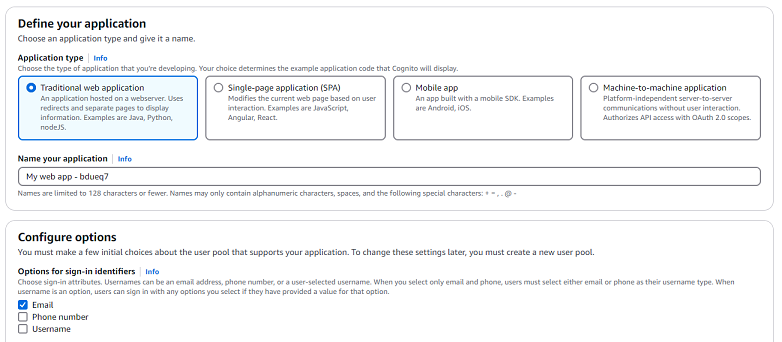
-
Click on the Created User Pool, then select the
App Clientsoption underApplicationsin the left side menu. After that, click on the created app client.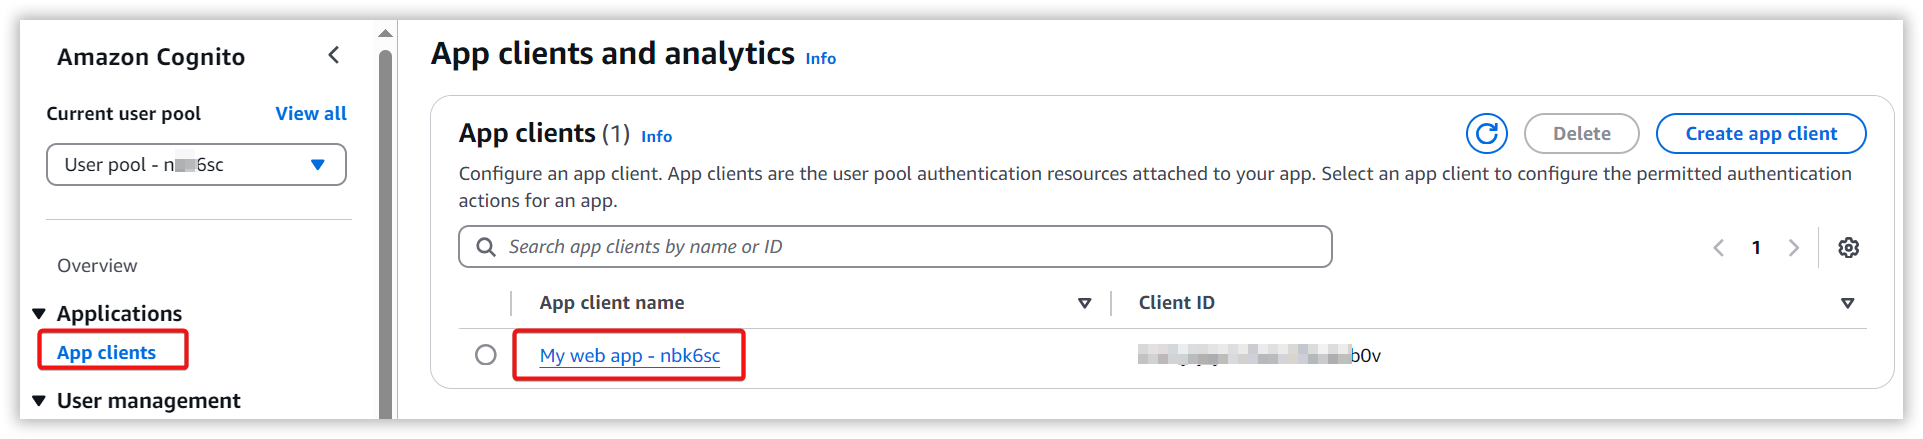
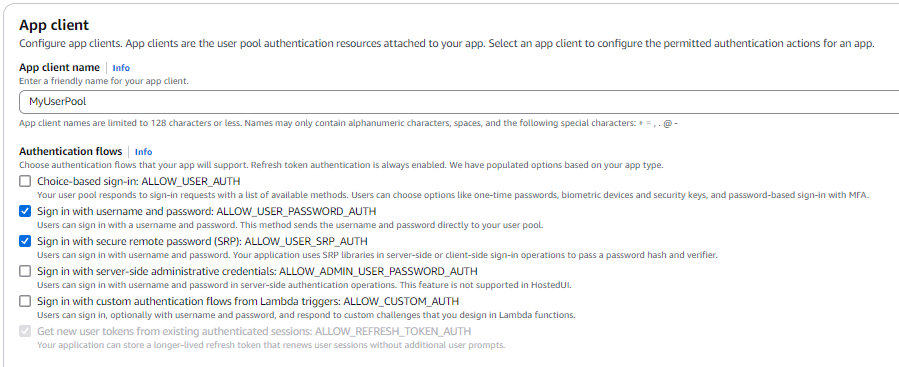
-
Click on the
Editbutton to make the necessary changes, as shown in the below image and save the changes.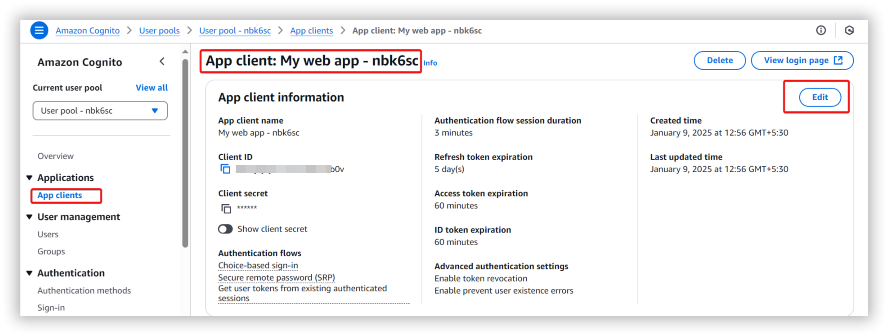
-
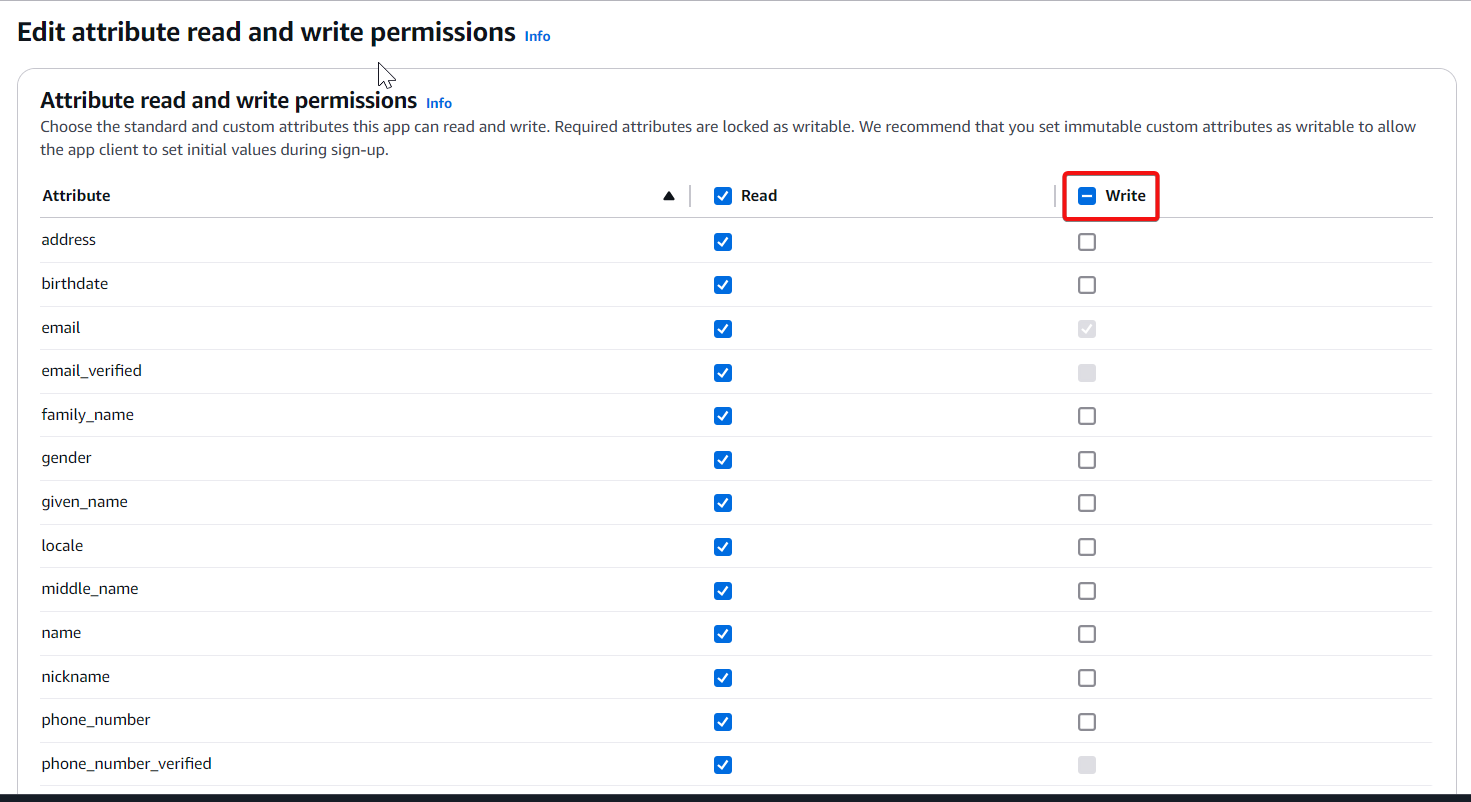
Click on the
Attribute permissionsoption, then selectEdit. After entering edit mode, disable all the options under Write and save the changes.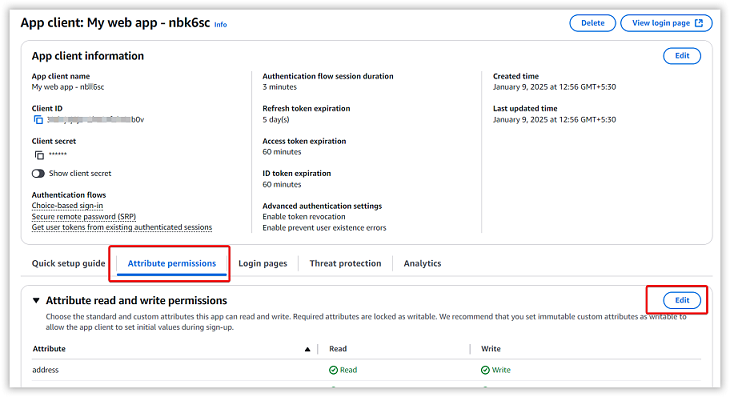
-
Click on the
Login Pagesoption, then select theEdit. After entering edit mode, choose the values as shown in the below image.
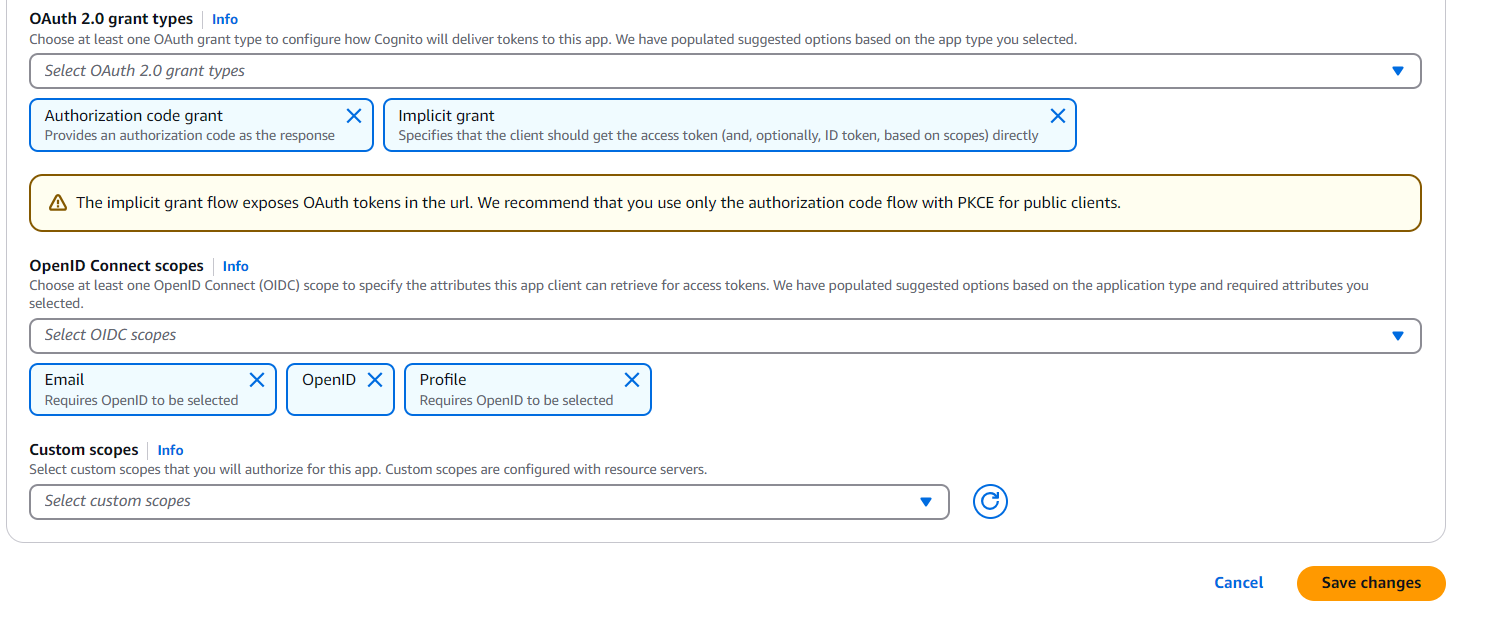
-
Please use this
App client idandApp client secretfor configuring the AWS Cognito.
-
You can obtain the Endpoints using this link: https://cognito-idp.us-east-1.amazonaws.com/{YourUserPoolID}/.well-known/openid-configuration
-
The
Callback URL(s)must be the URI in the settings of your Bold BI application, as shown in the following screenshot. If you need to create a new user account, you can enable the optionEnable User Account Creation.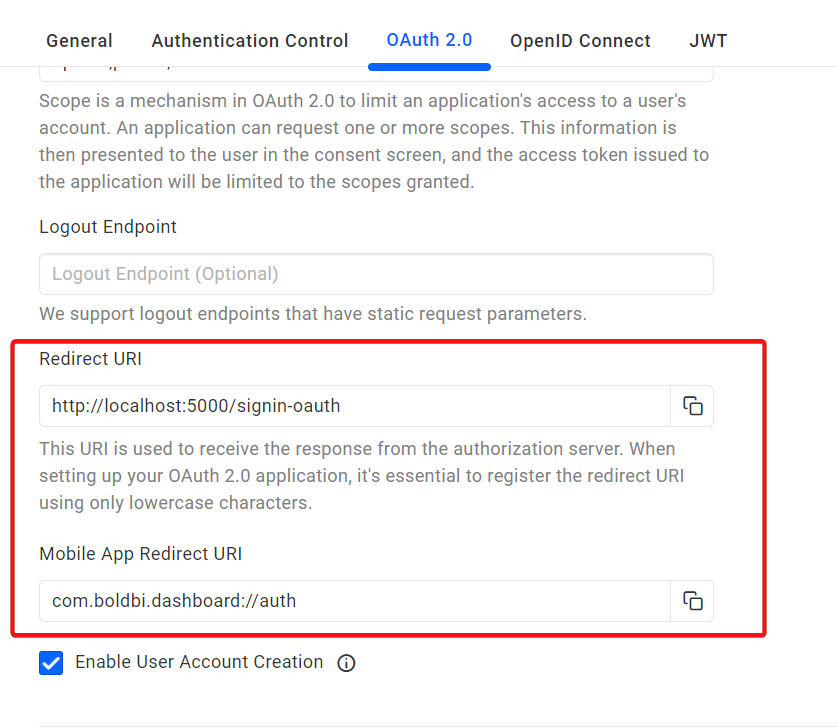
After successfully registering in Amazon Cognito, enter these details on the Authentication settings page using OAuth option and save the changes.
NOTE: As mentioned above, we configured the authentication directly on Site level. However, if you want to configure it across all tenants, you would need to apply the same configuration in the UMS page.
Enable Amazon Cognito support for authentication in Bold BI
Configure the settings in Bold BI, as shown in the following snapshot, to enable authentication using Amazon Cognito.

The fields that need to be saved in Bold BI to enable Amazon Cognito for authentication are explained below.
| Provider Name | It represents the name of the authentication provider to be displayed in the login page. |
| Provider Logo | It represents the logo of the authentication provider to be displayed in the login page. |
| Authorization Endpoint | It should be in the format https://AUTH_DOMAIN/oauth2/authorize Please refer blog for more details. |
| Token Endpoint Method | POST |
| Token Endpoint | It should be in the format https://AUTH_DOMAIN/oauth2/token Please refer blog for more details. |
| User Information Endpoint Method | GET |
| User Information Endpoint | It should be in the following format https://AUTH_DOMAIN/oauth2/userinfo. Please refer this documentation, for more details. |
| Client ID | The Client ID you get after registered the Bold BI application in Amazon Cognito website. |
| Client Secret | The Client Secret you get after registered the Bold BI application in Amazon Cognito website. |
| Scopes | openid, profile, email |
| Logout Endpoint | It is the endpoint in the Amazon Cognito website that signs the user out. |
| This must be the field name, in which email will be present when deserializing the token. |
Configure Amazon Cognito Group Import Settings in Bold BI
Configure the group import setting in Bold BI using Cognito AWS, as shown in the image below,
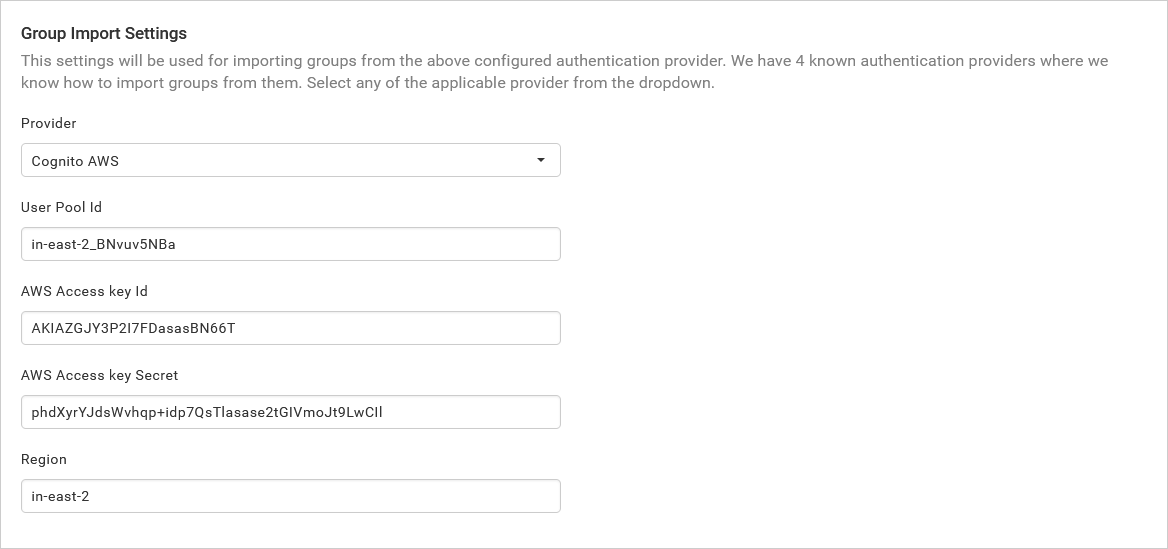
NOTE: Only the
IAM Usercan import Cognito AWS groups.
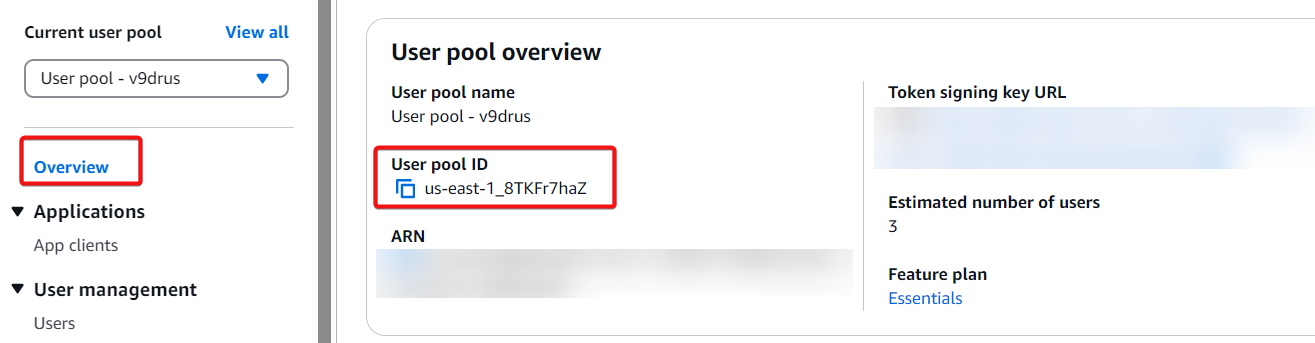
The User Pool Id and Region can be found in the general settings of your user pool in the Cognito AWS console.
Please find more information on managing access keys for IAM Users : AWS IAM User Guide - Creating Access Keys
and you can get the AWS Access Key ID and Key Secret under the Security credentials option. For more details, please refer to this blog.