Microsoft Office 365 Account Settings with OAuth authentication
This section explains how to configure the Microsoft Office 365 account to send emails from the Bold BI Server. This process requires creating an Azure app and granting it the necessary API permissions to access the email service. If needed, you can also restrict the app’s access to specific mailboxes.
To learn how to register an Azure app with mail-sending API permissions and restrict access to specific mailboxes.
NOTE: This email service configuration is only applicable for On-Premises Deployment.
The Bold BI Server requires the following Microsoft Office 365 account details in order to send email.
| Sender Email Address | The email address, which is displayed as the "From" email address in the recipient's email. |
| Authentication Type | The OAuth authentication is the default authentication type that requires the Tenant ID, Client ID, and Client Secret for authentication. |
| Tenant ID | A unique identifier specifies the Azure AD instance that manages the app's permissions and roles, establishing its authorization context. |
| Client ID | A unique identifier for the Azure app, which is essential for requesting and validating tokens when accessing mail services. |
| Client Secret | A confidential key that proves the app’s identity, used along with the Client ID for app authentication and authorization. |
Steps to configure Microsoft Office 365 account settings in Bold BI
-
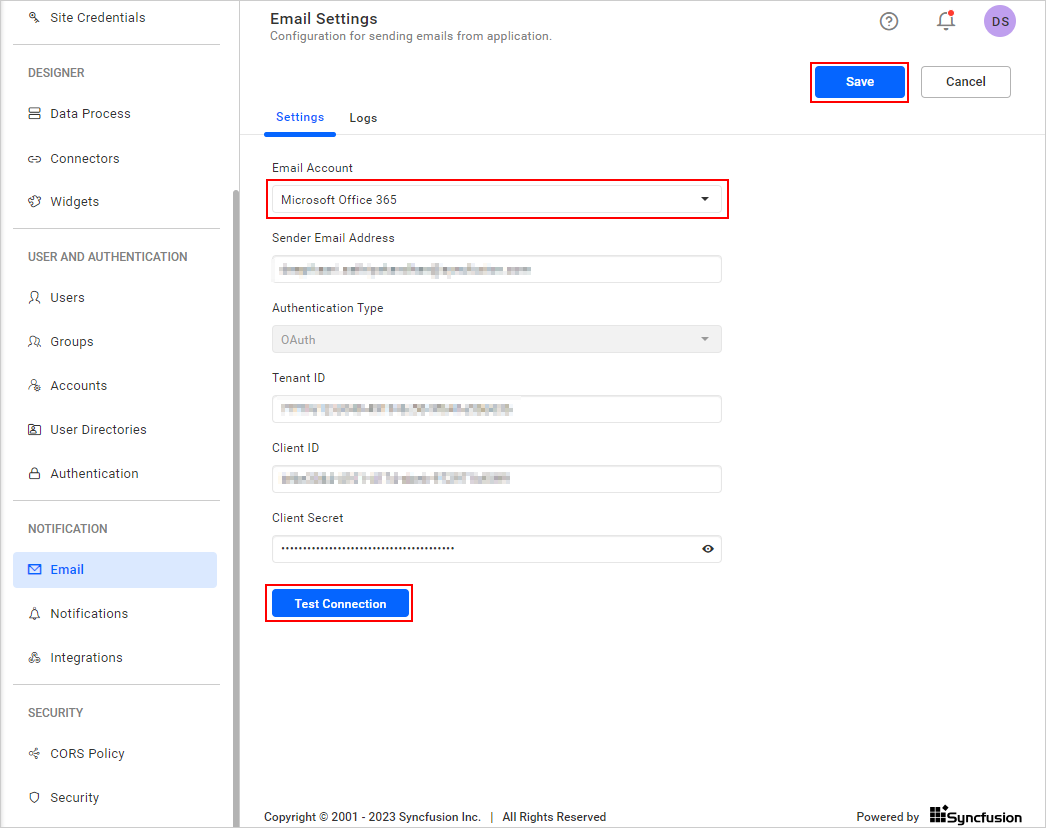
Go to
http://{domain}/bi/site/site1/administration/e-mail-settingsand selectMicrosoft Office 365from theEmail Accountdrop-down menu. -
Enter your email address in the Sender Email Address field, which has the
Mail.SendAPI permission for Microsoft Graph. -
By default, OAuth will be selected as the Authentication type. Enter the App’s Tenant ID, Client ID, and Client Secret in the respective fields.
-
Once you have filled in the email settings connection details, test the settings using the
Test Connectionoption and then clickSaveto save the settings.
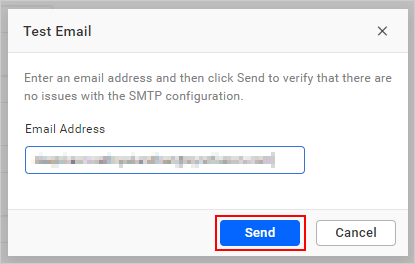
- Enter an email address and click
Sendto ensure that the Microsoft Office 365 configuration is correct.
What happens if the sender email address does not have application access?
If the sender email address used in the configuration does not have app access, the test email will fail, resulting in an Access to OData disabled error as shown below. Learn more about restricting app access to specific mailboxes here.
