User Interface Customization in Bold BI Embedded Analytics
This section explains how to customize the Bold BI application user interface by adding custom menus, listing menu items, showing previews, etc. through a configuration file.
NOTE: This feature is available in On-Premises Deployment, but not in Syncfusion Managed Cloud Server.
You can make your own selections about what you want to see or set preferences for how information is organized or displayed.
Configuration for layout customization
Steps to open and edit the custom_ui.json file to customize the user interface:
-
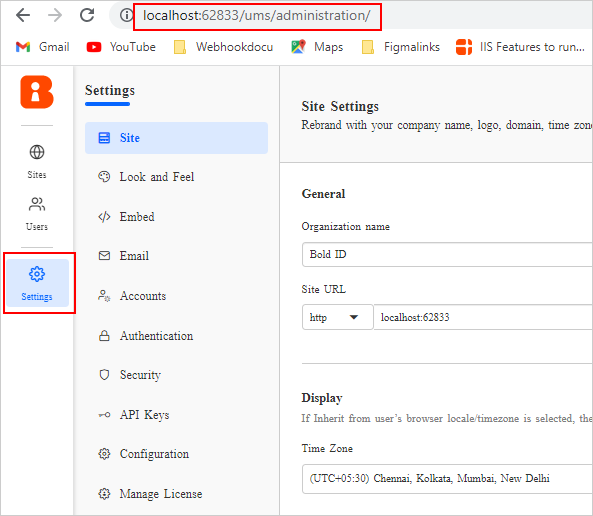
Go to the UMS
Settingspage.Example: http://{yourdomain}/ums/administration
-
Select the
Configurationtab from the settings menu and choosecustom_ui.jsonfrom theSearch your filesdrop-down.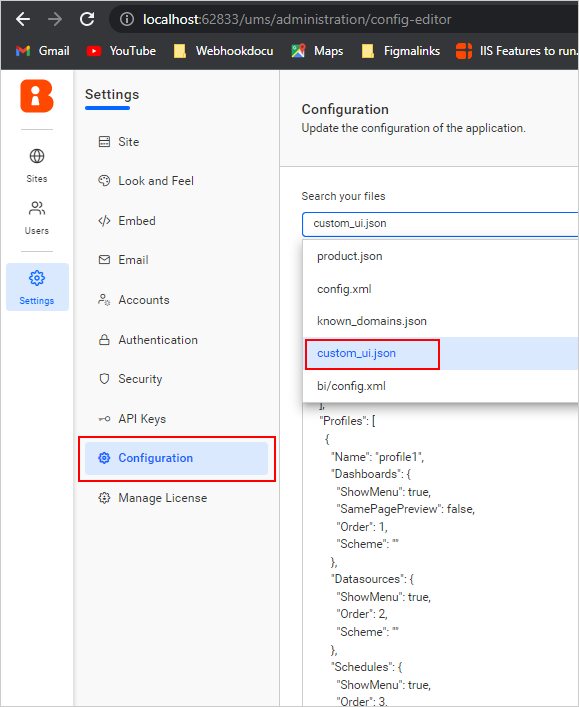
-
Fill in the required fields in the file and
Save. -
Restart the application and access the site. Please refer to the instructions on how to restart the Bold BI for more information.
Custom UI JSON
The Custom UI JSON file contains the following fields that are used to customize the UI in the Bold BI application:
- Sites
- Profiles
- Preview pane
- Schemes
- Custom menus
Sites
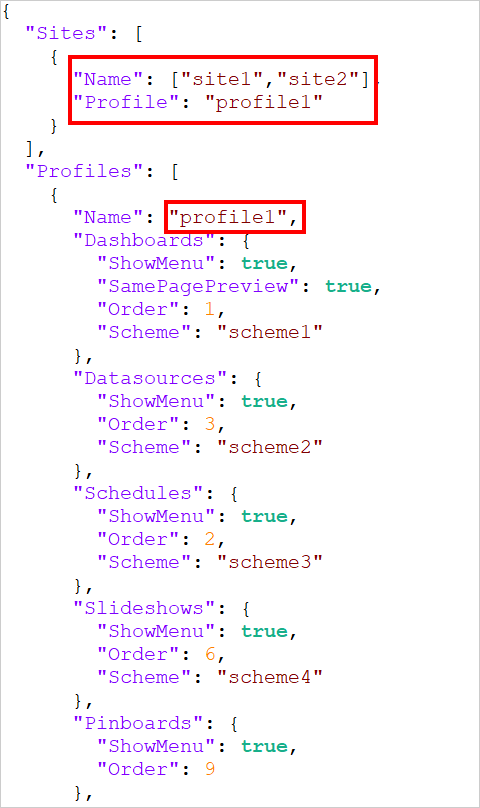
You need to provide the site name and matching profile name that you want to customize the UI for.
Profiles
This section contains a list of default left side menu options and custom menus.
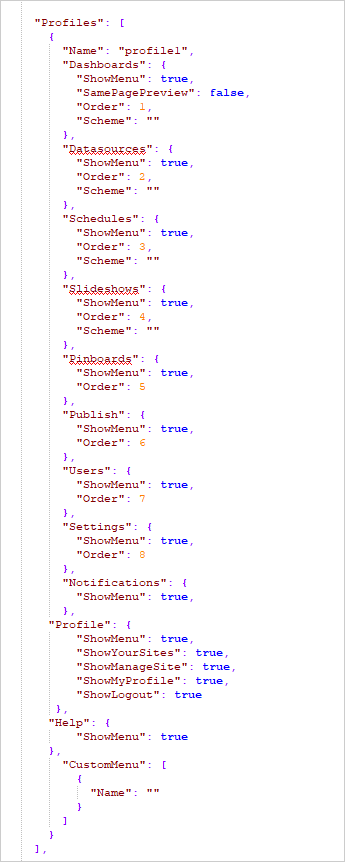
Profile syntax
	  "Profiles": [
		{
		  "Name": "profile1",
		  "Dashboards": {
			"ShowMenu": true,
			"SamePagePreview": false,
			"Order": 1,
			"Scheme": ""
		  },
		  "Datasources": {
			"ShowMenu": true,
			"Order": 2,
			"Scheme": ""
		  },
		  "BoldETL": {
			"ShowMenu": true,
			"Order": 3,
			"Scheme": ""
		  },
		  "Schedules": {
			"ShowMenu": true,
			"Order": 4,
			"Scheme": ""
		  },
		  "Slideshows": {
			"ShowMenu": true,
			"Order": 5,
			"Scheme": ""
		  },
		  "Pinboards": {
			"ShowMenu": true,
			"Order": 6
		  },
		  "Publish": {
			"ShowMenu": true,
			"Order": 7
		  },
		  "Users": {
			"ShowMenu": true,
			"Order": 8
		  },
		  "Settings": {
			"ShowMenu": true,
			"Order": 9
		  },
		  "Notifications": {
			"ShowMenu": true,
		  },
          "Profile": {
            "ShowMenu": true,
            "ShowYourSites": true,
            "ShowManageSite": true,
            "ShowMyProfile": true,
            "ShowLogout": true
          },
		  "Help": {
			"ShowMenu": true
		  },
		  "CustomMenu": [
			{
			  "Name": ""
			}
		  ]
		}
	  ]
-
Name: Provide the name of the profile that will be used to specify the profile on the sites.
-
ShowMenu: Determines whether that specific left side menu option should be shown or hidden.
-
Order: Determines the position of the specific menu option.
-
Scheme: Provide the matching scheme name. The scheme will be used to customize the options in the item listing and the context menu.
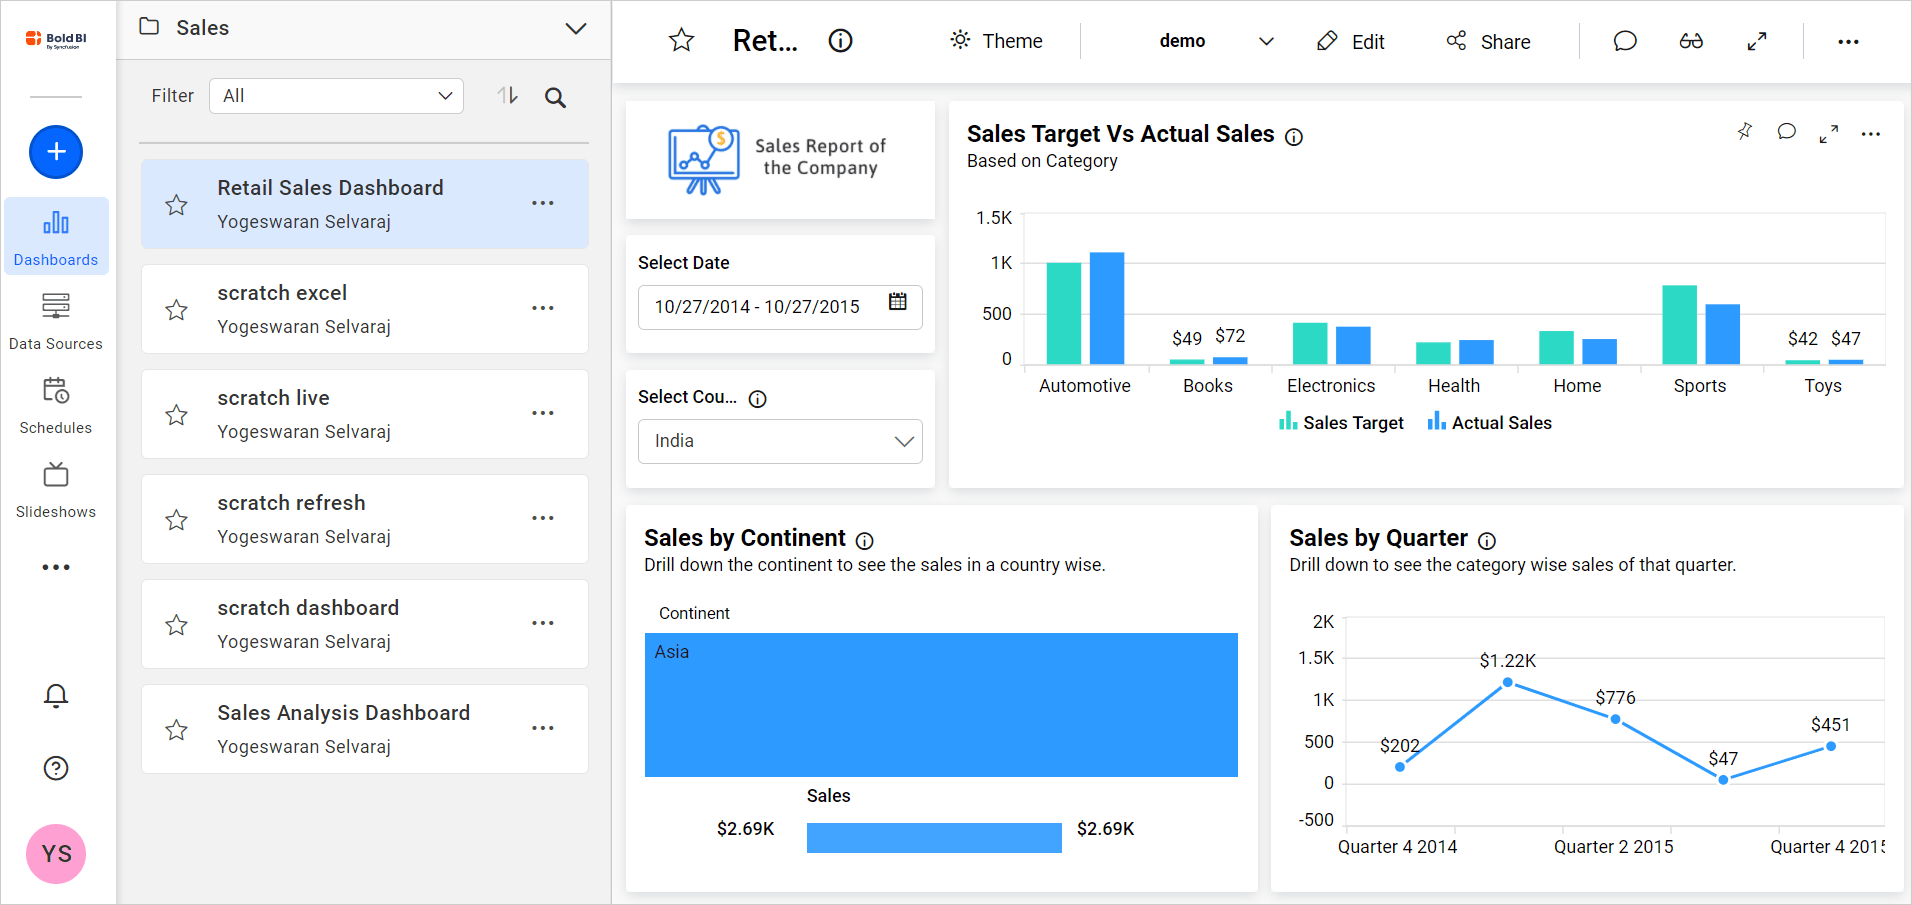
Preview pane
You can preview the dashboards on the right side of the dashboard listing by using the SamePagePreview property in the configuration file.
Schemes
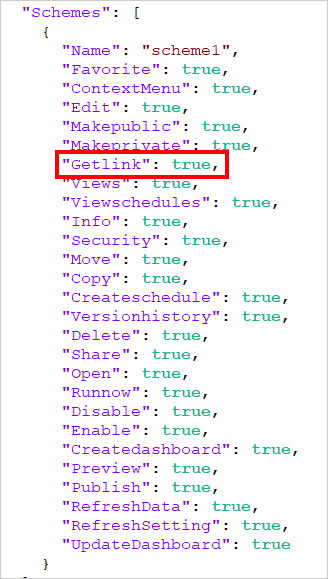
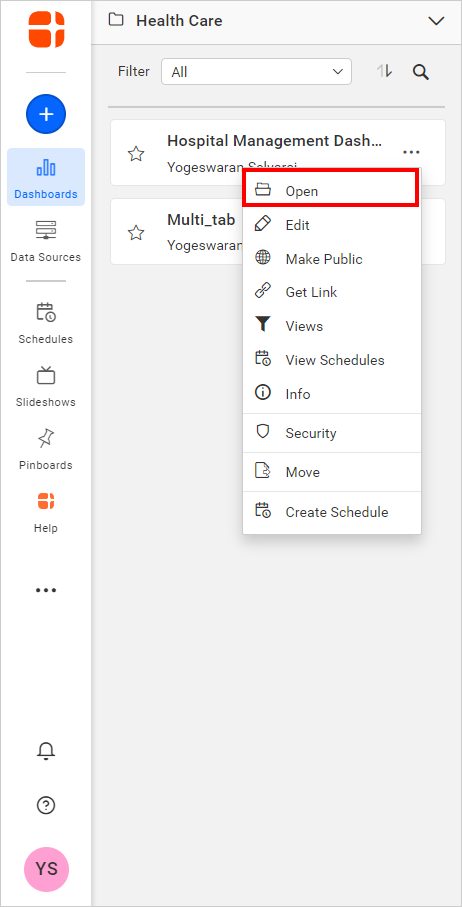
The scheme can be used to show or hide the context menu items in the item listing pages. These options are available on dashboards, slideshows, schedules, and data sources pages.
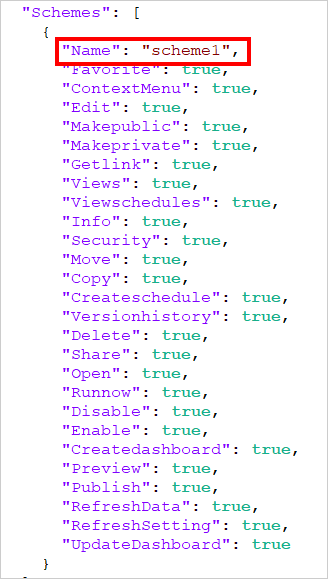
For example, you can display the Get Link option in the context menu by setting the GetLink property to true, and also mentioning the corresponding scheme name in the profile.

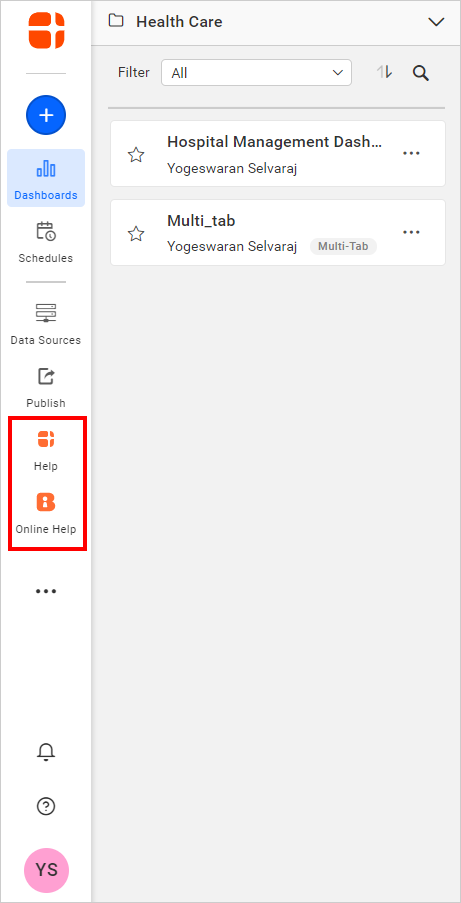
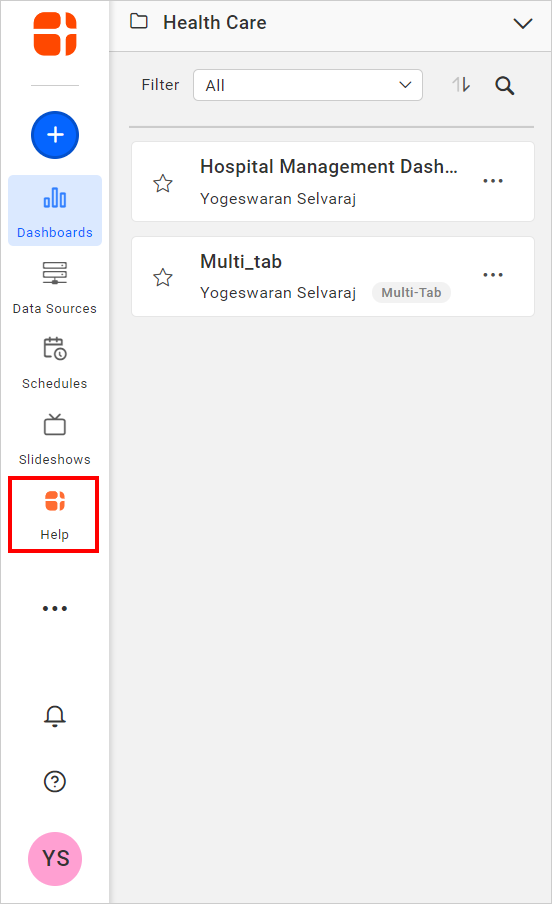
Navigation menu customization
You can add new menu items that you want to display in the left side menu along with the default side menu items.
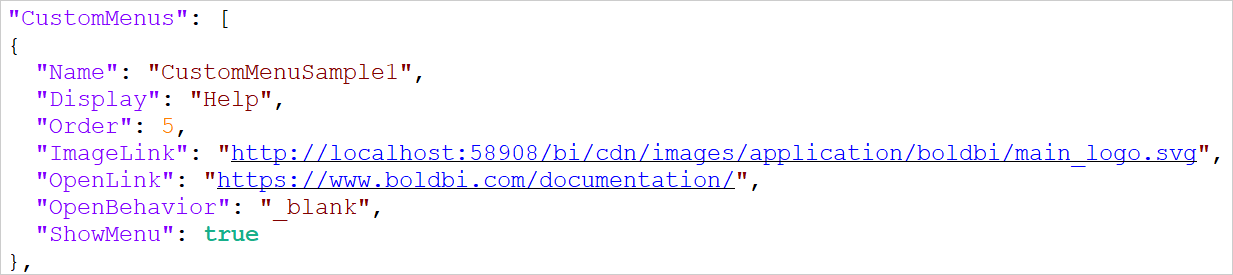
Navigation menu syntax
	"CustomMenus": [
		{
			"Name": "CustomMenuSamplel",
			"Display": "Help",
			"Order": 5,
			"ImageLink": "http://localhost:58908/bi/cdn/images/application/boldbi/main_logo.svg",
			"OpenLink": "https://www.boldbi.com/documentation/",
			"OpenBehavior":"_blank", //_blank, _self, _parent,
			"ShowMenu": true
		}
]-
Name: Specify the name of the scheme. This can be used to identify the scheme in the profiles.
-
Display: Name that should be shown in the menu item.
-
Order: Position of the menu item when displayed in the left side menu bar.
-
ImageLink: URL of the image to be displayed in the menu item.
-
OpenLink: URL of the site/page to navigate to when the menu item is clicked.
-
OpenBehavior: Determines whether the custom menu page opens in the same page or in a new tab.
-
ShowMenu: Determines whether the custom menu is visible or hidden.
Sample UI customization
Let’s customize site1 using the profile profile1 and scheme scheme1.
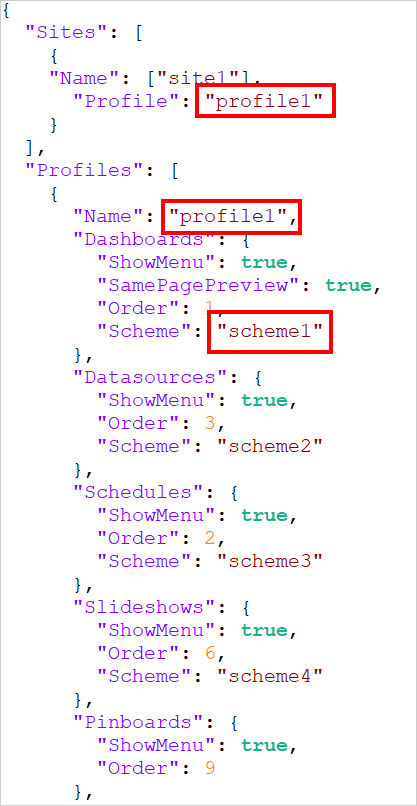
Here, we have changed the order of each side menu and applied support for same page preview.
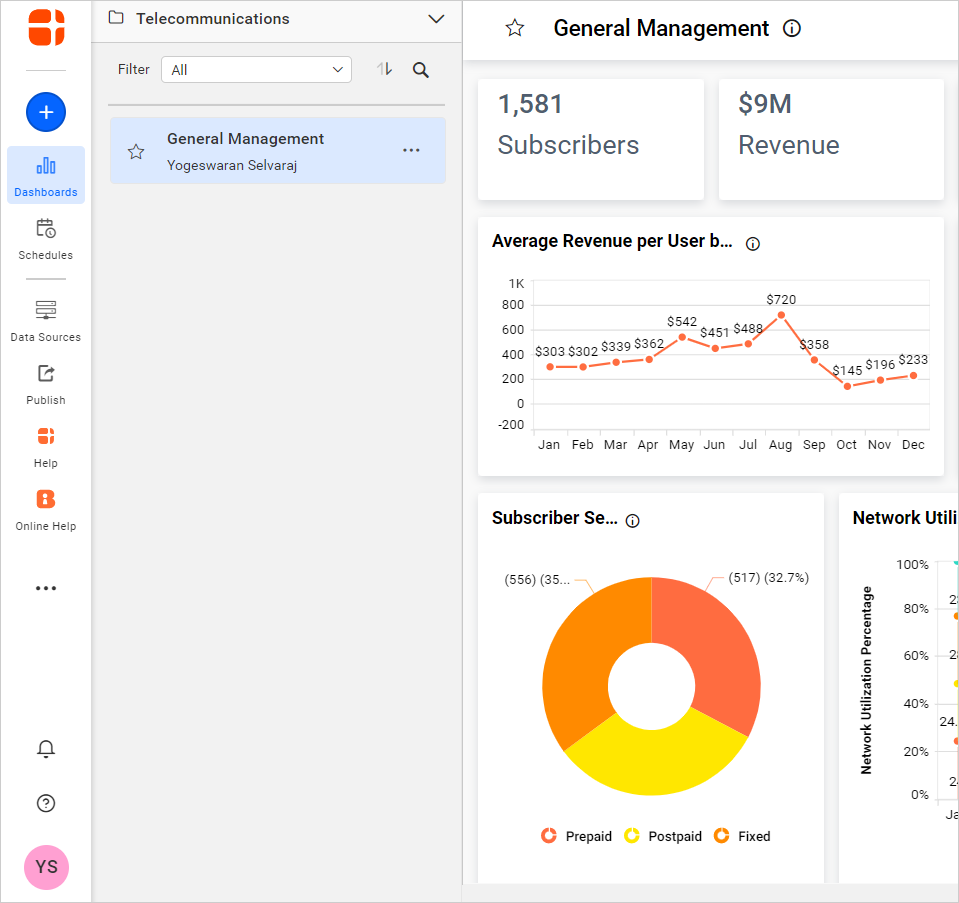
Different schemes have been provided for dashboards, datasources, schedules, and slideshows.
	"Schemes": [
		{
			"Name": "scheme1",
			"Open": true,
			"Favorite": true,
			"ContextMenu": true,
			"Edit": true,
			"Makepublic": true,
			"Makeprivate": true,
			"Getlink": true,
			"Views": true,
			"Viewschedules": true,
			"Info": true,
			"Security": true,
			"Move": true,
			"Createschedule": true,
		},
		{
			"Name": "scheme4",
			"Open": false,
			"Favorite": true,
			"ContextMenu": true,
			"Edit": true,
			"Makepublic": true,
			"Makeprivate": true,
			"Getlink": true,
			"Views": true,
		}
	]
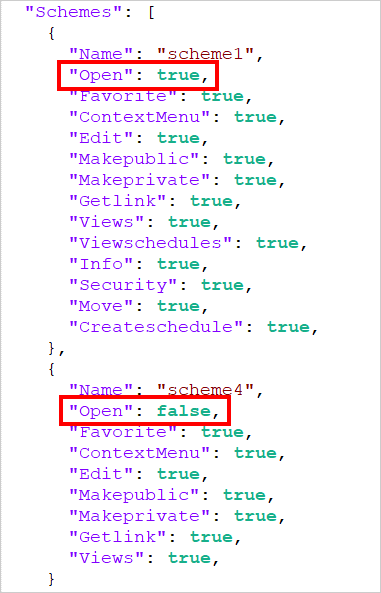
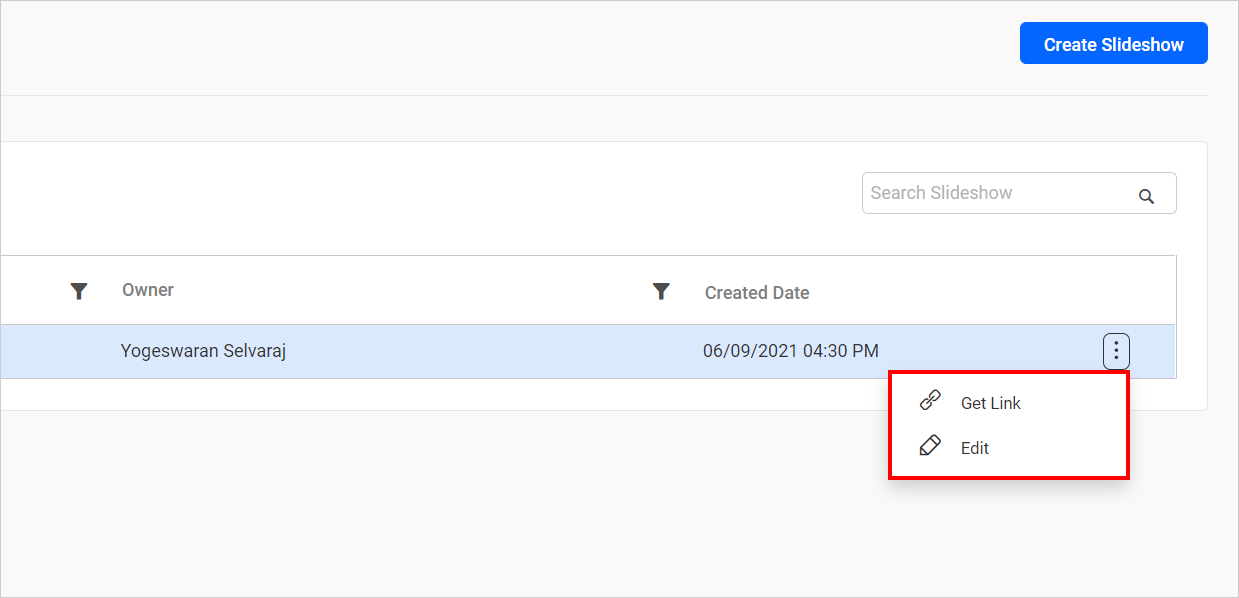
For example, the Open option will be visible in the dashboard context menu and hidden in the slideshow context menu.
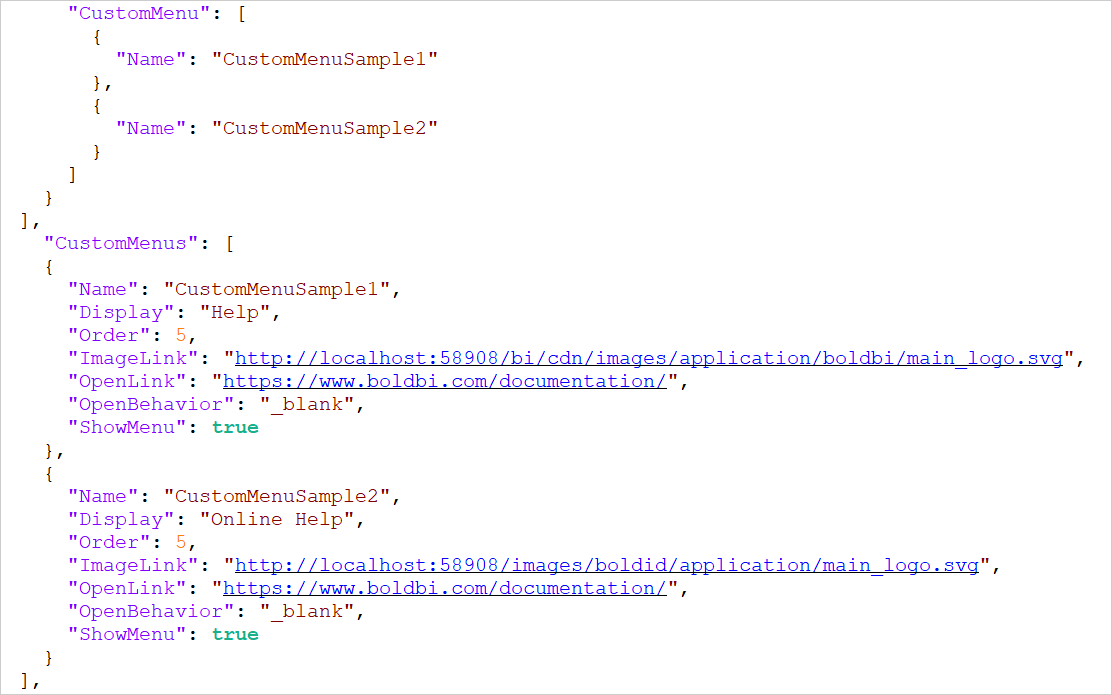
Two different custom menu options have been provided.
	"CustomMenu": [
		{
			"Name": "CustomMenuSamplel"
		},
		{
			"Name": "CustomMenuSample2"
		}
	],
	"CustomMenus": [
		{
			"Name": "CustomMenuSamplel",
			"Display": "Help",
			"Order": 5,
			"ImageLink": "http://localhost:58908/bi/cdn/images/application/boldbi/main_logo.svg",
			"OpenLink": "https://www.boldbi.com/documentation/",
			"OpenBehavior": "blank",
			"ShowMenu": true
		}
		{
			"Name": "CustomMenuSample2", "Display": "Online Help",
			"Order": 5,
			"ImageLink": "http://localhost:58908/images/boldid/application/main_logo.svg",
			"OpenLink": "https://www.boldbi.com/documentation/",
			"OpenBehavior":"_blank",
			"ShowMenu": true
		}
	]