Instructions to fine-tune a new Azure OpenAI GPT 3.5 model
-
Open the Command Prompt: Press
Win + Ron your keyboard, typecmd, and enter to open the Command Prompt window. -
Navigate to the Directory: Use the
cdcommand to change directories to where the OpenAI trainer utility is located.cd <:INSTALLED_DIRECTORY>\BoldServices\utilities\openai_trainer -
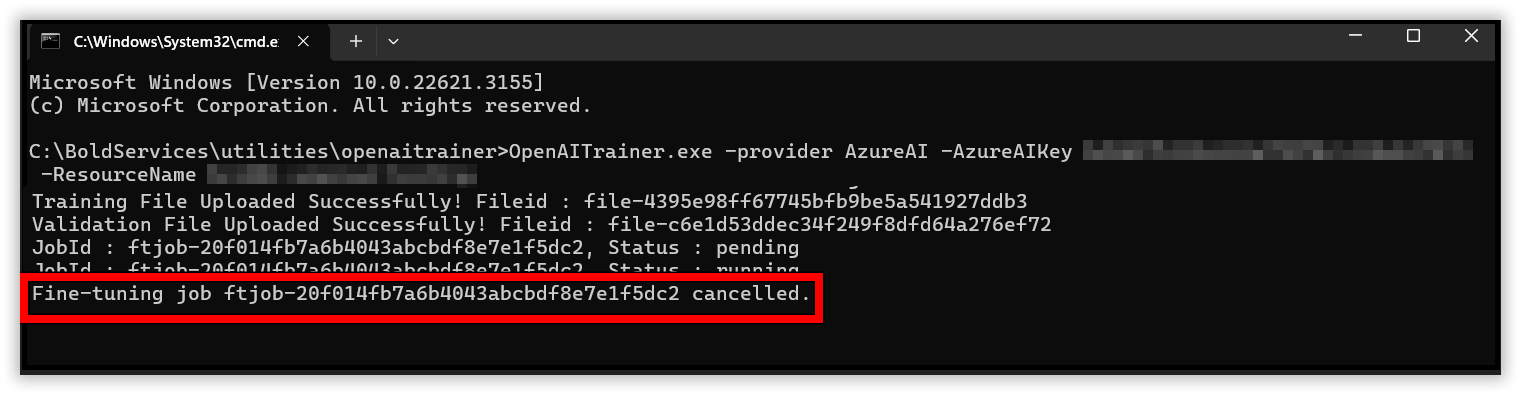
Execute the Application: Once in the correct directory, run the executable file by typing the following command, replacing
<:API_KEY>with your actual Azure key and<:RESOURCE_NAME>with the resource name you created.OpenAITrainer.exe -provider AzureAI -AzureAIKey <:API_KEY> -ResourceName <:RESOURCE_NAME>Ensure to replace
<:API_KEY>with the API key and<:RESOURCE_NAME>from Azure.
NOTE : You can generate your key by visiting the AzureAI portal and creating your resource at https://azure.microsoft.com/en-in/products/ai-services/openai-service.
Steps to run in Linux
-
Open a Terminal: Open a terminal using the appropriate key combination (e.g.,
Ctrl + Alt + T). -
Navigate to the Directory: Use the
cdcommand to change directories to where the OpenAI trainer utility is located.cd /var/www/bold-services/application/utilities/openai_trainer -
Once in the correct directory, run the dll file by typing the following command, replacing
<:API_KEY>with your actual Azure key and<:RESOURCE_NAME>with the resource name you created./var/www/bold-services/dotnet/dotnet OpenAITrainer.dll -provider AzureAI -AzureAIKey <:API_KEY> -ResourceName <:RESOURCE_NAME>
Steps to run in Docker
-
Run the following command to list all the containers and note the
BoldBI container name.docker ps -
Execute the following command for bashing boldbi running container.
docker exec -it <BoldBI container name> bash -
Navigate to the Directory: Use the
cdcommand to change directories to where the OpenAI trainer utility is located.cd /application/utilities/openai_trainer -
Once in the correct directory, run the dll file by typing the following command, replacing
<:API_KEY>with your actual Azure key and<:RESOURCE_NAME>with the resource name you created.dotnet OpenAITrainer.dll -provider AzureAI -AzureAIKey <:API_KEY> -ResourceName <:RESOURCE_NAME>
Once the training and validation JSONL files are uploaded for fine-tuning a machine-learning model, the system will begin processing the data. During this time, you will receive a jobId, which is a unique identifier for your fine-tuning task. This ID allows you to track the progress of your fine-tuning job.
Status of fine-tuning
The system will also provide you with status updates. The status indicates the current stage of the fine-tuning process. Initially, the status will show as pending as the system prepares and starts the training with your data.
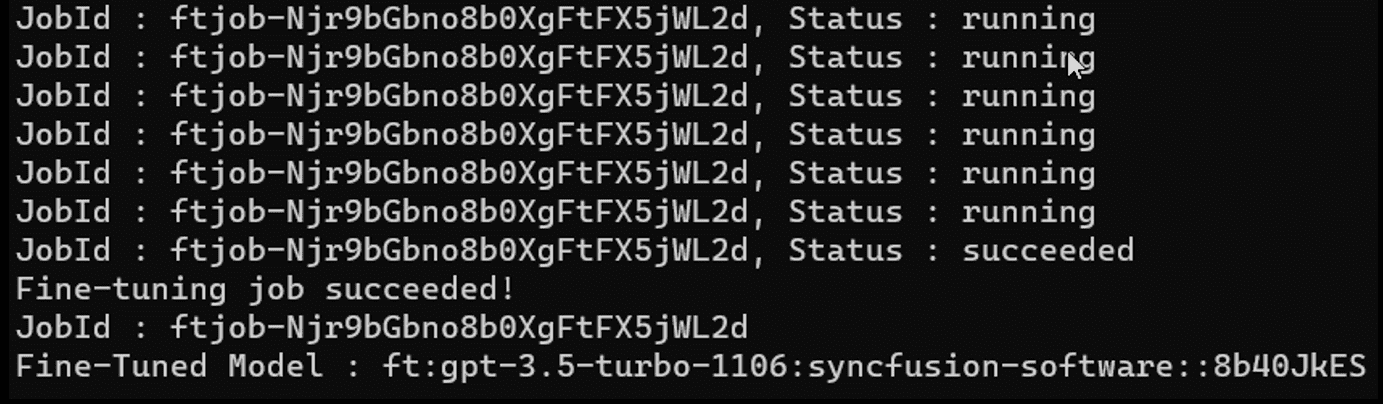
Subsequently, the status will transition to running and persist until the fine-tuning process succeeds or encounters a failure.
Hitting the esc key triggers the termination process for the ongoing fine-tuning task.
NOTE : Cancellation of the job will only take effect if the status transitions to running. If an attempt is made to cancel the job while it is still in the pending state, the cancellation won’t be successful, and manual intervention will be required to cancel the job.
The status of the fine-tuning job will be displayed after every one minute.
Post fine-tuning
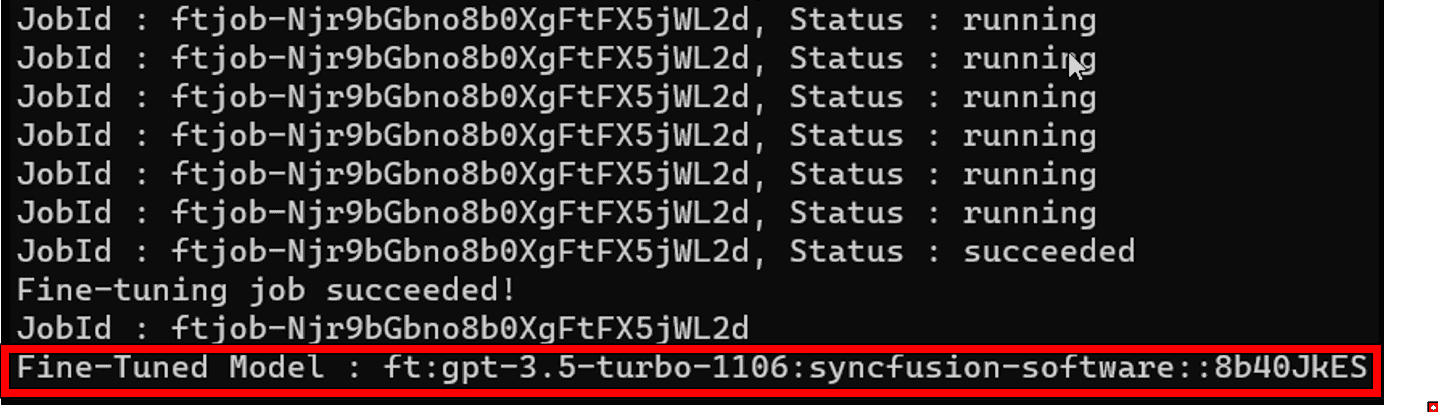
After a successful fine-tuning process, the console will display the name of the fine-tuned model. It is important to make a note of this model name for future use-cases and configure it in BoldBI.
NOTE : An error message will be displayed if an error occurs during the fine-tuning process.
Deploying Trained Model in Azure OpenAI
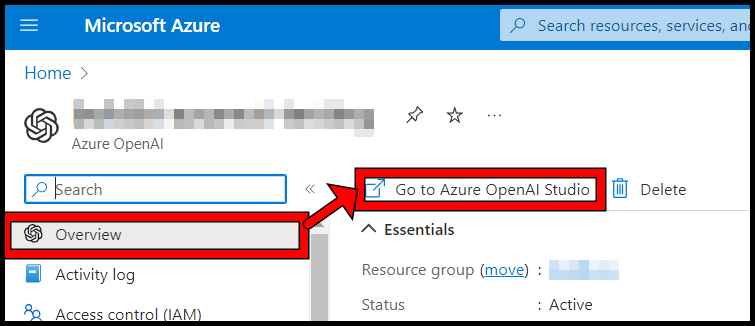
Login in to your portal using https://portal.azure.com/.
To access the Azure OpenAI Studio, navigate to the overview tab within the Azure Portal.
Next, navigate to the Models section and choose the fine-tuned model generated by the utility.
Once you have chosen the desired model, click on the Deploy option.
For further reference on deploying a model: https://learn.microsoft.com/en-us/azure/ai-services/openai/how-to/create-resource?pivots=web-portal#deploy-a-model

Ensure that the deployment is successfully created and visible within the Deployments tab.
Steps to update fine-tuned model name
NOTE : Support for AzureAI is provided on version 7.5 or later.
Bold BI version 7.5 or later
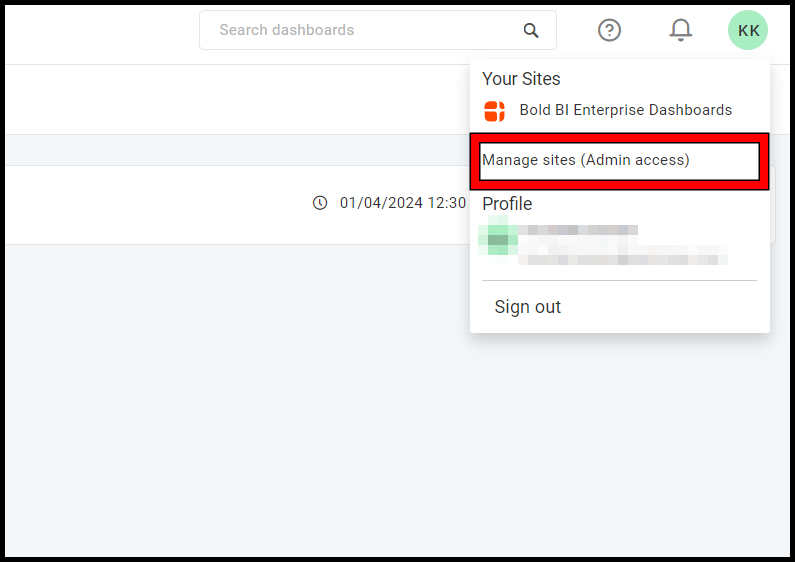
- Go to
Manage Sites.
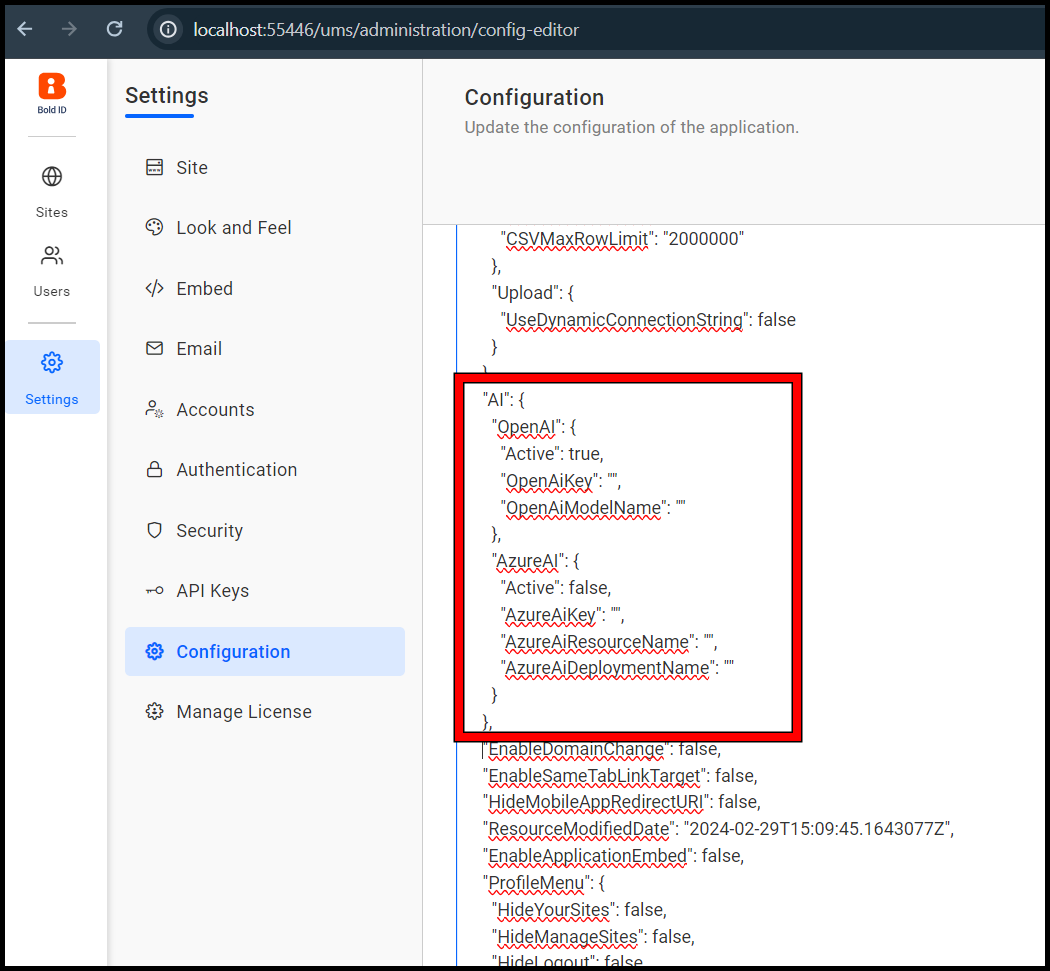
- Inside the
Settingstab, go to theConfigurationtab.

- In the
config.jsonfile, you will find OpenAI Active by default astrueand AzureAI Active asfalse.
- Replace
<:API_KEY>,<:RESOURCE_NAME>and<:DEPLOYMENT_NAME>with your apiKey resource name and deployment name.
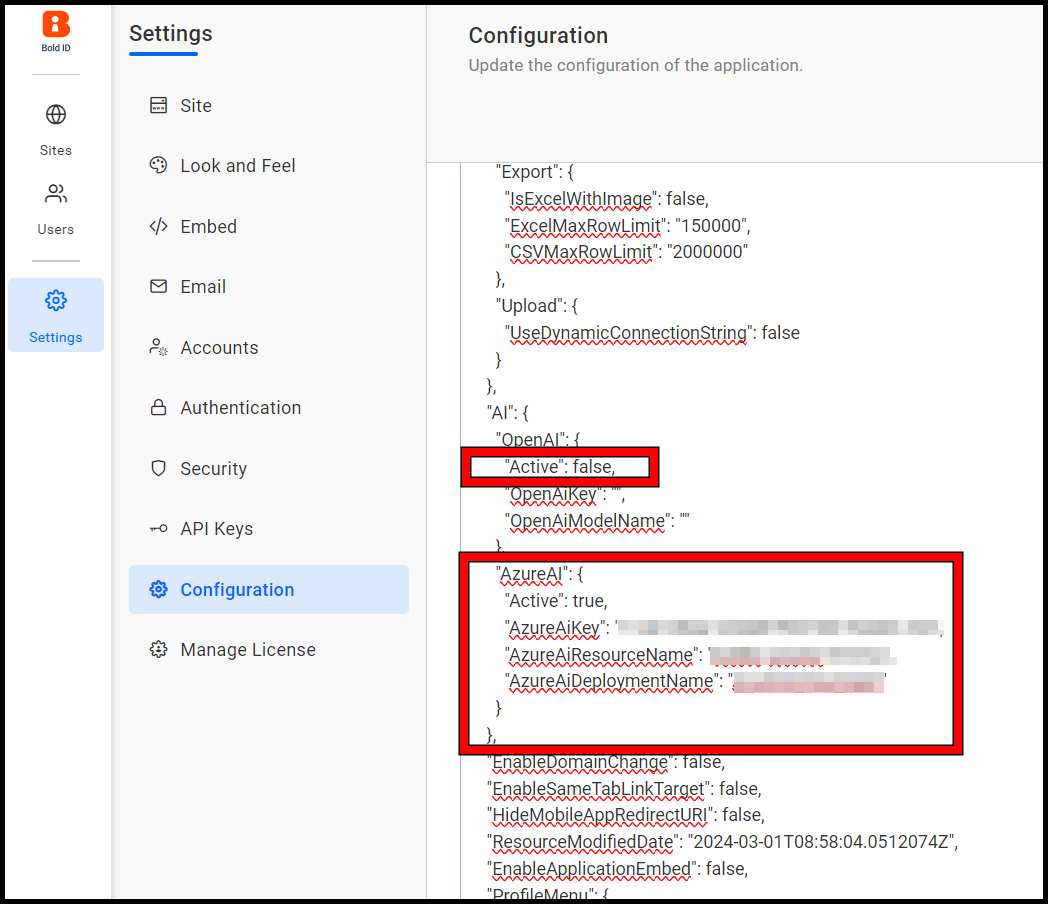
Syntax
   "AzureAI":{
     "Active":true,
     "AzureAiKey": "<:API_KEY>",
     "AzureAiResourceName": "<:RESOURCE_NAME>",
     "AzureAiDeploymentName": "<:DEPLOYMENT_NAME>"
   }
NOTE Ensure the Active is
truefor AzureAI andfalsefor OpenAI.
- Restart the Bold BI services and open the dashboard.
NOTE Refer to https://azure.microsoft.com/en-us/pricing/details/cognitive-services/openai-service/#pricing for the cost of fine-tuning and deployment.