Linking URLs in dashboards
URL linking allows you to link the dashboard with valid web URLs.
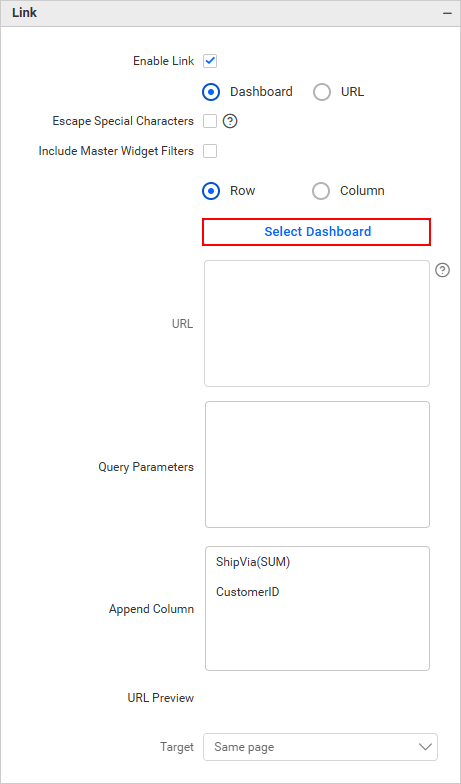
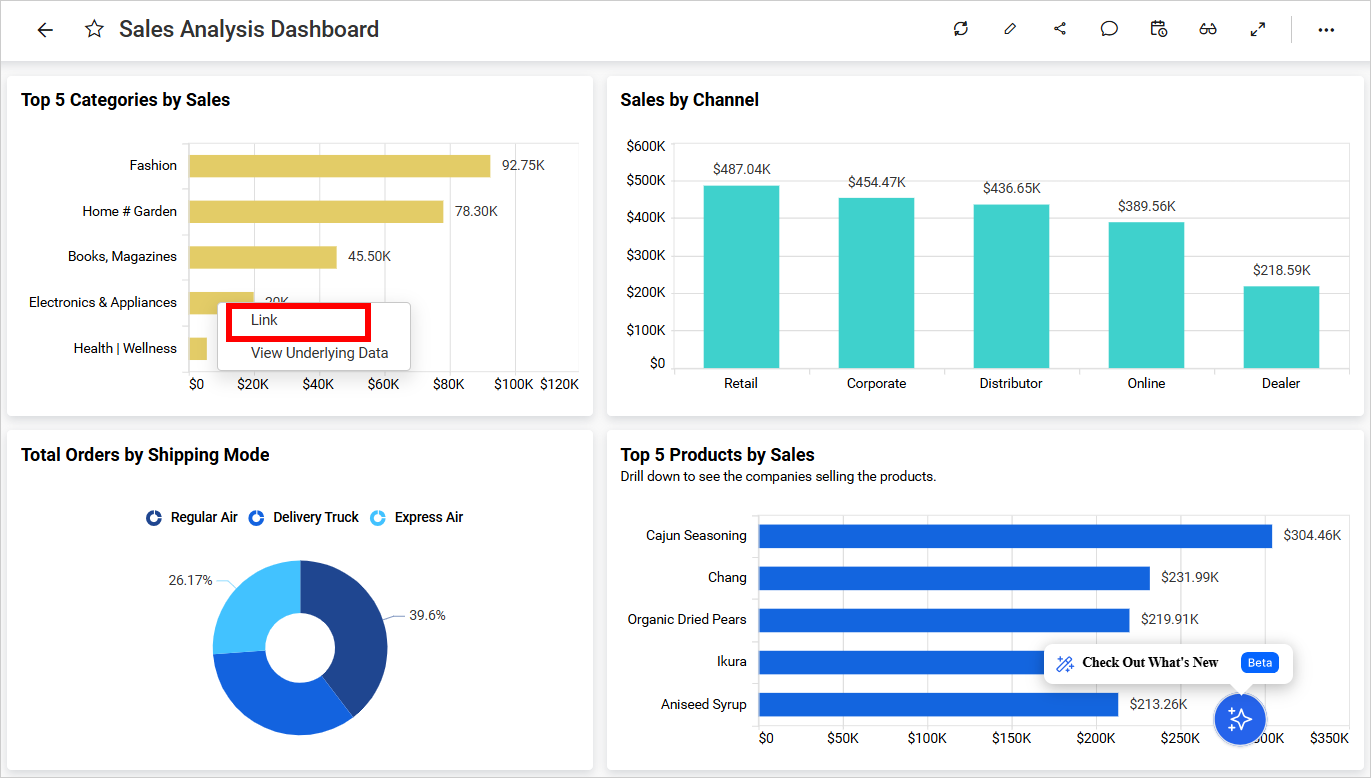
You can link URLs to a visualization widget by enabling the Enable Link property.
The Enable Link option is available in the Properties tab of the widgets.
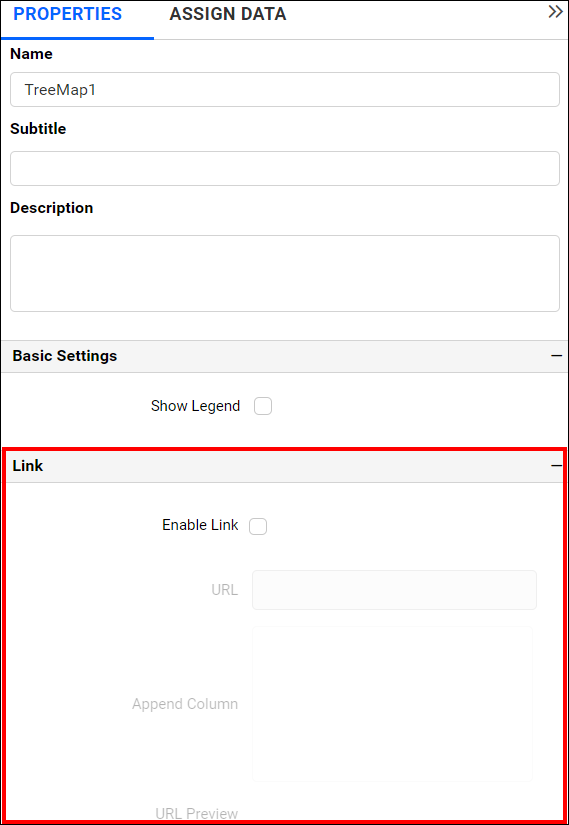
By default, the Enable Link property will remain unchecked.
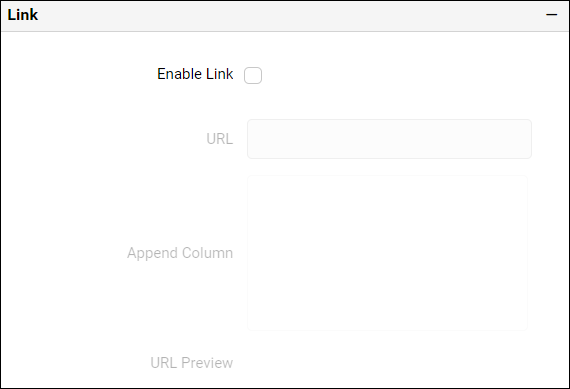
To enable linking, select the Enable Link checkbox.
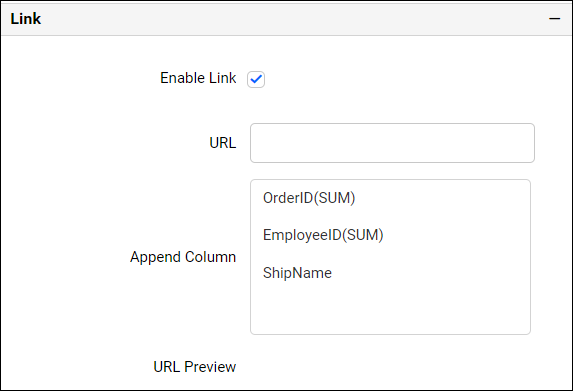
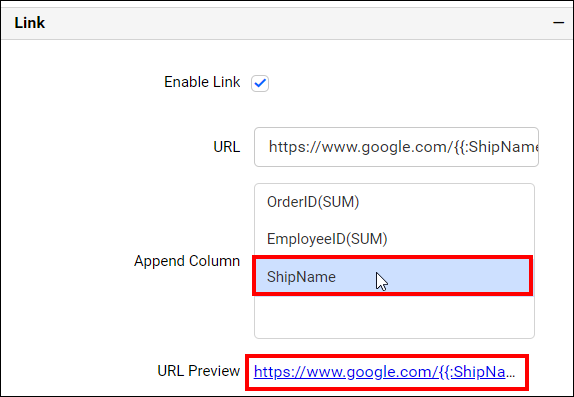
Enter the Web URL in the URL text box. If you click on the column names listed in the Append Column name list, it will be appended to the URL entered in the URL text box.
For the Grid widget, you can get a URL based on Row and Column.
There are two options available:
- Dashboard
- URL
Dashboard
In the dashboard section, users can select the dashboard they wish to navigate to using the link. The selected dashboard will be rendered using the same instance as the source dashboard. Users can also pass filter details from the source dashboard to the target dashboard.

Row and Column
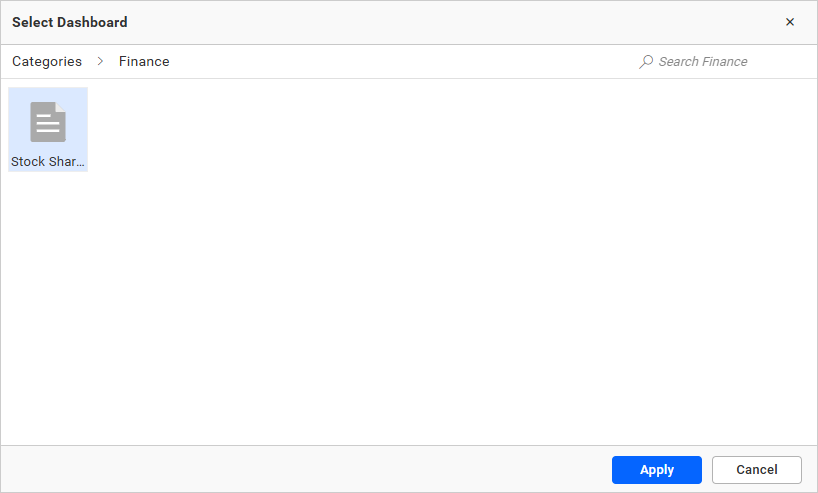
In the properties of the current widget, where you will find the “Select Dashboard” option under the “Link” category. Clicking on “Select Dashboard” will open a dialog box displaying relevant categories and dashboards based on user permissions.
Users can either double-click a dashboard file to select it or choose the dashboard and click the “Apply” button at the bottom of the dialog.
Query Parameter
When you click on a column name from the list in the Append Column section, it will be added to the Query Parameter entered in the Query Parameter text box. During navigation, the provided parameter will be passed to the target dashboard.

Pass Filter Details
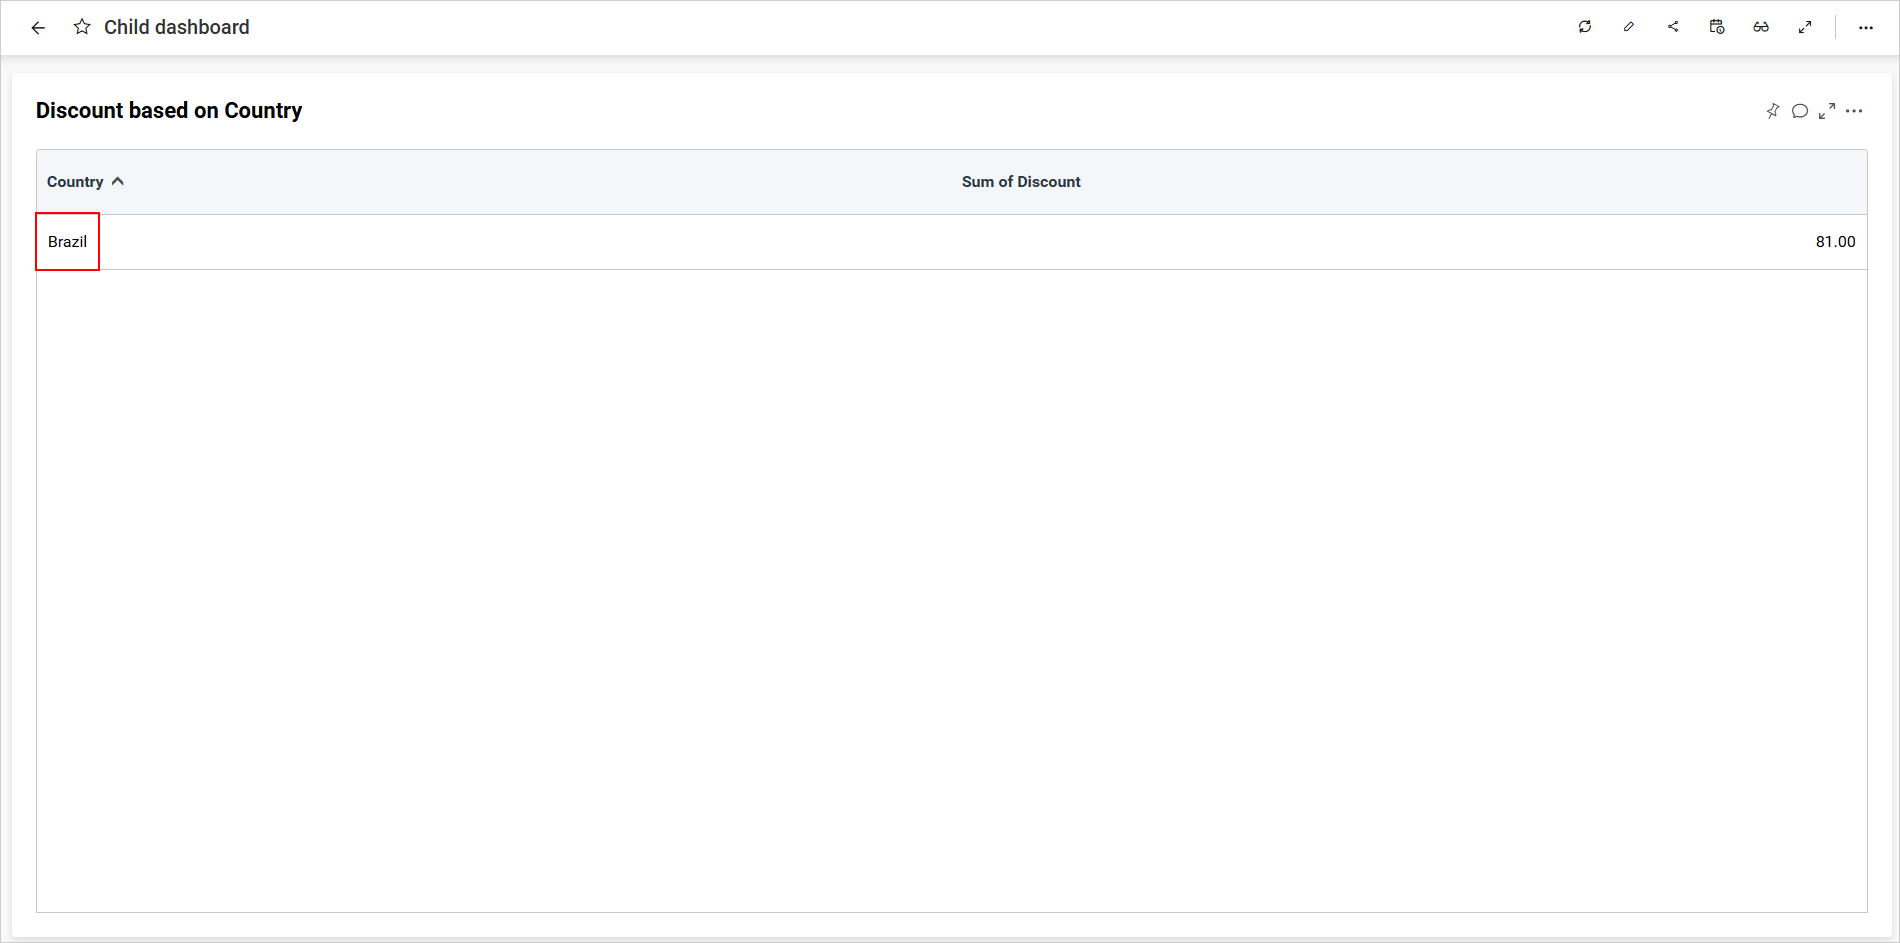
While navigating between dashboards, you can pass filter information from one dashboard to the target dashboard. For example, consider a combo box filter widget filtering the country values to Brazil. After navigation, the same filter will be applied to the target dashboard.
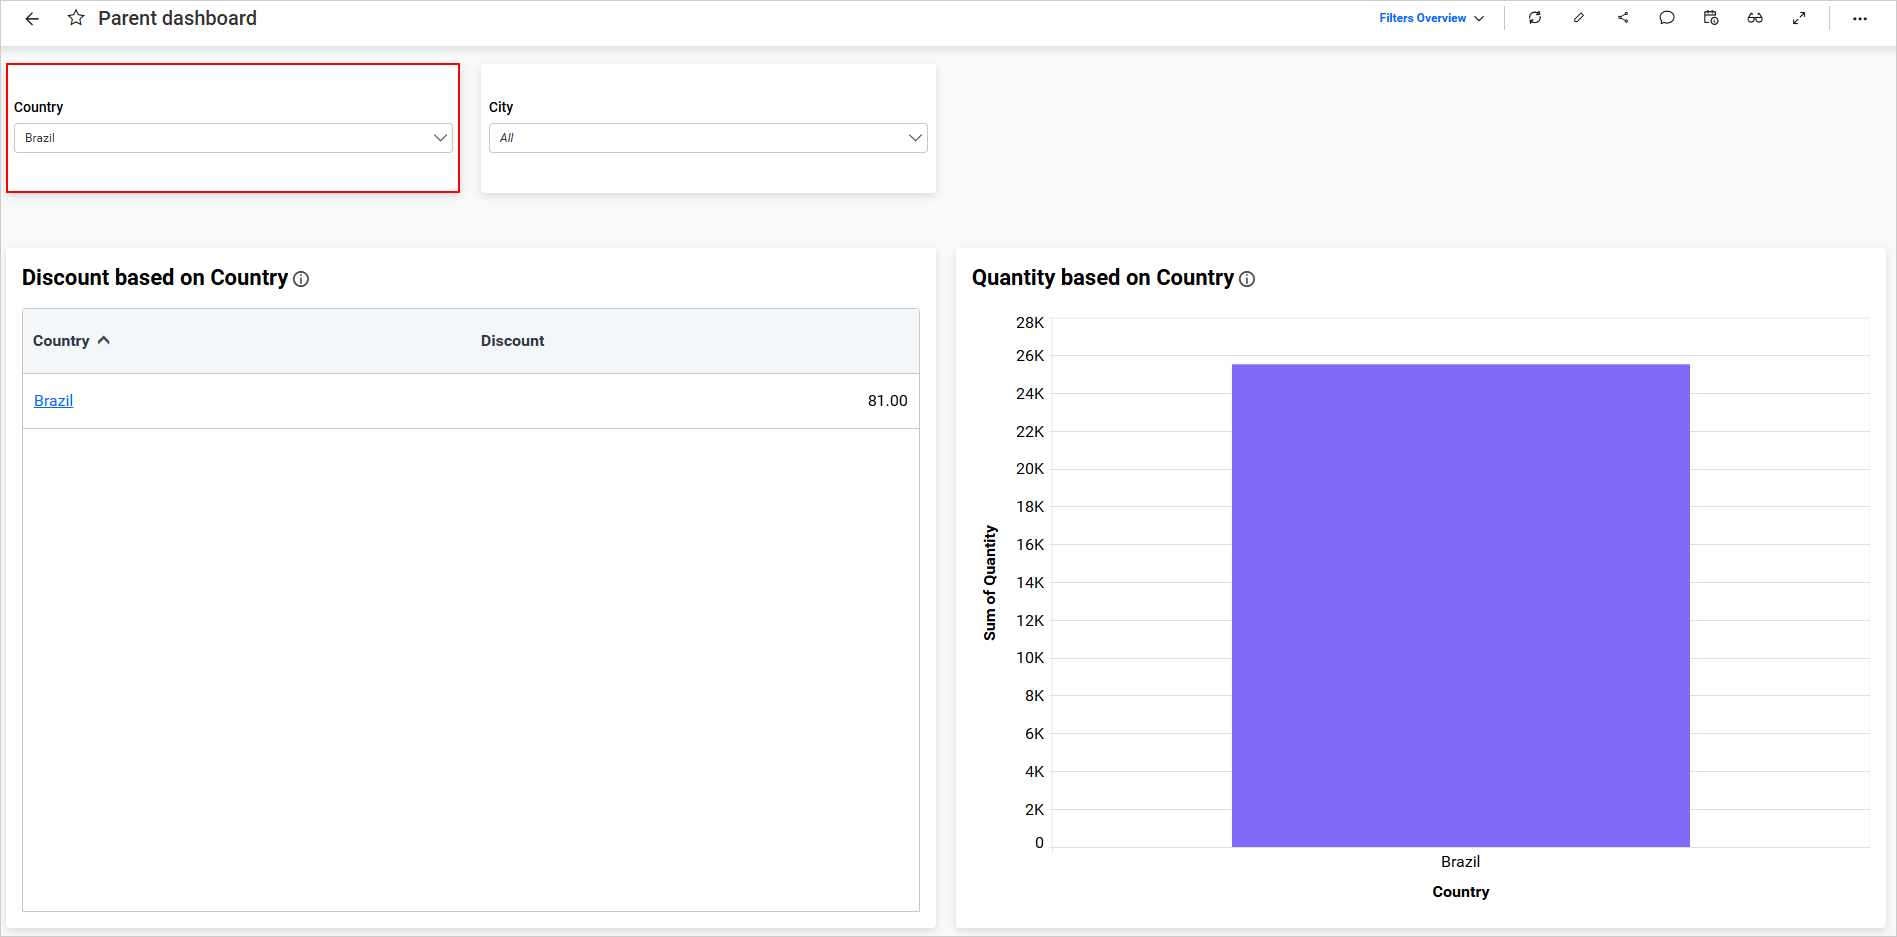
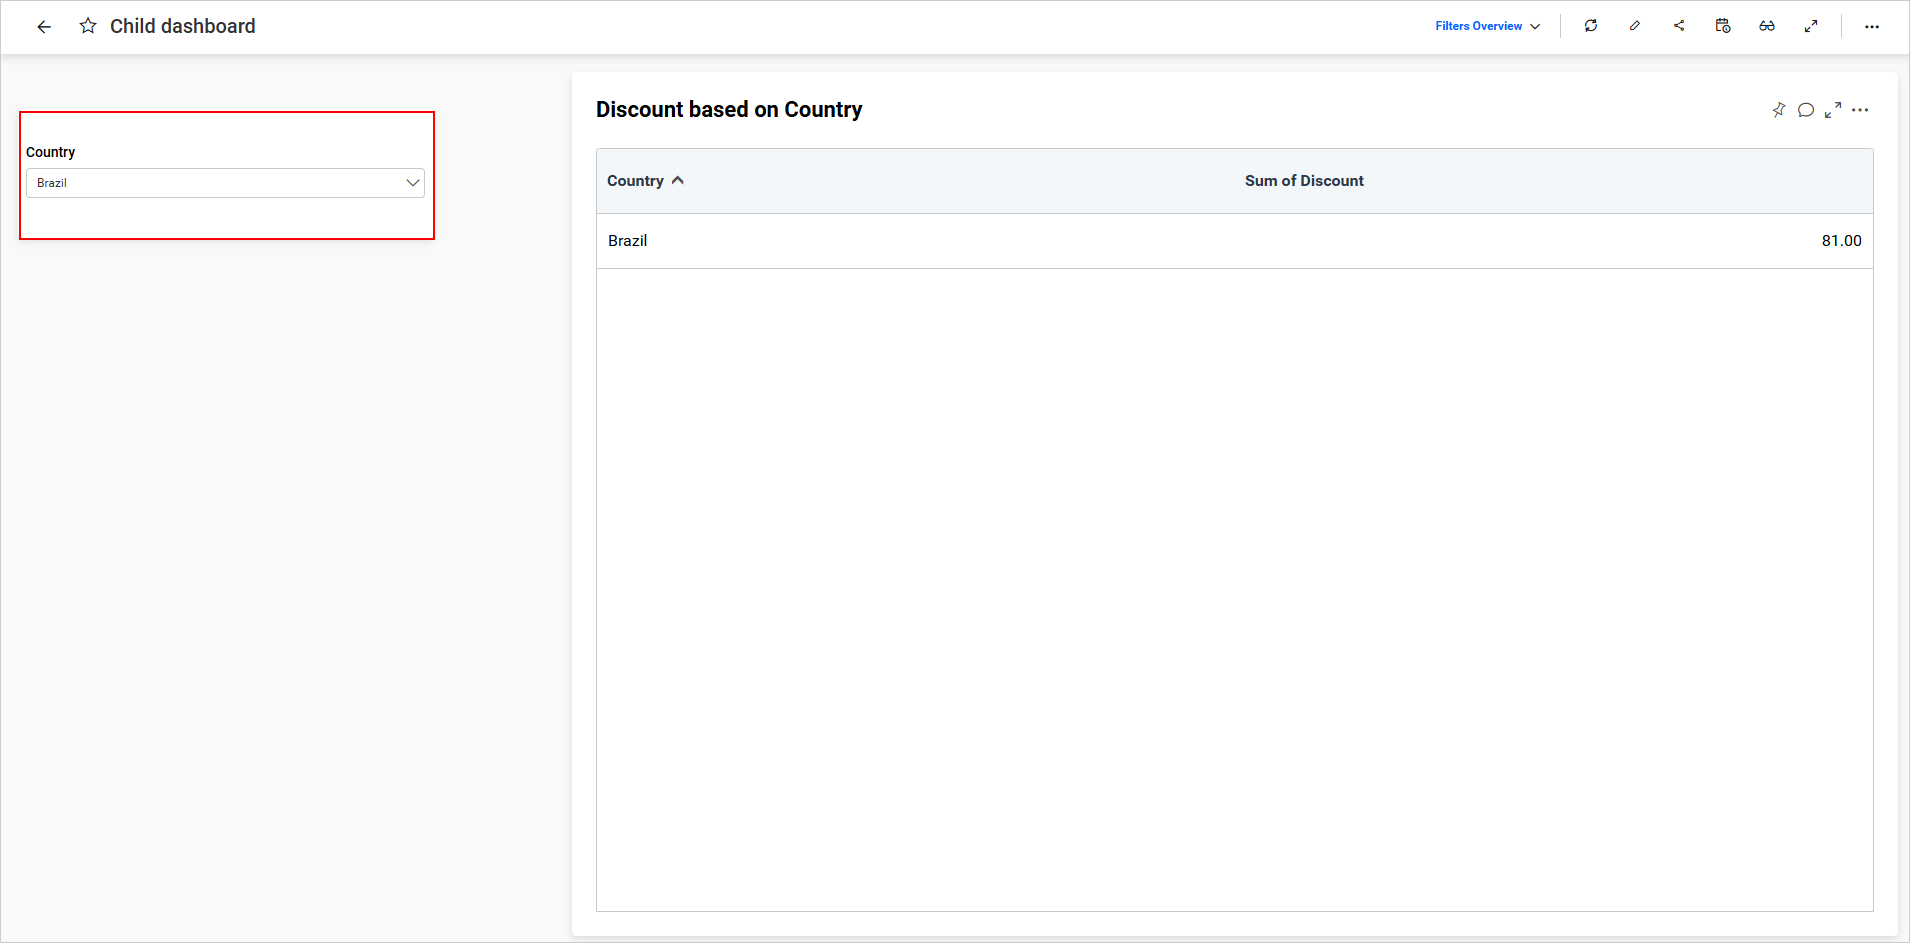
If no filter widgets are present in the target dashboard to receive filters from the source dashboard, the passed filter will act as a URL filter to filter the target dashboard.
NOTE:
- To pass filters between dashboards, users must configure the same data source for all dashboards.
- If a URL filter is applied to the navigating dashboard, only the filter is applied; the URL will not change.
URL
Row
Enter the Web URL in the URL text box. If you click on the column names listed in the Append Column name list, it will be appended to the URL entered in the URL text box.
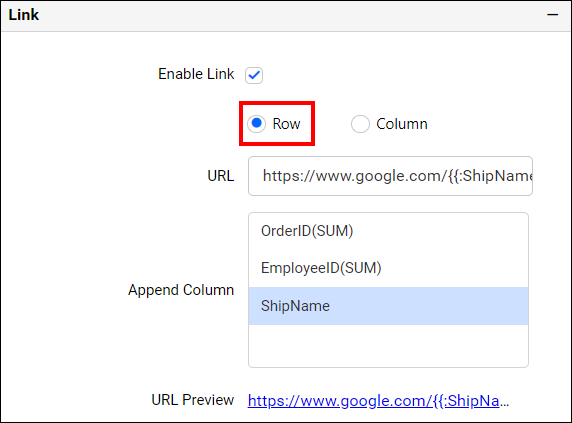
You can preview the linked URL using the URL preview option. If you click the preview URL link, it will be opened in a browser.
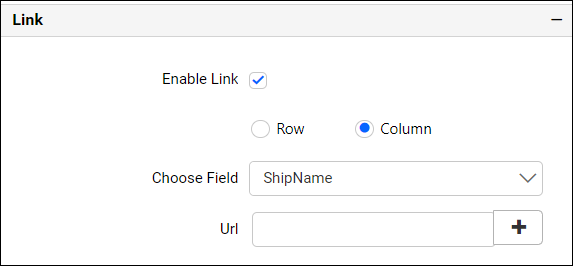
Column
You can select the column.
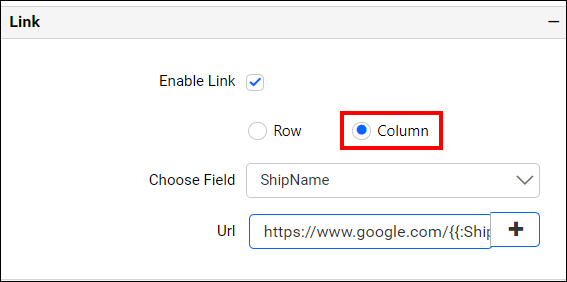
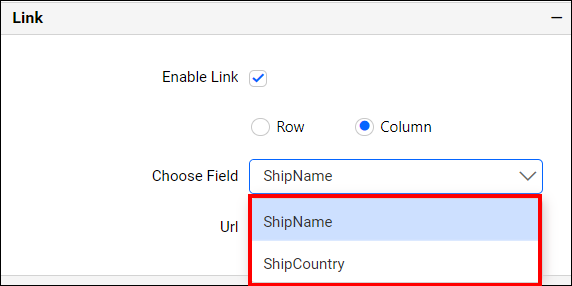
Choose the field from the Choose Field property listed in the combo box.
Add the web Url in the URL text box.
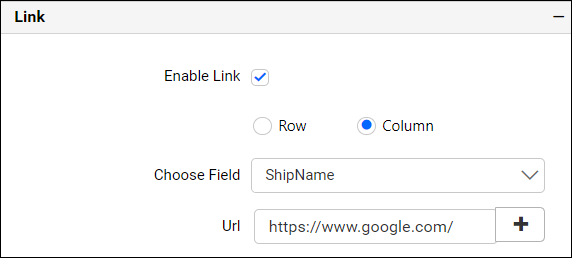
Click the Add button shown below to add the field.
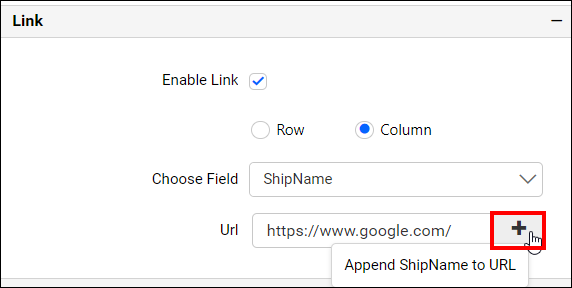
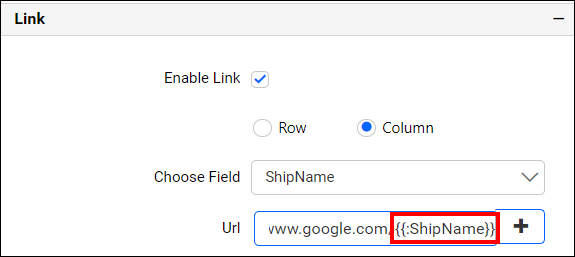
Now, the field will be added with the URL.
Dashboard Parameter support in URL Linking
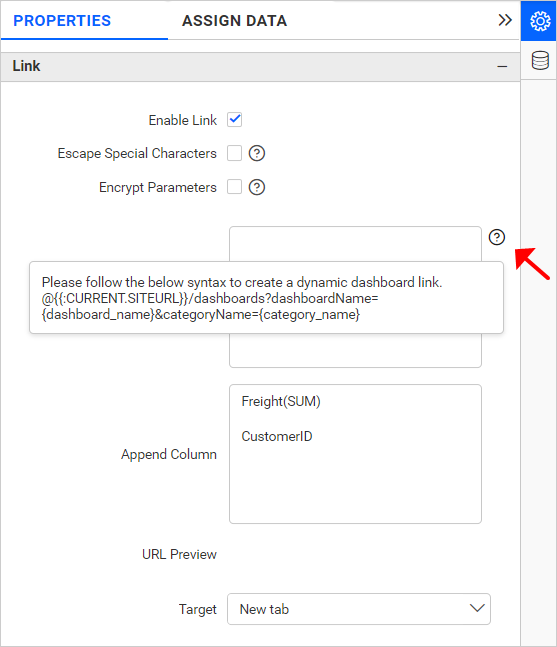
URL Linking allows you to use both the Dashboard Parameter and Default Parameter. You can create a dynamic link based on the current domain, dashboard, and category by referring to the info icon placed at the right side of the URL text box.
Syntax : @{{:CURRENT.SITEURL}}/dashboards?dashboardName={dashboard_name}&categoryName={category_name}
@{{:CURRENT.SITEURL}}- ThisDefault parameterwill automatically populate the URL of the current site.{dashboard_name}- Specify the name of the dashboard you want to link.{category_name}- Specify the name of the category under which the dashboard has been published.
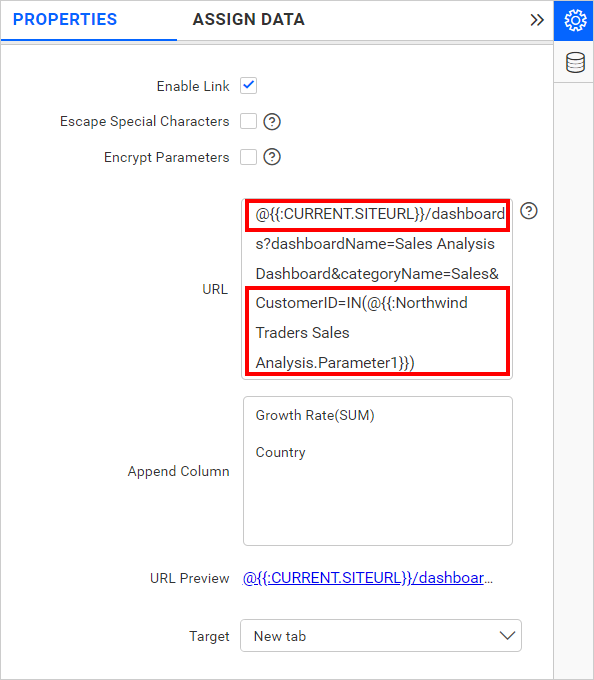
For Example, the dynamic URL can be created as @{{:CURRENT.SITEURL}}/dashboards?dashboardName=Sales Analysis Dashboard&categoryName=Sales.
Refer the URL info as shown in following image.
Based on the above syntax, create the dynamic linking URL using the Default parameter and Dashboard Parameter as shown in the image.
Advanced Url Linking
The linked url’s target can be changed with the help of a drop down as shown in the following image.
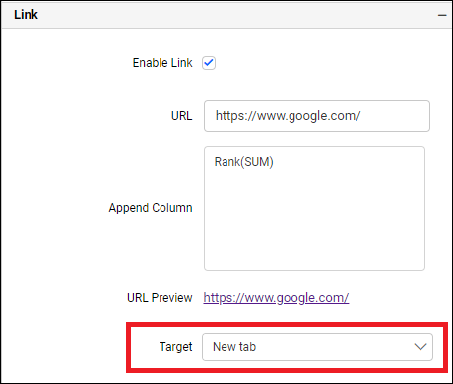
The target can be changed from the New tab, Same page, Current frame, Parent frame, Pop up and New Window.
| Target | Description |
| New tab | Opens the linked document in a new tab or window. |
| Same page | Opens the linked document in the full body of the window in which it is clicked. |
| Current frame | Opens the linked document in the same iframe as it was clicked. |
| Parent frame | Opens the linked document in the parent iframe from which the current frame is generated. |
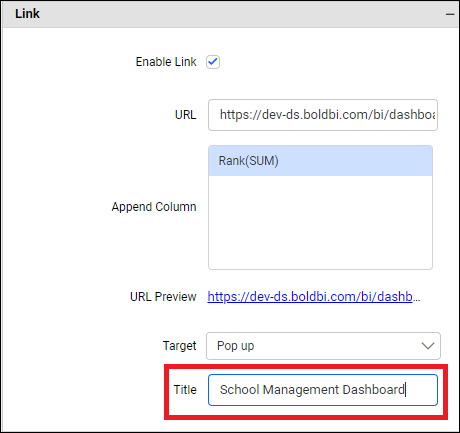
Pop up
This target type helps you to open the linked document inside a pop-up window. The title of the same pop-up window can also be set in the input box provided as shown in the following image.
When you open the linked document, it will appear as shown in the following image.
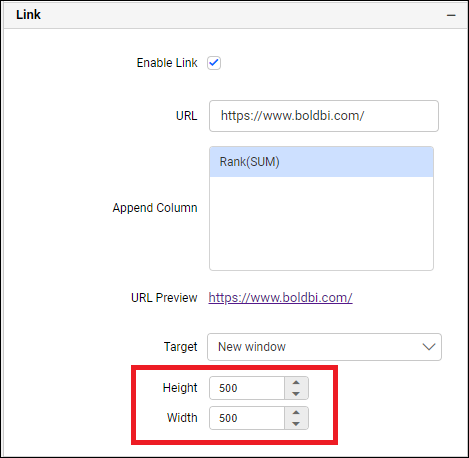
New Window
This target type helps you to open the linked document in a separate browser window. The specific Height and Width of the required window can be updated as shown in the following image.
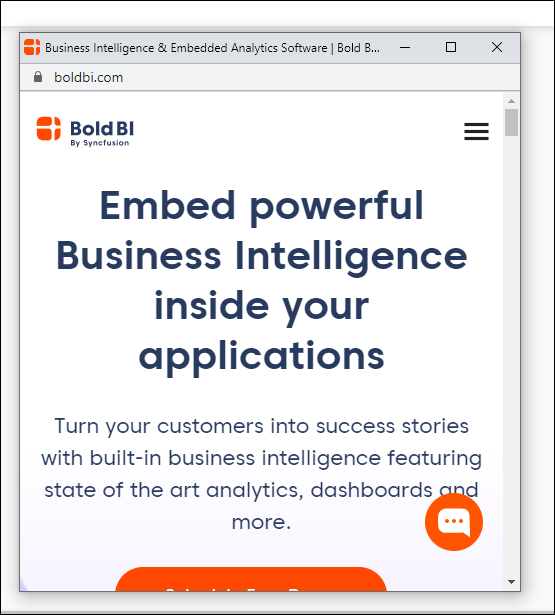
When you open the linked document with the above dimensions, it will appear as shown in the following image.
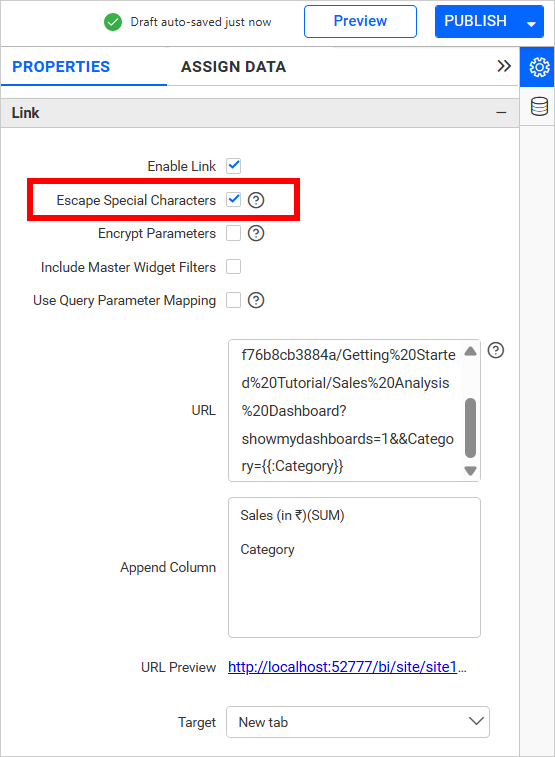
Escape Special Characters
The Escape Special Characters property is used to handle special characters in URL query parameters within widgets. It is found under the Link category in the Properties tab of a widget.
When enabled the property, any special characters in the URL query parameters are automatically replaced with a tilde (~) symbol. This ensures that the data is filtered correctly, avoiding errors or unexpected behavior caused by special characters.
After enabling the Escape Special Characters checkbox, follow the steps below:
- Navigate to Preview mode.
- Click the Link option from the widget.
- When the linked dashboard opens, it displays data based on the special character value filtered through the URL link.

Note: Only the following special characters are supported for escaping:
&
,
#
|
Encryption query Parameter
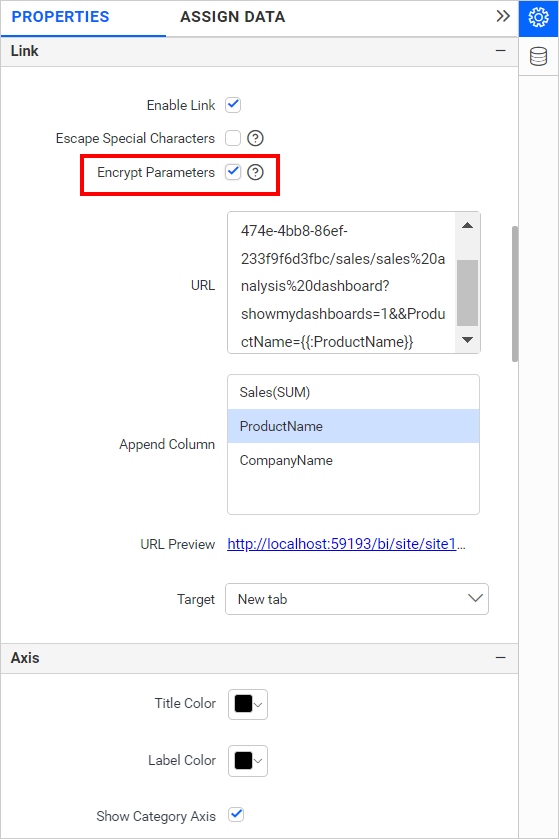
This property, Encrypt Parameters, allows you to encrypt the filter parameter that will be used in the URL text area under the Link category in the Properties tab of the widget.
To enable this property, select the Encrypt Parameters checkbox as shown in the following image.
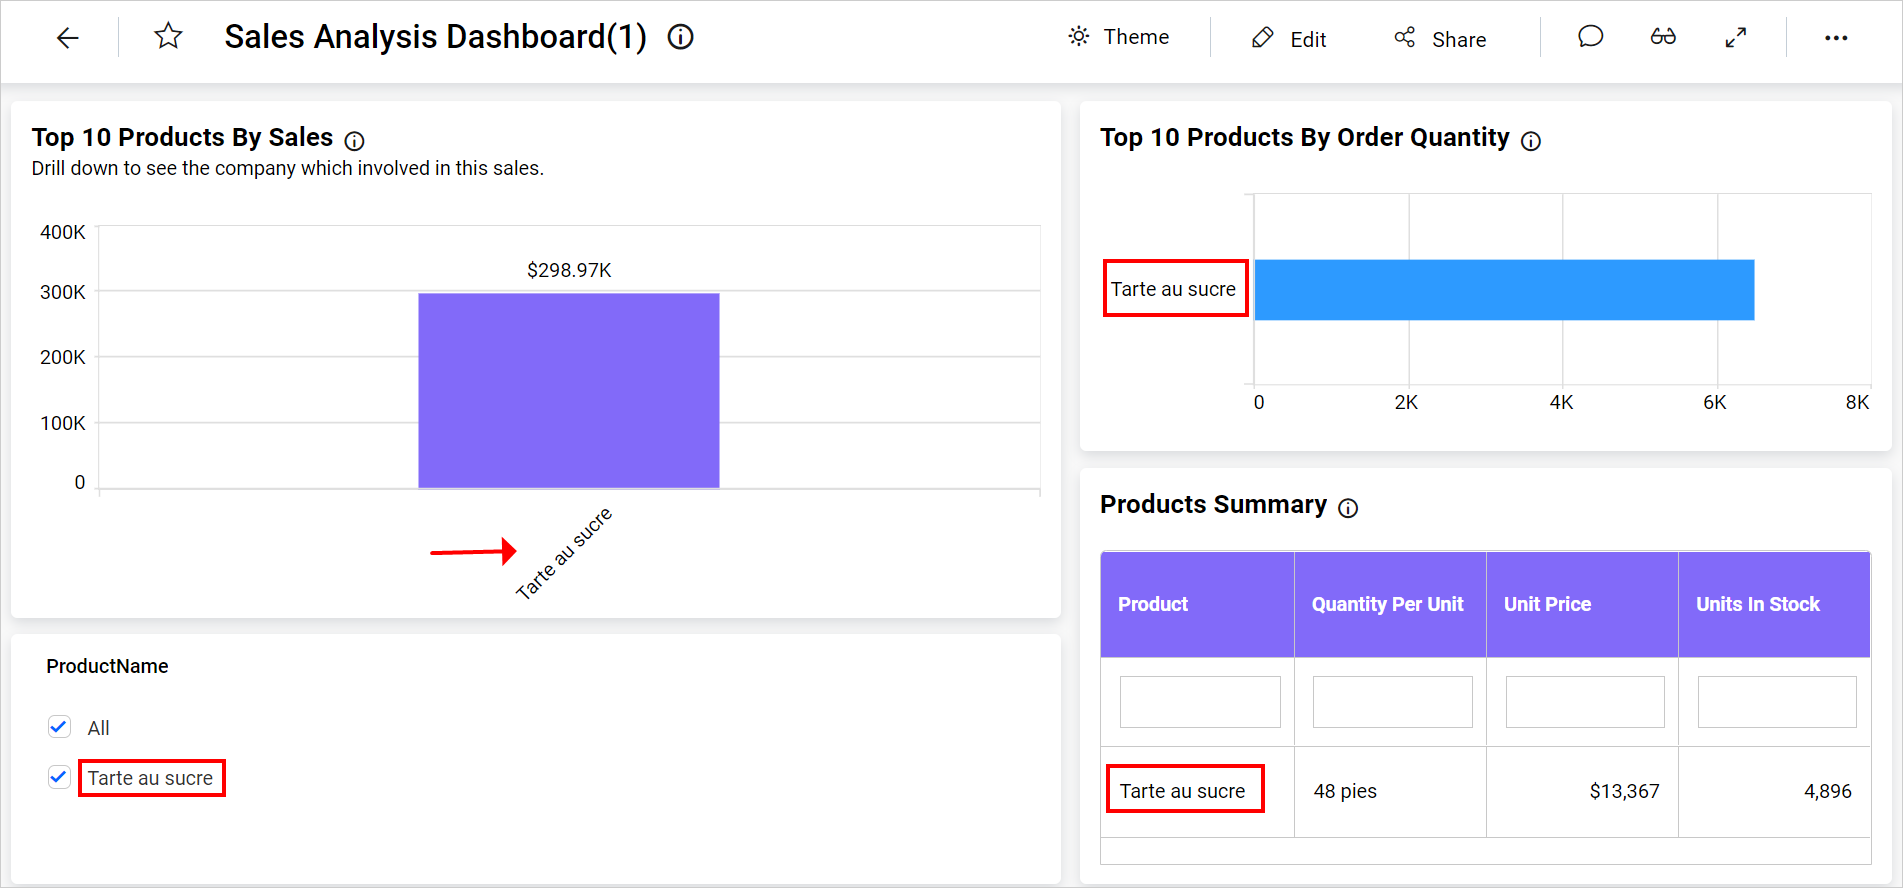
Preview the dashboard, then click the Link option from the widget. After opening the linked dashboard, it will appear as shown in the following image.

Include Master Widget Filters
This option allows the selected filter values from the chosen master widget to be automatically passed to the navigated dashboard via the URL parameters, without the need to manually append parameters.
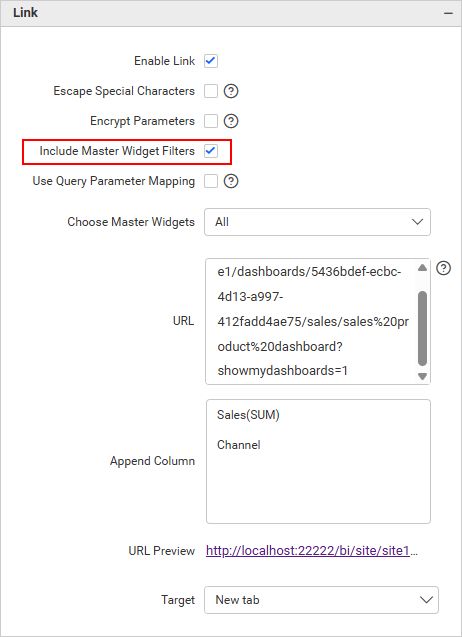
You can select the master widgets from the Choose Master Widgets dropdown. It will display the configured master widgets in the current dashboard. By default, all widgets are selected.
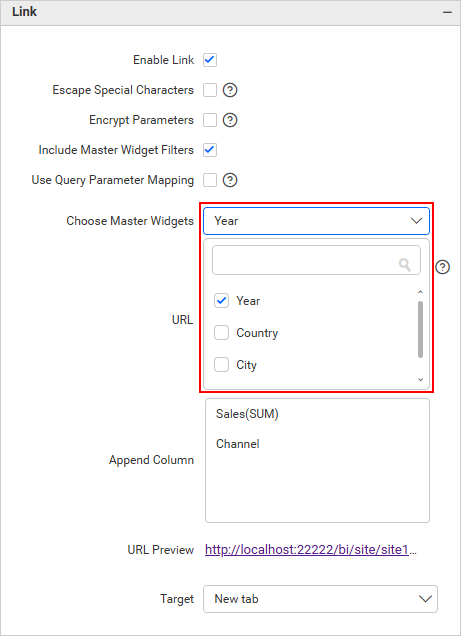
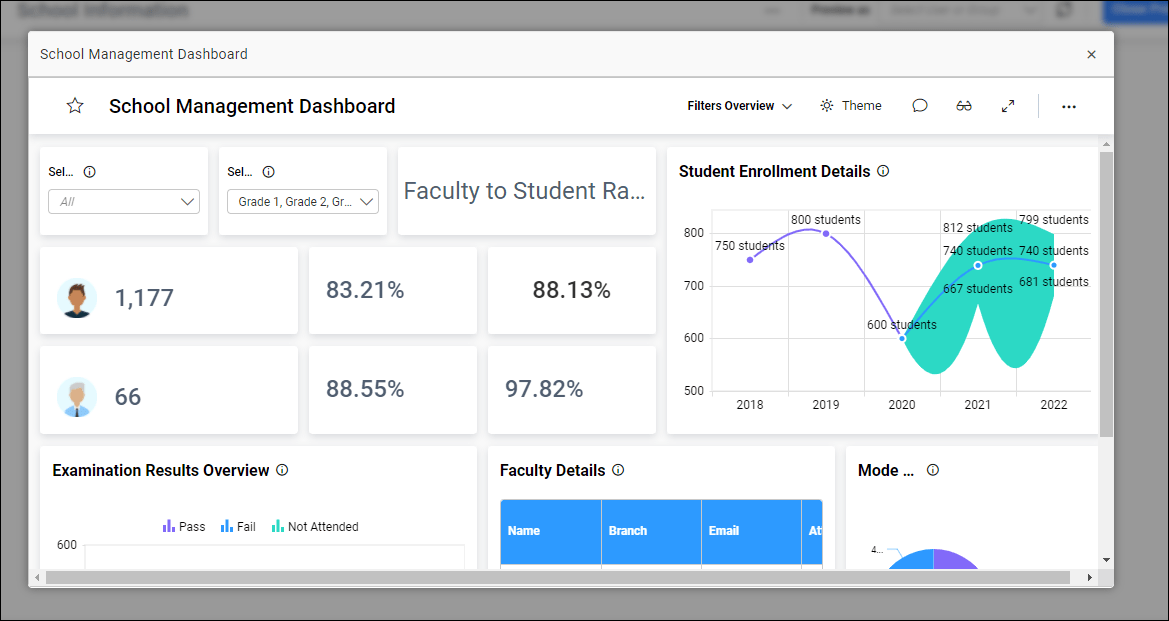
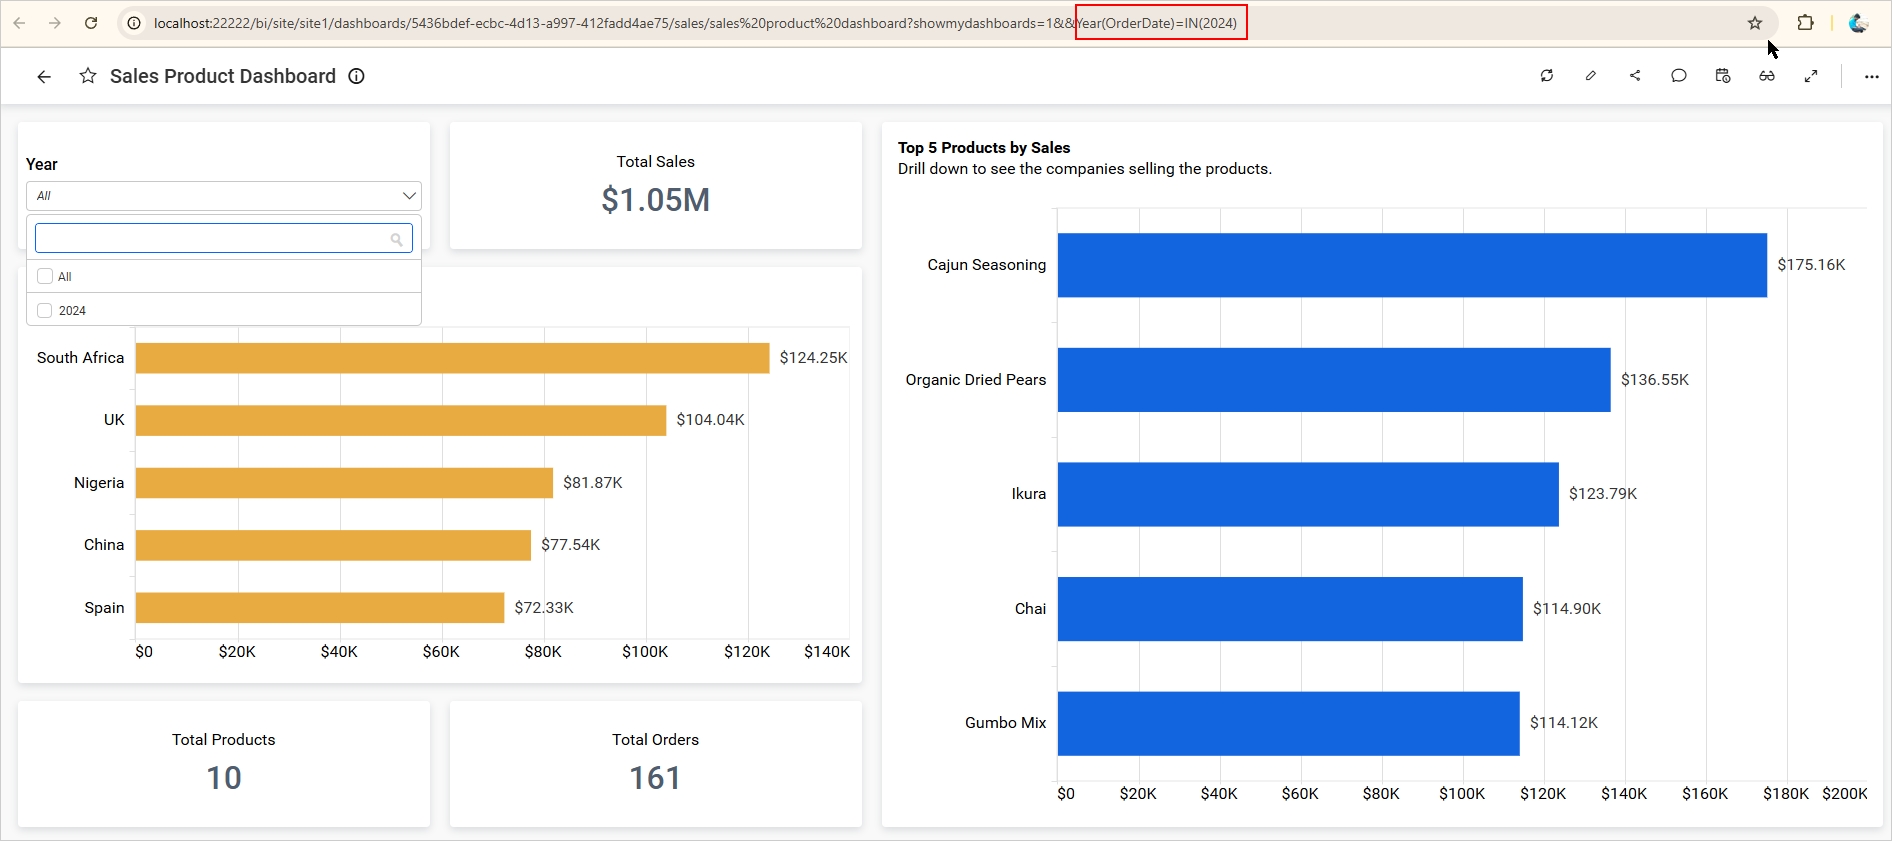
For example, in the dashboard shown below, the Year-configured filter widget is used as the chosen master widget for the slave widget, with 2024 selected as the value. Upon navigation, the selected value is automatically passed to the destination dashboard via a URL parameter.
Preserving URL Filters Across Dashboard Navigation
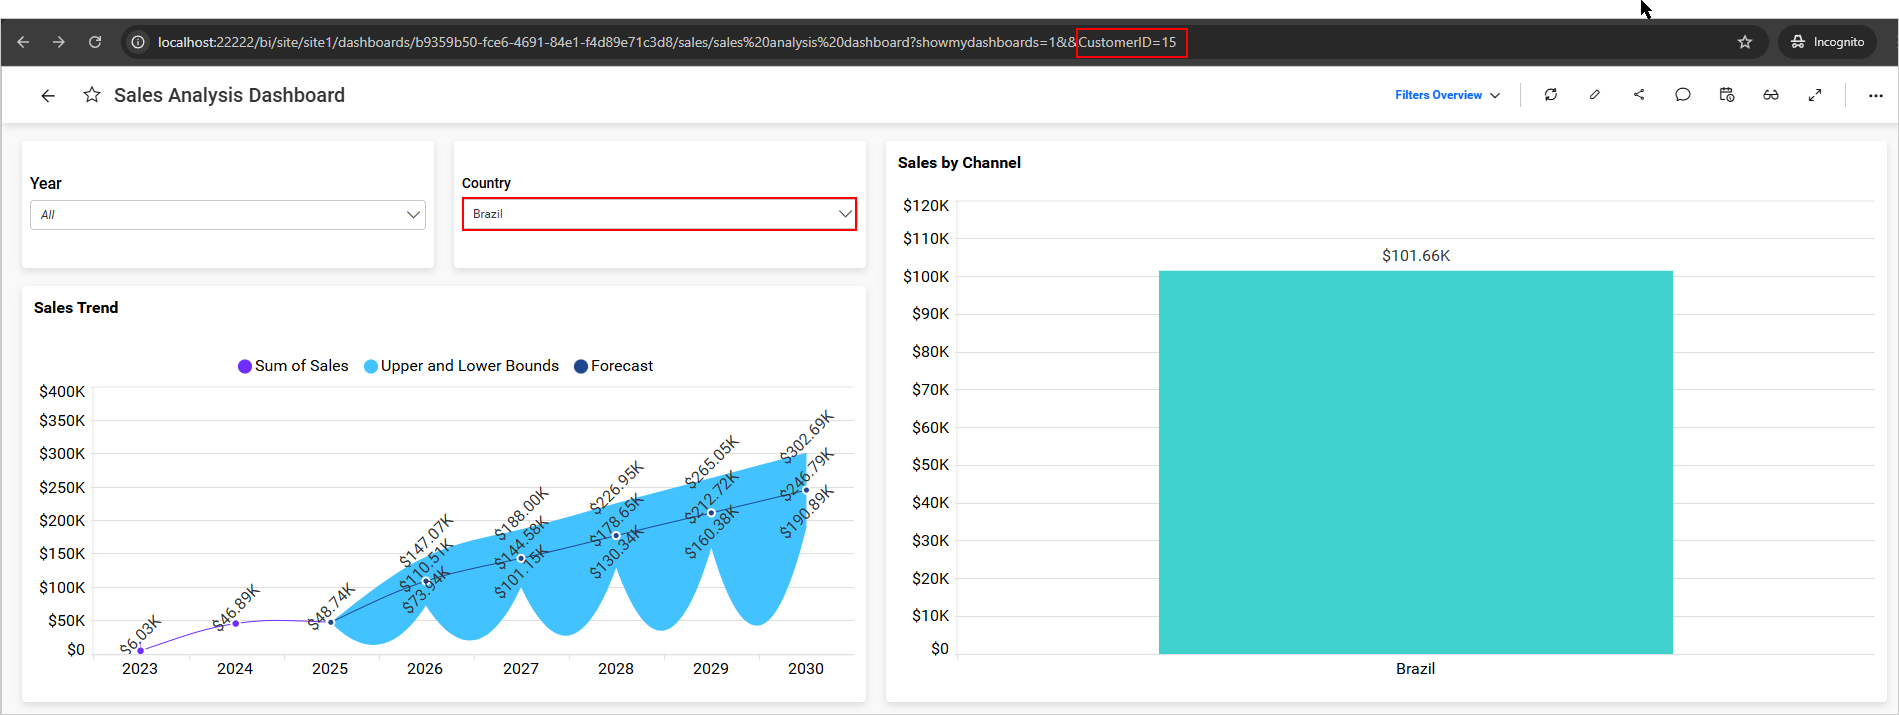
By using this option, you can pass URL parameter filter values to the navigated dashboard. As a result, users can transfer the parent dashboard’s filter information to all subsequently navigated dashboards via URL parameters.
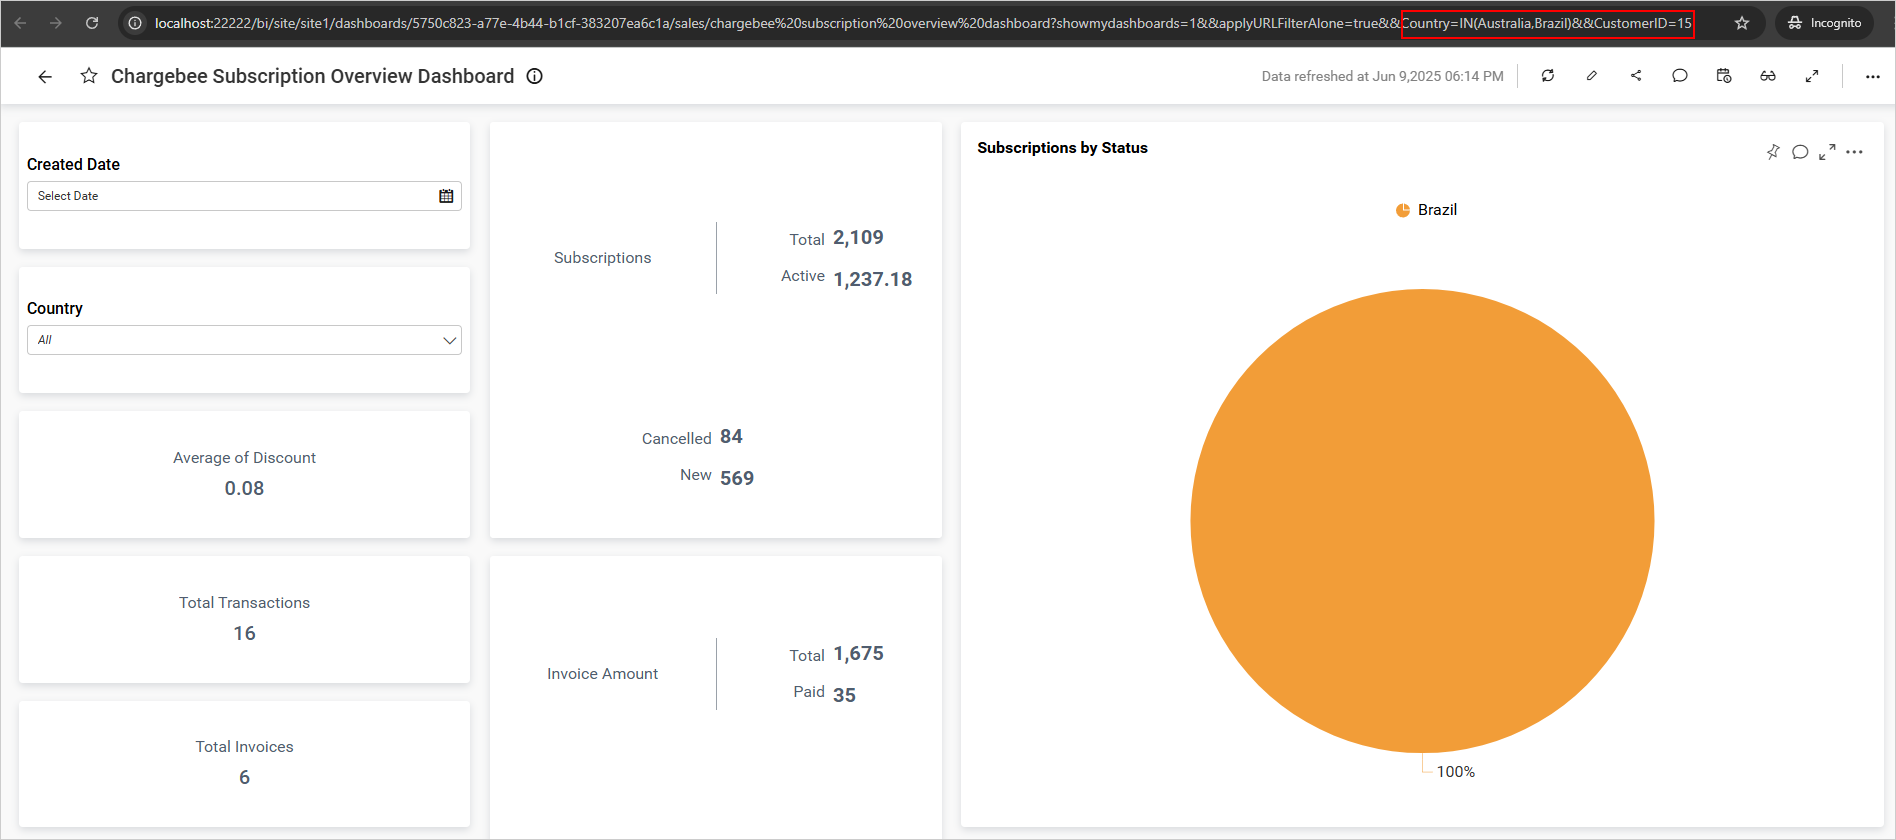
For example, in the dashboard shown below, a country filter has been applied using the filter widget, and an additional filter has been applied via URL parameters. After navigation, the second dashboard will be rendered with both filters applied, as shown in the second image. If you navigate to a third dashboard, these filters will continue to be passed along.
NOTE: If the selected master widgets are not filtered, then no values should be passed to the
URL.
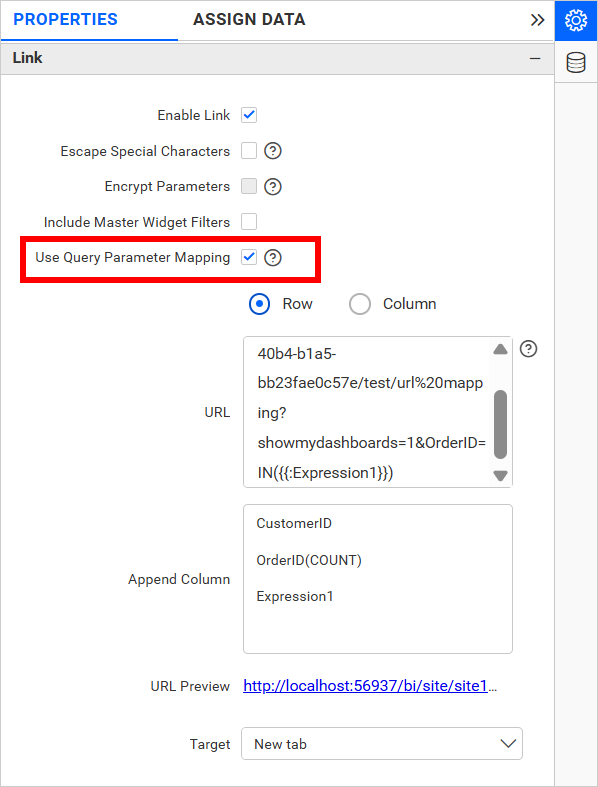
URL Query Parameter Mapping
This allows you to replace the long query parameters with mapped key, which is used in the URL text area under the Link category in the Properties tab of the widget.
To enable this property, select the URL Query Parameter Mapping checkbox as shown in the following image.
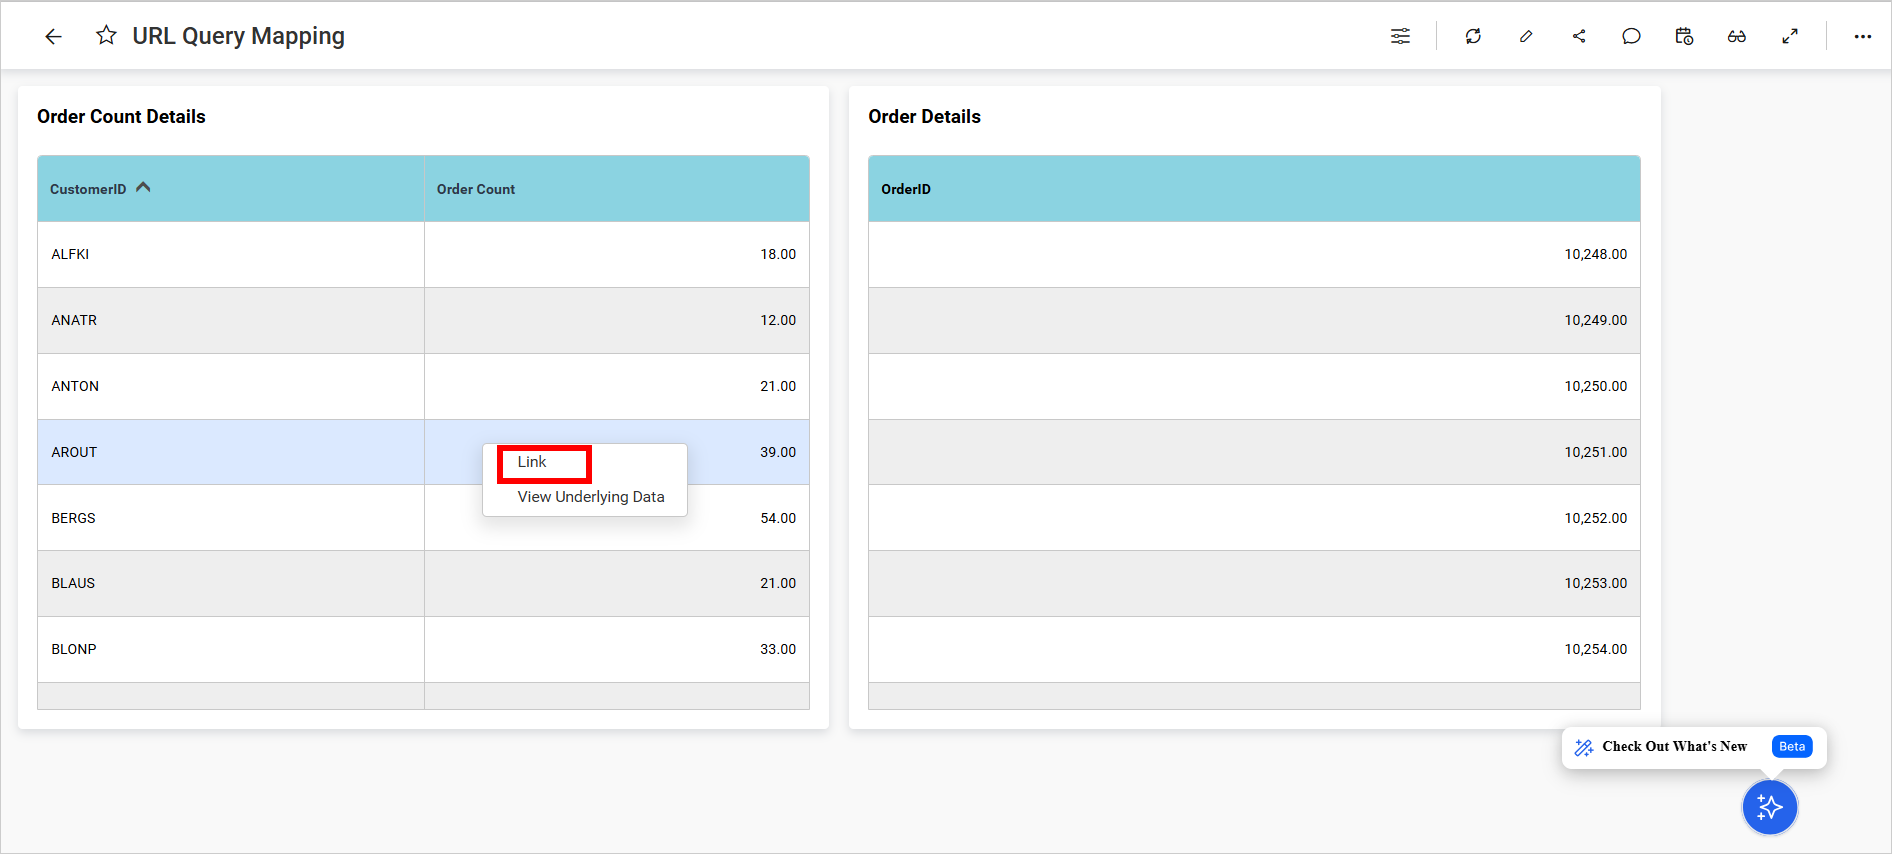
Open the dashboard and click the Link option on the widget. The linked dashboard will then open and appear as shown in the image below.
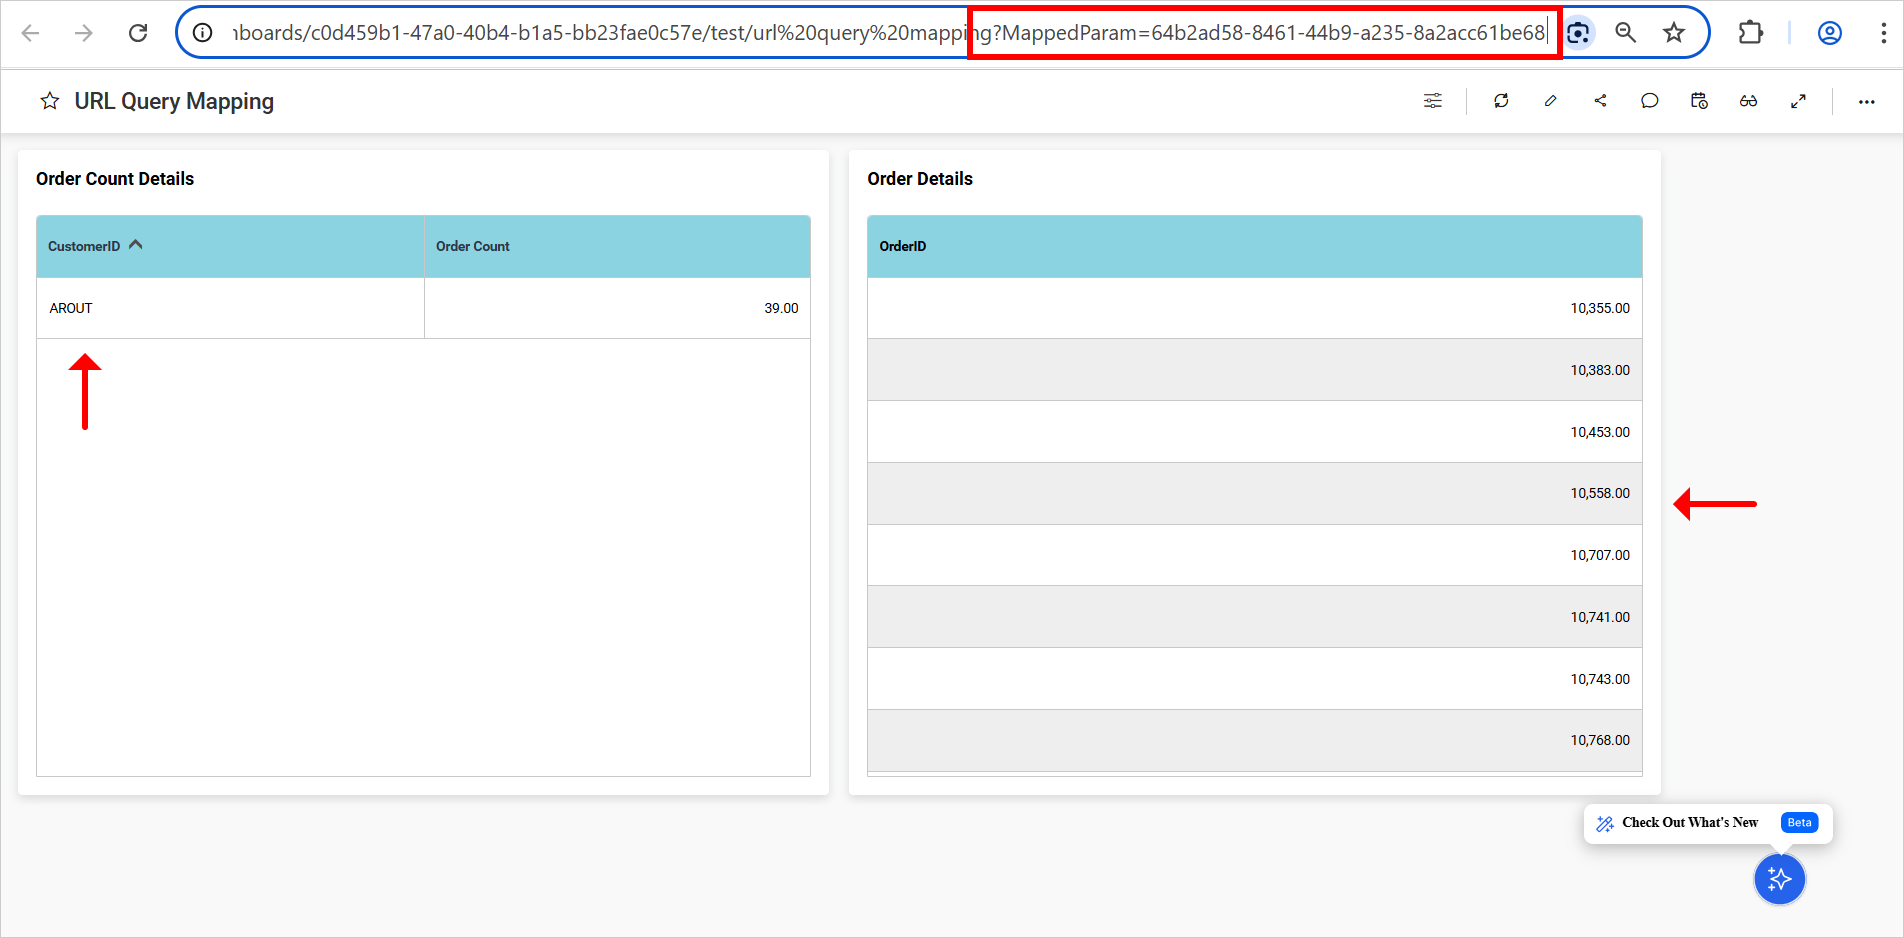
NOTE: This is applicable only when the dashboard is in view mode.