ElasticSearch
ElasticSearch is a distributed, RESTful search and analytics engine designed for handling a variety of data types, such as logs, metrics, search indexes, and application monitoring datasets. It is commonly used for real-time search, logging, analytics dashboards, and large-scale data ingestion.
Grab Credentials
To connect to ElasticSearch through Bold Data Hub, you must gather the required authentication details. ElasticSearch supports both API Key Authentication and Username/Password (Basic Auth) depending on how your cluster is configured.
Steps to obtain connection details
- Host & Port
- For Elastic Cloud deployments, the host URL is provided in the cluster dashboard.
- The port is usually 9200, unless otherwise configured.
- API Key Authentication
- Open the Elastic Cloud Console.
- Navigate to Management > security > API Keys.
- Click Create API Key.
- Provide a suitable name (e.g.,
boldbi-access-key). - Copy the generated API Key and store it securely.
- Open the Elastic Cloud Console.
- Username/Password
- Default username in Elastic Cloud is: elastic.
- Reset or copy the password from Elastic Cloud under Security Settings.
Connection Properties
The config section in the YAML file accepts the following properties:
ConnectorName: ElasticSearch
host: hostname
port: 9200
api_key: api_key
username: user
password: password
index_name: <indexname>
page_size: 10000
Example Configuration
version: 1.0.1
encrypt_credentials: false
direct_target_import: false
union_all_tables: true
add_dbname_column: false
direct_load_to_destination: true
use_snake_casing: true
set_not_null_as_primary_key: false
plugins:
  extractors:
    - name: es
      connectorname: ElasticSearch
      schemaname:
      config:
        host: https://e7024573e1574eaf8f2677593082e16e9.us-central1.gcp.cloud.es.io
        port: 443
        # Authentication (use either API Key OR Username & Password)
        api_key: essu_VG5SVWVUSTFjMEowUmxKQ01GZHB0OMjVuZDJvNlZVaDVTSE0zWlRCS2FIVnRhMFl5U210amRHdDJkdz09AAAAAPLMXaY=
        # username: elastic
        # password: password@123
        index_name: index
        page_size: 10000
      properties:
      metadata:
      select:
Configure the Data Hub to Connect ElasticSearch
- Click the Bold Data Hub icon from the left navigation panel.

-
Click Add Pipeline and enter a name for your new pipeline.

-
Select the newly created pipeline and add the ElasticSearch template.
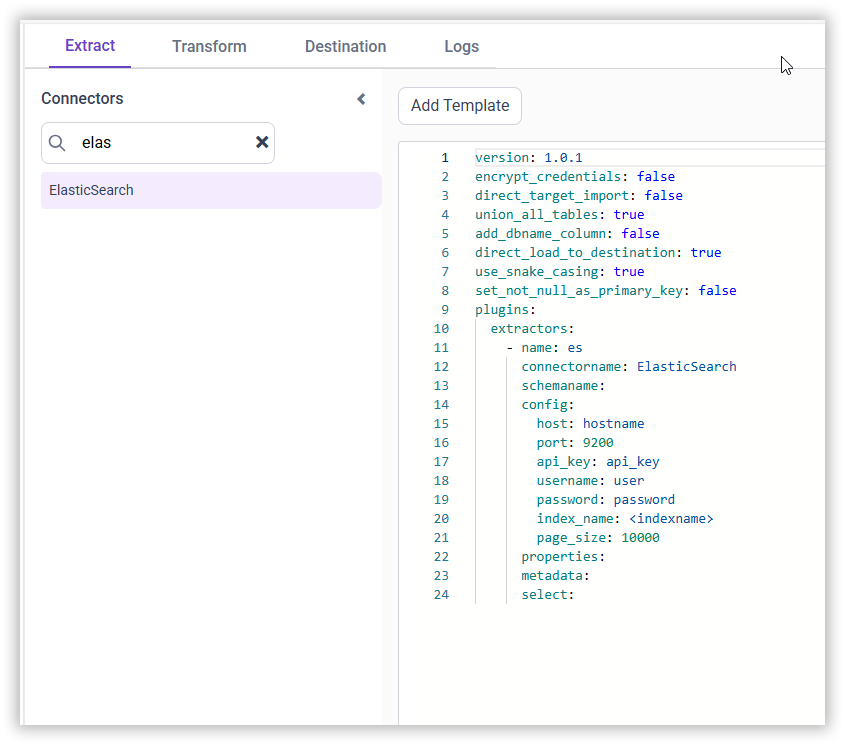
-
Enter the ElasticSearch connection and authentication details.
- Host - ElasticSearch host URL.
- Port - Port number of the ElasticSearch server.
- Index Name – Name of the ElasticSearch index.
- Authentication – Configure either one of the following:
- API Key
- Username and Password
Note: If both API Key and Username/Password are provided, the Username/Password will be used.
-
Creating a Pipeline in Bold Data Hub automatically creates a Data Source in Bold BI. The Bold BI Data Source is a live data source to the destination database used in Bold Data Hub. For more information on the relationship between Bold Data Hub Pipeline and the associated Data Sources in Bold BI , please refer to Relationship between Bold Data Hub Pipeline and Associated Data Sources in Bold BI
Click Save, then choose the destination database.

Warning:
1. The `Encrypt_Credentials` property should be set to false when updating the new access token on the template. If you have modified other properties, such as 'select' or 'account id', the `Encrypt_Credentials` property must be set to true.Schedule Data Hub Job
- To configure interval-based scheduling, click on the schedules tab and select the created pipeline and click on the schedule icon and configure it.


- For on-demand refresh, click
Run Nowbutton.
 .
.
- The Schedule history can be checked using the history option as well as logs.

- Click on Logs to see if the run is completed and data source is created in Bold BI.
- Click
Edit DataSourceOption to view the created tables.
Having trouble getting help?
Contact SupportHaving trouble getting help?
Contact Support