Dashboard view
This section explains how to embed the Bold BI dashboard into the sample application by integrating the Dashboards Listing, Designing, and Viewing modules.
Prerequisites
NOTE: Node.js versions 14.16 to 18.18 are supported.
How to run the sample
-
Please retrieve the sample of the Iframe Dashboard embedding Javascript from GitHub.
-
Please ensure that you have enabled embed authentication on the
embed settingspage. If it is not currently enabled, please refer to the following image or detailed instructions to enable it.
-
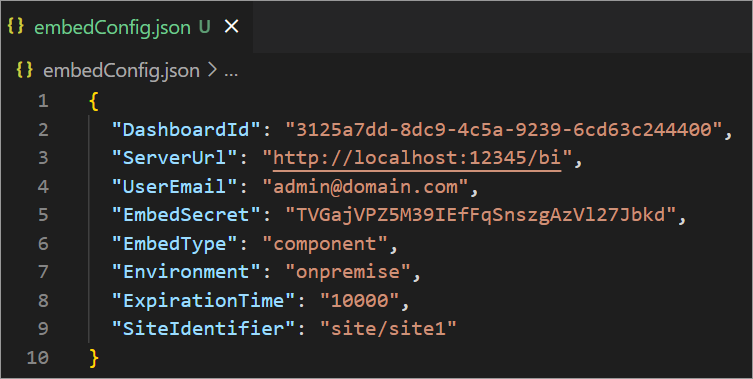
To download the
embedConfig.jsonfile, please use the provided link as a reference. Additionally, you can refer to the accompanying image for visual guidance.
-
Please copy the downloaded
embedConfig.jsonfile and paste it into the designated location within the application. Make sure you have placed it in the application exactly as shown in the following image.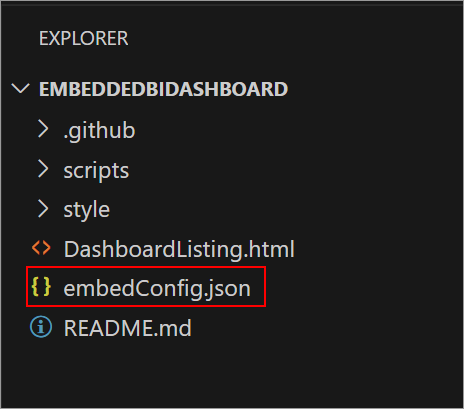
ServerUrl Dashboard Server BI URL (ex: http://localhost:5000/bi, http://demo.boldbi.com/bi) SiteIdentifier For Bold BI Enterprise edition, it should be like site/site1. For Bold BI Cloud, it should be an empty string.Environment Your Bold BI application environment. (If it is a cloud analytics server, use `BoldBI.Environment.Cloud`; if it is your own server, use `BoldBI.Environment.Enterprise`). DashboardId Item id of the dashboard to be embedded in your application EmbedSecret Get your EmbedSecret key from the Embed tab by enabling the Enable embed authenticationin the Administration pageUserEmail UserEmail of the Admin in your Bold BI, which would be used to get the Dashboard List ExpirationTime Token expiration time. (In the EmbedConfig.json file, the default token expiration time is 10000 seconds). -
Please open the terminal in Visual Studio code and run the following command to install the
http-serverpackage. This package allows the sample to run on a local HTTP server.npm install -g http-server -
Please execute this command to start the HTTP server on a designated port (eg.
http-server -p 5555).http-server -p <port number>NOTE: Replace
<port number>with the desired port number. -
After the server is running, open your web browser and go to the
DashboardListing.htmlfile, for example,http://localhost:5555/DashboardListing.html.
How the Sample works
-
To retrieve the embed details of the
embedConfig.jsonfile, a request is made using thefetch()function inProperties.js. If theembedConfig.jsonfile cannot be found, theshowErrorPopup()function will throw an error.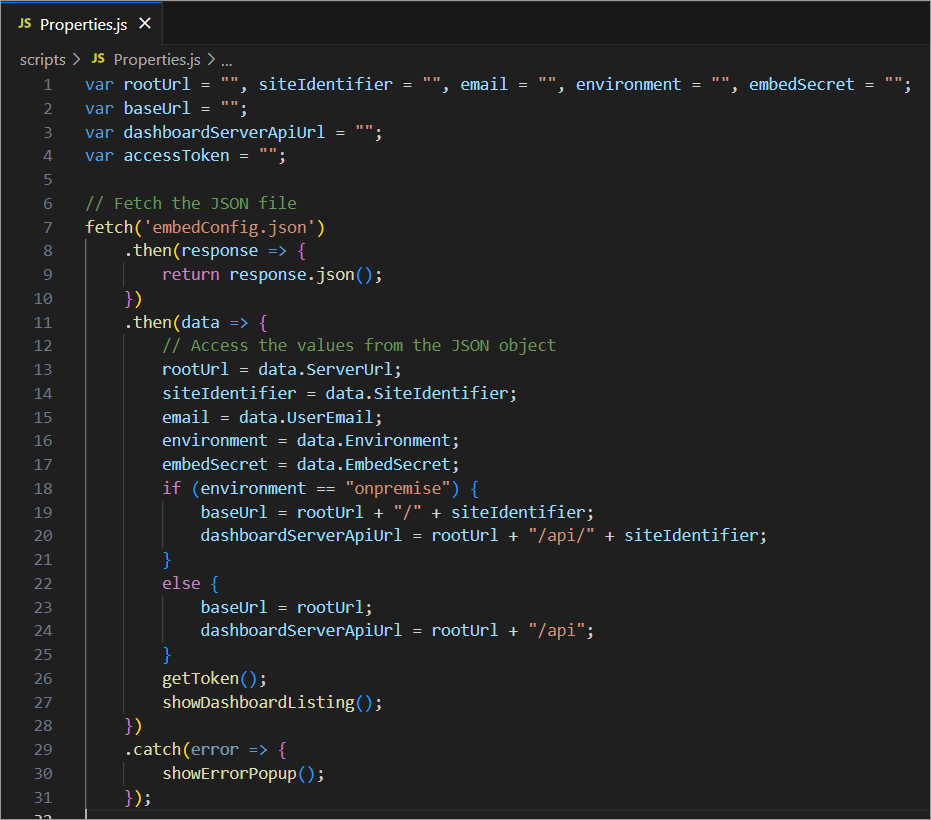
-
The
getToken()function generates an authorization token for the user using their email and the embedded secret key from theapiRequestobject inProperties.js. This token will be utilized for listing, rendering, and designing the dashboard. The obtained token is stored in theaccessTokenvariable.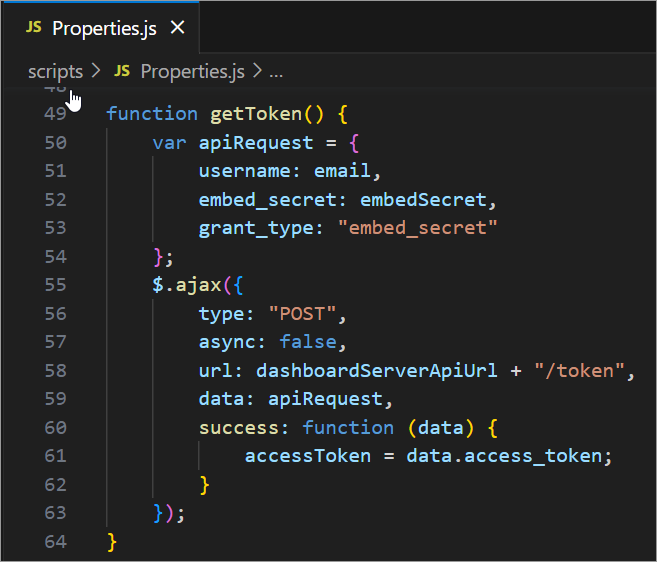
-
The
showDashboardListing()function inDashboardListing.jssends a GET request to thedashboardServerApiUrl +"/v2.0/items?ItemType=dashboard"endpoint with theaccessTokenas the authorization header. TheaccessTokenis obtained from thegetToken()function.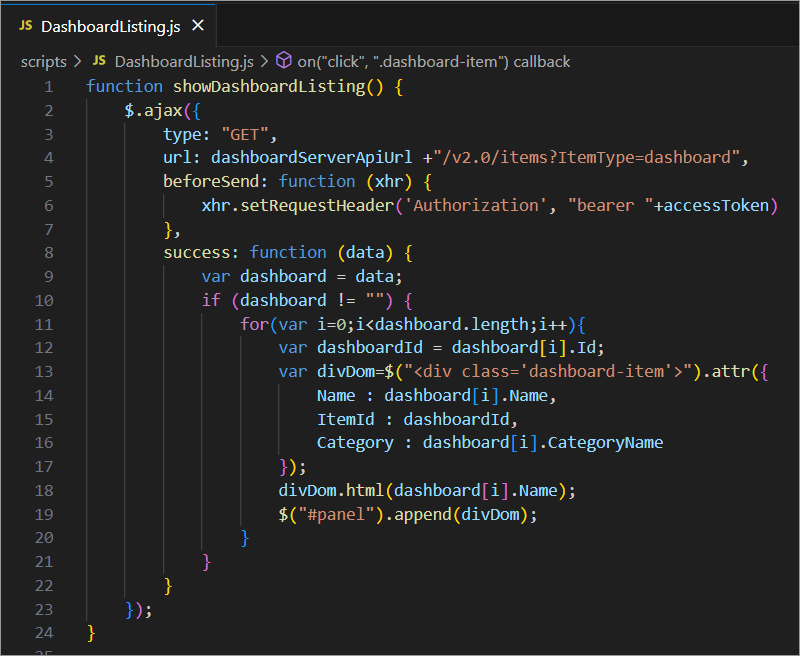
-
The dashboards list is retrieved from the server, and then we create the items based on the list.
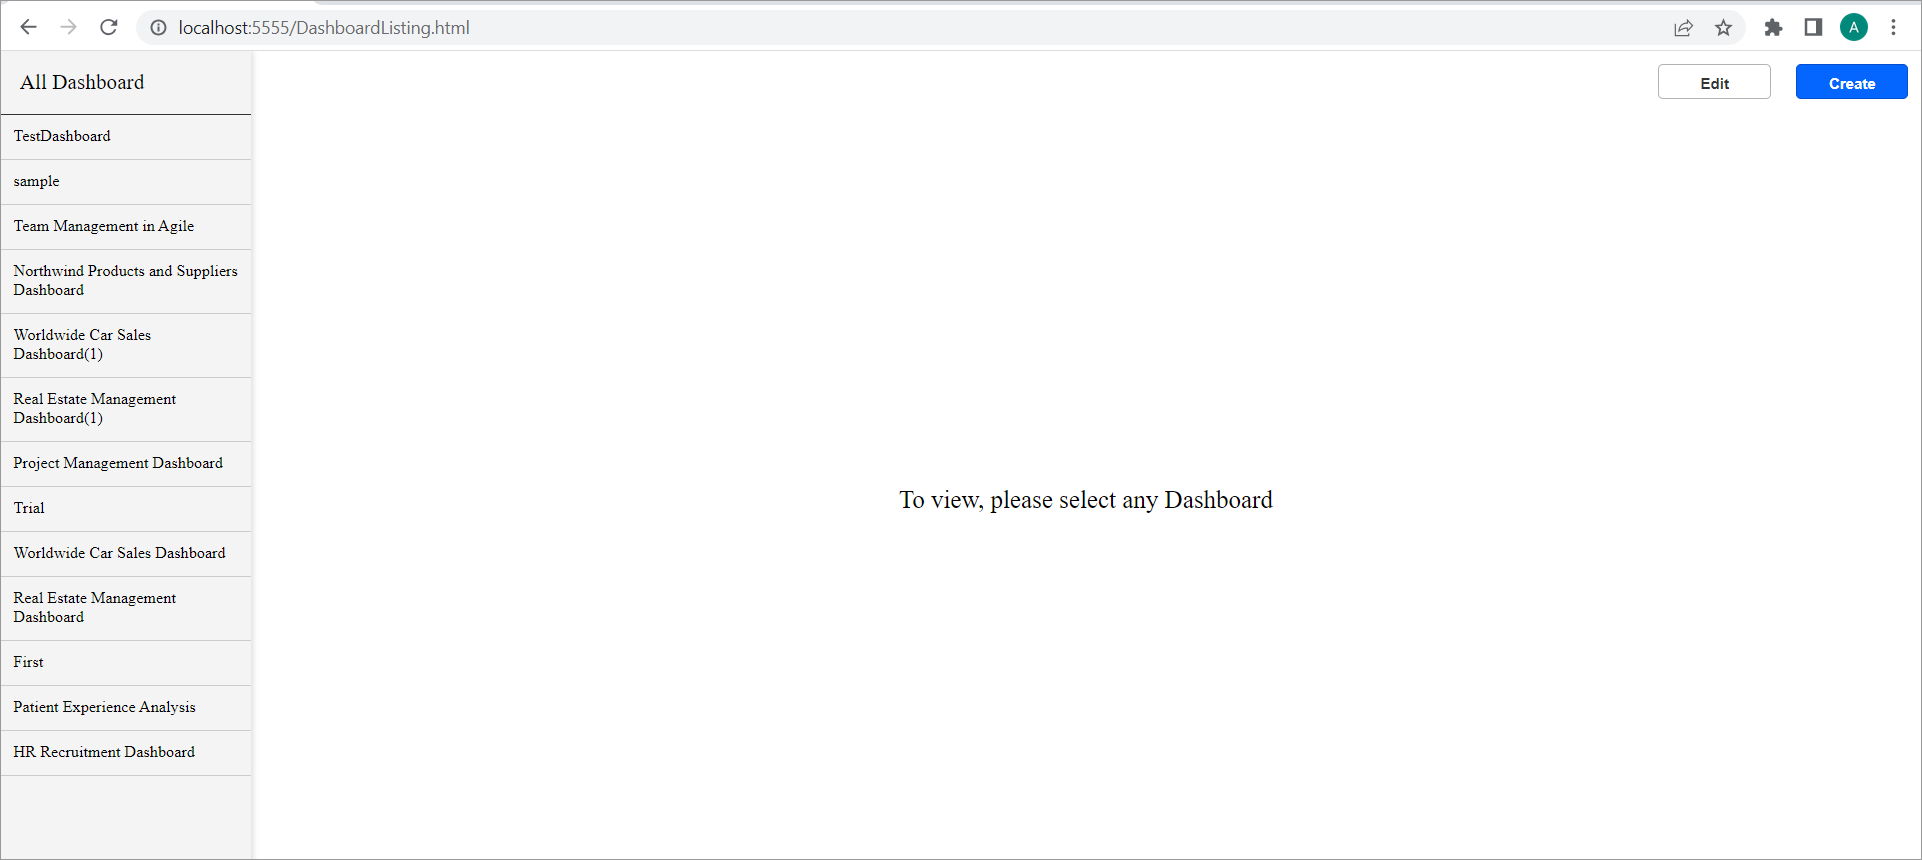
Viewing an existing Dashboard
-
The
renderDashboard()method inDashboardListing.jsis called to display the dashboard. It includes the dashboard ID, name, and category in the embedded URL. We retrieve the necessary value from the attribute when the user clicks on the dashboard and construct the embedded URL using this value. We subsequently append this code to the application.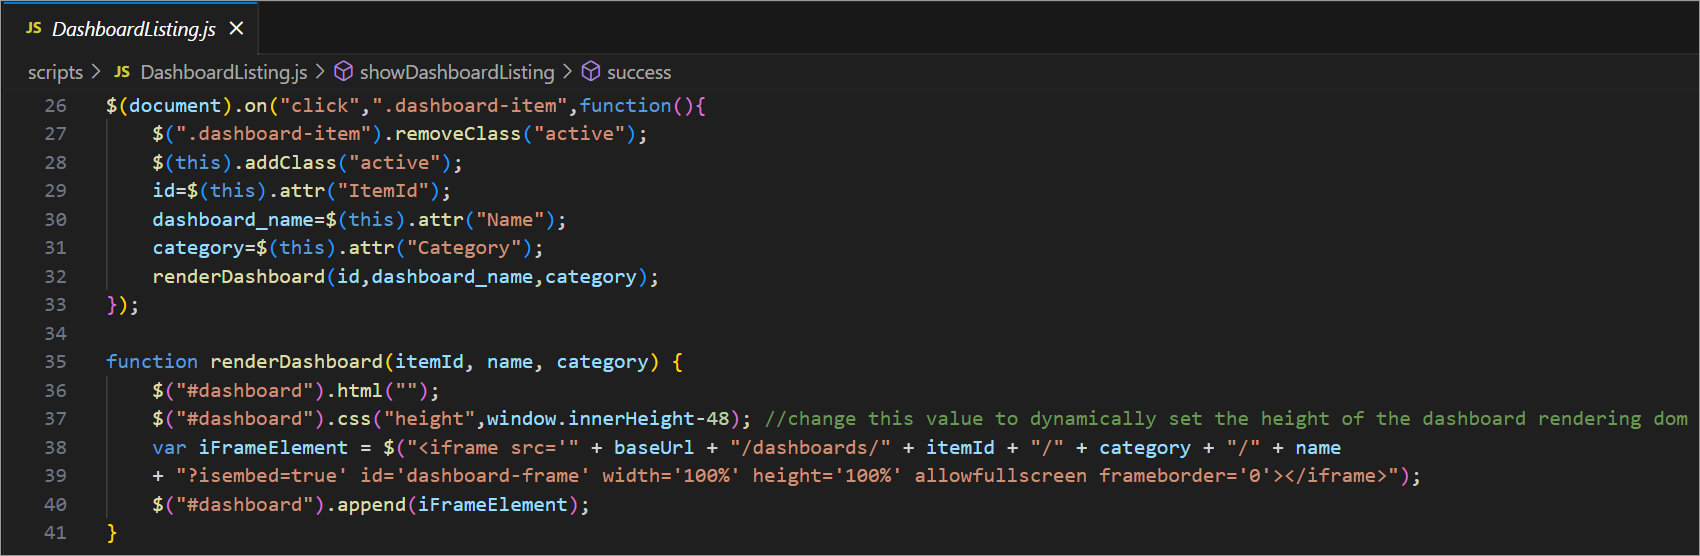
Creating a new Dashboard
-
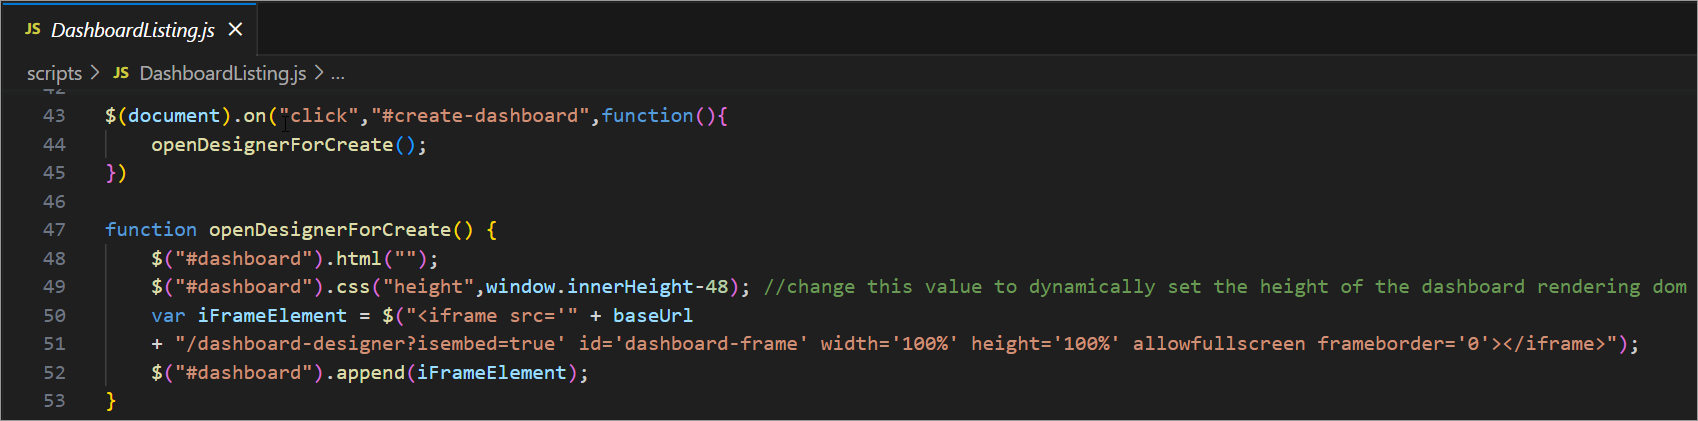
When the
Createbutton is clicked on the dashboard page, theopenDesignerForCreate()function inDashboardListing.jsis triggered. This function prepares the environment for creating a dashboard by removing any existing content. Afterwards, it generates an embedded view using an<iframe>element that redirects to the dashboard designer page.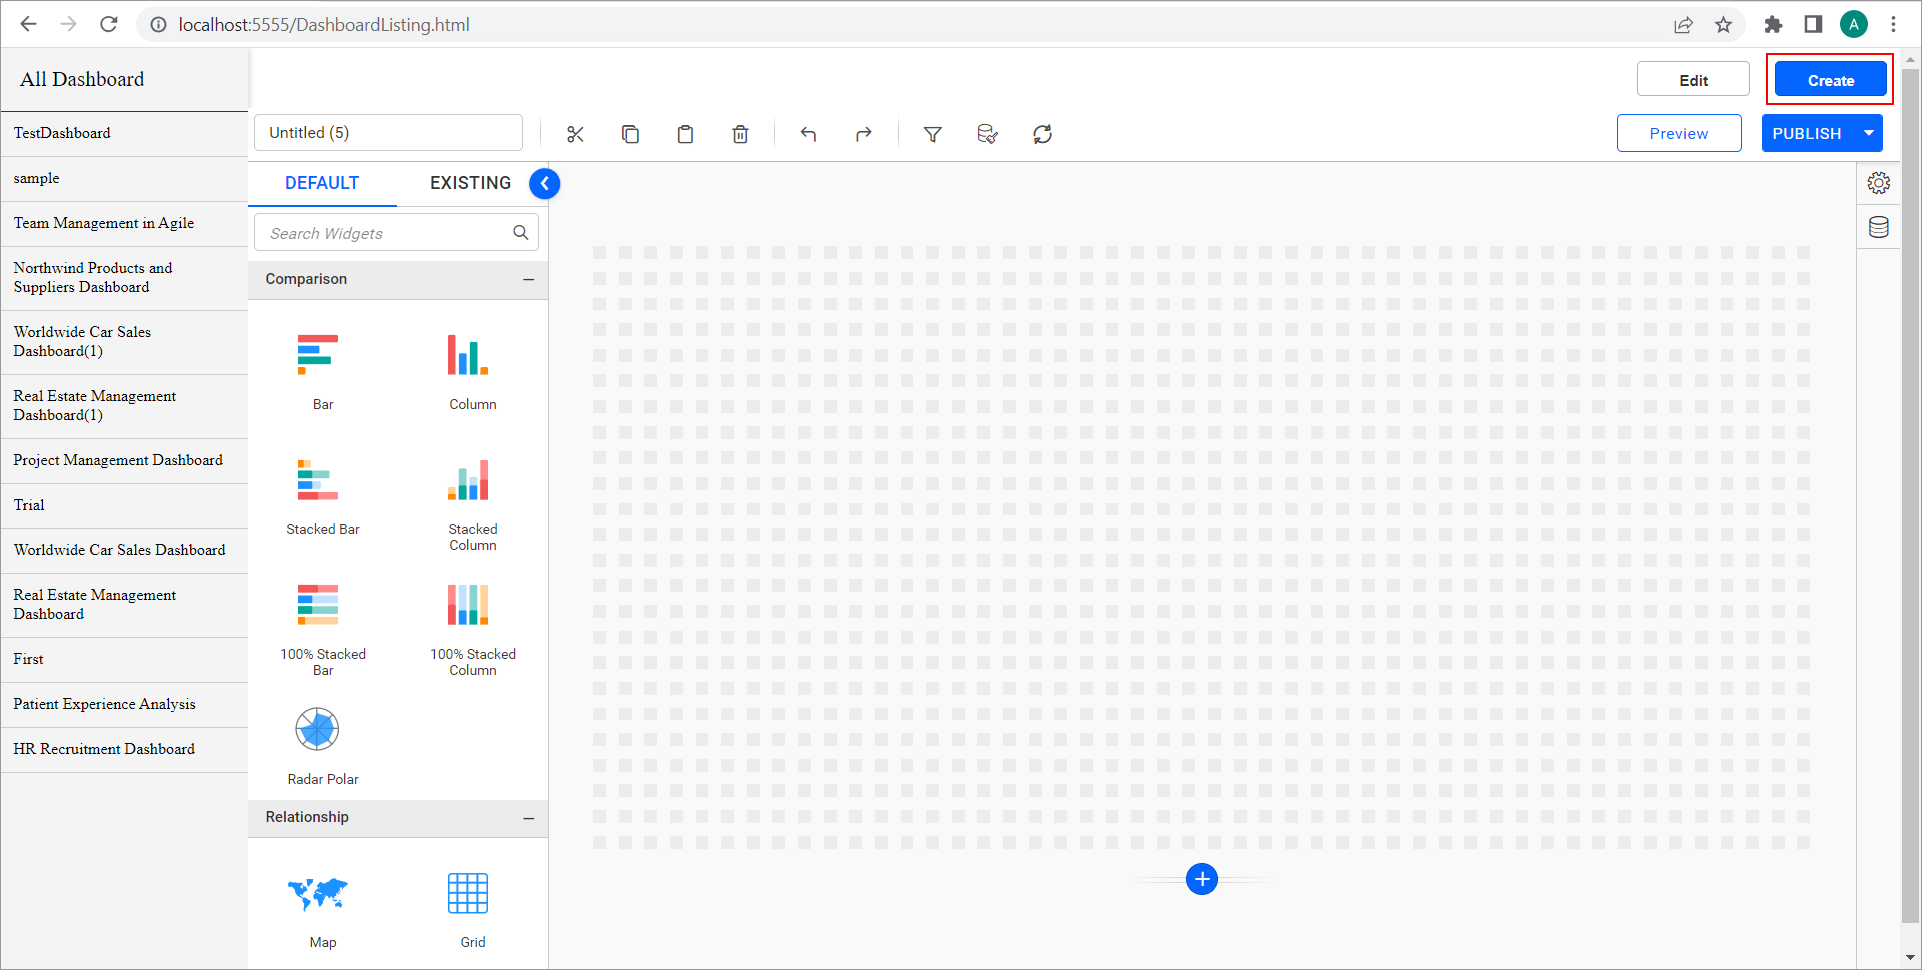
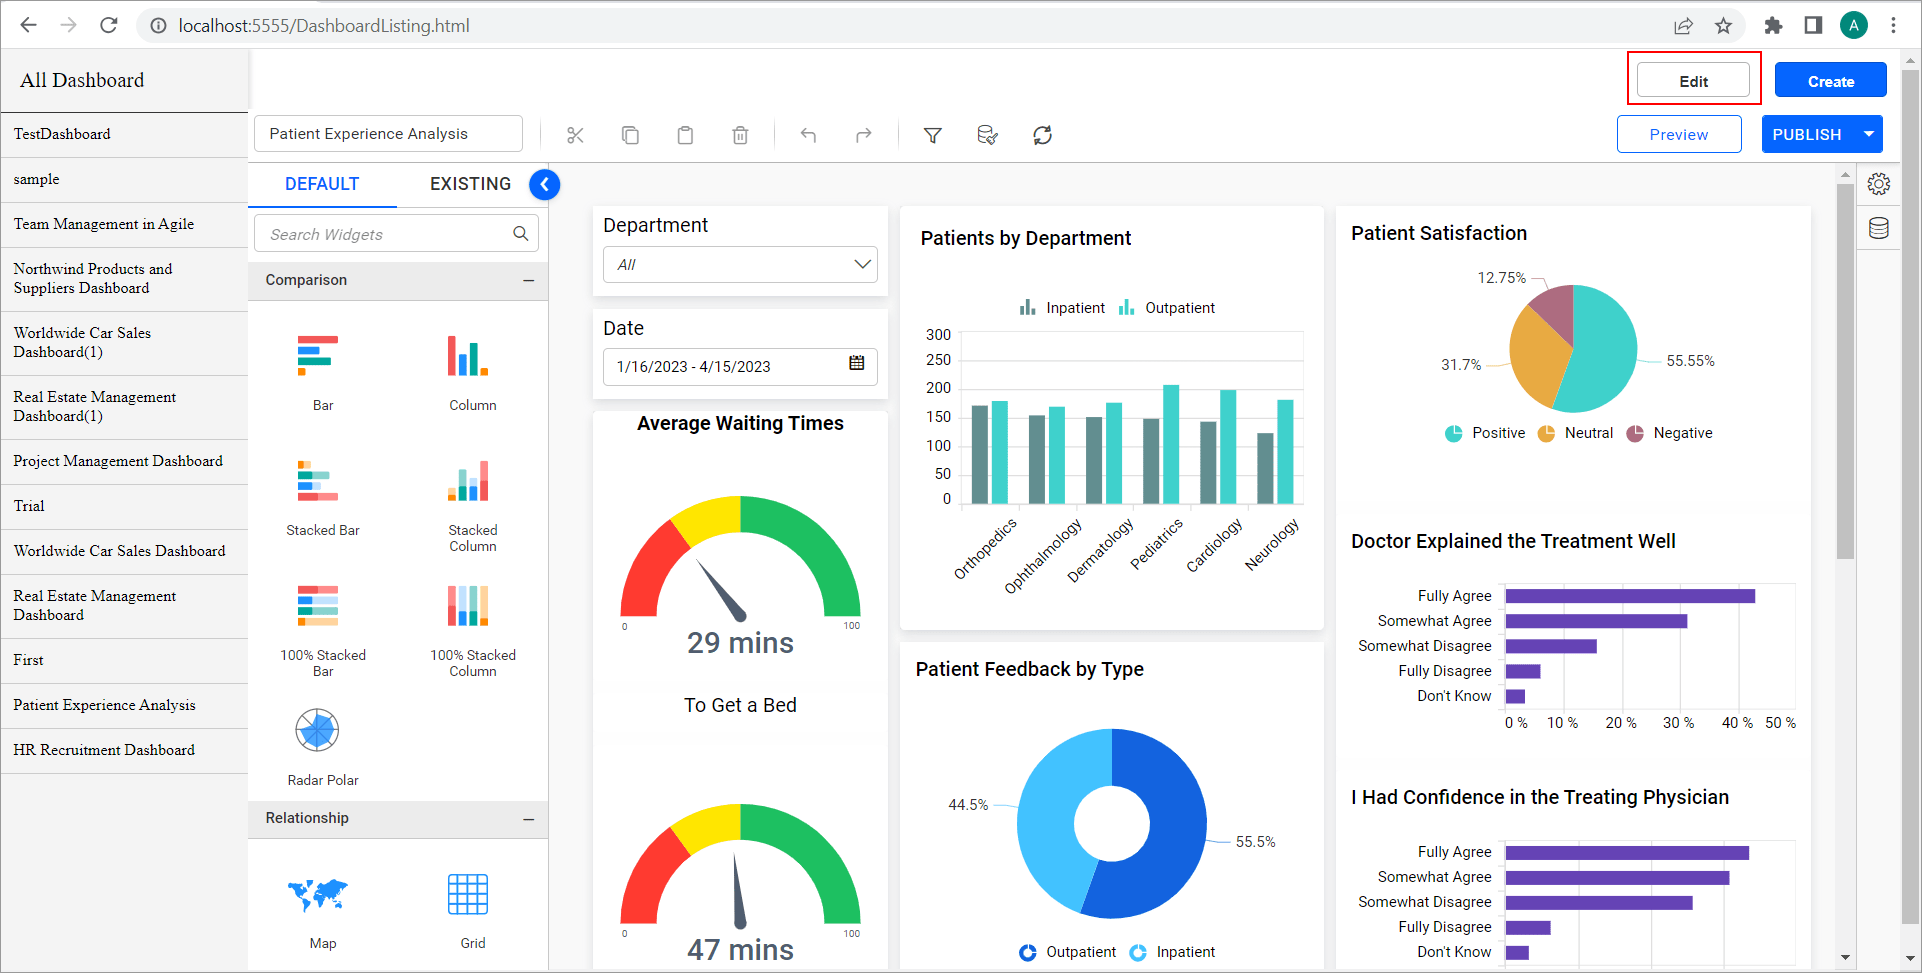
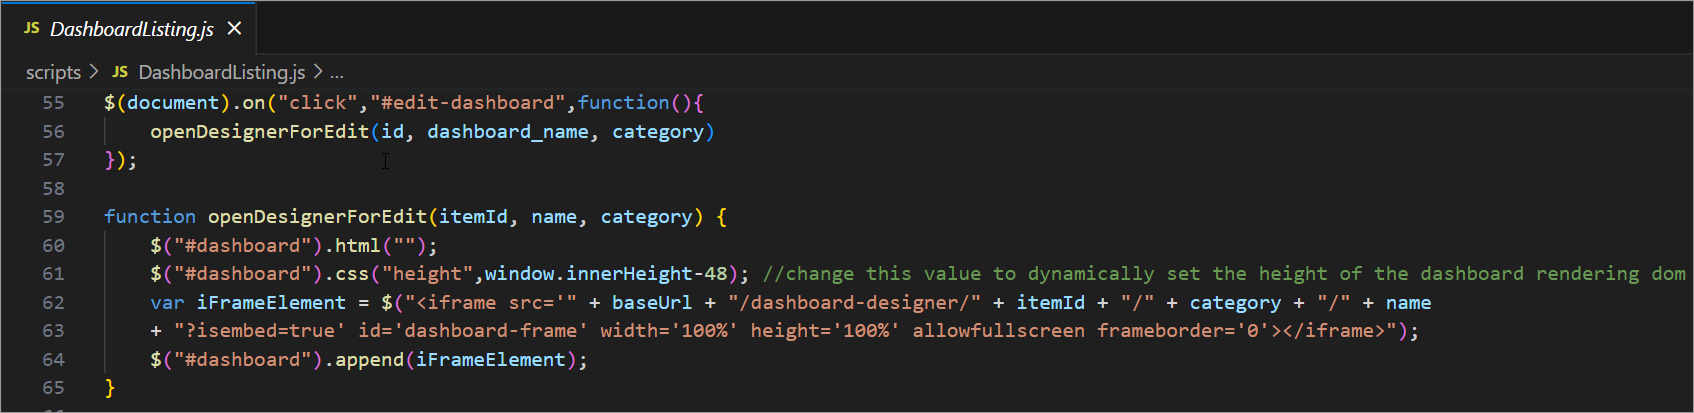
Editing an existing Dashboard
-
The
openDesignerForEdit()method inDashboardListing.jsis invoked when you click on any dashboard in the dashboard listing container and then click theEditbutton. It retrieves the item ID, dashboard name, and category from the properties of the clicked item and uses them to open the dashboard designer page for editing within the “dashboard” element.