Manage Localization
This section explains how to add, apply, and remove the localization files for the Bold BI application.
Localization involves adapting a website into different linguistic and cultural contexts, which goes beyond simple text translation.
Add language
To add a language file to the application, please follow these steps:
-
Go to the
SiteSettings page and click on theManageoption.
-
In the Manage Language dialog box, click the
Add Languagebutton to upload the language file.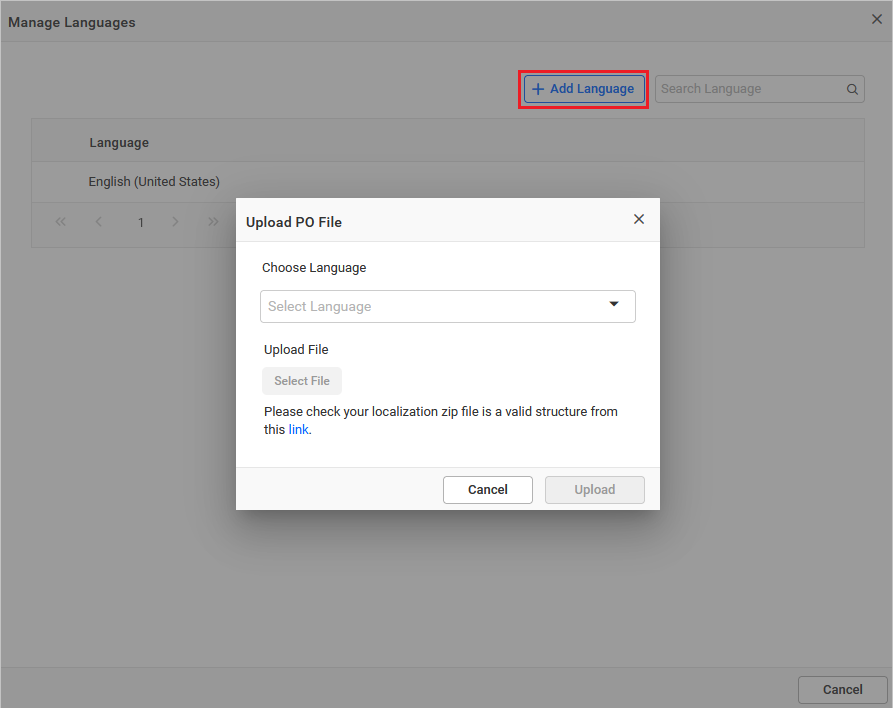
-
Choosethe language from the dropdown andselectthe file to upload. The zip file should have the correct structure. Refer to this link for the valid file structure.
-
After uploading the file, Click
Upload, and the language will be added to the application.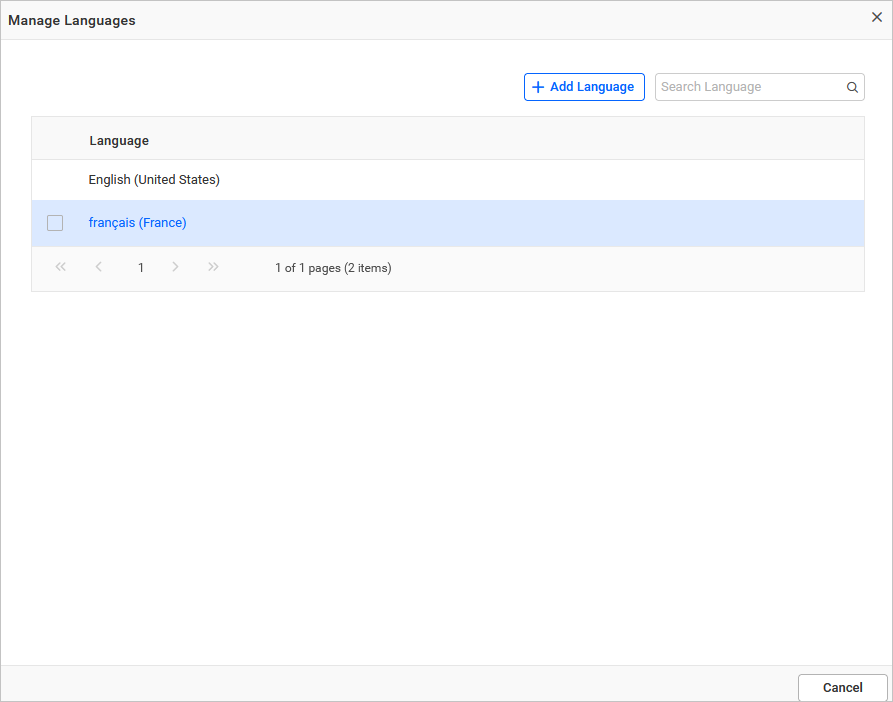
Note: The file should include all the Bold BI service folders and
message.pofor all services.
Localization file structure
-
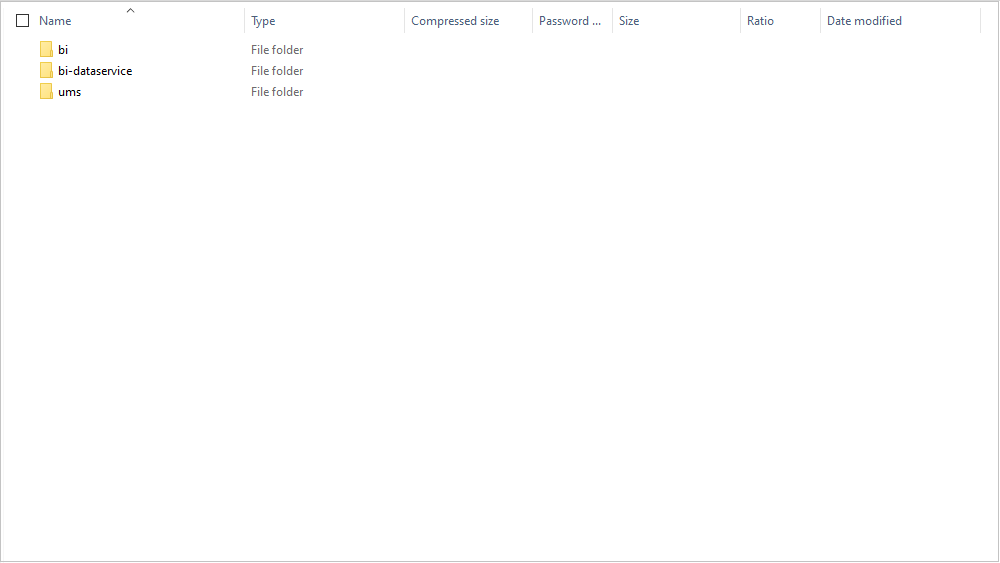
Create application folders with the following names for each service:
- bi
- bi-dataservice
- ums
-
To create a locale file
messages.pofrommessages.pot, you can either use manual editing or an online tool for theBIandUMSservices. Refer to this for instructions. -
To create a locale file
messages.pofromdefault.poyou can either use manual editing or an online tool for theDesignerservice. Refer to this for instructions. -
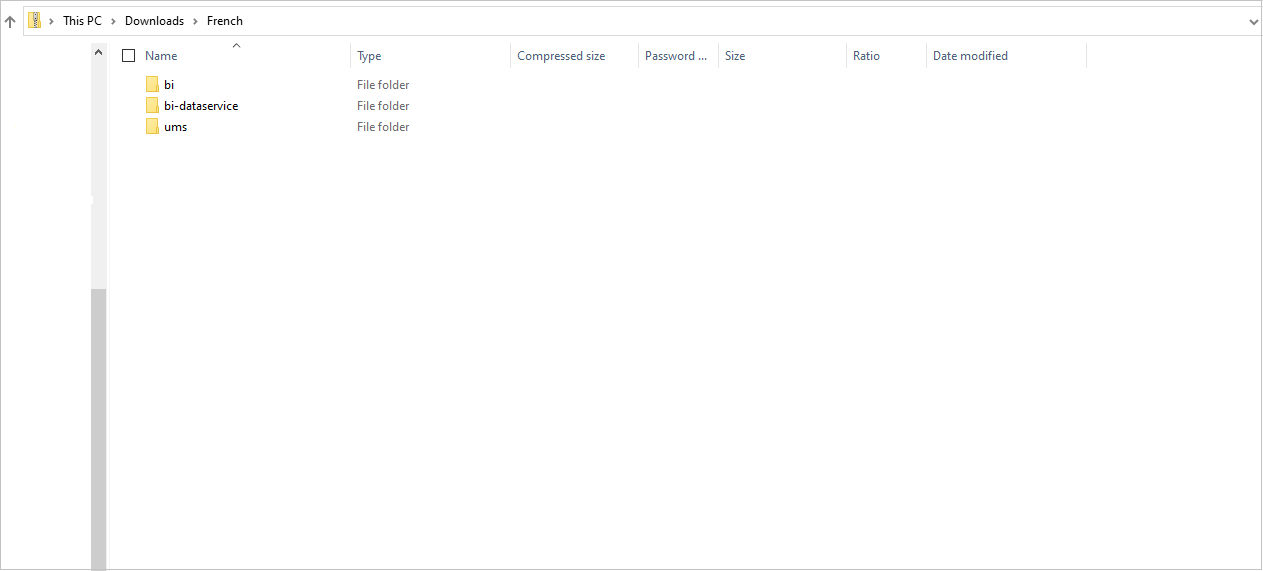
After completing the above steps, please convert the service folders into a zip file and upload them to the application.
Delete language
To remove a language, Select the language and Click the Remove option. You have the option to remove single or multiple languages.
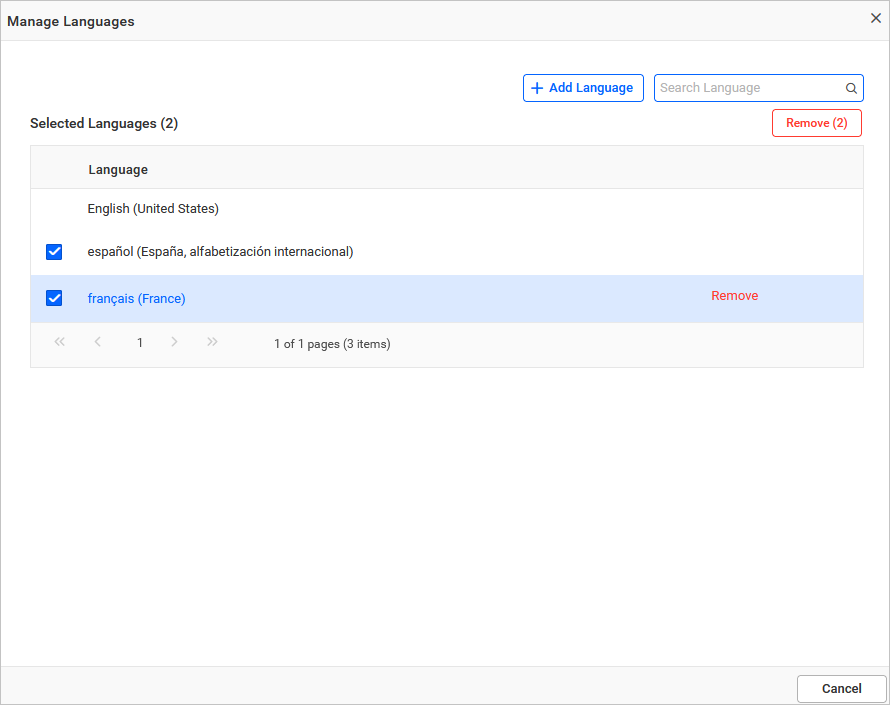
NOTE: You cannot delete the current application language. If you want to remove a language, change the application language to
Englishand then delete it.
Set localization in application
To set localization in the application, by default, the application will be in English. You can change the language at the global, site, or user level.
Please refer to this for instructions on setting localization.
Possible errors cases and their solution:
| Cases | Solution |
|---|---|
| Invalid File Type | Please ensure to upload the valid zip file (zip). |
| Invalid File Error | Please refer here to form the localization file structure. |
- Add language
- Delete language
- Set localization in application
- Possible errors cases and their solution
Having trouble getting help?
Contact Support- Add language
- Delete language
- Set localization in application
- Possible errors cases and their solution
Having trouble getting help?
Contact Support