
How to set up JWT for SSO authentication in Bold BI site
This section provides a step-by-step guide to configuring Single Sign-On (SSO) for users at the site level in the Bold BI application using Custom JSON Web Tokens (JWT).
Steps to configure JWT in Bold BI
-
Login with this URL
{domain}/bi/site/{site_identifier}/administrationusing the admin credentials. -
Click on
Authenticationand thenJWT.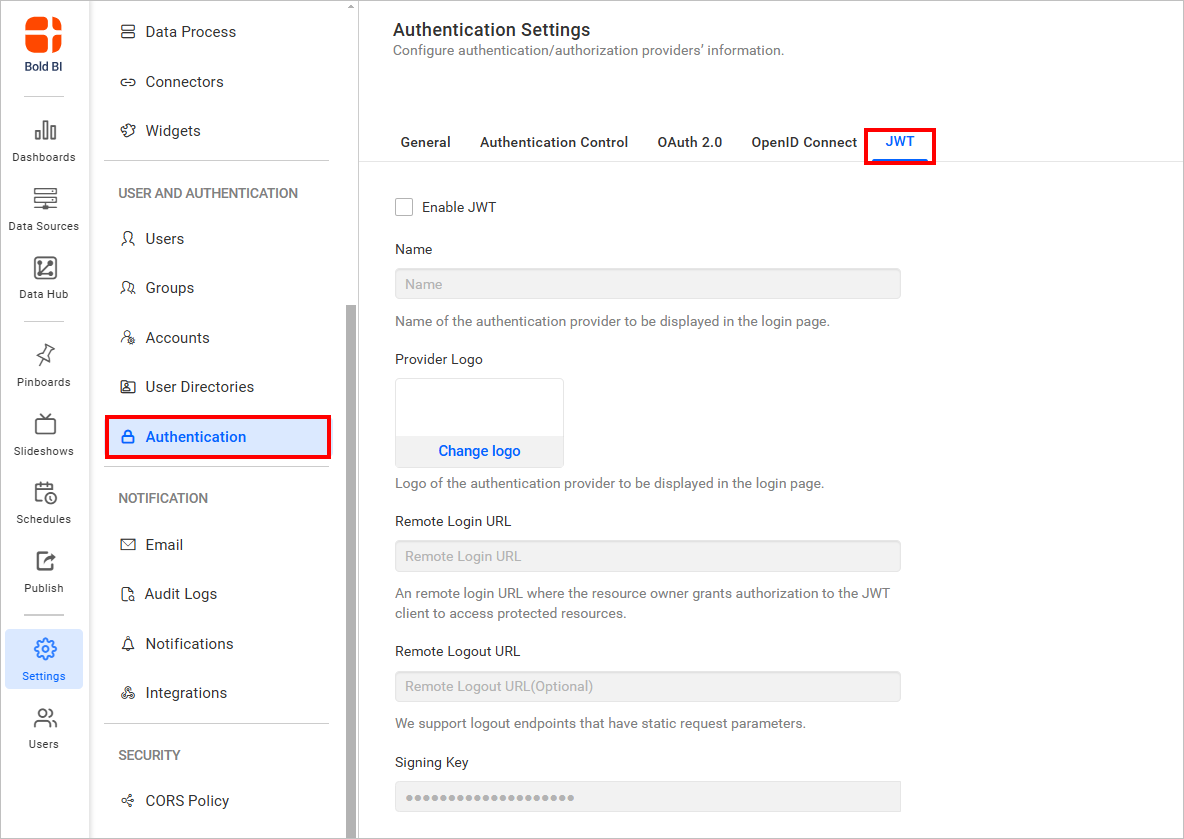
-
Enable the JWT settings.
-
Provide the following details in the
JWTsettings.Name It represents the name of the JWT provider to be displayed in the login page. Provider Logo It represents the logo of the JWT provider to be displayed in the login page. Remote Login URL It is the endpoint of the JWT provider to send the authorization request from Bold BI application. Remote Logout URL It is the endpoint of the JWT provider to send the logout request once user logged out in the Bold BI application. -
After the values are saved, the application will generate a
Signing Key. This signing key must be used for signing JSON Web Tokens from your application. -
The
Signing Keycan be copied, viewed, and reset using the following options: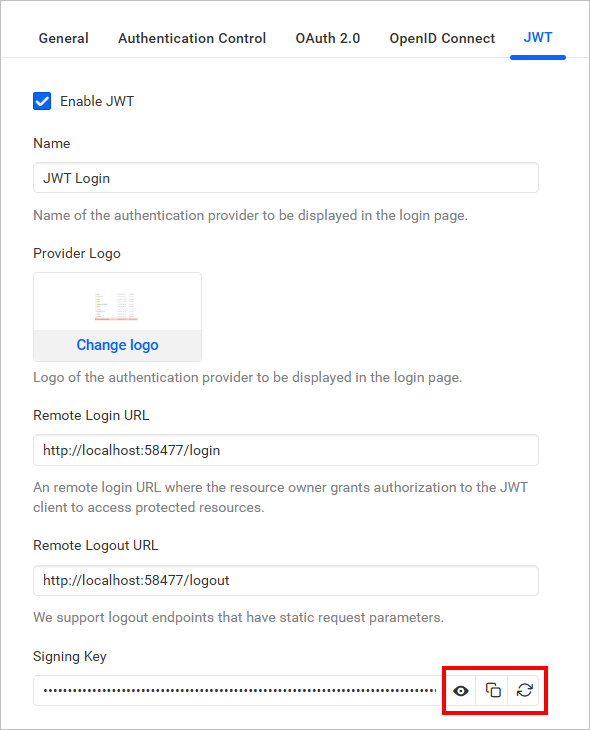
-
You can enable JWT token encryption by selecting
Enable Encryption. Once activated, a public key is generated, which is used to encrypt the JWT token. This enhances security by ensuring that token payloads remain confidential and protected from unauthorized access. By default, encryption remains disabled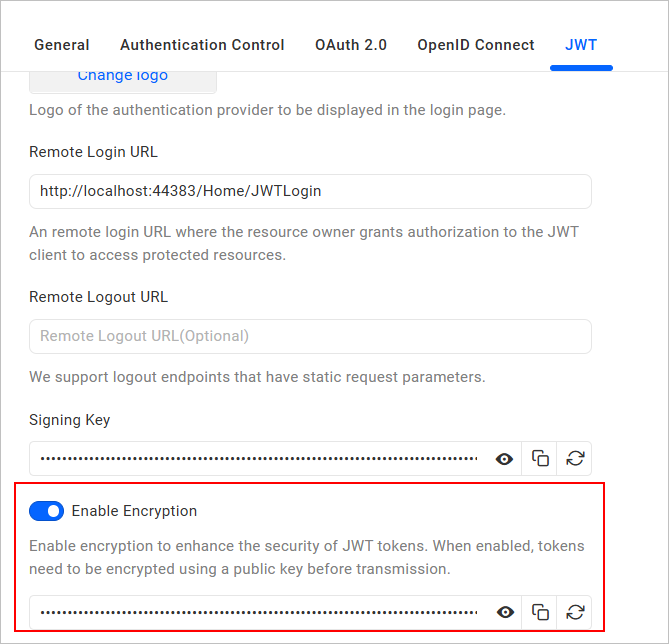
-
The
JWT Encryption Keycan be copied, viewed, and reset using the following options: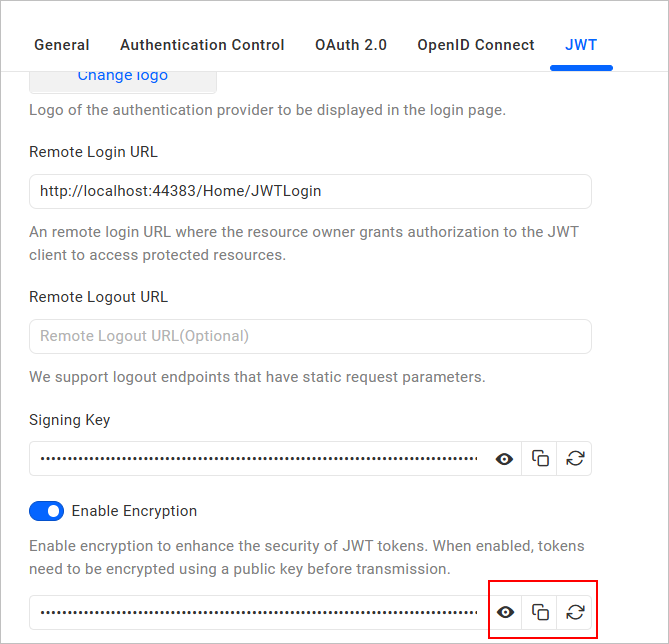
For more details on how JWT works with Bold BI, click here
JWT Callback URL
The JWT callback URL will validate the JWT response from the configured application.
After a user successfully logs into your configured application, you can redirect them to the specific URL provided.
{Bold BI URL}/sso/jwt/callback?jwt={token}&site_identifier={site identifier}&redirect_to={redirecturl}
| Parameter | Required | Comments |
|---|---|---|
| jwt | Yes | JSON Web Token will be passed in this parameter. It will contain the JWT Payload |
| site_identifier | Yes | This parameter will be used to grant site access for the JWT user.
If the JWT login accessed from the tenant, Bold BI login URL will redirect to your application with tenant site identifier in URL query string. You can use this identifier in JWT response URL. Example Url
|
| redirect_to | No | If this parameter is included in the JWT response, then the user will be redirected to that page by validating with the site identifier, after the login process completed. |
Enable JWT Callback with HTTP GET (Optional)
Note: Enabling GET requests may increase the risk of token exposure because JWT values can be recorded in browser history, URLs, and various logging mechanisms. It is strongly recommended to use HTTP POST whenever possible and enable GET support only when required for legacy workflow compatibility.
By default, the JWT callback endpoint accepts only HTTP POST requests to enhance security. Using POST helps prevent JWT tokens from being exposed in browser history, web server logs, proxy logs, and URL query parameters.
For backward compatibility, organizations that need to continue using the legacy (old) workflow can enable HTTP GET request support through the application configuration. When this option is enabled, the JWT callback endpoint will accept JWT tokens provided through URL parameters, allowing existing integrations to continue operating without modification.
- Go to {domain}/ums/administration
- Open Configuration in settings page.
- Select the dropdown and open
config.jsonand then locatePreferSecureHttpVerbs. - Set the
PreferSecureHttpVerbsnode tofalse. If thePreferSecureHttpVerbsnode is not present, create it and configure it asfalse.
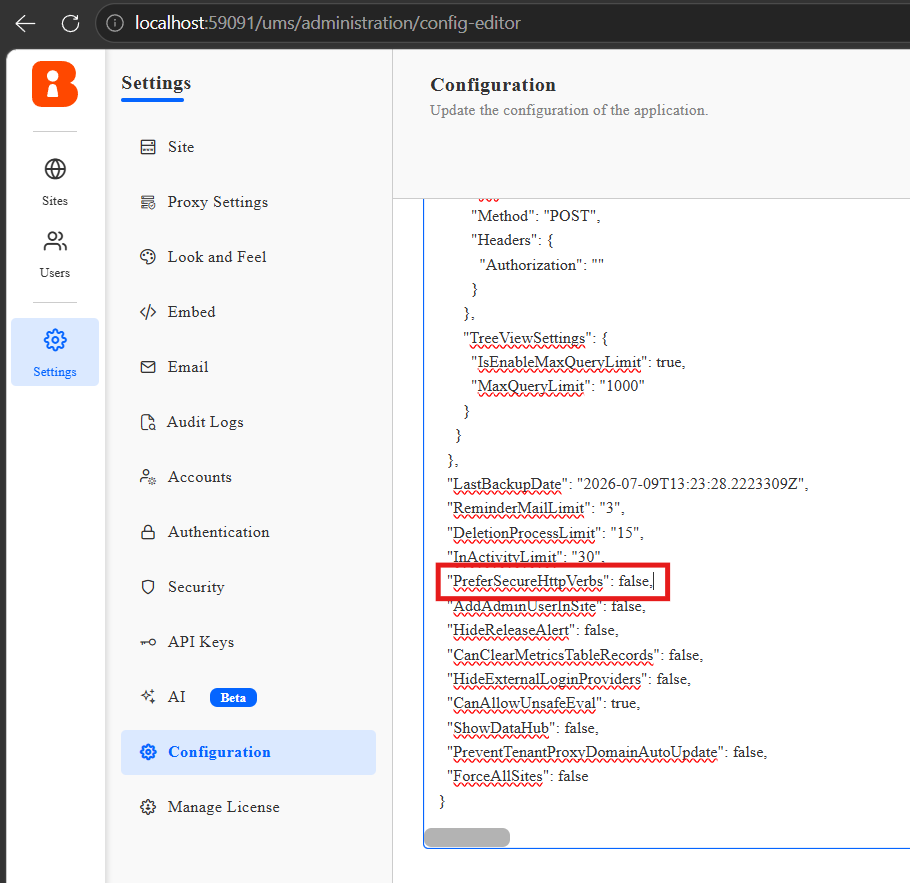
- After updating the configuration, save the changes and restart the application to apply the updated settings.
After the application is restarted, the JWT callback endpoint will accept HTTP GET requests for all tenant sites, enabling support for the legacy (old) workflow.
Creating a JSON Web Token (JWT) To get started with SSO, you need to create a valid JSON Web Token (JWT). Follow the instructions outlined here to generate a JWT for your Bold BI application.