Configuring Custom Attribute
A custom attribute is a piece of code that functions as a parameter and can be replaced by users in a query. The attribute name is replaced by the code, which is saved for each user and used to render the dashboard.
Custom attribute hierarchy
Custom attributes can be defined at three levels:
- User level
- Group level
- Site level
The user level attribute takes precedence over the other levels. The group and site level attributes can be overridden at the user level. Additionally, the group level attribute can override the site level attribute.
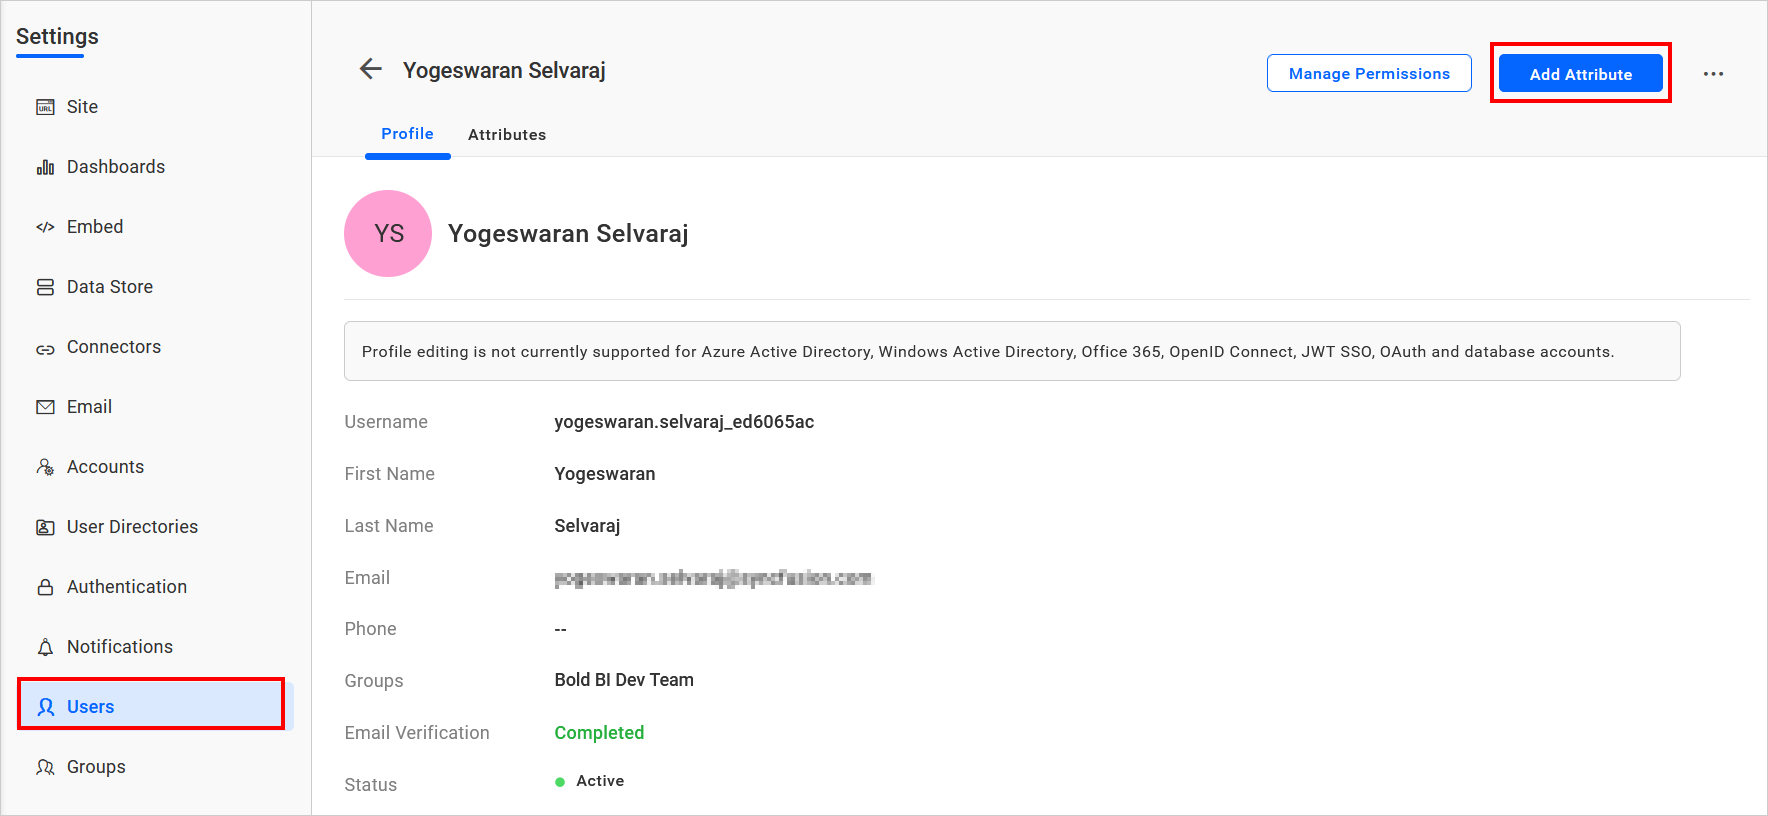
User level attribute
This attribute can be set by the site admin for a user on the user management profile page. The user’s attribute listing will display the attributes inherited from the group and site levels.
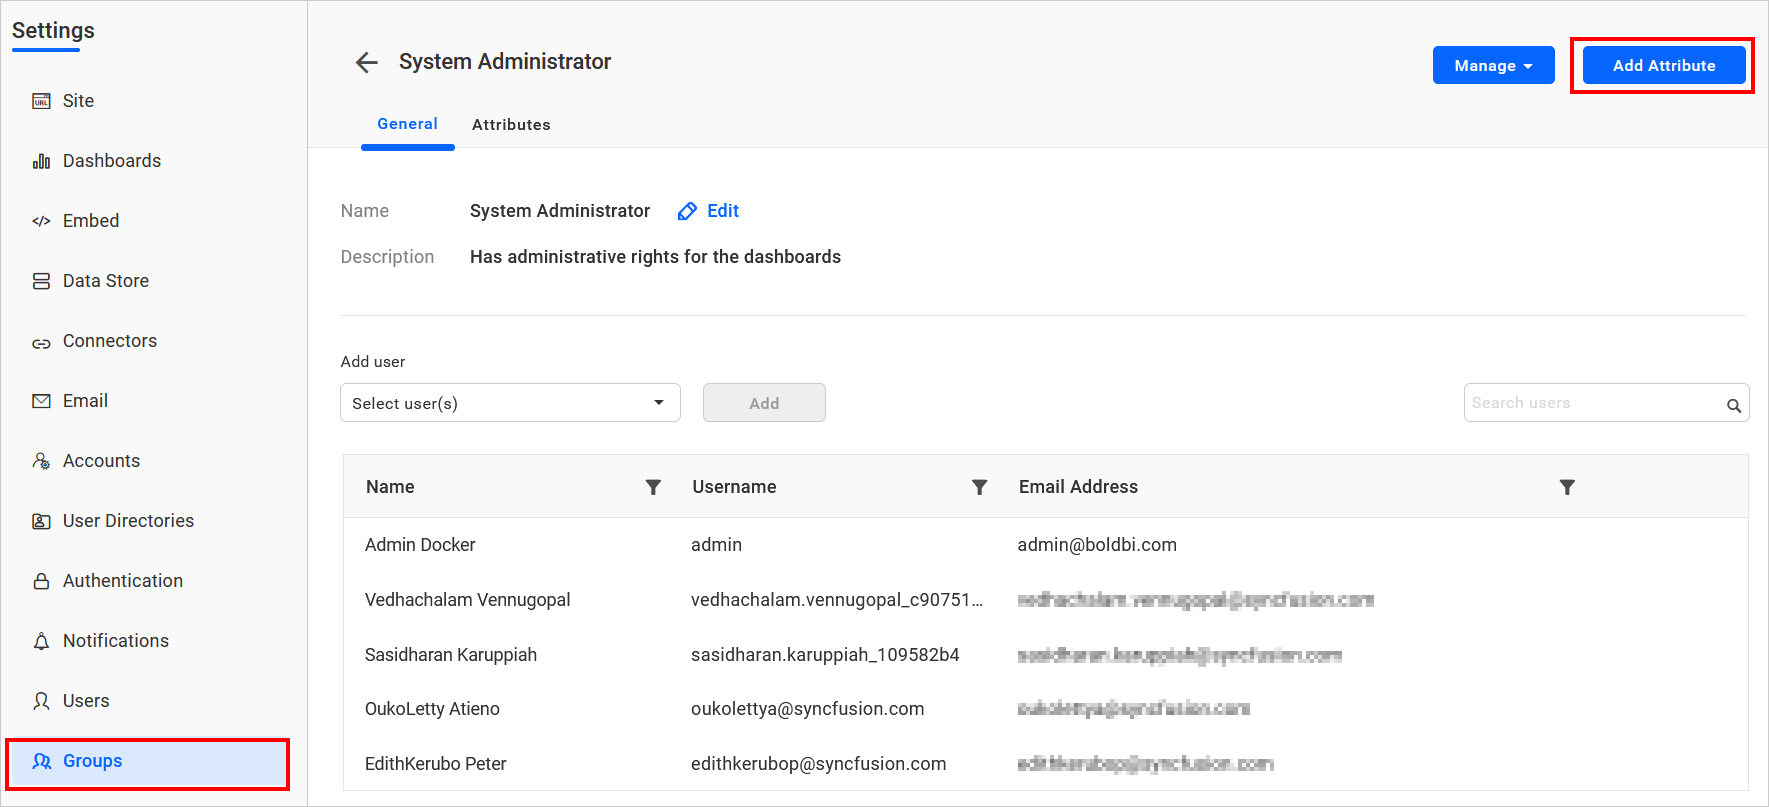
Group level attribute
This attribute can be set by the site admin for a group on the group profile page. The group’s attribute listing will display the attributes inherited from the site level.
Site level attribute
This attribute can be set by the UMS admin for a site on the site details page.

Adding custom attribute
Attributes are name-value pairs associated with users, groups, and sites (tenants).
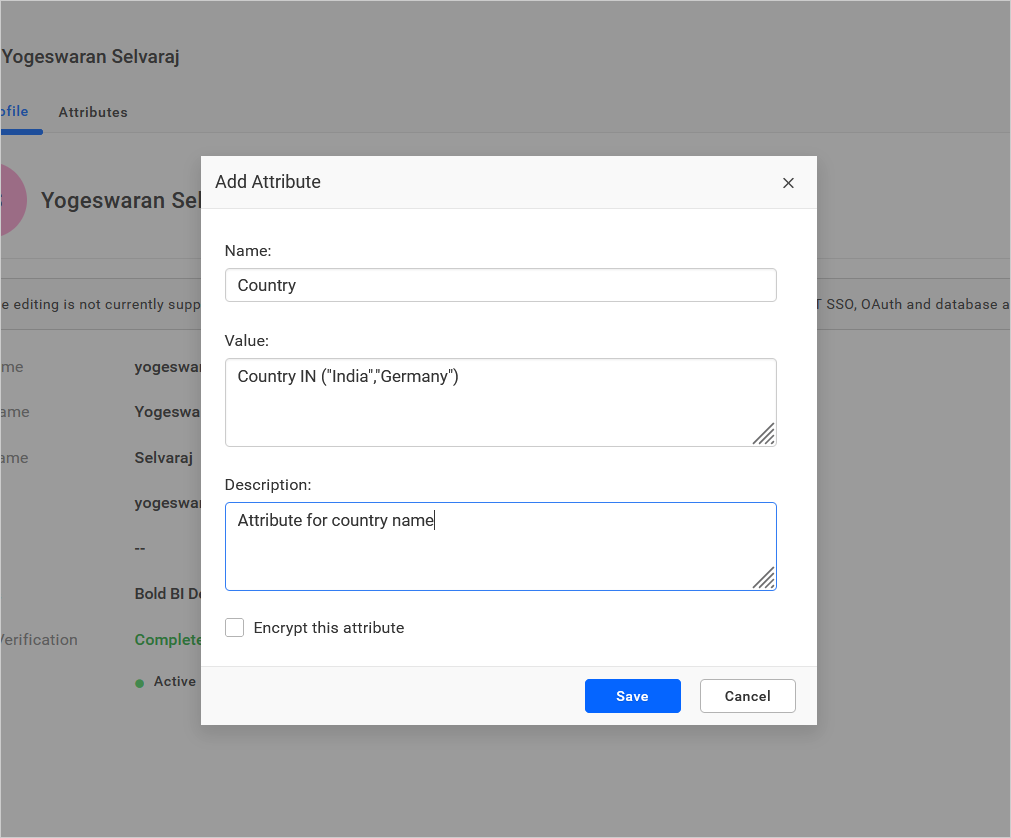
Name – The name of the attribute.
Value – The value of the attribute
Description – An explanation of the purpose of this attribute.
Encrypt – Option to store the attribute as encrypted in the database, with the value displayed as dots in the grid.
Applying custom attribute for different users
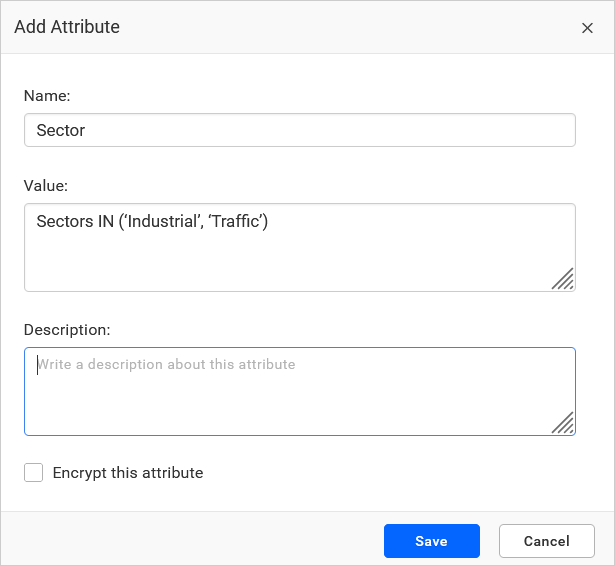
Let’s consider the user James with the custom attribute value configured as Sectors IN (‘Industrial’, ‘Traffic’) and the attribute name as Sector.
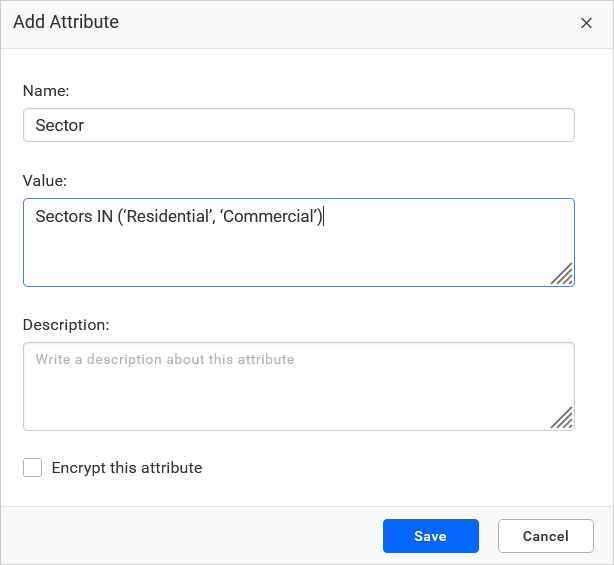
For the user Christ, the custom attribute value is configured as Sectors IN (‘Residential’, ‘Commercial’) with the attribute name as Sector.
Uses of custom attribute
Custom attributes can be used in the following areas:
- Custom Query.
- Web Connection window.
1. Custom Query
Custom attributes can be used in a custom query by manually providing the required custom attribute name in the code view using the syntax:
Syntax: ${{:AttributeName}}
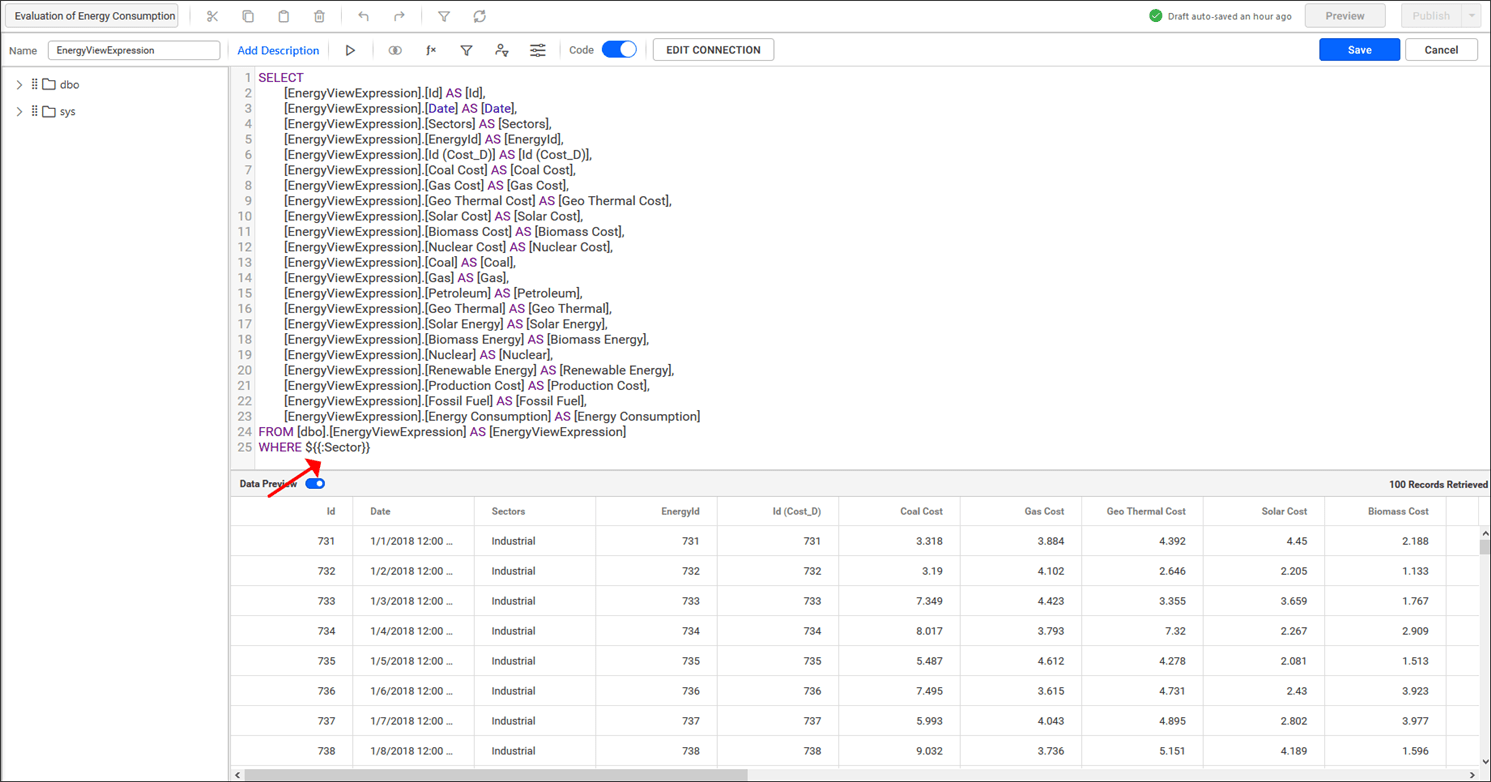
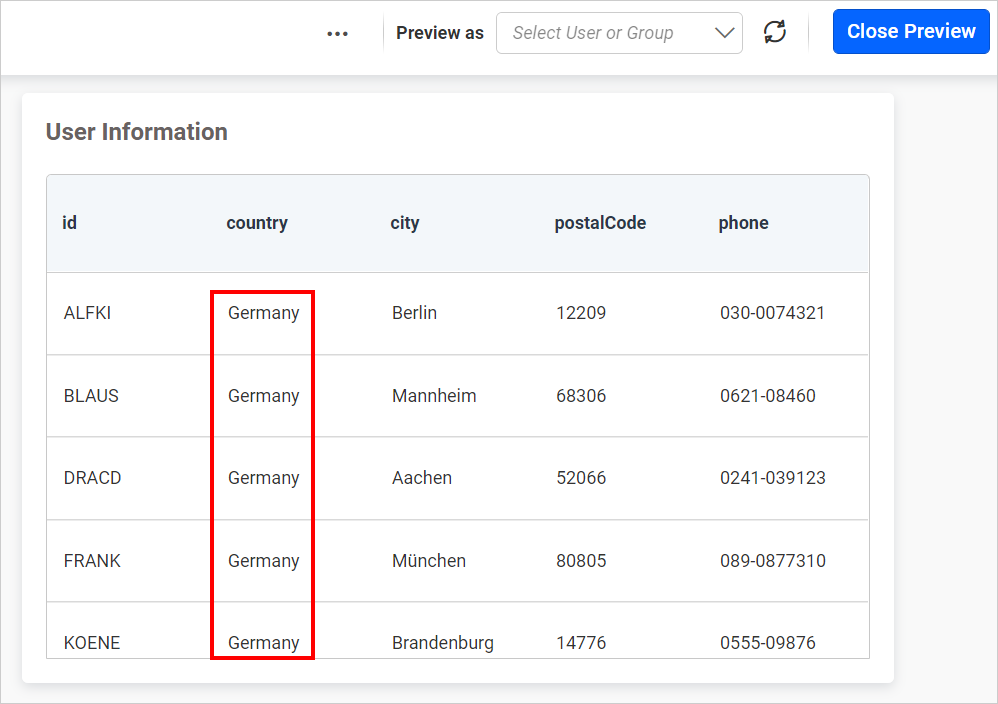
Here, a simple dashboard is created for James, and the data is retrieved based on the condition for the column Sectors as given in the custom attribute Sectors.
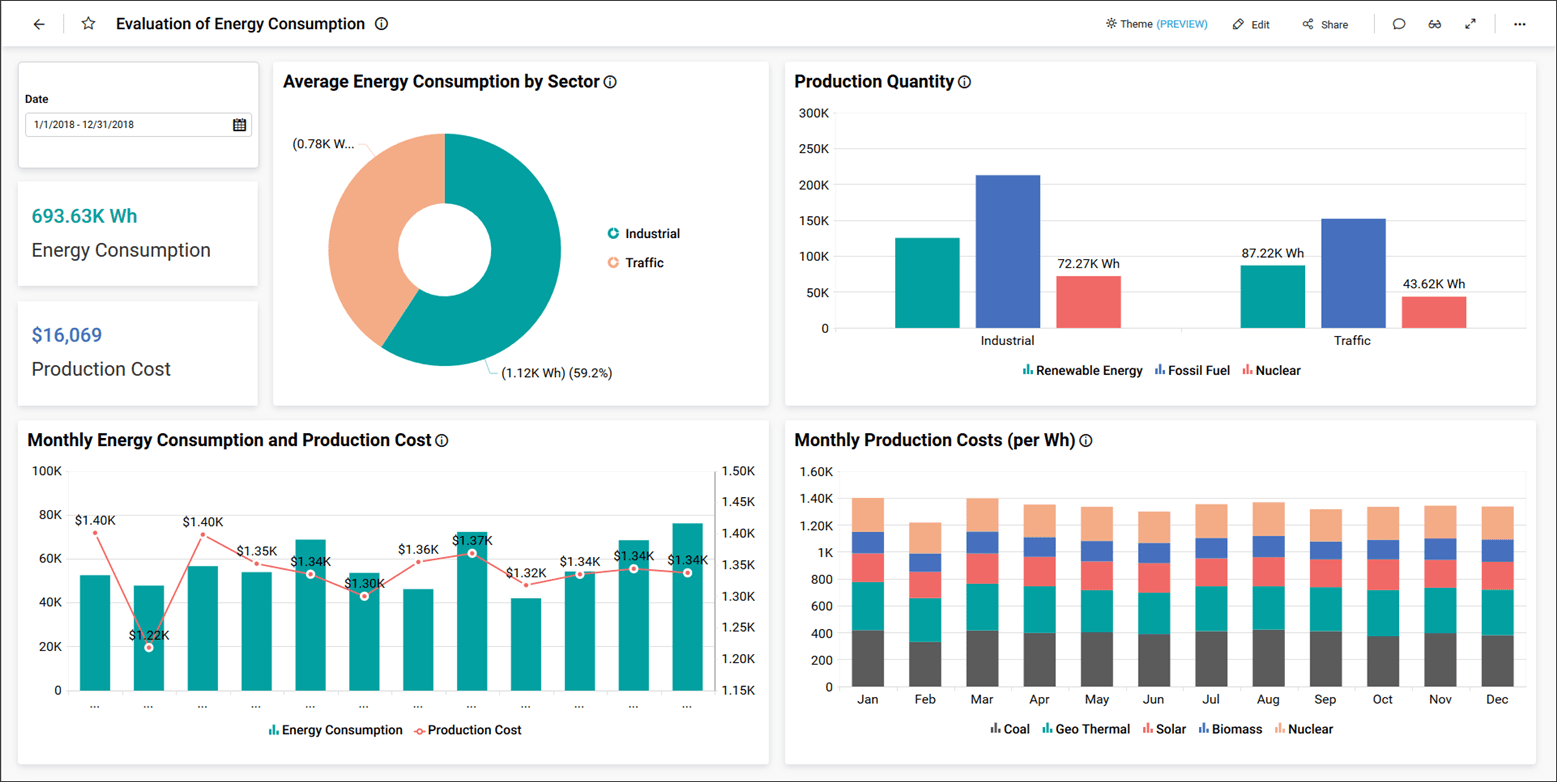
For Christ, the data is retrieved based on the condition for the column Sectors as given in the custom attribute Sectors.
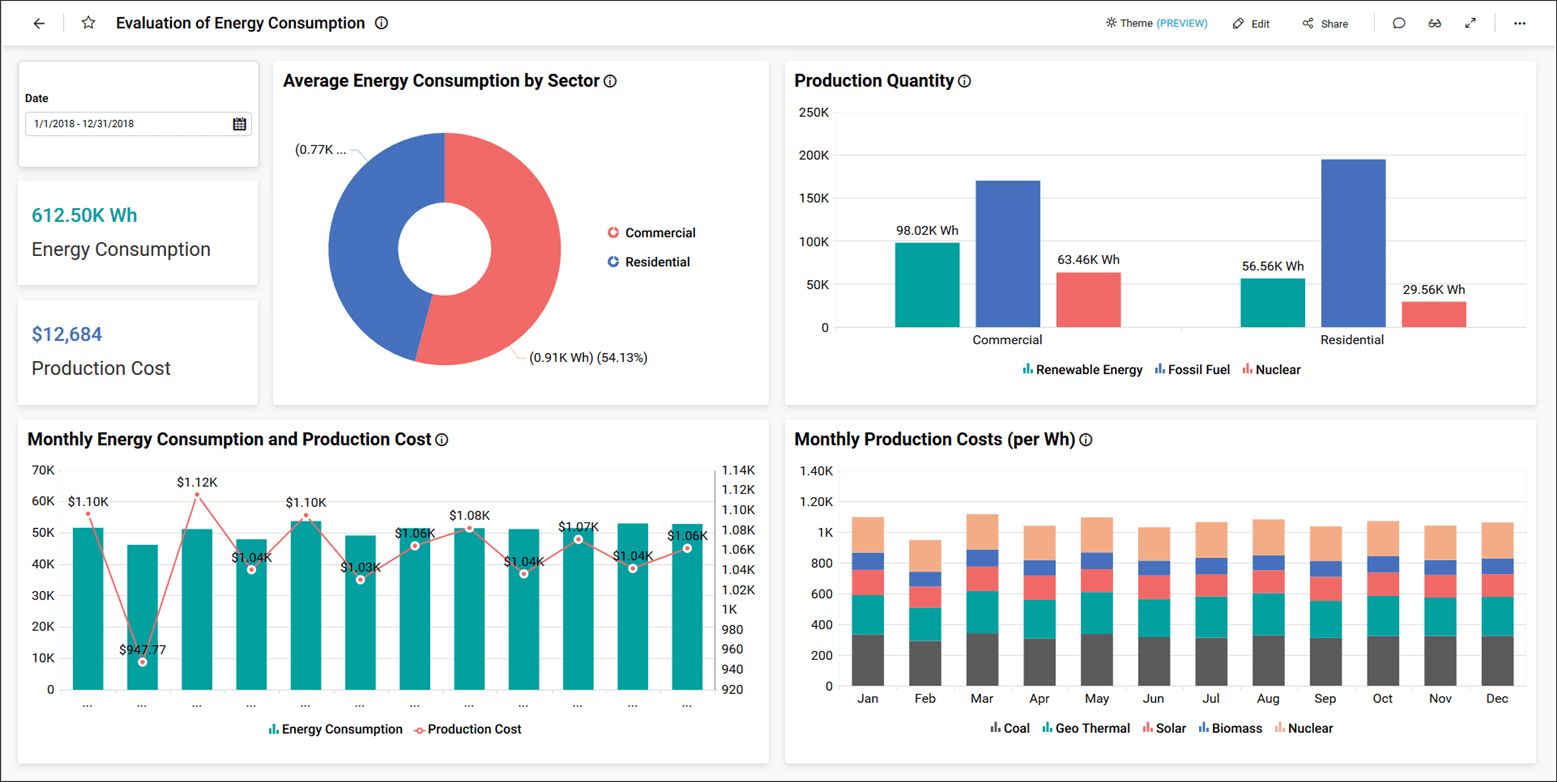
Note: Please refer to this Datasource connector page for instructions on creating a datasource using a custom attribute.
2. Data source Connection window
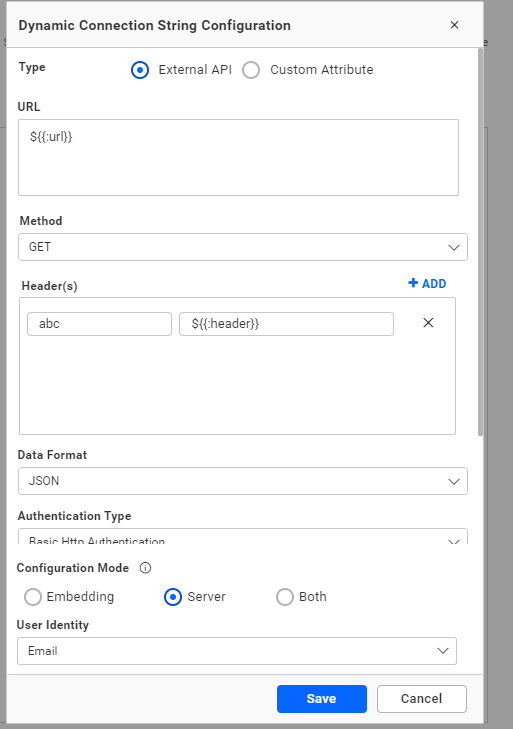
Custom attributes can be utilized within the Data Source Connection interface to set up the Dynamic Connection String interface for the External API.
SQL Data Sources Configuration
Configure the following properties:
- Username.
- Password.
- Servername.
- Port.
- Database.
- Maxrows.
- CommandTimeout.
- AdvancedSettings.
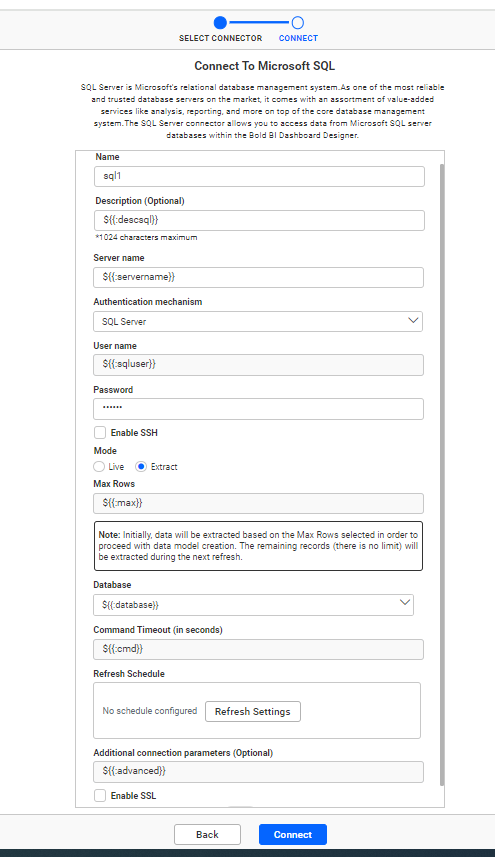
External API Dynamic Connection String Interface
Configure the following properties:
- URL.
- Header(s).
- Username.
- Password.
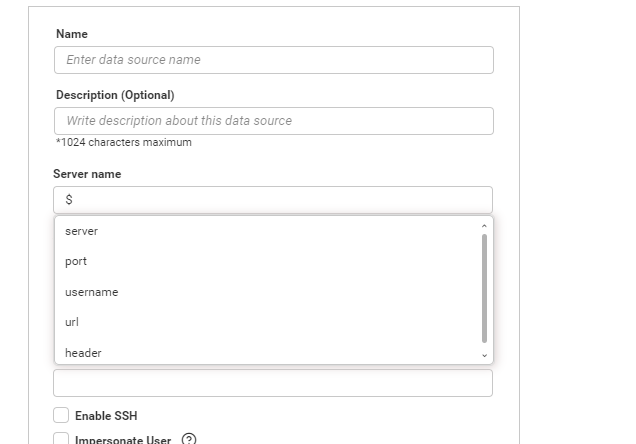
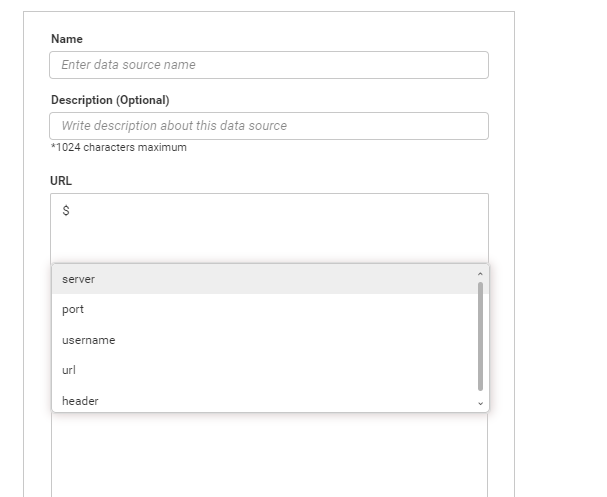
IntelliSense support has been implemented for custom attributes, allowing users to type ’$’ within the All SQL data source properties or web data source properties to display the custom attributes.
Note Custom attribute support is not available for connections using SSH or SSL modes.
WEB DataSources
Configure the following properties:
- URL.
- Header(s).
- Parameter(s).
- Raw.
- Username.
- Password.
- Servername.
- Database.
- APItokenbearer.
- Apikey.
- Hostname.
- Authtoken.
- Accesstoken.
- Authsecret.
- Authid.
- Accountid.
- AppId.
- Authentication.
- Sitetoken.
- Chainid.
- Cloudtoken.
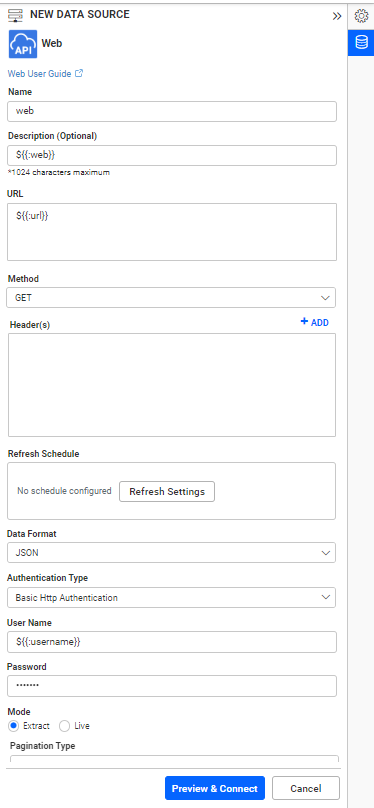
IntelliSense support has been implemented for custom attributes, allowing users to type ’$’ within the web data source properties to display the custom attributes.
Note Custom attribute support has been incorporated for both internal and external site publishing of data sources. Additional features for downloading and uploading have also been enabled.
When uploading a dashboard to a different site with a custom attribute, ensure that you create the same custom attribute name and its corresponding value.
Use the following syntax for the custom attribute.
Syntax: ${{:AttributeName}}
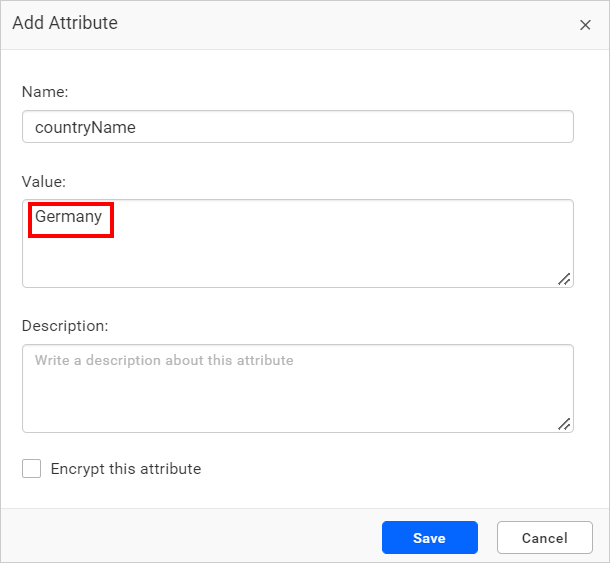
When a simple dashboard is created, the data is retrieved based on the condition for the column id as given in the custom attribute sectors.
3. Expression
We have provided custom attribute support for Expression. please refer Expression documentation.
Syntax: ${{:Custom Attribute Name}}
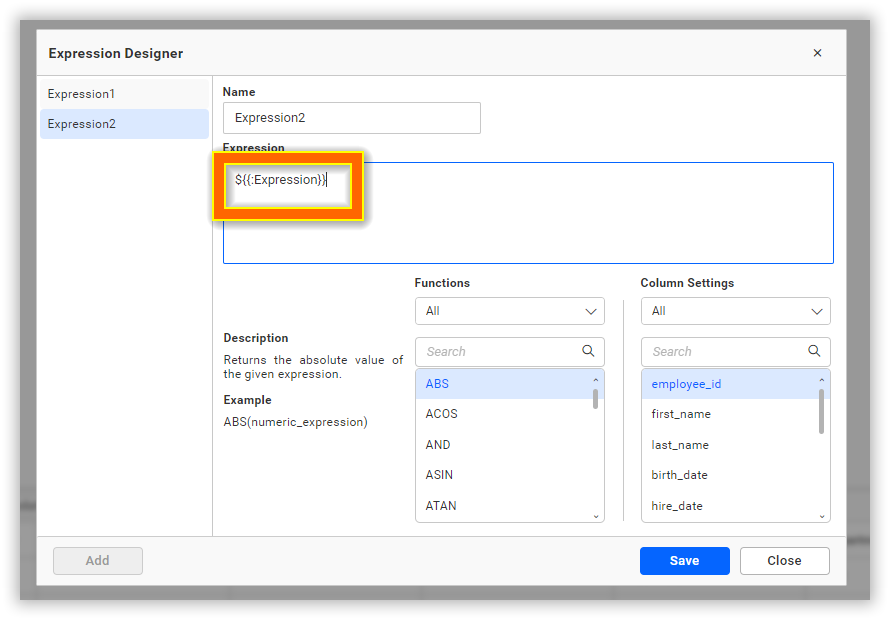
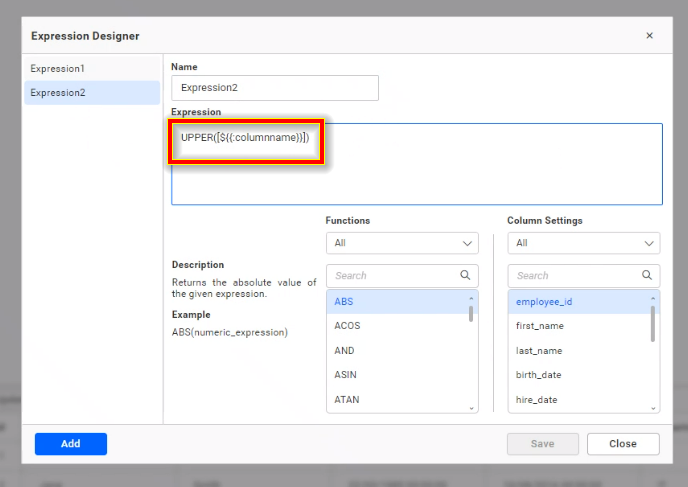
Note: Please refer to this Datasource connector page to create a datasource using a custom attribute.
4. Benefits:
- Be able to use the same connection string for creating/modifying multiple data sources with a single credential.
- Configure different connection strings for different users in both design and view modes of dashboards.
- Effortlessly move dashboards with different connection strings between various environments, such as development, staging, and production.
- Download and upload the same dashboards with varied data for different servers.
Publish dashboards across different tenants with different servers. 5. Create a single dashboard template and use it for multiple tenants with different source credentials seamlessly. 6. Maintain unique values for each user using user-level attributes. 7. Maintain common values for specific user groups using group-level attributes. 8. Maintain common values for all users at a site using site-level attributes.
Note
- The order of priority for custom attributes is as follows: user level = 1, group level = 2, site level = 3.
- When uploading a dashboard to another site or user level, ensure that the same custom attribute name is available at the new site or user level.
- When publishing a data source externally, verify that the same custom attribute name exists at the relevant site or user level.
- When granting access to User 1’s dashboard to User 2, ensure that the same custom attribute is available at the user level or site level.
Limitation
Do not allow the same custom attribute to be available in different groups if it is used in the data source.
