Bold BI Dashboards embedding in Django using Embedded SDK
A GitHub link has been provided to get the sample application, which demonstrates the rendering of the dashboard available on your Bold BI server. This is followed by steps to create a new embedding application in Django on your own.
NOTE: The best way to get started would be to read the Getting Started section of the documentation. The
Getting Startedguide provides you with enough information that you need to know before working on the sample.
Prerequisites
How to run the sample
-
Please get the Django sample from the attached file.
-
Please ensure that you have enabled embed authentication on the
embed settingspage. If it is not currently enabled, please refer to the following image or detailed instructions to enable it.
-
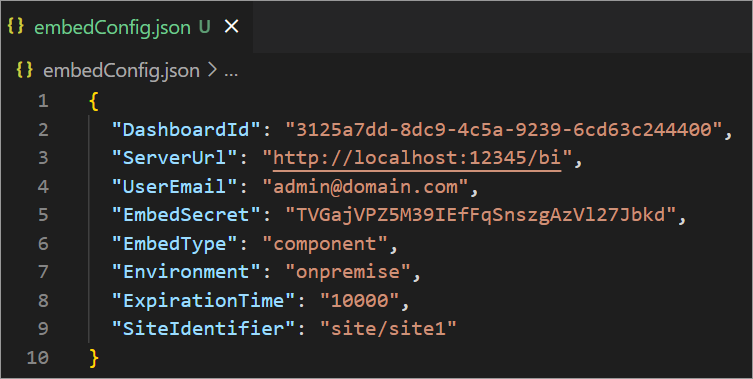
To download the
embedConfig.jsonfile, please follow this link for reference. Furthermore, you can refer to the accompanying image for visual guidance.
-
Please copy the downloaded
embedConfig.jsonfile and paste it into the designated location within the application. Make sure to place it in the application as shown in the following image.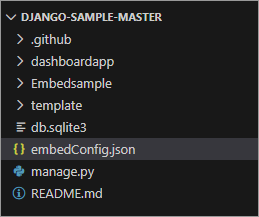
ServerUrl Dashboard Server BI URL (ex: http://localhost:5000/bi, http://demo.boldbi.com/bi) siteIdentifier For Bold BI Enterprise edition, it should be like site/site1. For Bold BI Cloud, it should be empty string.environment Your Bold BI application environment. (If it is cloud analytics server, use `BoldBI.Environment.Cloud`; if it is your own server, use `BoldBI.Environment.Enterprise`). DashboardId Item id of the dashboard to be embedded in your application. EmbedSecret Get your EmbedSecret key from the Embed tab by enabling the Enable embed authenticationin the Administration pageUserEmail UserEmail of the Admin in your Bold BI, which would be used to get the dashboards list. ExpirationTime Token expiration time. (In the EmbedConfig.json file, the default token expiration time is 10000 seconds). -
Open the folder in terminal in Visual Studio Code and execute the command
python manage.py runserverto run the application.
How this sample works
-
The
renderDashboardmethod will be invoked from thefetchEmbedAndLoad()function based on the configured embedConfig values in theindex.htmlfile.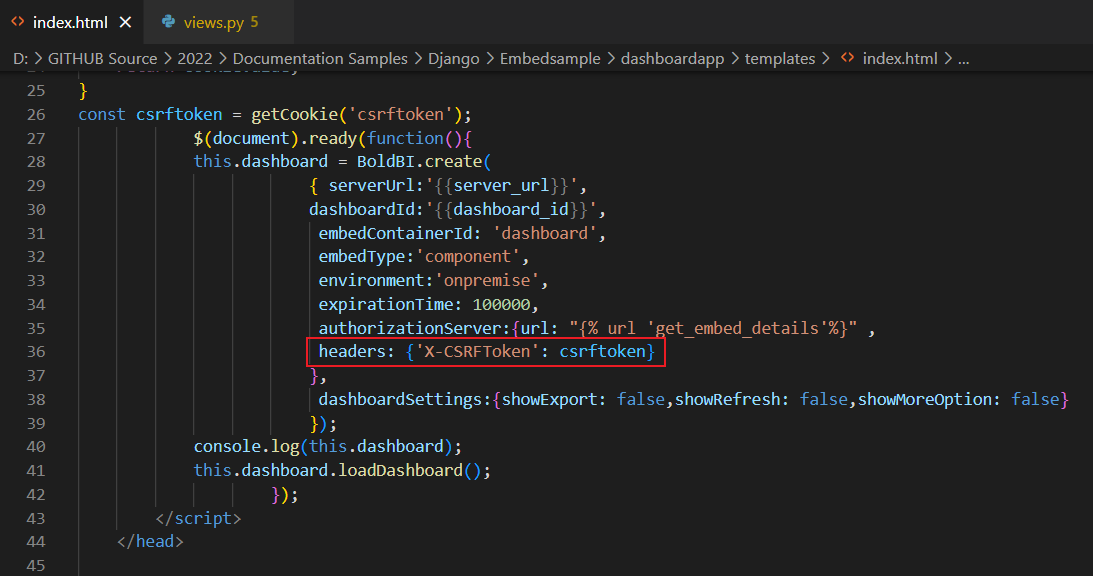
-
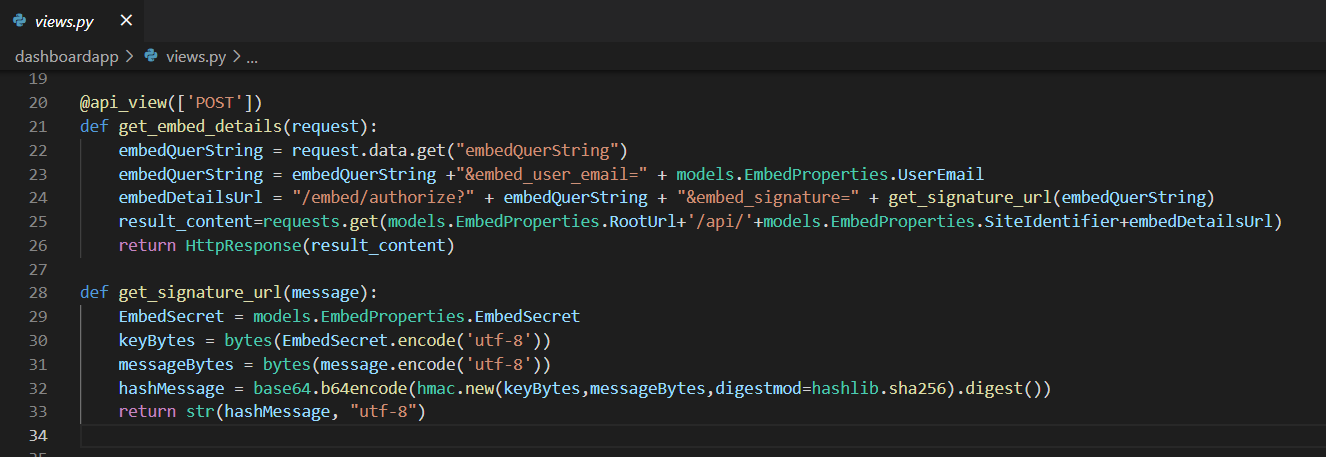
Before rendering, call the
tokenGenerationUrl, which redirects to theTokenGenerationaction in theviews.py. This action generates the access token using the providedembedDetails.
-
Once the token is generated, it will be returned to the
index.htmlfile and the dashboard will start to render it.