Embedding Bold BI Dashboards in Flutter using the Embedded SDK
A GitHub link is provided to access the sample application, demonstrating the rendering of a dashboard on your Bold BI server. Following are the steps to create your own embedding application in Flutter.
NOTE: Reading the Getting Started section of the documentation is the best way to begin. The
Getting Startedguide provides all the necessary information before working on the sample.
Prerequisites
To run the samples, you will need the following:
- VS Code
- Flutter SDK
- Node.js and npm
- Google Chrome(for Flutter web)
How to Run the Sample
-
Download the Flutter with JavaScript sample from GitHub.
-
Ensure you have enabled embed authentication on the
embed settingspage. If not, refer to instructions to enable it.
-
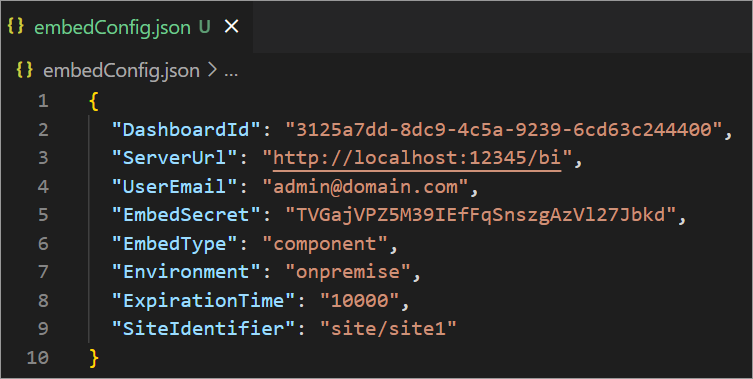
Download the
embedConfig.jsonfile by following this link. Refer to the image below for guidance.
-
Copy the downloaded
embedConfig.jsonfile and paste it into the designated location within the application.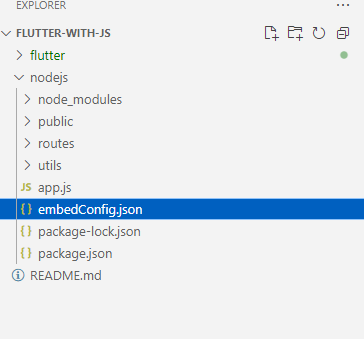
-
Navigate to the
nodejsbackend folder and install dependencies:cd nodejs npm install -
Start the server using the following command:
node app.jsNote: The server will run on port 8080. If you want to change the port, you can do so in the
app.jsfile. -
Navigate to the
flutterfolder and install dependencies:cd flutter-sample flutter pub get -
Ensure web support is enabled:
flutter devices -
Run the app with the following command to open it in Chrome:
flutter run -d chrome
How This Sample Works
-
In
api.js, the/getdetailsroute reads values fromembedConfig.jsonand provides them to the front-end as JSON. These values are used for initializing the BoldBI SDK.router.get('/getdetails', (req, res) => { const serverEmbedConfigData = path.join(__dirname, '../embedConfig.json'); const jsonData = fs.readFileSync(serverEmbedConfigData, 'utf8'); const parsedData = JSON.parse(jsonData); const clientEmbedConfigData = { DashboardId: parsedData.DashboardId, ServerUrl: parsedData.ServerUrl, SiteIdentifier: parsedData.SiteIdentifier, EmbedType: parsedData.EmbedType, Environment: parsedData.Environment }; res.send(clientEmbedConfigData); }); -
The
renderDashboard(dashboardId)function runs when the page loads, initializing theBoldBI.create()function with key parameters.function renderDashboard(dashboardId) { var dashboard = BoldBI.create({ serverUrl: ServerUrl + "/" + SiteIdentifier, dashboardId: dashboardId, embedContainerId: "dashboard", embedType: BoldBI.EmbedType.Component, mode: BoldBI.Mode.View, environment: Environment, expirationTime: 100000, authorizationServer: { url: apiUrl + "/authorizationserver" } }); dashboard.loadDashboard(); } -
The
authorizationserverroute constructs the embed signature using theEmbedSecretkey for secure communication.router.post('/authorizationserver', async (req, res) => { let embedQuerString = req.body.embedQuerString; const dashboardServerApiUrl = req.body.dashboardServerApiUrl; embedQuerString += "&embed_user_email=" + userEmail; embedQuerString += "&embed_server_timestamp=" + Math.round(Date.now() / 1000); const embedSignature = "&embed_signature=" + getSignatureUrl(embedQuerString, embedSecret); const embedDetailsUrl = "/embed/authorize?" + embedQuerString + embedSignature; const serverProtocol = url.parse(dashboardServerApiUrl).protocol === 'https:' ? https : http; serverProtocol.get(dashboardServerApiUrl + embedDetailsUrl, function(response) { let str = ''; response.on('data', function(chunk) { str += chunk; }); response.on('end', function() { res.send(str); }); }); }); -
The dashboard is securely embedded in the
#dashboardcontainer inindex.htmlafter successful token validation.<body onload="Init()"> <div id="viewer-section" style="width: 100%;"> <div id="dashboard"></div> </div> </body>
Steps to Create a New Flutter Application to Embed a Dashboard
-
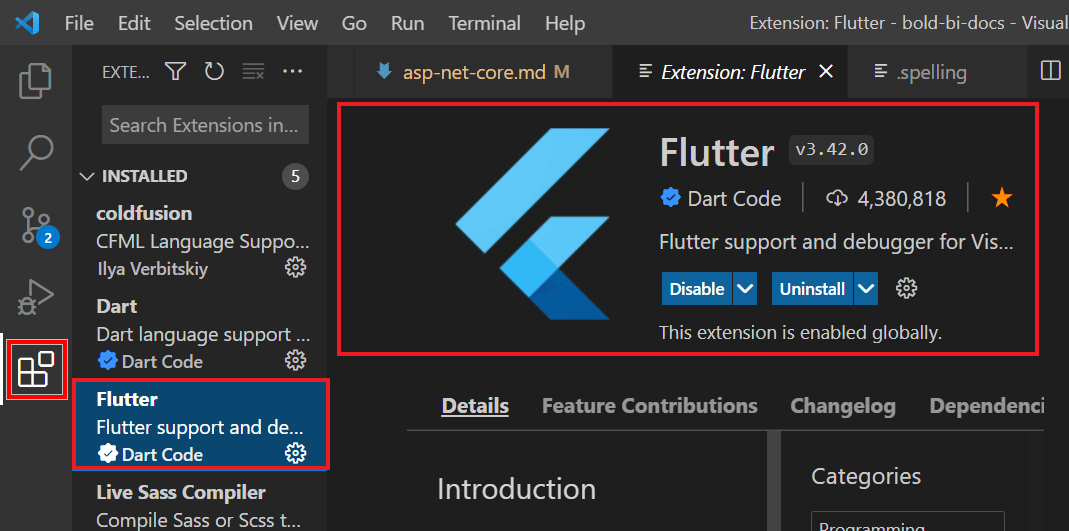
Install the
Flutterin the visual studio code.
-
Download Android Studio from the official website provided, download the Flutter SDK from the official website provided, and include the paths in the system environment variable.
-
Create a folder for this project in the desired location and open it in Visual Studio Code.
-
Create the Flutter folder, run a command in the Visual Studio terminal as
flutter create my_app. Here,my_appis the Flutter project name. Change the directory by running the commandcd my_app. -
In the
web/index.htmlfile of the Flutter project, include the following script in the<head>tag to load the BoldBI SDK:<script type="text/javascript" src="https://cdn.boldbi.com/embedded-sdk/latest/boldbi-embed.js"></script> -
In the
<body>tag, invoke theInit()method and define the viewer container as follows:<body onload="Init()"> <div id="viewer-section"> <div id="dashboard"></div> </div> </body>The
Init()method fetches dashboard configuration from the backend API and triggers the embedding:async function Init() { try { const res = await fetch('http://localhost:8080/api/getdetails'); const config = await res.json(); ServerUrl = config.ServerUrl; SiteIdentifier = config.SiteIdentifier; Environment = config.Environment; DashboardId = config.DashboardId; renderDashboard(DashboardId); } catch (err) { console.error('Error initializing embed:', err); } } -
Create an
Express.jsbackend (api.js) that exposes two endpoints: one for returning embed config and one for secure authentication:/api/getdetails: ReturnsDashboardId,ServerUrl,SiteIdentifier, and other info fromembedConfig.json./api/authorizationserver: Appends user email and timestamp to the query string, signs it usingEmbedSecret, and securely fetches the embed token from BoldBI.
const express = require('express'); const router = express.Router(); const fs = require('fs'); const url = require('url'); const http = require('http'); const https = require('https'); const path = require('path'); const { getSignatureUrl } = require('../utils/signature'); let appconfig = JSON.parse(fs.readFileSync(path.join(__dirname, '../embedConfig.json'))); const embedSecret = appconfig.EmbedSecret; const userEmail = appconfig.UserEmail; router.post('/authorizationserver', async (req, res) => { let embedQuerString = req.body.embedQuerString; const dashboardServerApiUrl = req.body.dashboardServerApiUrl; embedQuerString += "&embed_user_email=" + userEmail; embedQuerString += "&embed_server_timestamp=" + Math.round(Date.now() / 1000); const embedSignature = "&embed_signature=" + getSignatureUrl(embedQuerString, embedSecret); const embedDetailsUrl = "/embed/authorize?" + embedQuerString + embedSignature; const serverProtocol = url.parse(dashboardServerApiUrl).protocol === 'https:' ? https : http; serverProtocol.get(dashboardServerApiUrl + embedDetailsUrl, function (response) { let str = ''; response.on('data', chunk => str += chunk); response.on('end', () => res.send(str)); }); }); router.get('/getdetails', (req, res) => { const config = { DashboardId: appconfig.DashboardId, ServerUrl: appconfig.ServerUrl, SiteIdentifier: appconfig.SiteIdentifier, EmbedType: appconfig.EmbedType, Environment: appconfig.Environment }; res.send(config); }); module.exports = router; -
In the
renderDashboard()function (insideindex.html), call the backend authorization route to authenticate and embed the dashboard:function renderDashboard(dashboardId) { var dashboard = BoldBI.create({ serverUrl: ServerUrl + "/" + SiteIdentifier, dashboardId: dashboardId, embedContainerId: "dashboard", embedType: BoldBI.EmbedType.Component, mode: BoldBI.Mode.View, expirationTime: 100000, environment: Environment, authorizationServer: { url: 'http://localhost:8080/api/authorizationserver' } }); dashboard.loadDashboard(); } -
Now, run the backend server using
node app.jsand execute the Flutter web app using the command:flutter run -d chrome