Bold BI Dashboards embedding in Node.js using Embedded SDK
A GitHub link has been provided to get the sample application, which demonstrates the rendering of the dashboard available on your Bold BI server. This is followed by steps to create a new embedding application in Node.js on your own.
NOTE: The best way to get started would be to read the Getting Started section of the documentation first. The
Getting Startedguide provides you with enough information that you need to know before working on the sample.
Prerequisites
NOTE: Node.js versions 18.18 to 20.15 are supported.
How to run the sample
-
Please get the Node.js sample from GitHub.
-
Please ensure that you have enabled embed authentication on the
embed settingspage. If it is not currently enabled, please refer to the following image or detailed instructions to enable it.
-
To download the
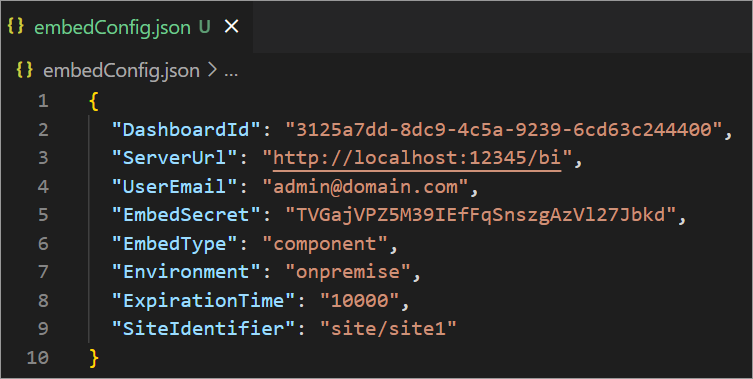
embedConfig.jsonfile, please follow this link for reference. Furthermore, you can refer to the accompanying image for visual guidance.
-
Please copy the downloaded
embedConfig.jsonfile and paste it into the designated location within the application. Make sure to place it in the application as shown in the following image.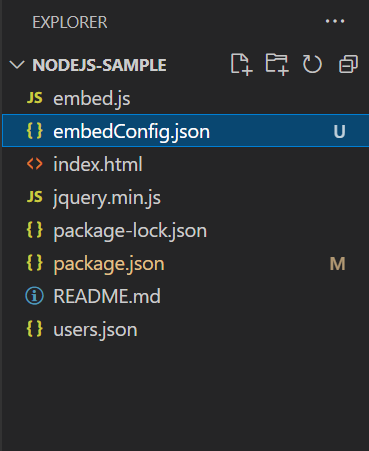
ServerUrl Dashboard Server BI URL (ex: http://localhost:5000/bi, http://demo.boldbi.com/bi) siteIdentifier For Bold BI Enterprise edition, it should be like site/site1. For Bold BI Cloud, it should be empty string.environment Your Bold BI application environment. (If it is cloud analytics server, use `BoldBI.Environment.Cloud`; if it is your own server, use `BoldBI.Environment.Enterprise`). DashboardId Item id of the dashboard to be embedded in your application. EmbedSecret Get your EmbedSecret key from the Embed tab by enabling the Enable embed authenticationin the Administration pageUserEmail UserEmail of the Admin in your Bold BI, which would be used to get the dashboards list. ExpirationTime Token expiration time. (In the EmbedConfig.json file, the default token expiration time is 10000 seconds). -
To install all the necessary packages, please use the following command.
npm install -
To run the samples, please use the following command.
node tokengeneration.js
How this sample works
-
To generate an access token, call the
TokenGenerationAPI (http://localhost:8080/TokenGeneration) with the providedembedConfigvalues.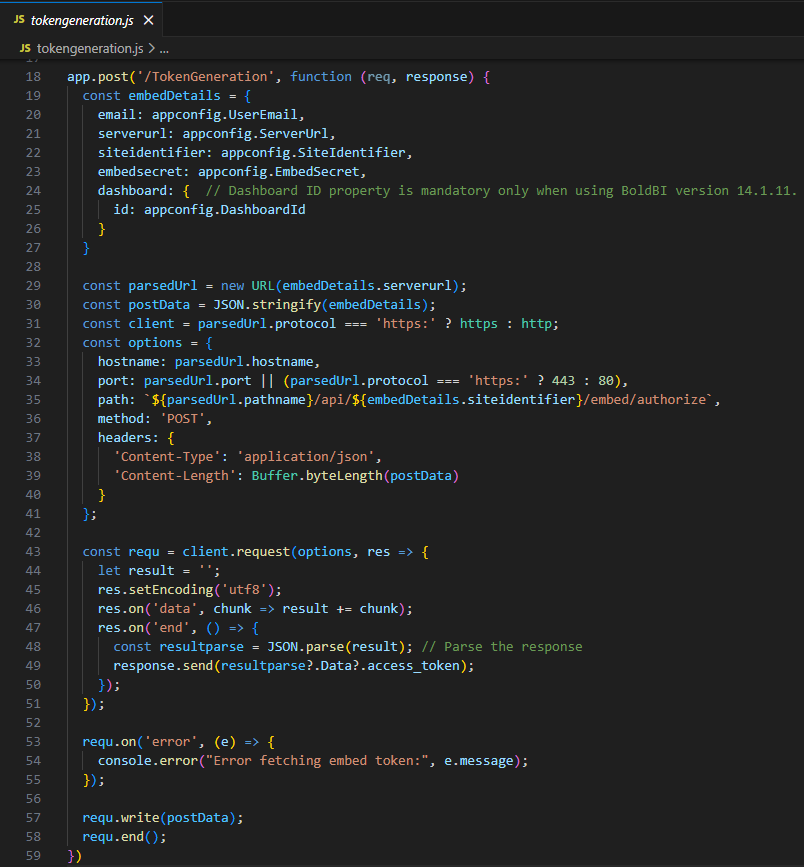
-
Once the token is generated, it will be returned to the
index.htmlfile and the dashboard will start to render it.
Steps to create new Node.js application to embed dashboard
-
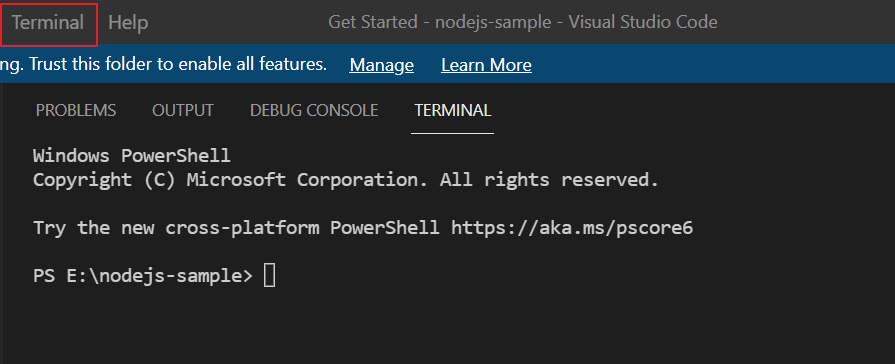
Create a folder in the desired location and open it in Visual Studio Code.
-
Open the terminal in Visual Studio Code. Please refer to the following image.
-
Please ensure that you have enabled embed authentication on the
embed settingspage. If it is not currently enabled, please refer to the following image or detailed instructions to enable it. -
To download the
embedConfig.jsonfile, please follow this link for reference. Additionally, you can refer to the following image for visual guidance.
-
Please copy the downloaded
embedConfig.jsonfile and paste it into the designated location within the application. Make sure you have placed it in the application exactly as shown in the following image.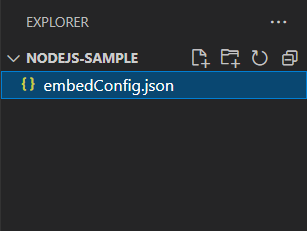
-
Create a
JavaScriptfile namedembed.jsand anhtmlfile namedindex.html. -
In the
tag. The tag initializes theindex.htmlfile, refer to the mandatory file in theembedSample()method, and the DOM element with thedashboardid is created in the<div>tag where the required dashboard will be rendered.<head> <script type="text/javascript" src="https://cdn.boldbi.com/embedded-sdk/v16.1.70/boldbi-embed.js"></script> </head> <body onload="embedSample();"> <div id="dashboard"></div> </body> -
In the
<script>tag, define the required properties as follows:<script> //For Bold BI Enterprise edition, it should be like `site/site1`. For Bold BI Cloud, it should be empty string. var siteIdentifier = configjson.SiteIdentifier; //Your Bold BI application environment. (If Cloud, you should use `cloud`, if Enterprise, you should use `enterprise`) var environment = configjson.Environment; var embedType = configjson.EmbedType; //Item id of the dashboard in the Bold BI server` var dashboardId = configjson.DashboardId; //Bold BI Server URL (ex: http://localhost:5000/bi, http://demo.boldbi.com/bi) var rootUrl = configjson.ServerUrl; //Url of the GetDetails(API) in this application var authorizationUrl="http://localhost:8080/embeddetail/get"; function embedSample() { var boldbiEmbedInstance = BoldBI.create({ serverUrl: rootUrl + "/" + siteIdentifier,//Dashboard Server BI URL (ex: http://localhost:5000/bi/site/site1, http://dashboard.syncfusion.com/bi/site/site1) dashboardId: dashboardId, //Item id of the dashboard in BI server. embedContainerId: "dashboard", // This should be the container id where you want to embed the dashboard. embedType: embedType, environment: environment, // If Cloud, you should use BoldBI.Environment.Cloud mode: BoldBI.Mode.View, height: "800px", width: "1200px", authorizationServer: { url: "http://localhost:8080/embeddetail/get" //Url of the GetDetails(API) in this application. }, expirationTime: "100000", //Set the duration for the token to be alive. }); boldbiEmbedInstance.loadDashboard(); } </script> -
In the
javascriptfile, create an API/embeddetail/getthat utilizes theGetSignatureUrl()method to generate the algorithm. In this API, append theembedQuerString,userEmailand the value from theGetSignatureUrl()method as query parameters in the URL to retrieve details of a specific dashboard.var express = require('express'); var app = express(); var url = require("url"); var cors = require('cors'); var fs = require("fs"); app.use(cors()); var http = require("http"); var https = require("https"); var crypto = require('crypto'); // Parse JSON bodies (as sent by API clients) app.use(express.json()); var appconfig = JSON.parse(fs.readFileSync('embedConfig.json')); // Get the embedSecret key from Bold BI var embedSecret = appconfig.EmbedSecret; var configjson ={"DashboardId": appconfig.DashboardId, "ServerUrl": appconfig.ServerUrl, "SiteIdentifier": appconfig.SiteIdentifier, "Environment": appconfig.Environment, "EmbedType": appconfig.EmbedType}; //Enter your BoldBI credentials here var userEmail = appconfig.UserEmail; app.post('/embeddetail/get', function (req, response) { var embedQuerString = req.body.embedQuerString; var dashboardServerApiUrl = req.body.dashboardServerApiUrl; embedQuerString += "&embed_user_email=" + userEmail; embedQuerString += "&embed_server_timestamp=" + Math.round((new Date()).getTime() / 1000); var embedSignature = "&embed_signature=" + GetSignatureUrl(embedQuerString); var embedDetailsUrl = "/embed/authorize?" + embedQuerString+embedSignature; var serverProtocol = url.parse(dashboardServerApiUrl).protocol == 'https:' ? https : http; serverProtocol.get(dashboardServerApiUrl+embedDetailsUrl, function(res){ var str = ''; res.on('data', function (chunk) { str += chunk; }); res.on('end', function () { response.send(str); }); }); }) function GetSignatureUrl(queryString) { var keyBytes = Buffer.from(embedSecret); var hmac = crypto.createHmac('sha256', keyBytes); data = hmac.update(queryString); gen_hmac= data.digest().toString('base64'); return gen_hmac; } app.get("/",function (request, response) { var pathname = url.parse(request.url).pathname; console.log("Request for " + pathname + " received."); response.writeHead(200); if(pathname == "/") { html = fs.readFileSync("index.html", "utf8"); html = html.replace("<script>","<script>var configjsonstring='"+JSON.stringify(configjson)+"';var configjson=JSON.parse(configjsonstring);"); response.write(html); } response.end(); }) var server = app.listen(8080, function () { var host = server.address().address var port = server.address().port console.log("Example app listening at http://%s:%s", host, port) }) -
Create a new file and name it
package.json. It is essential to install thepackageslisted in the following dependencies section.{ "name": "NodeJS", "version": "", "description": "", "main": "embed.js", "dependencies": { "cors": "", "express": "", "utf8-bytes": "" } } -
Please run the following commands in the terminal:
npm install,npm install express,npm install corsandnpm install utf8-bytes. -
To run the sample, execute the following command.
node embed.js -
Once you execute the command above, the sample will be hosted at
http://localhost:8080/.