Embedding Bold BI Dashboards in PHP using the Embedded SDK
A GitHub link has been provided to get get the sample application, which demonstrates the rendering of the dashboard available on your Bold BI server. After that, there are steps to create a new embedding application in PHP on your own.
NOTE: Reading the Getting Started section of the documentation is the best way to begin. The
Getting Startedguide provides you with enough information that you need to know before working on the sample.
How to run the sample
-
Please get the PHP sample.
-
Please ensure that you have enabled embed authentication on the
embed settingssettings page. If it is not currently enabled, please refer to the provided image or detailed instructions to enable it.
-
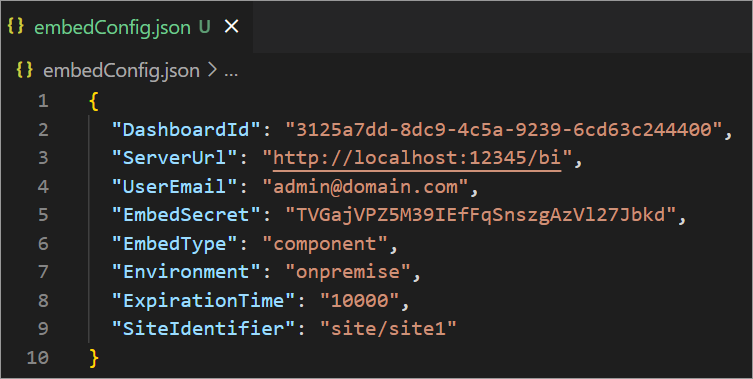
To download the
embedConfig.jsonfile, please follow this link for reference. Additionally, you can refer to the image below for visual guidance.
-
Please copy the downloaded
embedConfig.jsonfile and paste it into the designated location within the application. Make sure that you have placed it correctly in the application, as shown in the image.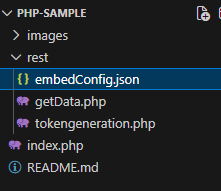
ServerUrl Dashboard Server BI URL (ex: http://localhost:5000/bi, https://demo.boldbi.com/bi) SiteIdentifier For the Bold BI Enterprise edition, it should be like site/site1. For Bold BI Cloud, it should be an empty string. UserEmail UserEmail of the Admin in your Bold BI, which would be used to get the dashboard list. EmbedSecret Get your EmbedSecret key from the Embed tab by enabling the Enable embed authenticationin the Administration pageEnvironment Your Bold BI application environment. (If it is a cloud analytics server, use `BoldBI.Environment.Cloud`; if it is your server, use `BoldBI.Environment.Enterprise`) DashboardId Item ID of the dashboard to be embedded in your application. ExpirationTime Token expiration time. (In the EmbedConfig.json file, the default token expiration time is 10000 seconds) -
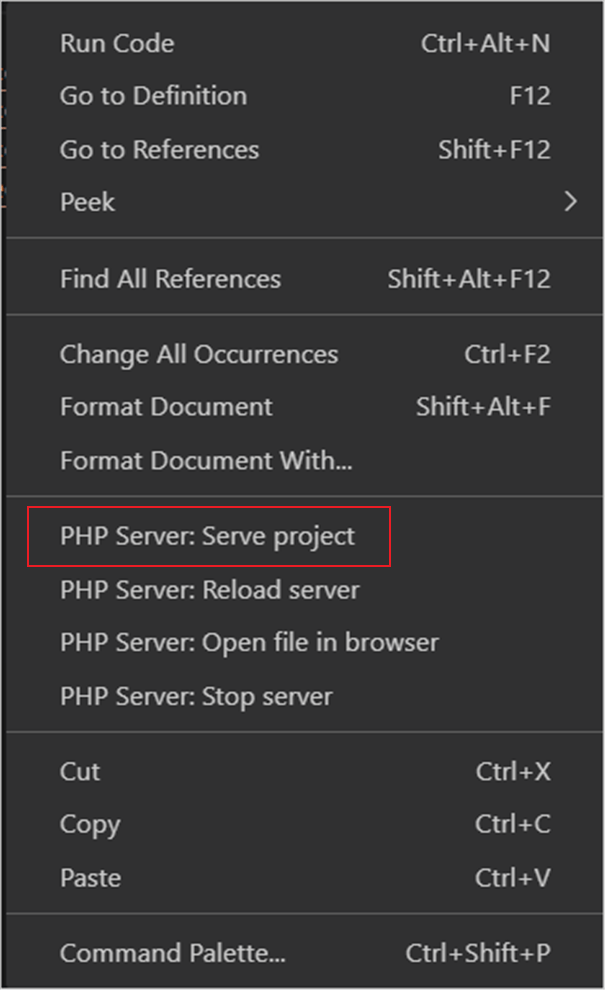
To run sample in
Visual Studio Code, Right-click theindex.phpfile and selectPHP Server: Serve project. -
The dashboard can be edited in design mode, allowing users to create a new dashboard with the following changes in the
renderDashboard()method.dashboardId Provide the dashboard ID of the dashboard you want to embed in view or edit mode. Ignore this property to create a new dashboard. mode In which mode do you want to render the dashboard? It can either be 'BoldBI.Mode.View' or 'BoldBI.Mode.Design' mode. embedToken Provide the access token which you get from the 'TokenGeneration' API action in the application.
How this sample works
-
To generate an access token, call the
tokengeneration.phpwith the providedembedConfigvalues.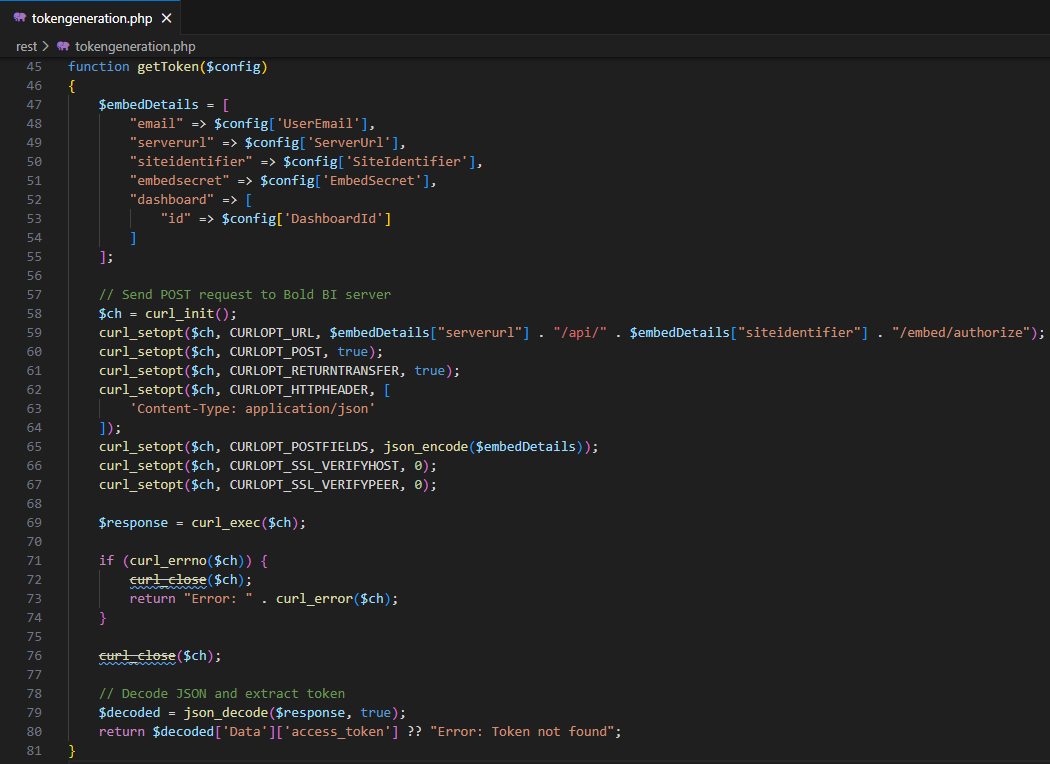
-
Once the token is generated, it will be returned to the
index.phpfile and the dashboard will start to render it.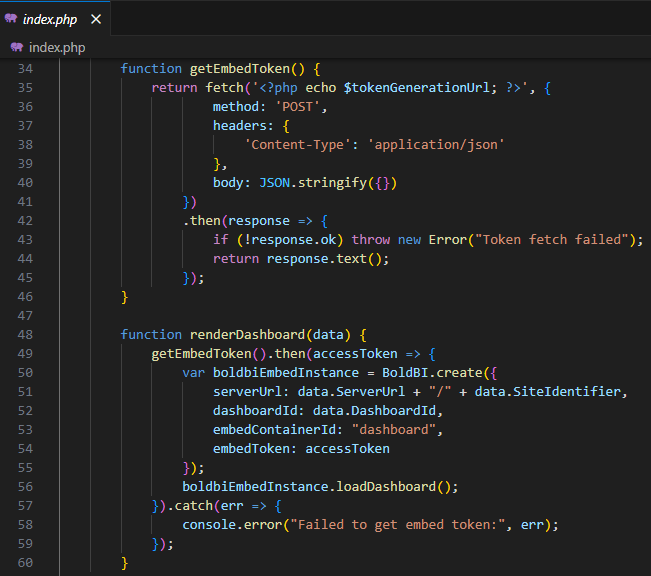
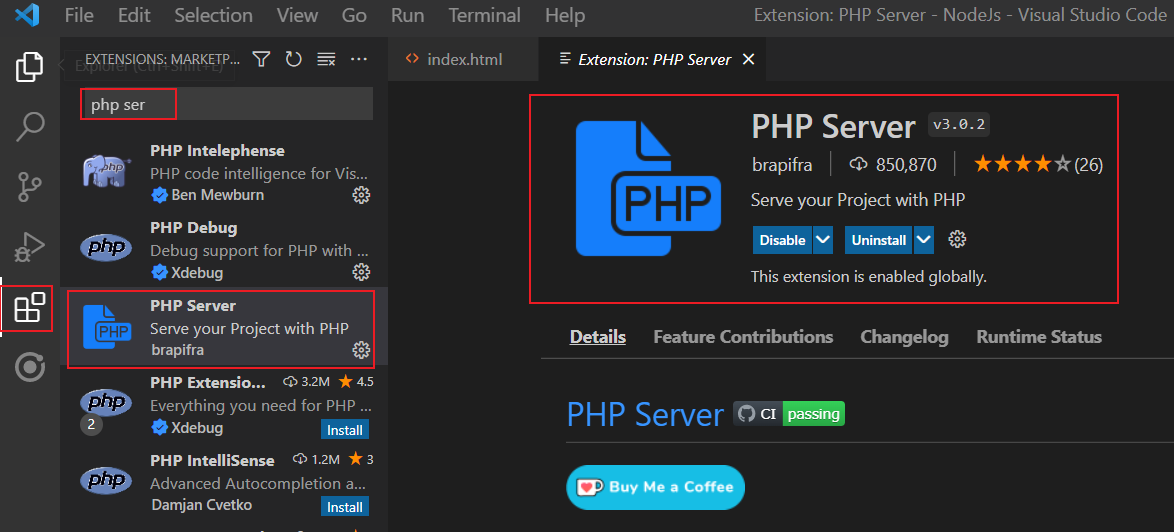
Steps to create new PHP application to embed dashboard
-
To install the
PHP IntelephenseandPHP Serverextensions in Visual Studio Code.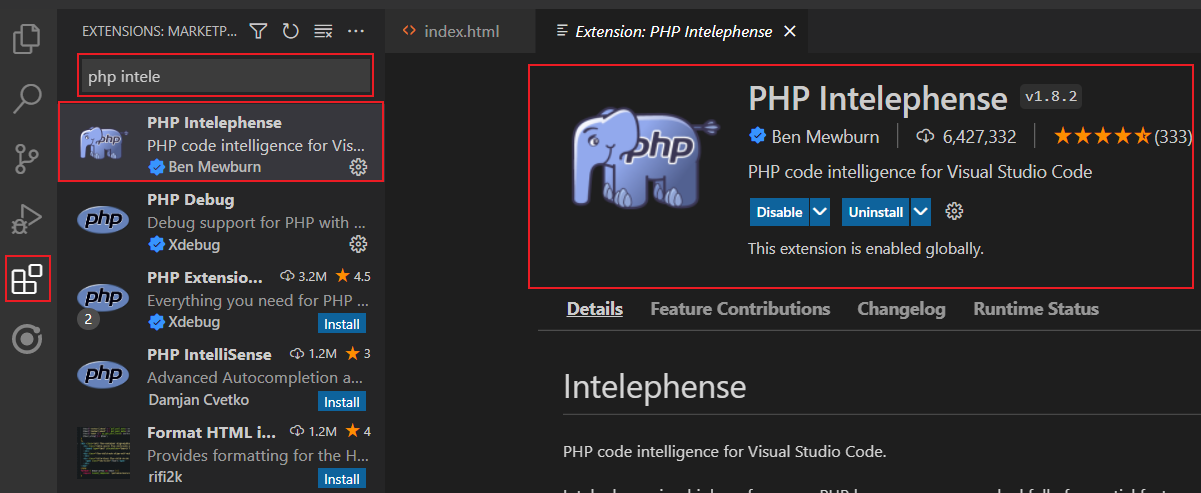
-
Download the PHP from the official website mentioned below and include the path in the system environment variable.
-
In the desired location, create a folder for this project and open it in Visual Studio Code.
-
Create an
index.phpfile inside the folder and define variables as follows.<?php // The ServerURL, DashboardPath, and AuthorizeSeverURL to embed the widget. $serverUrl = "http://localhost:55106/bi/site/site1"; $dashboardId ="a3042415-5c57-4f66-b475-8502be4987e8"; $authorizeServerUrl = "http://localhost:8070/boldbi/dashboard/rest/authorizeserver.php"; ?> -
Refer to the mandatory CDN file in the
<head>tag as follows.<script type="text/javascript" src="https://cdn.boldbi.com/embedded-sdk/v15.2.6/boldbi-embed.js"></script> -
In the
<body>tag, create the DOM element with the iddashboardand initialize theembedSample()method. TheembedSample()method is implemented in the<script>tag as follows.<div id="dashboard"> </div> <script> function embedSample() { var dashboardemb = BoldBI.create({ serverUrl: '<?php echo $serverUrl;?>', //Dashboard Server BI URL (ex: http://localhost:5000/bi/site/site1, http://demo.boldbi.com/bi/site/site1) dashboardId: '<?php echo $dashboardId;?>', //Dashboard id of the dashboard you want to embed here. embedContainerId: "dashboard", embedType: BoldBI.EmbedType.Component, environment: BoldBI.Environment.Enterprise, // If Cloud, you should use BoldBI.Environment.Cloud mode: BoldBI.Mode.View, height: "700px", width: "1500px", authorizationServer: { url: '<?php echo $authorizeServerUrl;?>' //URL from which particular dashboard details is obtained from server. }, expirationTime: "100000", //Set the duration for the token to be alive. }); dashboardemb.loadDashboard(); } </script> -
Create a file named
authorizeserver.phpinside a folder calledrest, and define the variablessecretCodeanduserEmailfor authorization purposes.$secretCode = "";// Use your SecretCode here. $userEmail = ""; // Email address of the user. $data = json_decode(file_get_contents('php://input'), true); // Getting the embedQuerString and dashboardServerApiUrl from the BoldBI wrapper if ($data != null && $data["embedQuerString"] !="" && $data["dashboardServerApiUrl"]!="") { $embedQuerString = $data["embedQuerString"]; $dashboardServerApiUrl= $data["dashboardServerApiUrl"]; $dashdetails = GetEmbedDetails($embedQuerString, $dashboardServerApiUrl); header('Content-type: application/json'); echo json_encode($dashdetails); } // This function used to get dashboard details from the Bold BI Server. function GetEmbedDetails($embedQuerString, $dashboardServerApiUrl){ global $userEmail; $embedQuerString = $embedQuerString . "&embed_user_email=" . $userEmail. "&embed_datasource_filter=[{&&StoreName=Trousers','Jackets}]"; $embedSignature = "&embed_signature=" . getSignatureUrl($embedQuerString); //echo $embedSignature; $embedDetailsUrl = "/embed/authorize?" . $embedQuerString . $embedSignature; //echo $dashboardServerApiUrl . $embedDetailsUrl; $curl = curl_init(); curl_setopt_array($curl, array( CURLOPT_URL => $dashboardServerApiUrl . $embedDetailsUrl, CURLOPT_RETURNTRANSFER => true, CURLOPT_TIMEOUT => 50000, CURLOPT_HTTP_VERSION => CURL_HTTP_VERSION_1_1, CURLOPT_CUSTOMREQUEST => "GET", CURLOPT_HTTPHEADER => array( "Content-Type: application/json" ), )); $response = curl_exec($curl); $err = curl_error($curl); curl_close($curl); return $response; } //// Prepare embed_Signature by encrypting with secretCode //// function getSignatureUrl($embedQuerString) { global $secretCode; $keyBytes = utf8_encode($secretCode); $messageBytes = utf8_encode($embedQuerString); $hashMessage = hash_hmac('sha256',$messageBytes, $keyBytes, true); $signature = base64_encode($hashMessage); return $signature; } -
To obtain specific dashboard details, you should implement the
GetDetails()function, which utilizes theGetSignatureUrl()method to generate the algorithm. In this API, theembedQuerString,userEmail, and the value from theGetSignatureUrl()method are appended as query parameters in the URL to retrieve the details of a specific dashboard. -
Now, right-click and select the
PHP Server: Server project.