This document explains how to add the localization file in version 4.2.69 or below. To add localization files in Bold BI from version 5.1.55.
Localization Support in Bold BI Application
Localization is the process of adapting a website into different linguistic and cultural contexts, involving much more than the simple translation of the text.
By default, Bold BI application is available in English (en-US) localization.
Refer to the following documentation to add a new localization and to edit the existing localization.
How to generate the localization file for another language
We can generate the locale files in two ways as follows:
- Manual edit
- Auto-generate using online tools
Follow these common steps for both ways:
-
Create a new folder inside the locale folder, which is present in the Bold BI application in the following location.
Check the following location for Bold BI version 4.1.36 or later.
NOTE: By default, Bold BI is deployed in the
C:\BoldServiceslocation for Windows.
| Application | Location |
|---|---|
| Idp | {Deployed Location}\idp\web\locale |
| Ums | {Deployed Location}\idp\ums\locale |
| Bi | {Deployed Location}\bi\web\locale |
| BiDesigner | {Deployed Location}\bi\dataservice\locale |
Check the following location for Bold BI Linux server.
NOTE: By default, Bold BI is deployed in the
/var/www/bold-services/applicationlocation for Linux.
| Application | Location |
|---|---|
| Idp | /var/www/bold-services/application/idp/web/locale |
| Ums | /var/www/bold-services/application/idp/ums/locale |
| Bi | /var/www/bold-services/application/bi/web/locale |
| BiDesigner | /var/www/bold-services/application/bi/dataservice/locale |
Check the following location for Bold BI version below 4.1.36.
NOTE: By default, Bold BI is deployed in
C:\Bold BI.
| Application | Location |
|---|---|
| IDP | {Deployed Location}\IDP\locale |
| UMS | {Deployed Location}\IDP\UMS\locale |
| Dashboard Server | {Deployed Location}\Dashboard Server\locale |
| Dashboard Designer | {Deployed Location}\Dashboard Designer\locale |
-
Specify the folder name in the locale language code for the language you wish to generate the localization file for.
-
In this case, a folder named
fr-frwas created, which corresponds to the French language code.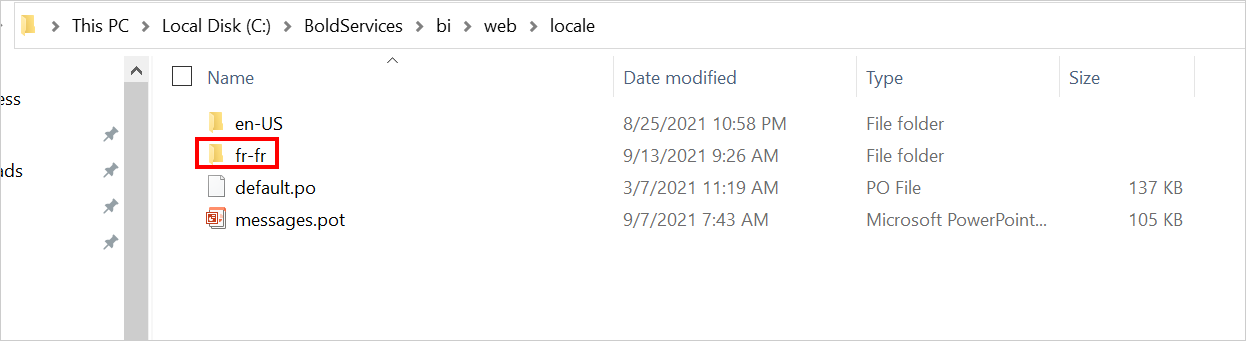
Manual edit
- Copy the
default.pofile in the locale folder and paste it into the newly created folder. Then, change the name of the file tomessages.po.
Within this file, there are two variables present: msgid and msgstr.
msgid - It contains the product content in the default language.
msgstr - The field is empty and it displays the translated language.
-
Convert the content in the
msgidinto the equivalent language of the localization support that you want. Replace this converted content into the empty string inmsgtr. -
Change the locale language code at the top of the
messages.pofile.
The sample converted locale file will appear as follows.

Auto-generate using any tools
-
Use the online site to generate the localization file.
-
Browse to select the
default.pofile in the locale folder.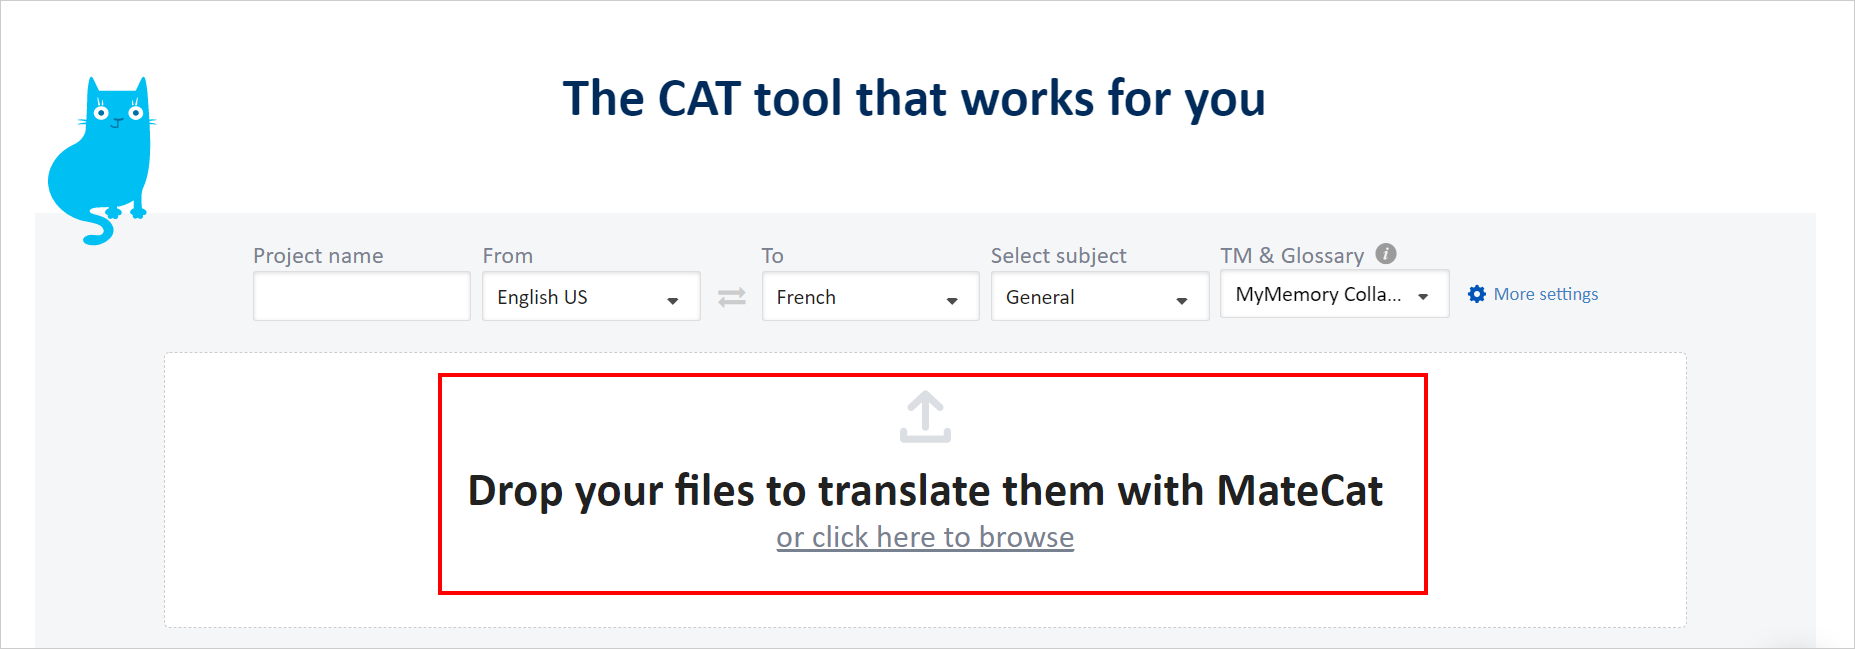
-
Change the language in the
TOoption to the language in which you want to generate the localization file
-
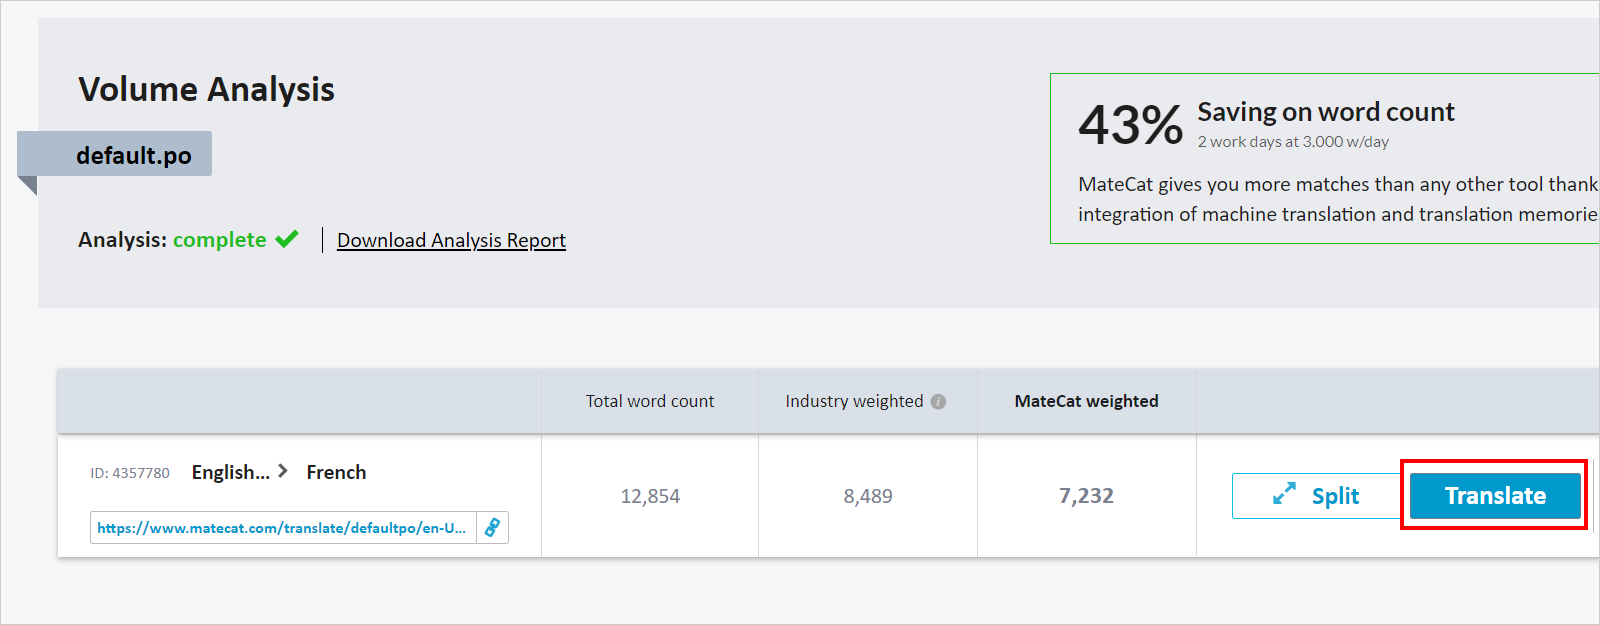
Select the
Analyzeoption and then clickTranslate.
-
At the top of the page, there is an icon for downloading the file. Use it to download the file.

-
Change the downloaded file name to
messages.poand paste it into the newly created localize folder.
NOTE: You will need to run the locale utility for Bold BI version 4.2.68 or later
How to generate the locale JS file
-
Download the Locale Utility Once the download is completed, extract the
.zipfile. -
Open the
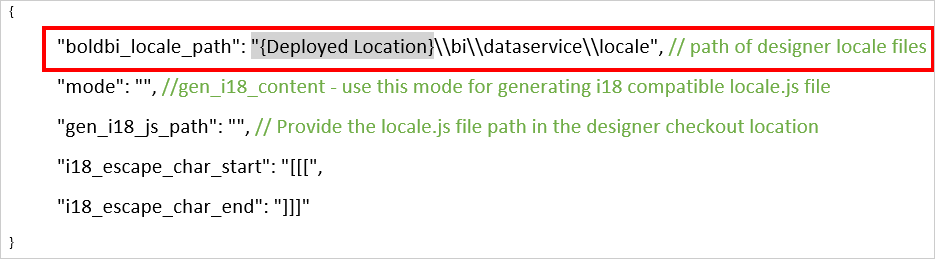
appsettings.jsonfile in an editor and modify theboldbi_custom_locale_pathto the deployed path of the designer locale files.
- Run the
BoldBI.Locale.Utility.exefile.
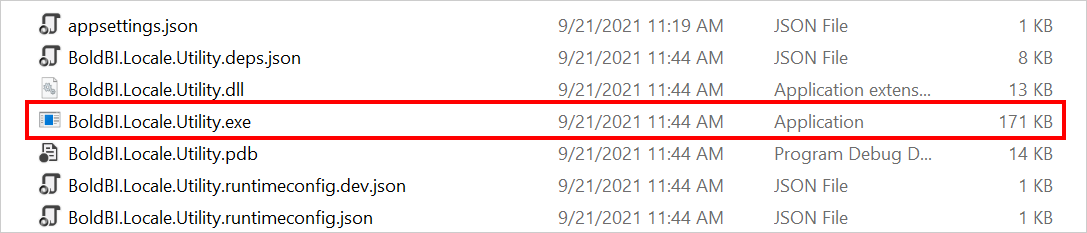
- Once you have run the utility, a
locale.jsfile will be generated in the newly created localize folder path of the designer locale.
Where to change the localization in application
Global language settings
In the Bold UMS application, you can set the global language. This language is applied to UMS, IDP, and Dashboard Server when no language is selected in site settings or user preference settings.
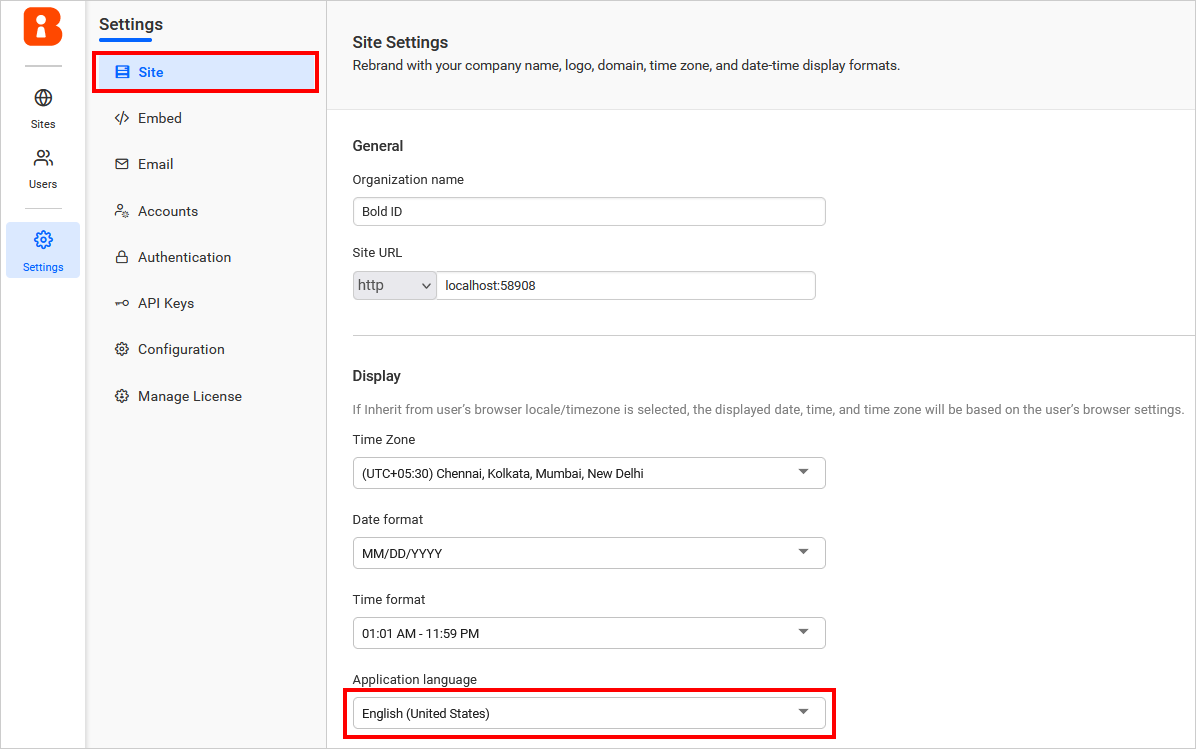
Site language settings
Change the localization in the site settings page. By default, site language settings inherit the language from global language settings. If you want to change the language, you can change it to the desired language.
Admin can enforce this language for all users. If the admin enforces this language, then user preference settings are disabled.

User preference settings
Users can set their language preference in the profile page. By clicking the Update application language details through your account link on the profile page, they will be redirected to the IDP profile page where they can set their own language preference.
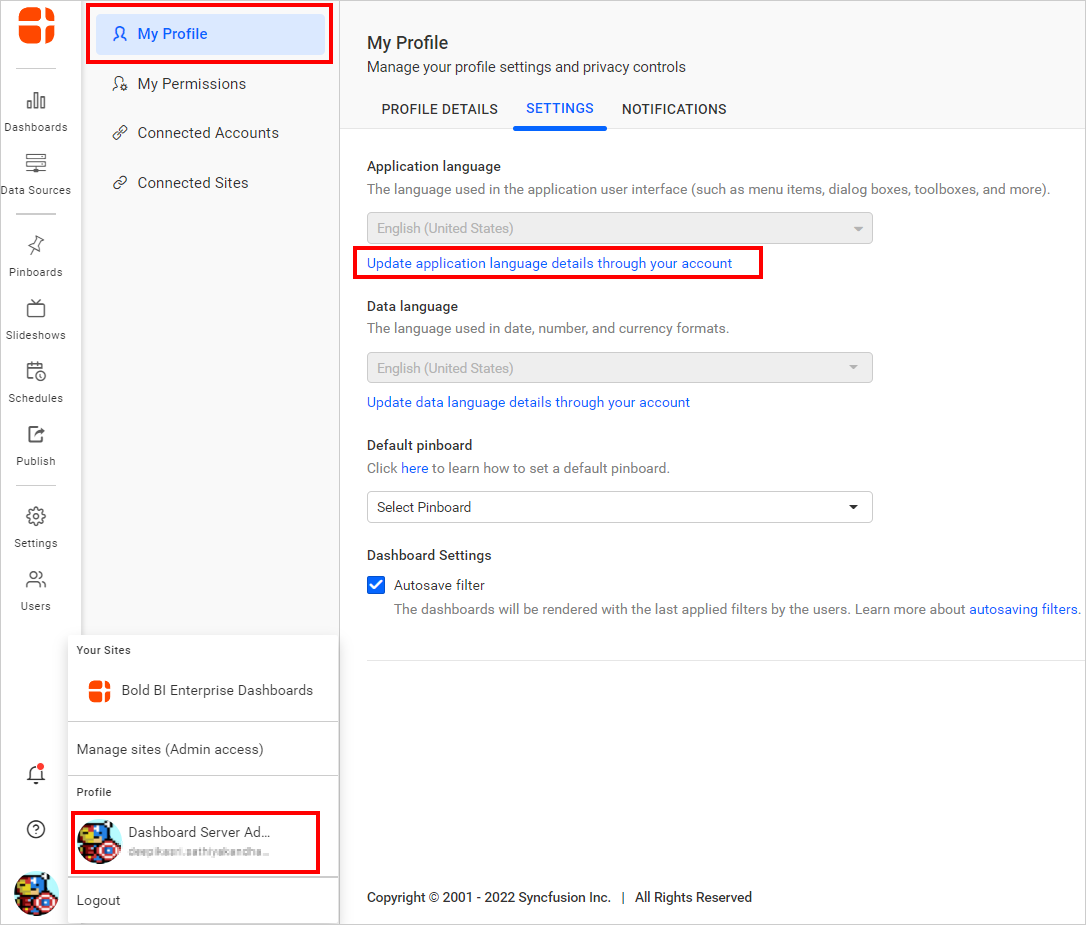
A user can set any language as their preferred language, and it will be applied on all sites. However, if the admin disables the user language preference on any site, the user’s preferred language will not be applied on that site.