Manage Data Source Connections
This section explains how to share data sources, manage the version history of data sources, and delete them in Bold BI.
Data sources that are accessible by the user, depending on the user’s permission, are displayed on the data sources page.
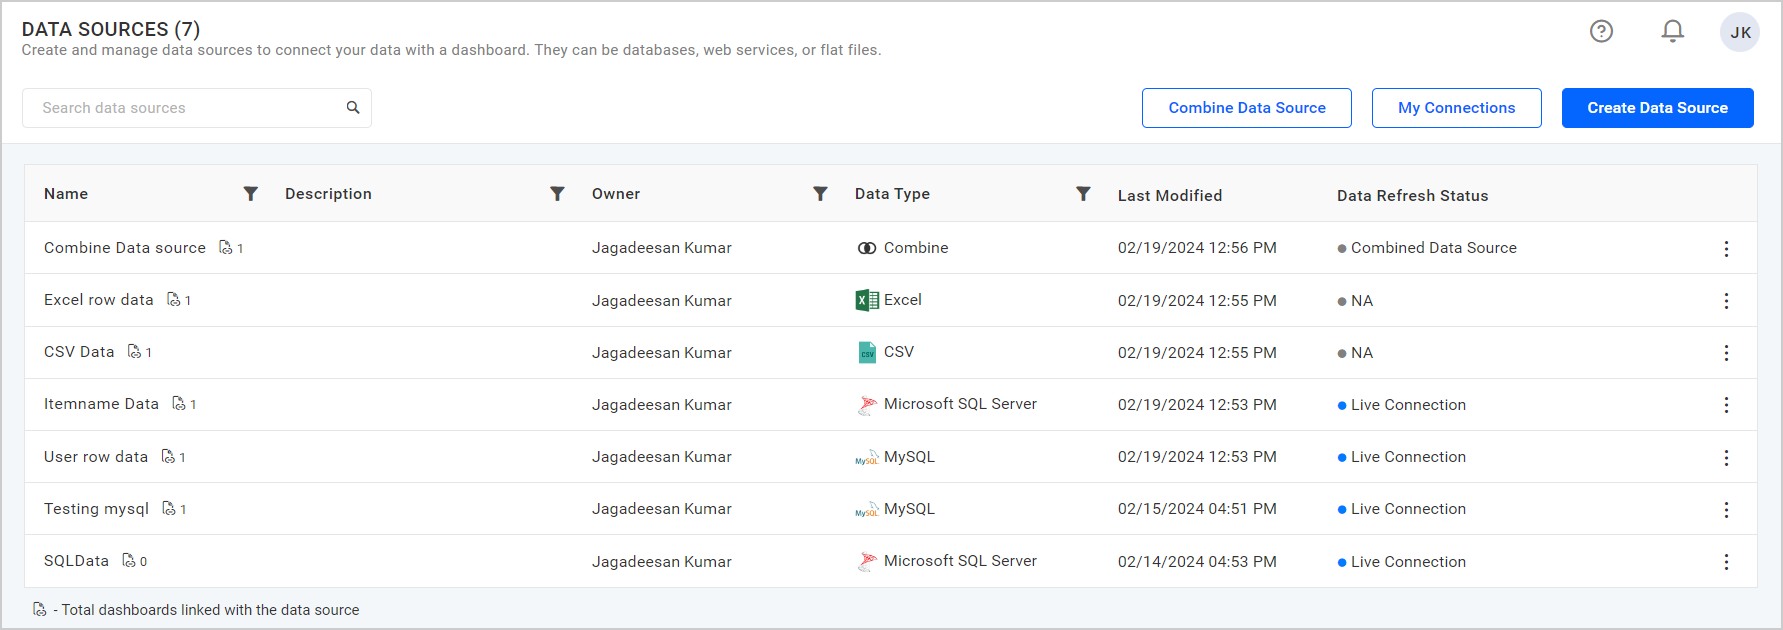
There are two connection types available in Data Source:
- Live mode
- Extract mode
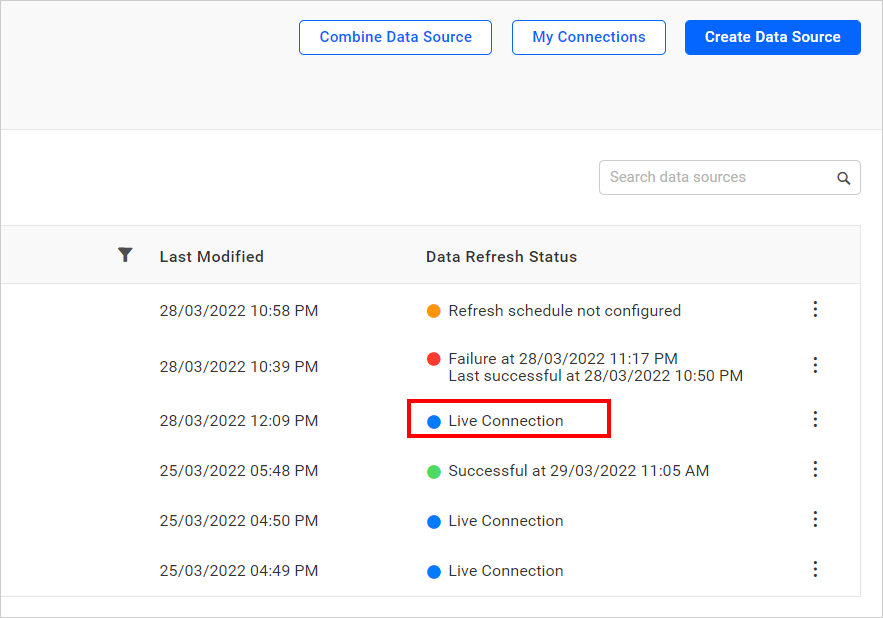
Live mode connection
In this connection type, data sources are directly fetched from the source, examples include MySQL, Oracle, etc.
Extract mode connection
In this connection type, data sources are fetched from the source periodically, examples include CSV, JSON, etc.
Within extract mode, users can choose between two methods of connecting to the data source:

-
Bold BI Extract: In Bold BI Extract, The data will be extracted in using Bold BI Engine and the data will be moved to configured datastore in Bold BI.
-
Data Hub: When switching to Data Hub, Data extraction is handled through the Data Hub. An equivalent pipeline is created, utilizing the Data Hub’s Extract, Transform, Load (ETL) capabilities to filter, optimize, or transform the data, and to generate new tables.
-
To view the equivalent pipeline created using Data Hub for data extraction, navigate to the Query Designer page and click on View Pipeline.

- When the data refresh is configured for data sources that uses the Data Hub Extract Engine, the refresh will be managed within the Data Hub.
NOTE:: Initially, The Data Hub extracts 1000 records for sql connectors, and additional records will be extracted in the next iteration based on the Refresh Settings.
- Limitations: The following options are not supported when using the Data Hub method:
- Max rows
- Additional Connection Parameters
- Dynamic Connection String
- ssl/ssh
In summary, Bold BI provides users with two distinct modes for connecting to SQL data sources, each offering unique benefits depending on the nature of the analysis and the requirements of the user. Whether opting for real-time access through live mode or leveraging the efficiency of extract mode, users can access and analyze SQL data effectively to drive informed decision-making and achieve their analytical objectives.
Users can see the data source refresh status and the number of occupied data rows count on this page.
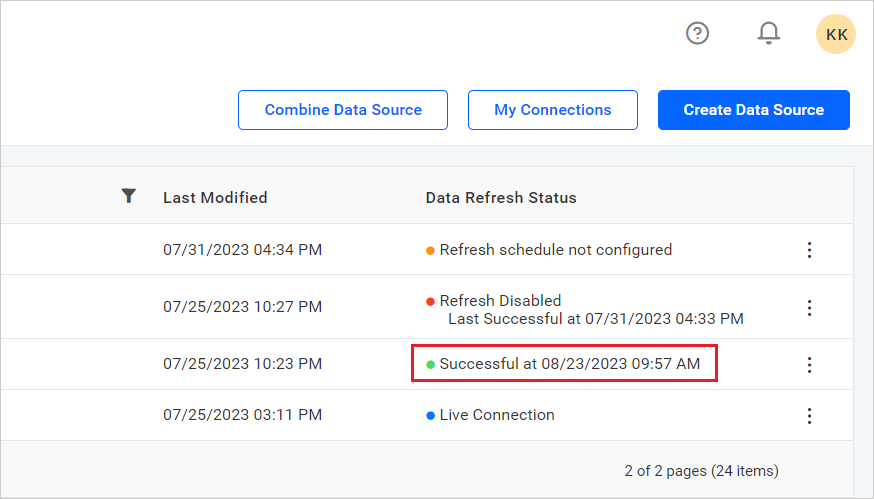
Check the connectivity section for more details.
Refresh Setting
This section explains on how to configure the data source refresh setting.
Steps to configure a data source refresh setting
-
Click the
Actionsbutton in the Data sources grid context menu and select theRefresh Settingoption.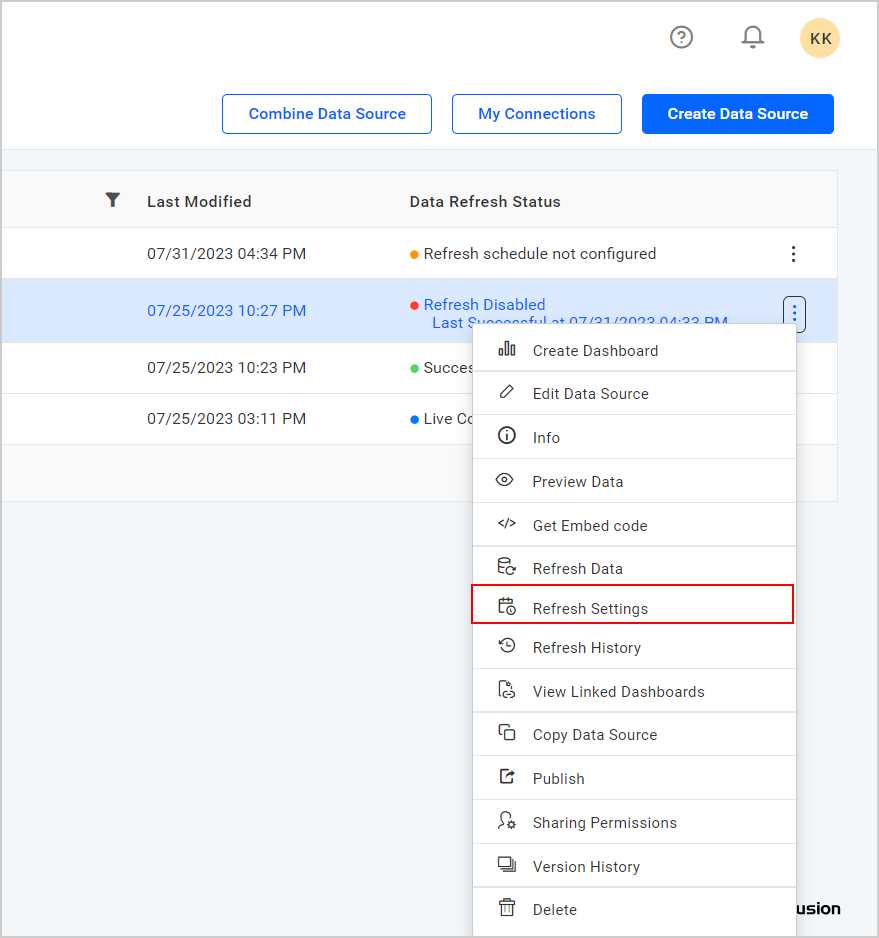
-
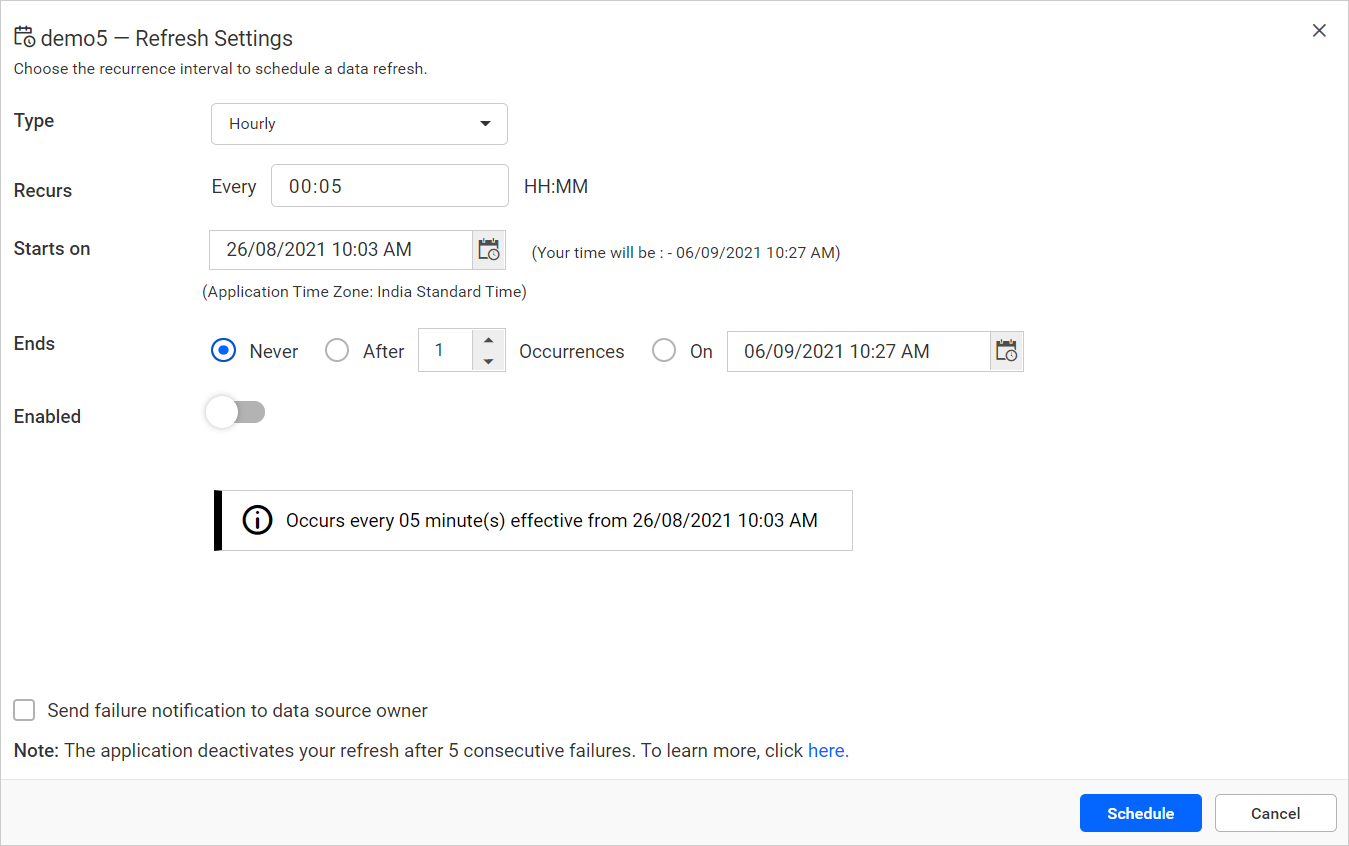
Select the recurrence type, recurrence, start and end dates in the
Refresh Settingdialog box.- Data refresh can be scheduled hourly, daily, weekly, and monthly.
- The minimum data refresh interval time will be 5 minutes.
- Application Time Zone is displayed below the date picker. The start time of the schedule is converted to the client’s Time Zone and shown on the right side for the user’s convenience. After selecting, click on the
Schedulebutton. - Data refresh failure notification can be sent to the owner of the data source with the error message and a link to the data source refresh history by enabling the ‘send failure notification to owner’ option.
- Bold BI application deactivates the data refresh after limited consecutive failures and sends the disable notification to the owner by mail.
NOTE: Only the data source created with extract mode will have this refresh setting option.
Refresh Data
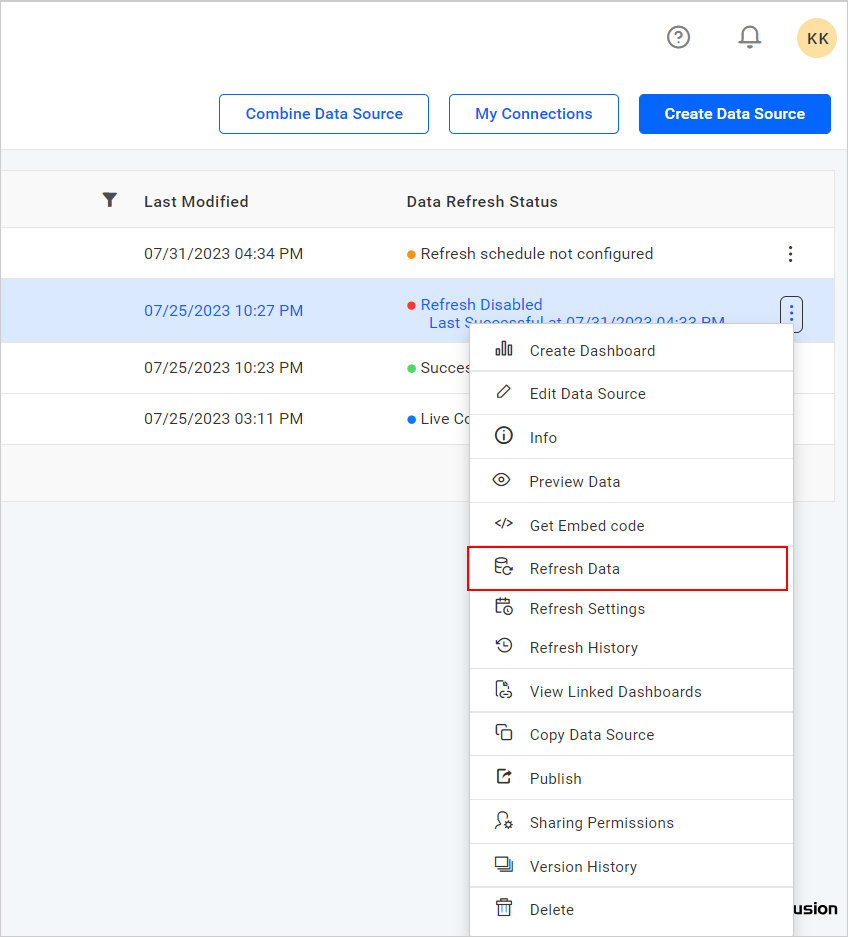
Data refresh can be run on demand by using the Refresh Data option in the data source grid context menu.
Refresh History
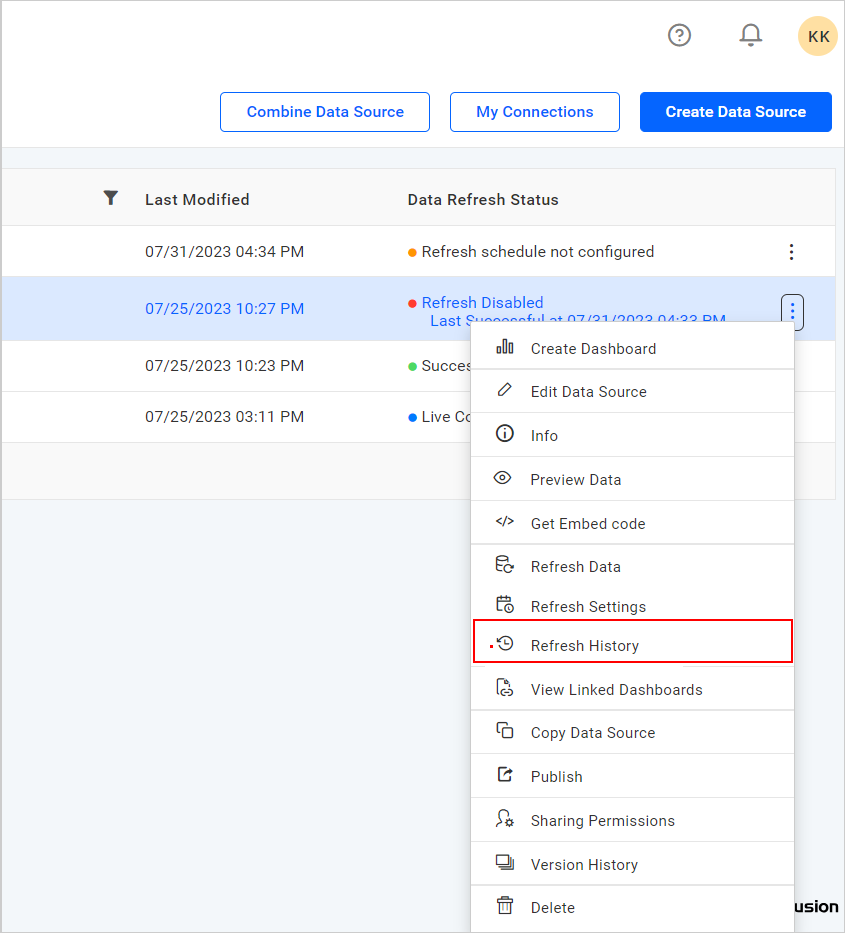
You can see the data refresh history information of the corresponding data source in the Refresh History option in the data source grid context menu.
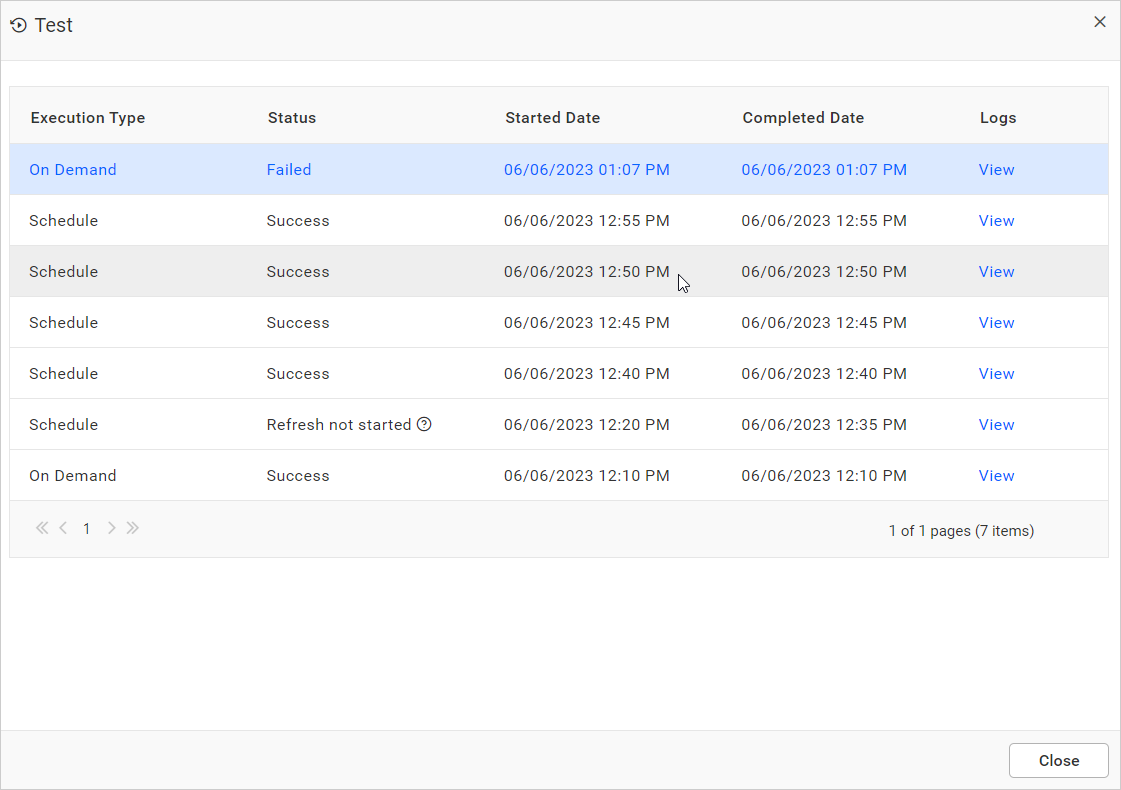
You can also see failure information by clicking the failed link in the run history dialog box.
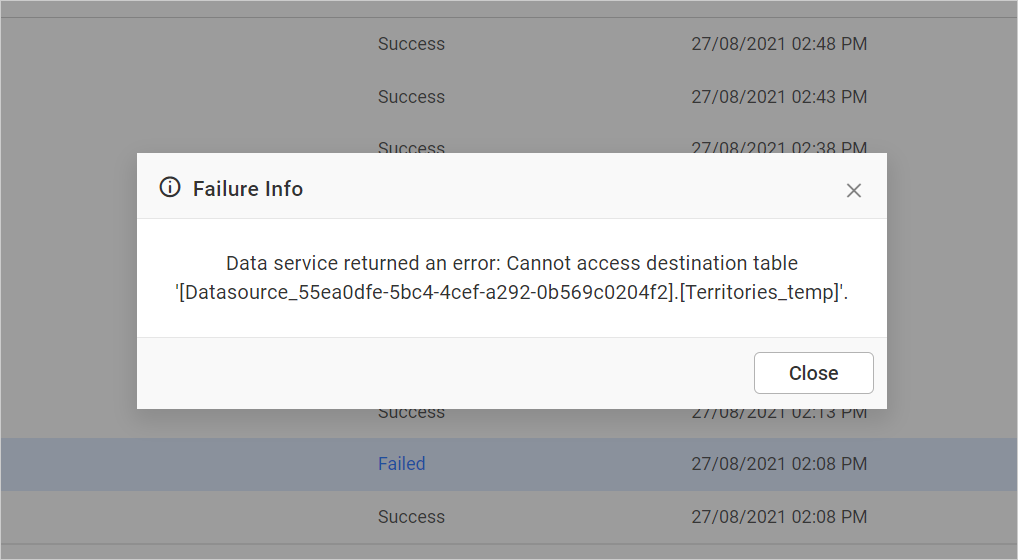
If the data source refresh fails due to consecutive failures, a disabled status will be displayed on the listing page. You can check the history using the option below the status.

NOTE: Only the data source created with extract mode will have this refresh history option.
Refresh Logs
The refresh log provides a comprehensive overview of the refresh activities, including the corresponding timestamp of each event.
To access the refresh logs, click the View option in the grid. This will open the refresh log in the New tab.
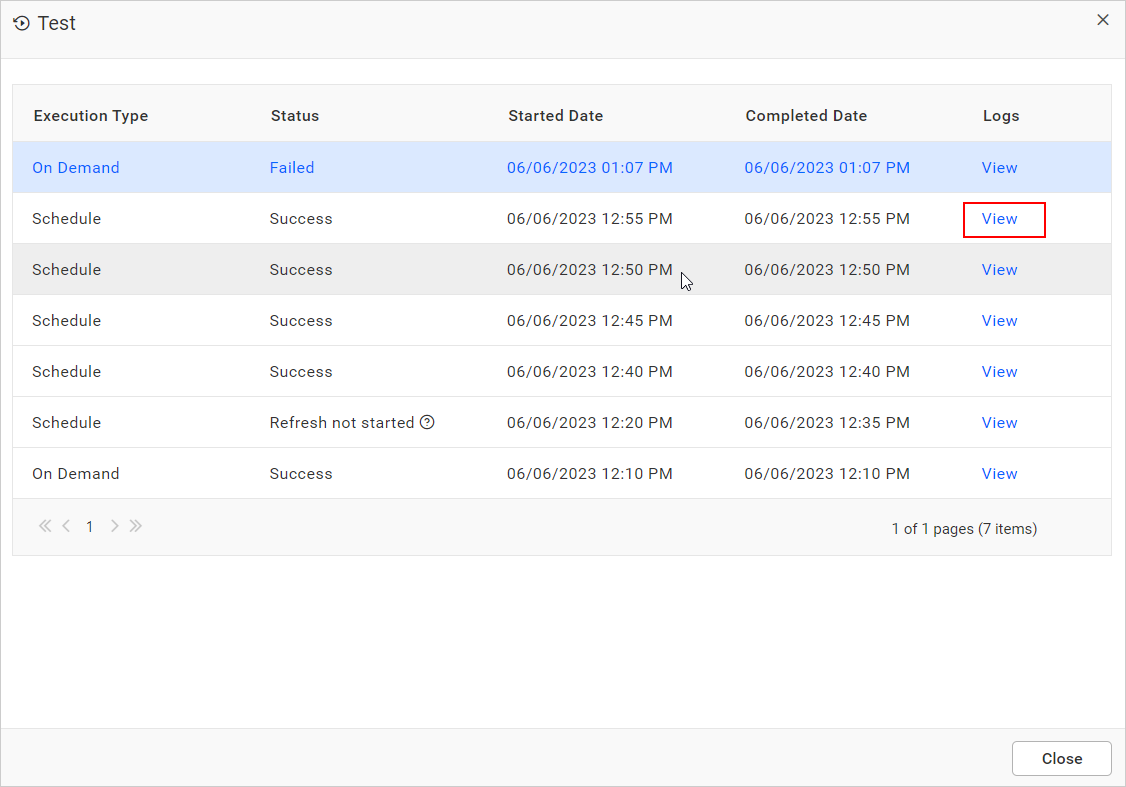

NOTE:
- The refresh log will display tooltip information indicating whether it has been deleted after a certain period from its creation time or if it is unavailable due to being an older refresh request.
- The logs for each refresh will be automatically deleted after 15 days from their respective creation time.
Row Level Security
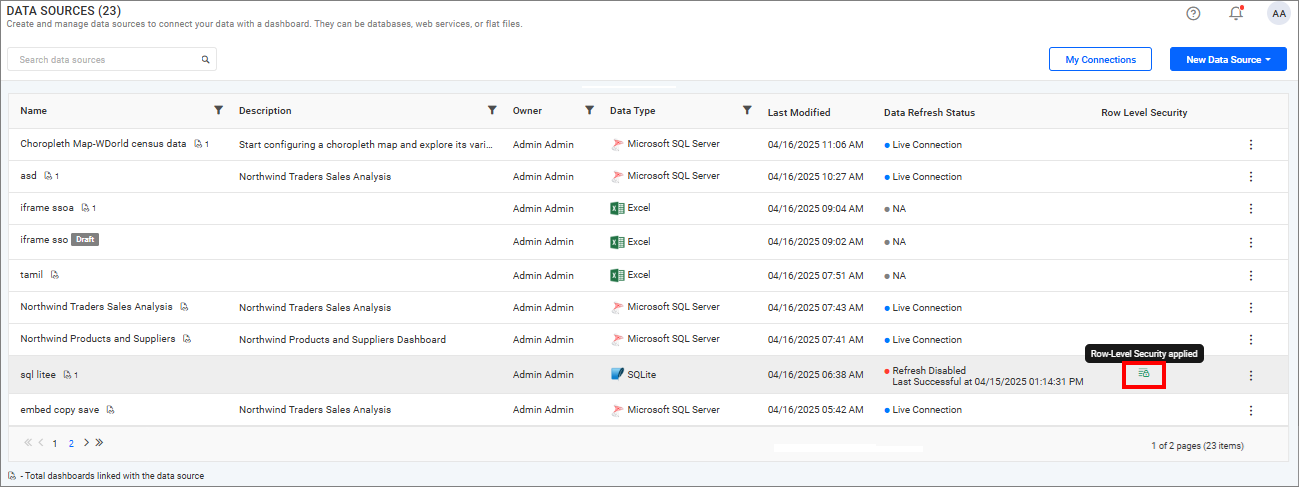
Row-level security for the data used to create dashboards allows us to restrict the data visible to each user. If row-level security is applied to a data source, it will be indicated in the listing grid. Know More
View Linked Dashboards
You can view the dashboard(s) created with the corresponding data source using the View Linked Dashboards option in the data source grid context menu.
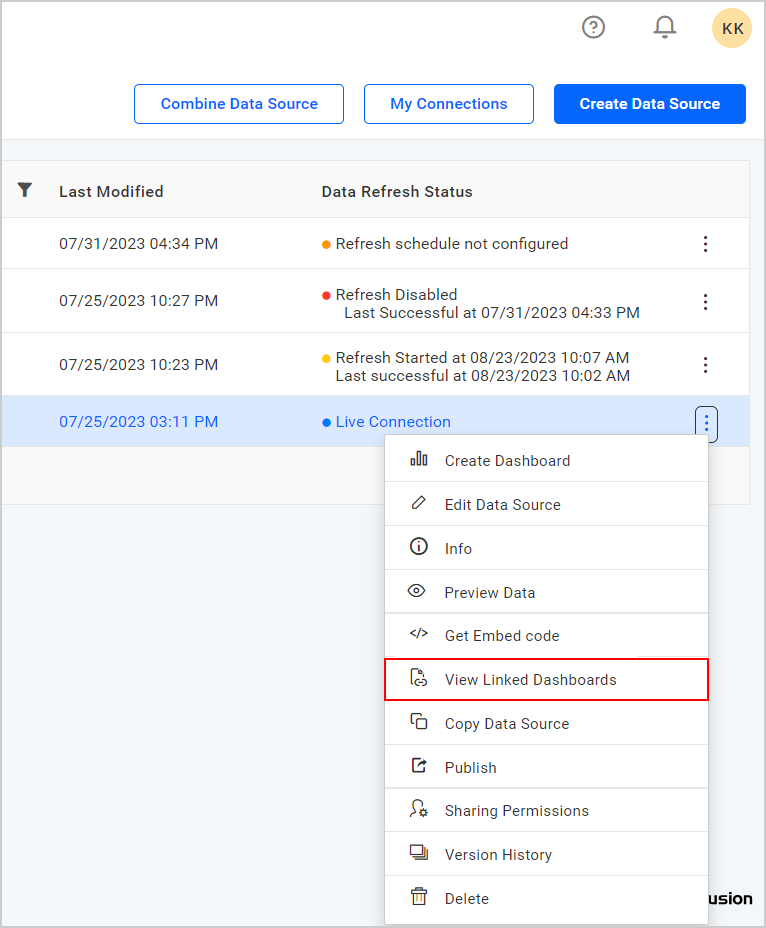

You can also view the number of dashboards linked to the data source on the data source listing page.
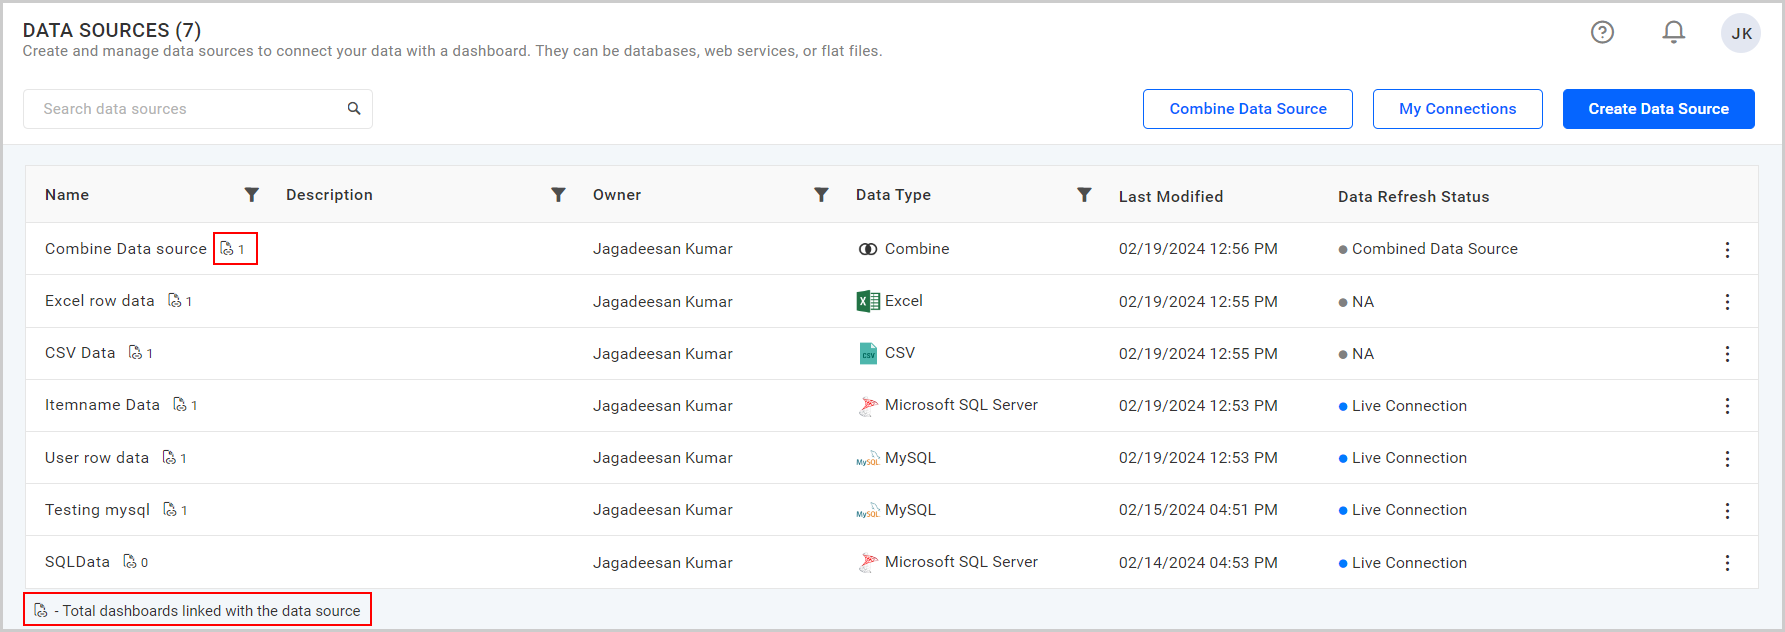
NOTE: All the dashboards associated with the data source will be updated whenever the data source is updated.
Share Data sources
This section explains how to share data sources with other users in Bold BI.
Steps to share a data source
-
Click the
Actionsbutton in the Data sources grid context menu and select theSharing Permissionsoption.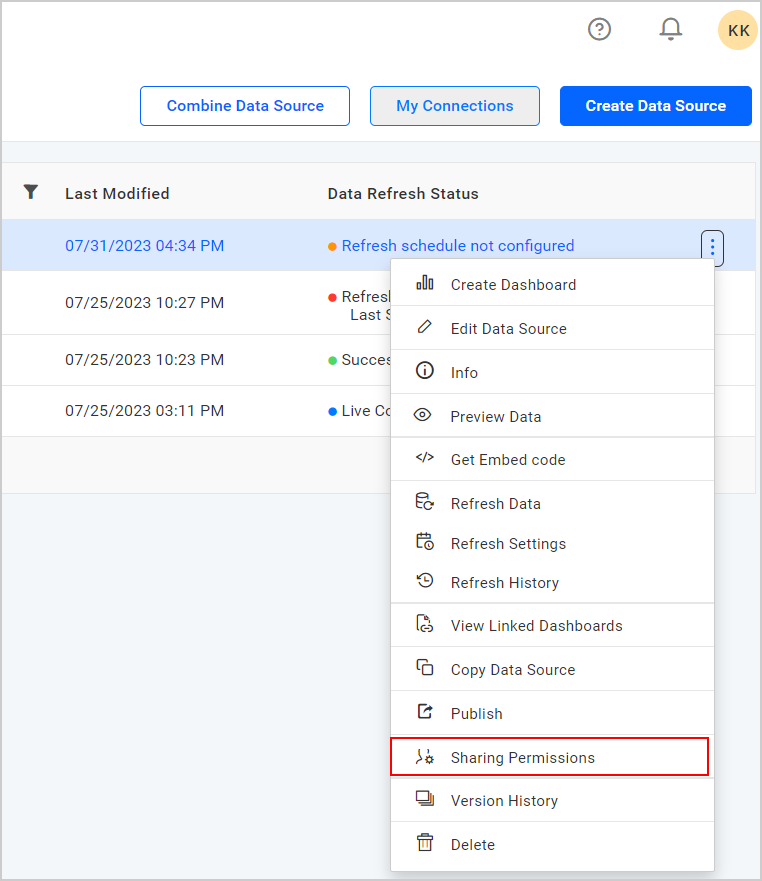
-
Select the permission access from the
Select Accessdropdown and type in the user or group name with whom you want to share the data source.
-
After selecting the permission access and users or groups, click the
Sharebutton.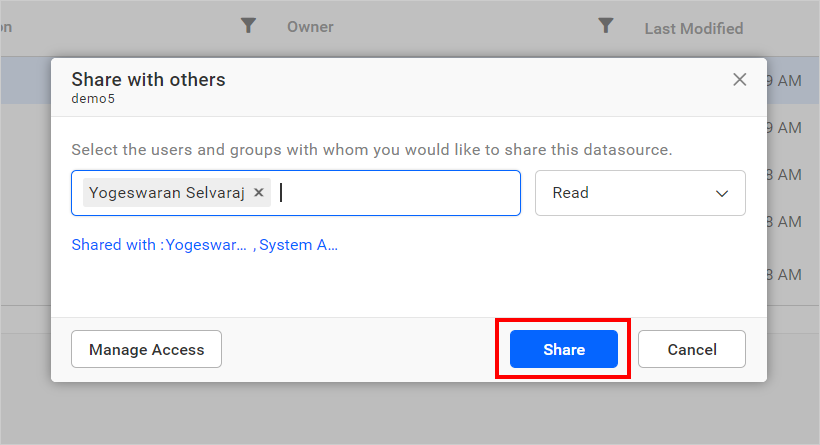
NOTE: Only the user who created the data source and the Administrator can share the data source with other Bold BI users.
Remove Permission
The user who created the data source and the Administrator can remove the shared data source permissions.
-
Click the
Manage Accessbutton to see the users or groups and their permissions.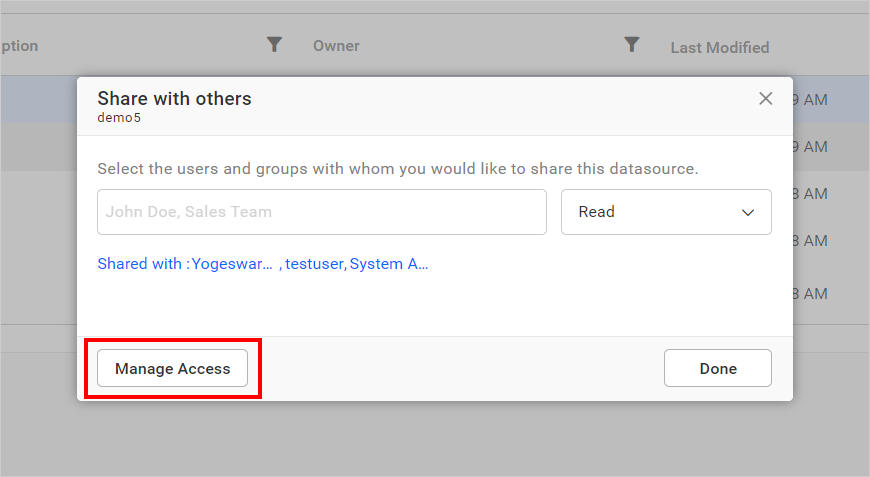
-
Then remove the permissions using the
Removeoption in theActionscolumn of each permission.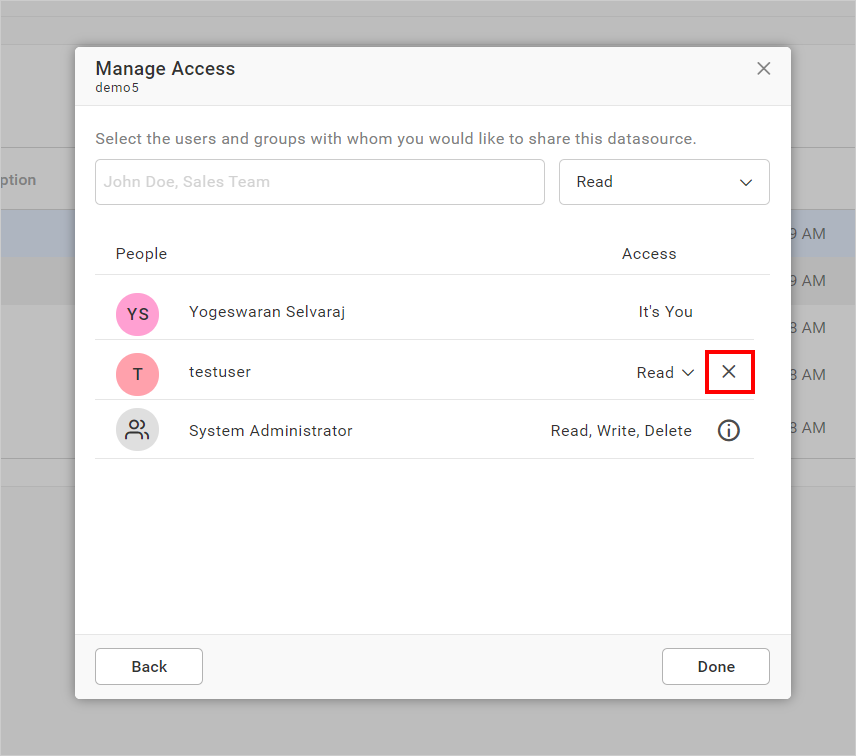
Version History
Versions and file logs for each data source are maintained in Bold BI for every change in the data source. Check the Version History section for more details.
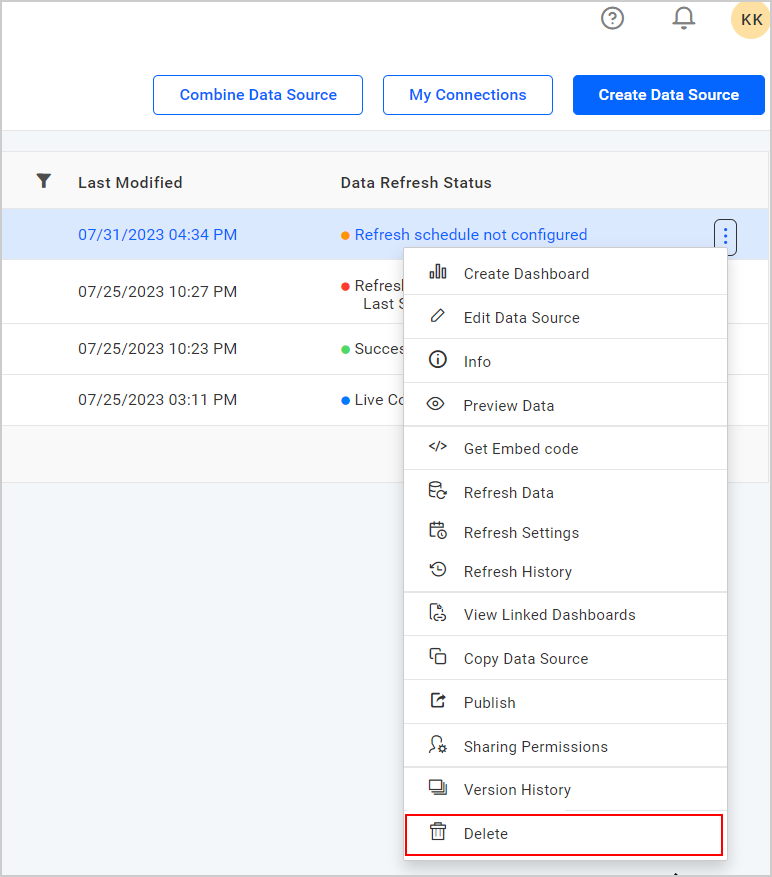
Delete Data Sources
Data Sources can also be deleted from Bold BI when they are no longer required.
Click the Actions button in the data sources grid context menu and select Delete to delete the data source.
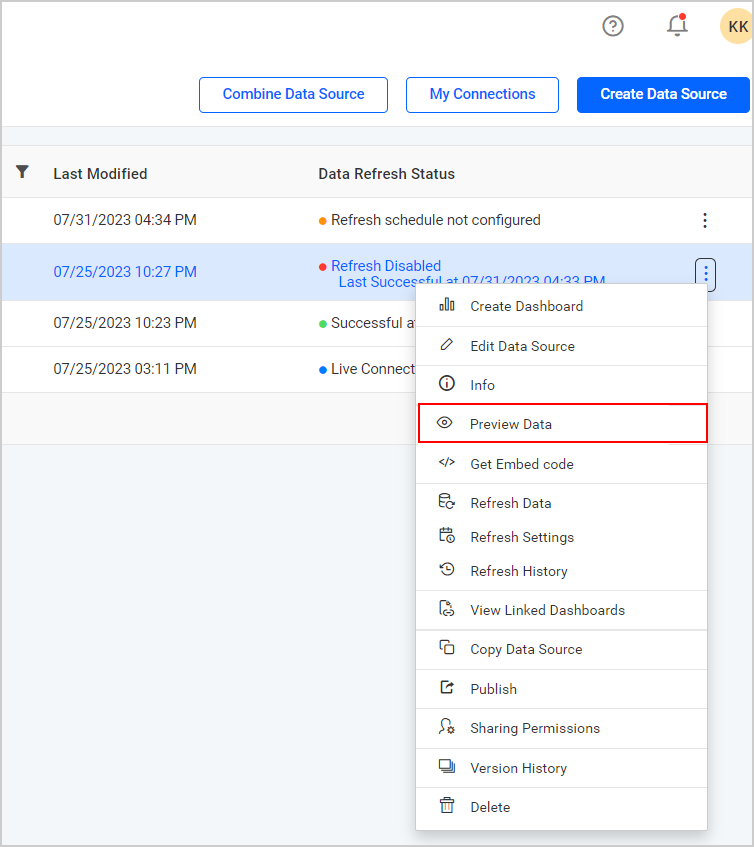
Preview Data Sources
You can preview the data of your data sources.
Click Actions in the data sources grid context menu and select Preview Data to preview the data source.
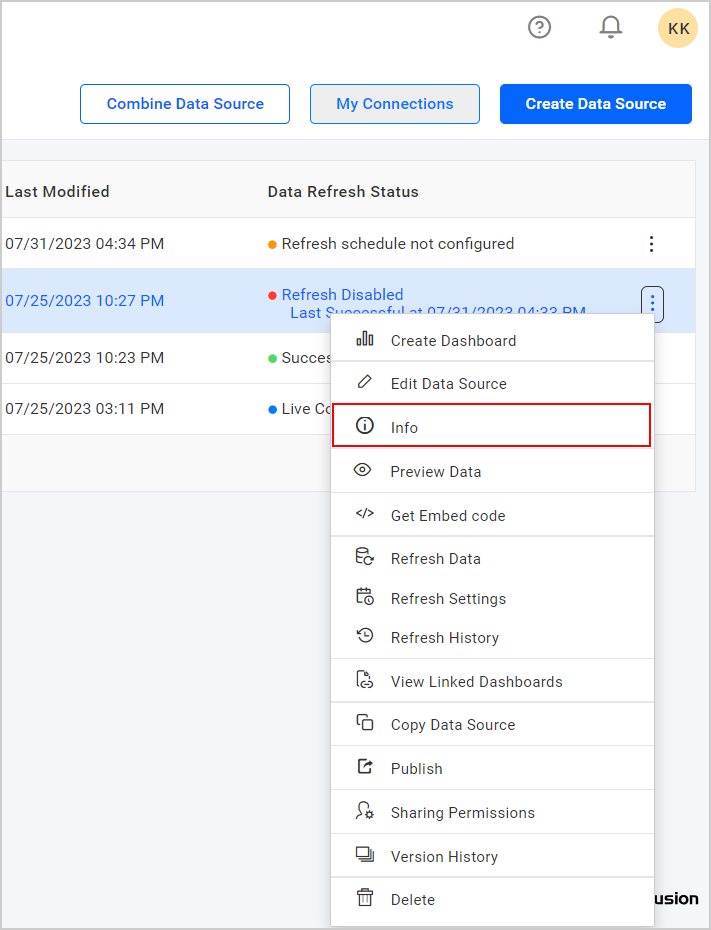
Information of Data Source
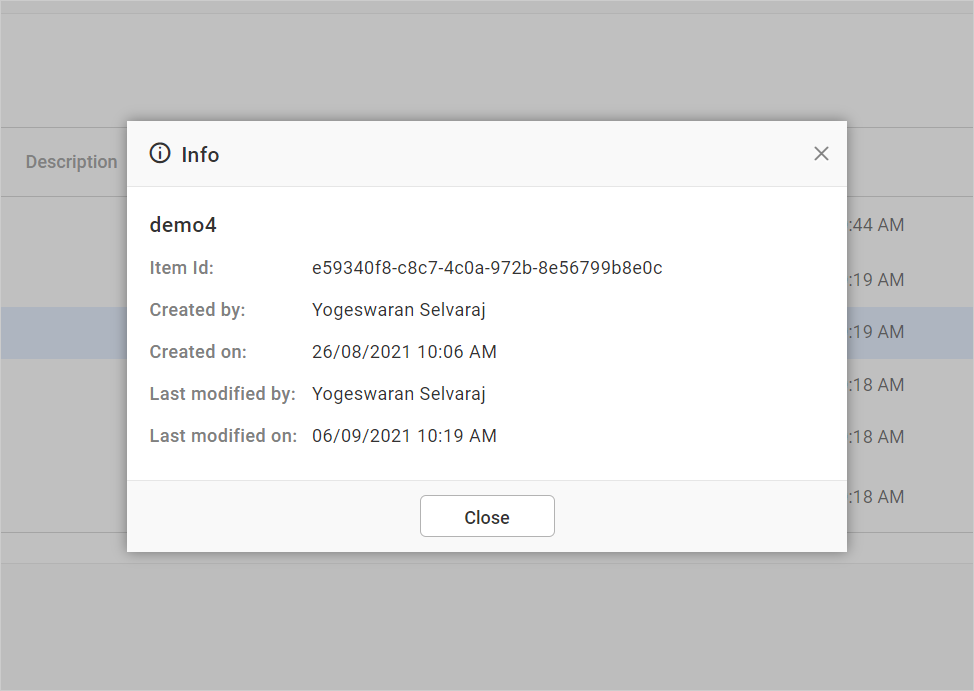
You can see the information of the respective Data Source in the dialog box. Click Actions in the grid context menu and select Info.
Copy Data Sources
Copy the data source item for the data sources of the Live and Extract mode connection types.
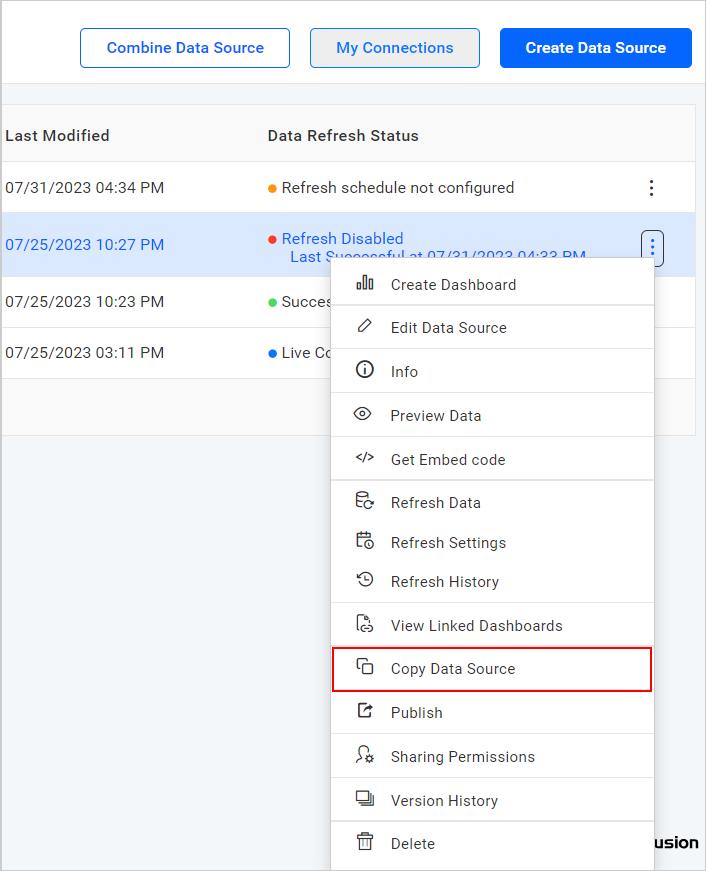
Click the Actions button in the data sources grid context menu and select Copy Data Source to copy the data source.
Draft Data Sources
The Data Source will be automatically saved as a draft when the user did not publish the created data source.
You can view the unpublished draft data sources in the data source listing page tagged with draft label.

- Live mode connection
- Extract mode connection
- Refresh Setting
- Refresh Data
- Refresh History
- Refresh Logs
- Row Level Security
- View Linked Dashboards
- Share Data sources
- Version History
- Delete Data Sources
- Preview Data Sources
- Information of Data Source
- Copy Data Sources
- Draft Data Sources
Having trouble getting help?
Contact Support- Live mode connection
- Extract mode connection
- Refresh Setting
- Refresh Data
- Refresh History
- Refresh Logs
- Row Level Security
- View Linked Dashboards
- Share Data sources
- Version History
- Delete Data Sources
- Preview Data Sources
- Information of Data Source
- Copy Data Sources
- Draft Data Sources
Having trouble getting help?
Contact Support