Getting Started With User Filter
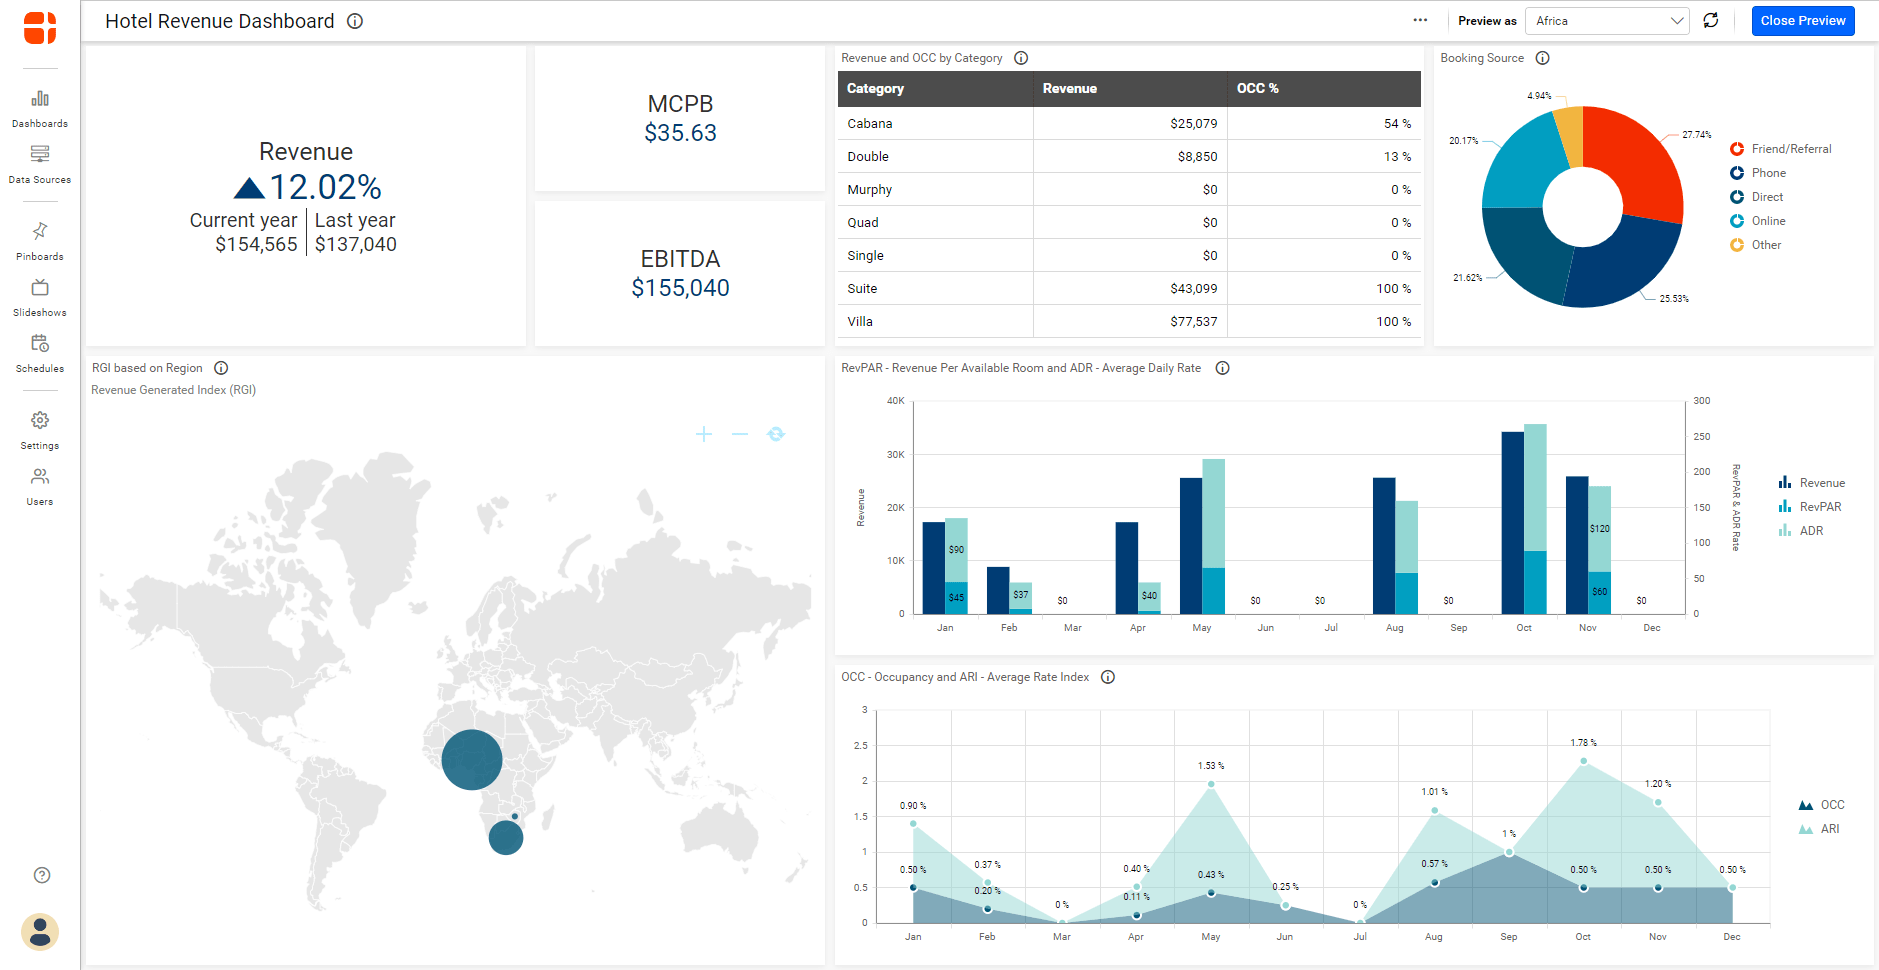
The user filter provides row-level security for the data used to create dashboards, allowing us to restrict the data visible to each user. Let’s consider the Hotel Revenue Management Dashboard. In this dashboard, we can restrict revenue data for hotels in different geographical areas so that managers and staff will only see data from the region they are handling.
NOTE: The User filter will be applied to the result set of the Data Source and cannot be used to change the connection string. For this requirement, you can use the Dynamic Connection String Feature.
Configuring User Filter
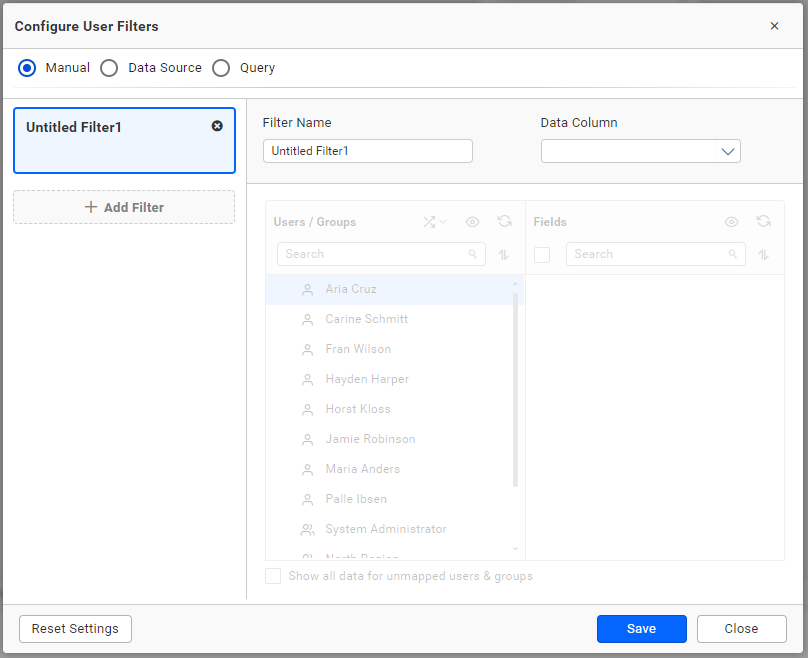
The User Filter can be configured in a data source using the Configure User Filters dialog. To access the Configure User Filters dialog, click on the Configure User Filters icon in the toolbar.
![]()
To make the most of User Filters, it is important to be familiar with the main concepts: Users, Groups, and Filters.
Users - Users who view the dashboard and data sources. In Bold BI, users are identified by their email. Know More
Groups - Users with the same permissions can be grouped together. Permissions defined for the group will be inherited by all users in the group. Know More
Filters - Actual restrictions applied to the data. In User Filter, the filter is applied using the AND logical operator if more than one filter column is configured (for manual, data source, and query modes).
Getting familiar with User Filter
Modes
User Filter can be configured in any of the three available modes.
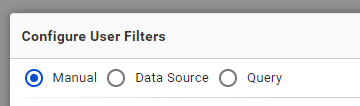
Manual
This mode is suitable for most use cases where the applied filter will not change dynamically and the data is either static or close to static. User data may be present as a column within the data used for the dashboard, such as email or full name. For example, in our Hotel Revenue Management Dashboard, the data is mostly static as the hotels span across all continents, and the staff handling the hotels in each continent are restricted to their specific geography. In this case, the Manual mode is the most suitable. Refer here to learn more about the Manual Mode.
Data Source
This mode is well suited for cases where the applied filters are more dynamic and the data used in the dashboard does not contain any user information in its columns. Refer here to learn more about the Data Source Mode.
Query
This mode is similar to the Data Source mode, but provides more advanced user control over the data used for filtering. Users can write their own custom SQL query to fetch the data, giving them the freedom to apply filters or generate dynamic columns. Refer here to learn more about the Query Mode.
IMPORTANT: Only one mode can be used for a data source. Switching modes will reset the settings.
Action Buttons

Reset Settings
Removes all user applied settings and resets the user filter dialog to its initial state.
Save
Validates user settings and saves the information in the data source.
Close
Closes the user filter dialog, reverting all changes made by the user in the UI.
Previewing dashboard
When previewing the dashboard, users can impersonate a user or group in the server to see what that user or group will be able to view.
The Preview as drop-down allows users to choose the user or group to impersonate.
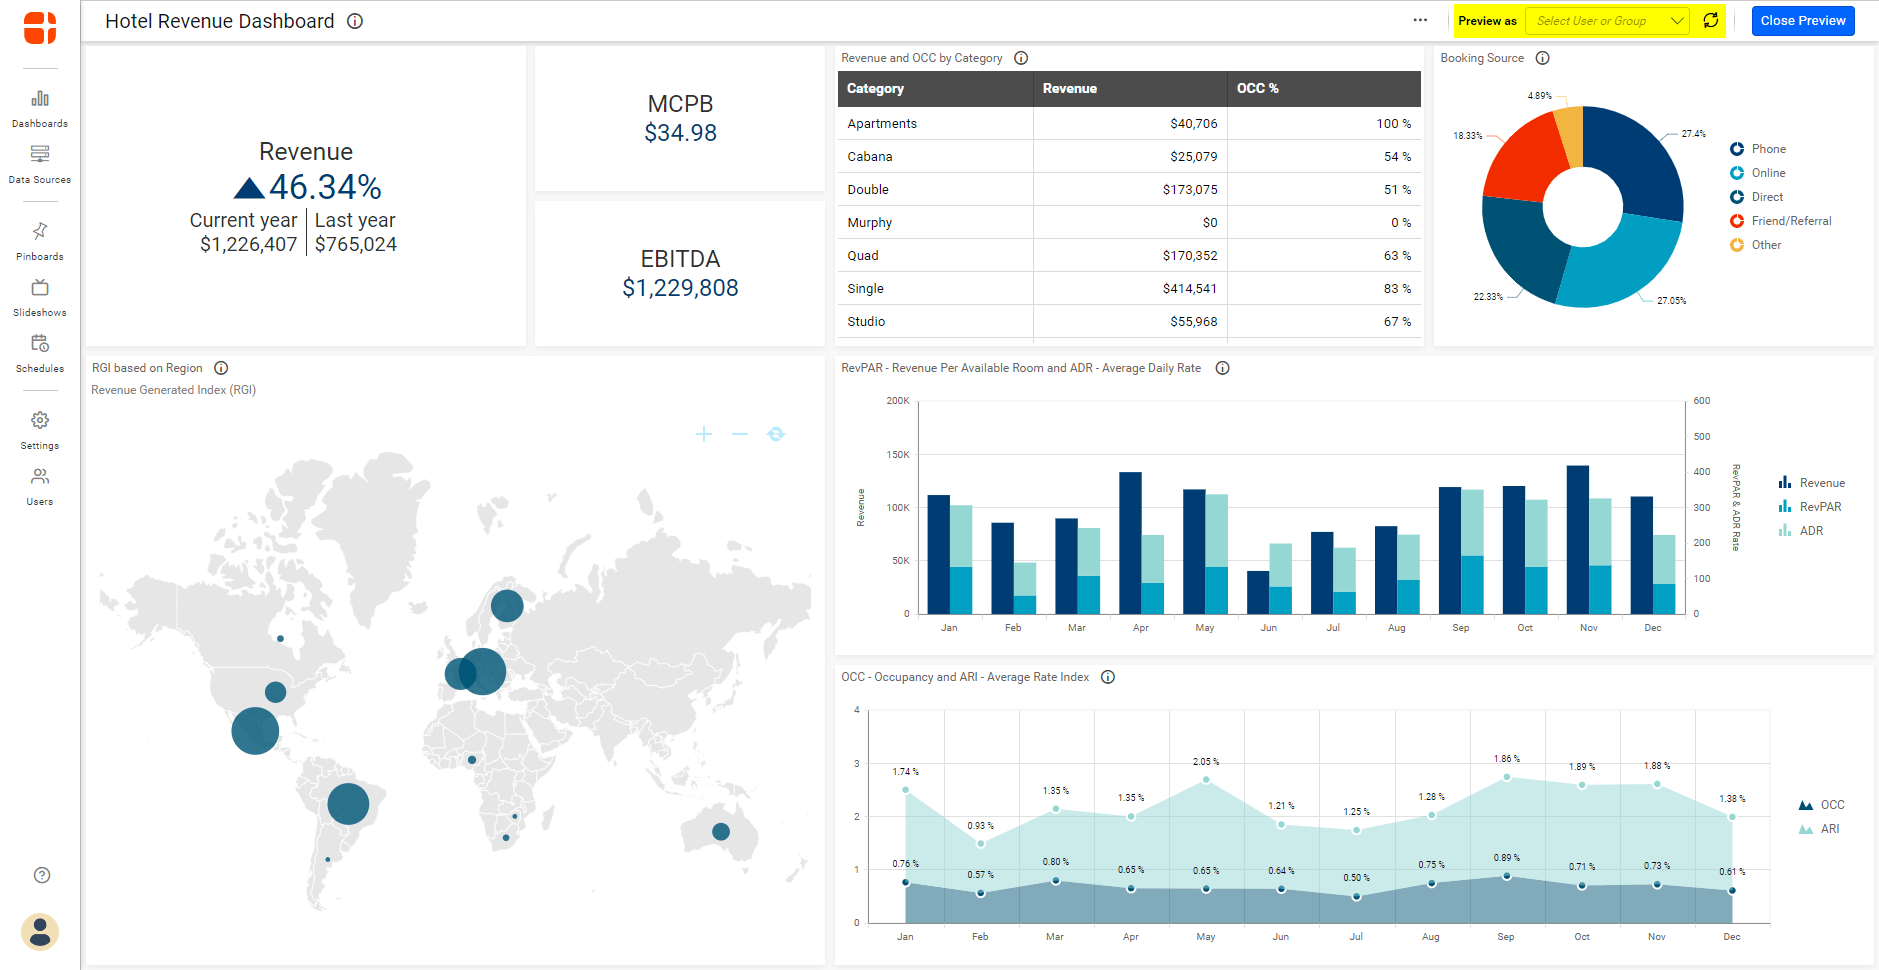
Let’s consider our Hotel Revenue Management Dashboard example here. Since we have applied the user filter based on the groups, we can choose a group name in the Preview as dropdown to see how the users who belong to the group will see the dashboard.