Custom Vanity Domain Setup for the Cloud Analytics Server
When you create a dashboard application, you will be given the option to choose a site name of your choice, and this name will be used in your application URL. For example, your-site.boldbi.com.
Using custom vanity domain support, you can set your custom vanity URL instead of the predefined URL.
Setup your Custom Vanity Domain
To set up your custom vanity URL, you should own a domain from a DNS provider.
Setup the custom vanity domain
Follow these steps to set up the custom vanity domain:
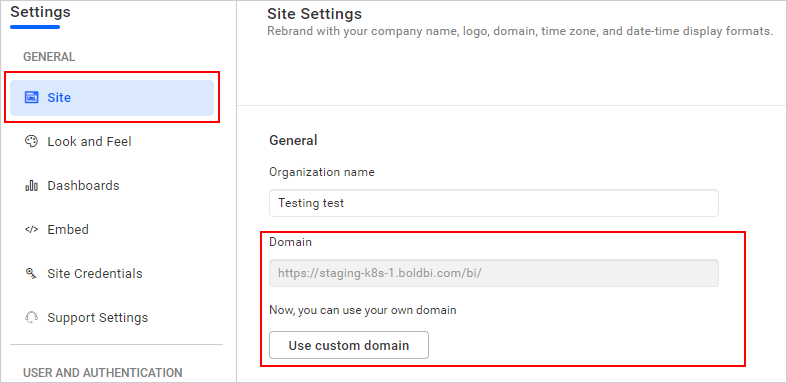
- Go to the
Sitesettings page as shown in the following image. You will see the domain module at the top, as indicated in the image. The custom vanity URL you use to access the application will be displayed in the text box.
-
Click
Use custom domainto start the custom vanity domain setup. -
Add the custom vanity domain in the site name text box and click
Add. You need to update the CNAME in your DNS records. The dashboard application will verify the CNAME in the DNS records available. There is a possibility that this validation may fail, which could occur if the CNAME is not set up correctly or if you need to wait for the TTL time for the changes to take effect. Once verification is successful, you will be redirected to your vanity domain to view your dashboards.
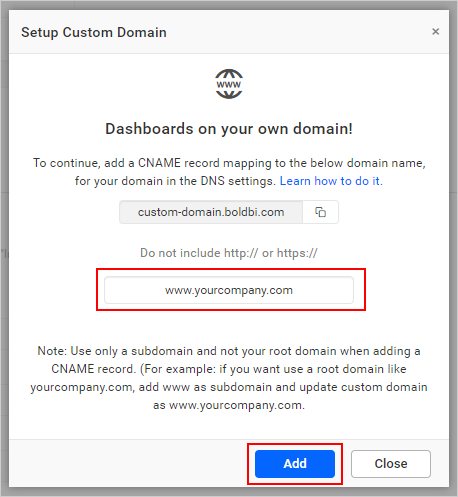
Update CNAME in your DNS records
-
In your DNS provider settings, add a new DNS record for your domain with the following value:
CNAME value:
custom-domain.boldbi.com -
Various DNS providers have their own DNS settings UI. The following table shows how the DNS record will be displayed in a typical DNS settings page. This DNS setting will help us authorize the application with the domain name you choose.
Record Type: CNAME
Host: your-site
Points To: custom-domain.boldbi.com TTL: Automatic / 1 hour