Connecting Bold BI to Cosmos DB data source
The Bold BI dashboard designer supports connecting to Cosmos DB database through MongoDB client.
Configuring Cosmos DB data source
To configure the Cosmos DB data source through the MongoDB data source, follow the given steps:
- Sign in to your Azure portal account and open your Cosmos DB account.
- In the left panel of the account blade, click on Connection String. This section contains all the information needed to connect to Bold BI using the MongoDB data source. Take note of the host, port, SSL, username, and password.
- To connect to Cosmos DB using the MongoDB connector, an Azure Cosmos DB account should be created with the API type of MongoDB from the Azure Portal.
NOTE:
- As of writing, Cosmos DB has a limitation. The type of API cannot be changed after the Azure Cosmos DB account is created, so you either need to create a new account for a different API type or migrate data into a new database account from an older database account. Data migration steps are provided for each API type for MongoDB.
- The Azure Cosmos DB’s API for MongoDB is compatible with MongoDB server version 3.2 and 3.6. There are some limitations in the query language explained in this documentation.
Choose MongoDB data source by following the given steps:
-
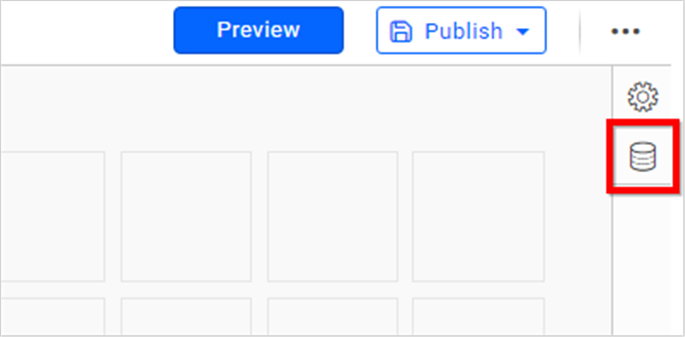
Click the Data Sources button in the configuration panel to add a new data connection.
-
Click CREATE NEW to launch a new connection from the connection panel.
-
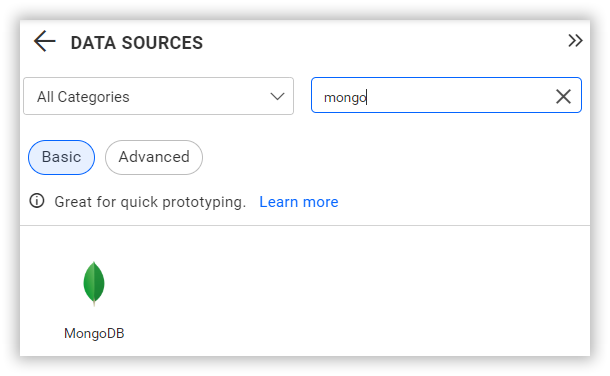
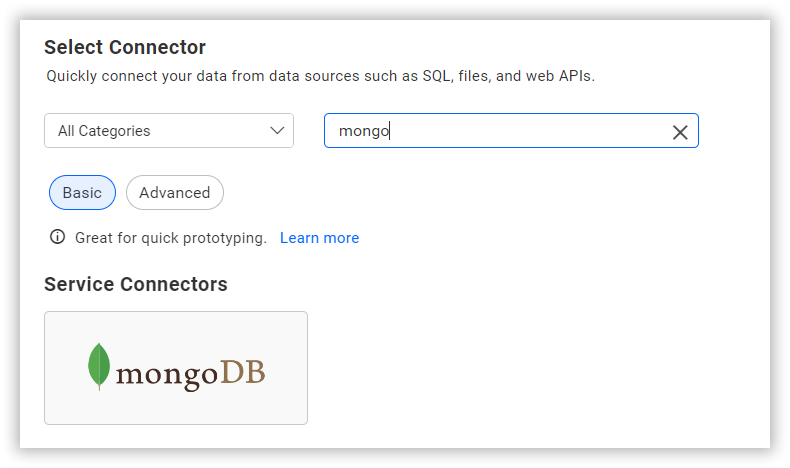
Select the MongoDB connection in the connection panel.
NOTE: You can also create a data source from the home page by clicking on the Data Sources menu on the left menu panel and selecting Create Data Source from the data sources page.
Create Cosmos DB data source via MongoDB data source
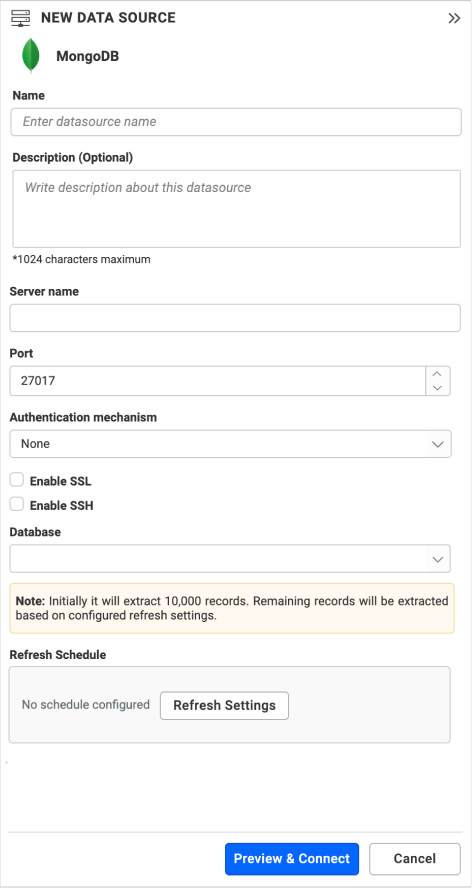
Once you click the data source, the NEW DATA SOURCE configuration panel opens. Follow the given steps to create Cosmos DB data source through MongoDB data source.
-
Enter a name and description (optional) for the data source.
-
Enter a valid Cosmos DB server or host name in the Server Name text box.
-
Enter its corresponding port in the Port text box.
-
Choose Enable SSL, if the given Cosmos DB server is configured with SSL Encryption.
NOTE: Enable Allow Self-Signed Certificates if the Cosmos DB server is configured to accept self signed certificates.
-
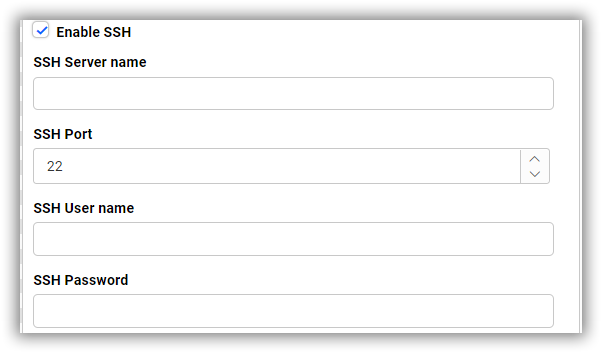
Choose the Enable SSH, if the given Cosmos DB server is configured with an SSH Port.
-
Enter a valid SSH credentials in the SSH Server name, SSH Port, SSH User name, and SSH Password.
-
Choose None or SCRAM authentication in the Authentication Mechanism combo box.
-
Enter valid SCRAM credentials in the Username and Password text boxes if you choose SCRAM Authentication Mechanism.
-
Select the database you want to query in the listed database associated with the given Cosmos DB Server in the Database combo box.
NOTE: If your Cosmos DB server reside inside a firewall, contact Bold BI support to get the list of IP addresses to be white-listed.
-
Choose a time interval for Refresh Settings using the combo box, to trigger a request to Cosmos DB server periodically to keep the data in sync with our dashboard.
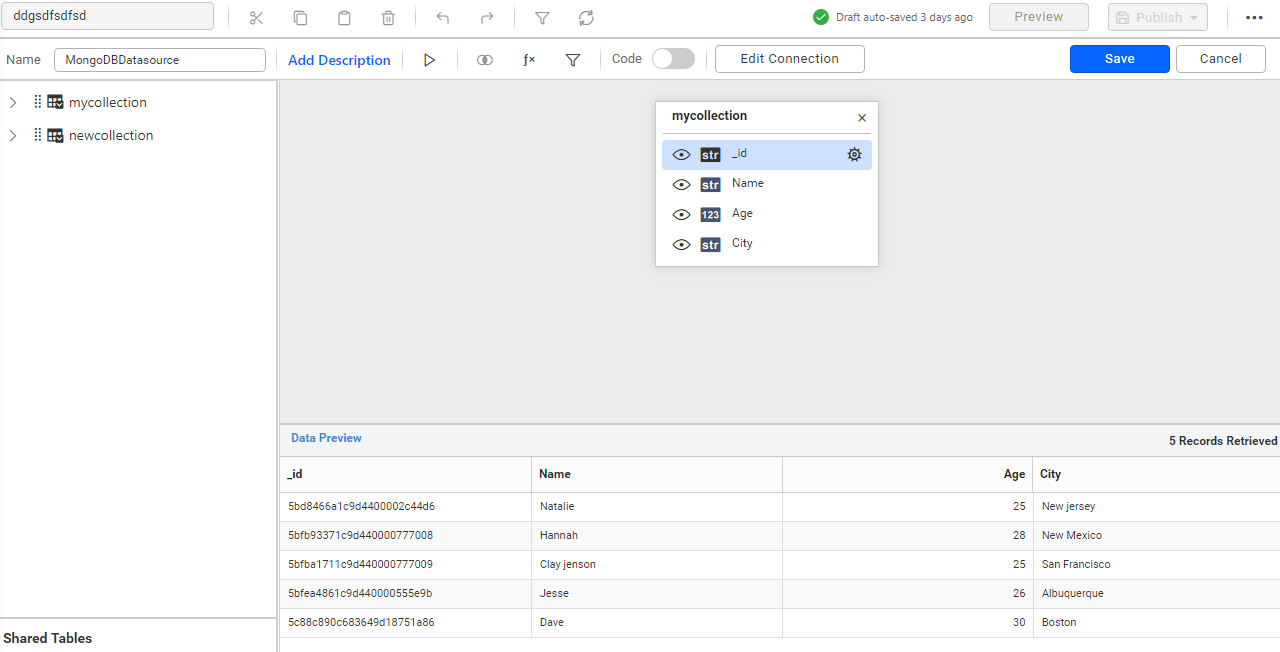
You can also edit the connection information set here using the Edit Connection option.
Additional information
| Refresh Settings | The period of time before the next refresh call is triggered. This will automatically trigger a call to the API configured in the data source to keep the data up to date. If you do not want to sync your new data, choose 'Never'. |
| Pagination | On initial connect Cosmos DB will extract a maximum of 10,000 records. Configure the Refresh option and it will extract all the tables and data for the chosen database on every refresh call. |
Preview and data import
-
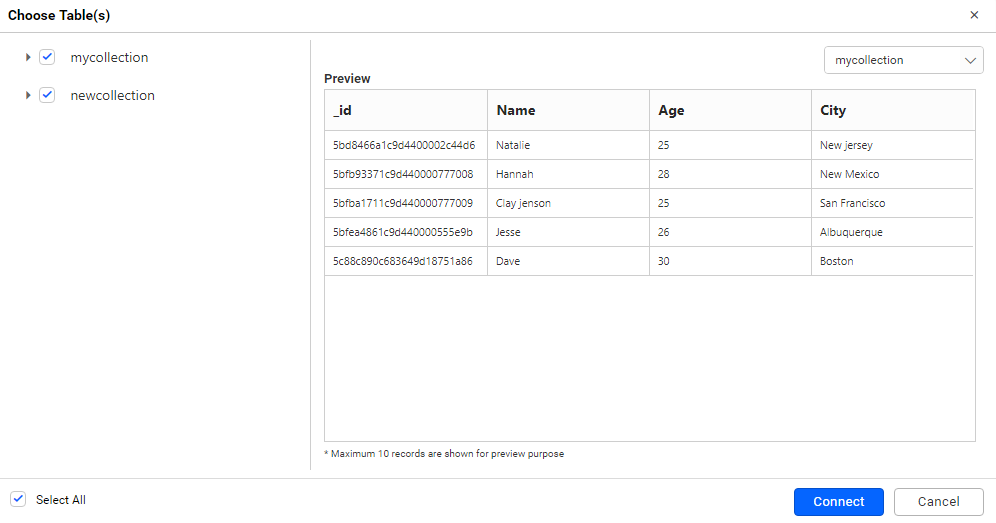
Click Preview & Connect to connect with the configurations that have been set.
-
The Choose Table(s) dialog opens. The schema represents the collection list that are retrieved from the Cosmos DB server. This dialog displays a list of schemas in treeview and its corresponding values in grid for preview. Select required schema(s) from treeview to use in designer and click Connect.
-
Now, the data design view page with the selected table schema opens. Drag and drop the table.
-
Click Save to save the data source with a relevant name.