Connecting Bold BI to Files (JSON, XML, CSV) data source
The Bold BI dashboard designer supports connecting to JSON, XML and CSV files.
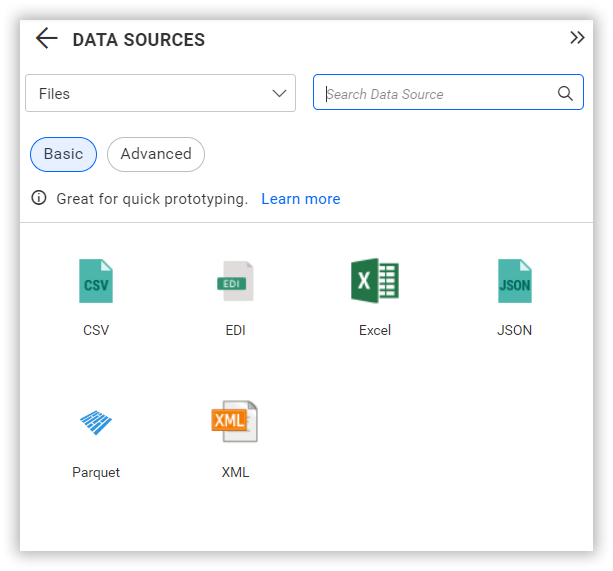
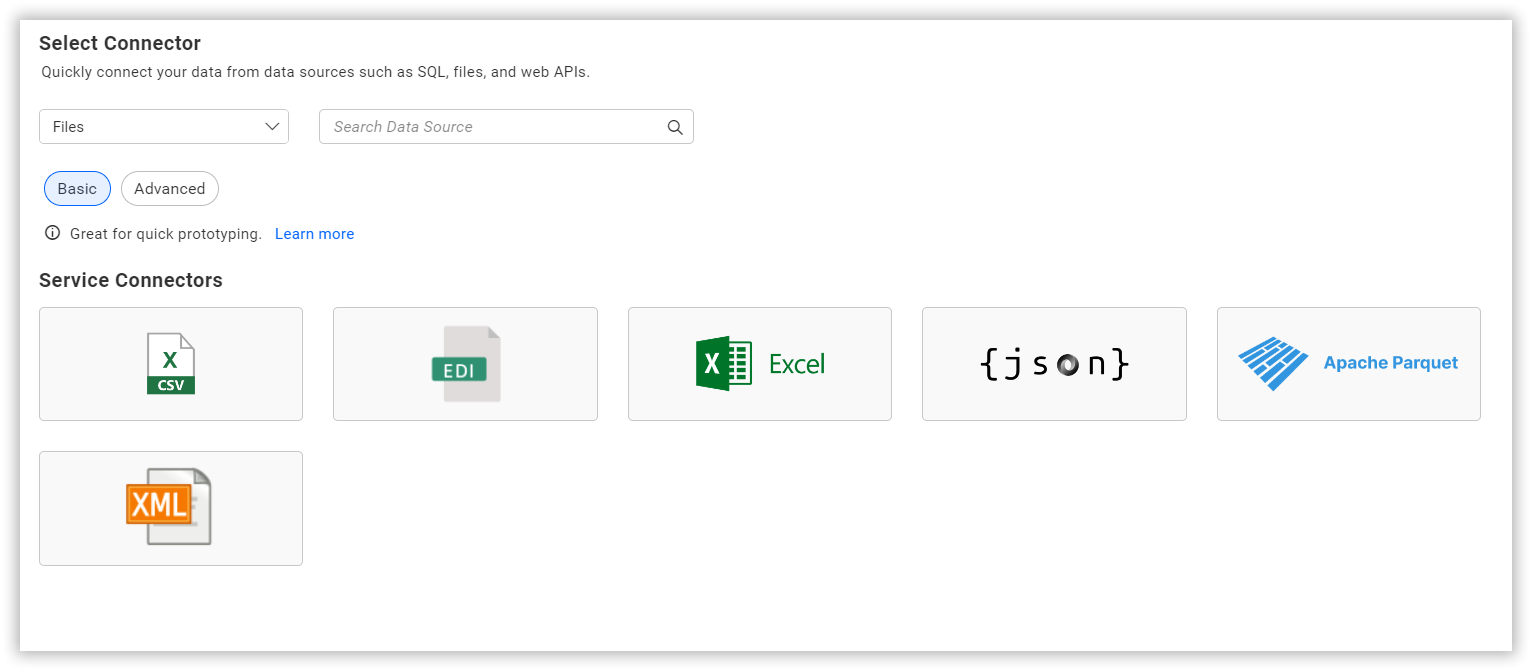
Choose Files (JSON, XML, CSV) data source
To configure the Files data source, follow the below steps:
-
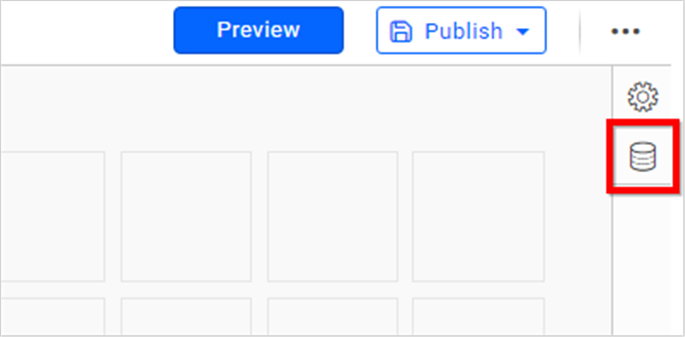
Click on the Data Sources button in the configuration panel to add a new data connection.
-
Click CREATE NEW to launch a new connection from the connection panel.
-
Select a data source file type from the connection panel.
NOTE: You can also create a data source from the home page by clicking on the Data Sources menu on the left menu panel and selecting Create Data Source from the data sources page.
Create Files (JSON, XML, CSV) data source
Once you click on the data source, the NEW DATA SOURCE configuration panel will open. Follow the steps below to create the data source.
- Enter a name and description (optional) for the data source.
- Choose the Extract Engine
- Upload a file based on selected file type data source.
Extract Engine
You can connect to the data source using one of the following extract methods:

-
Bold BI Extract: Data will be extracted and managed directly within Bold BI.
-
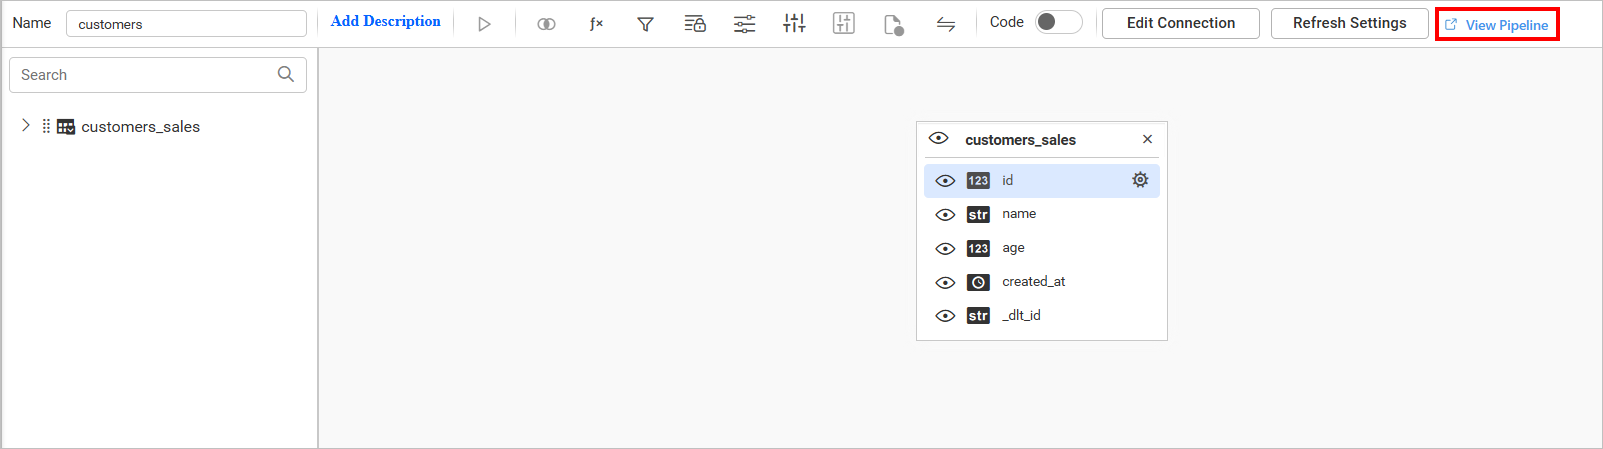
Data Hub: Data extraction is handled through the Data Hub. An equivalent pipeline is created, utilizing the Data Hub’s Extract, Transform, Load (ETL) capabilities to filter, optimize, or transform the data, and to generate new tables.
-
To view the equivalent pipeline created for data extraction, navigate to the Query Designer page and click on View Pipeline.
NOTE: You can preview data with a file size less than or equal to
200 megabytes.
You can also edit the connection information set here using the Edit Connection option.
Additional information
| CSV |
You can also upload |
Preview and data import
-
Click Preview & Connect to connect with the configurations that have been set.
-
The Choose Schema(s) dialog opens. The schema represents the key fields of data of the uploaded file. This dialog displays a list of schemas in a treeview and its corresponding values in grid for preview. Select required schema(s) from treeview to use in designer and click Connect.
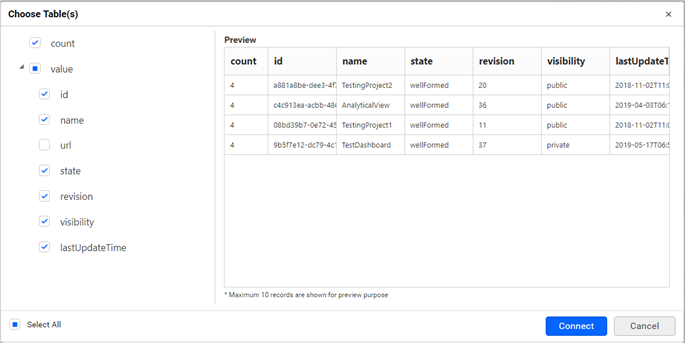
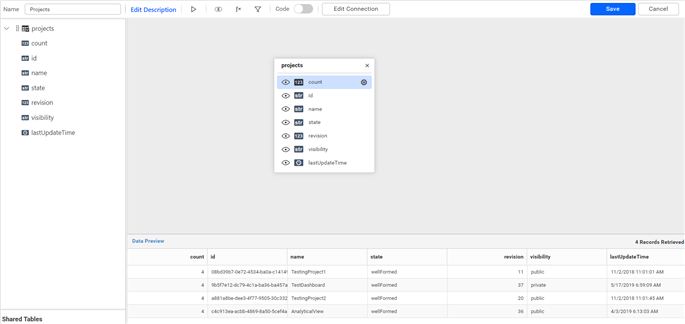
-
Now, the data design view page with the selected table schema opens. Drag and drop the table.
-
Click Save to save the data source with a relevant name.