Publish Dashboards Online in the Bold BI application
Migrating a dashboard online involves the process of publishing a dashboard in the Bold BI application to multiple tenants, whether on the same server or different instances. This allows for easy sharing of dashboards across various sites.
To publish a dashboard to other site(s), follow these steps:
-
Click on
Actionsin the dashboard grid context menu and choosePublishto publish the selected dashboard.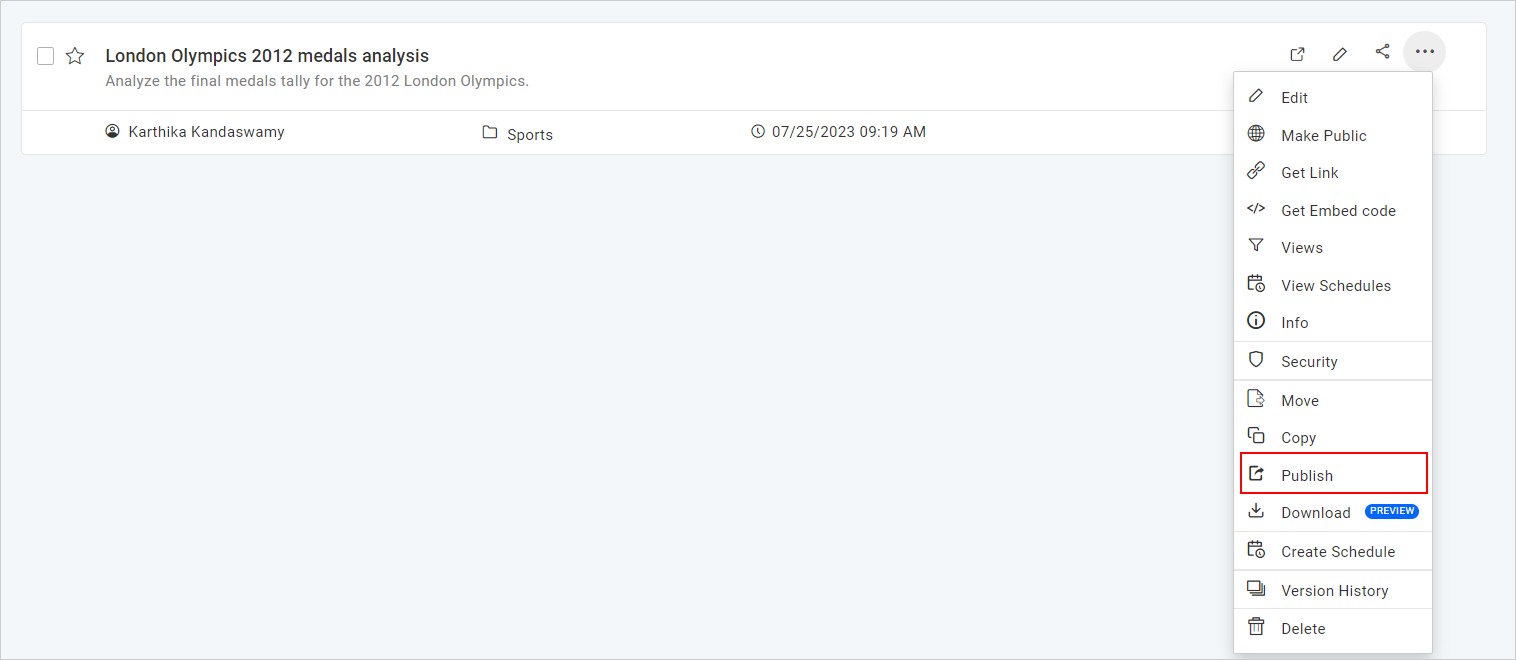
-
For the master site, the dialog will be shown as follows with the options for
Internal SiteandExternal Site. Please select eitherInternal SiteorExternal Sitefor publishing the dashboard in the publish dialog, and proceed to theNextstep.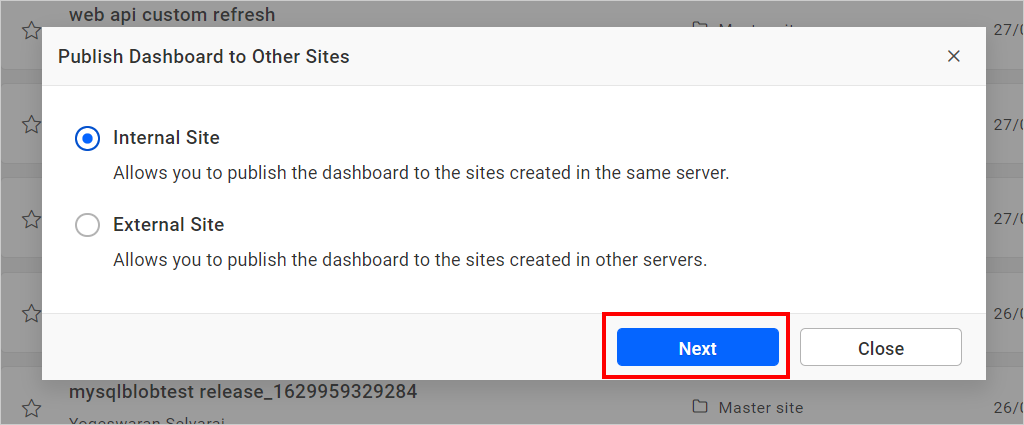
For non-master sites, the external site publish dialog will be shown directly. Additionally, publish the dashboard to the internal sites using the external site publish option for the non-master sites.
NOTE: The master site is the first site created during startup in Bold BI, and later you can set any other sites as the master site.
Internal site
Publish the dashboard to the sites created in the same Bold BI server.
-
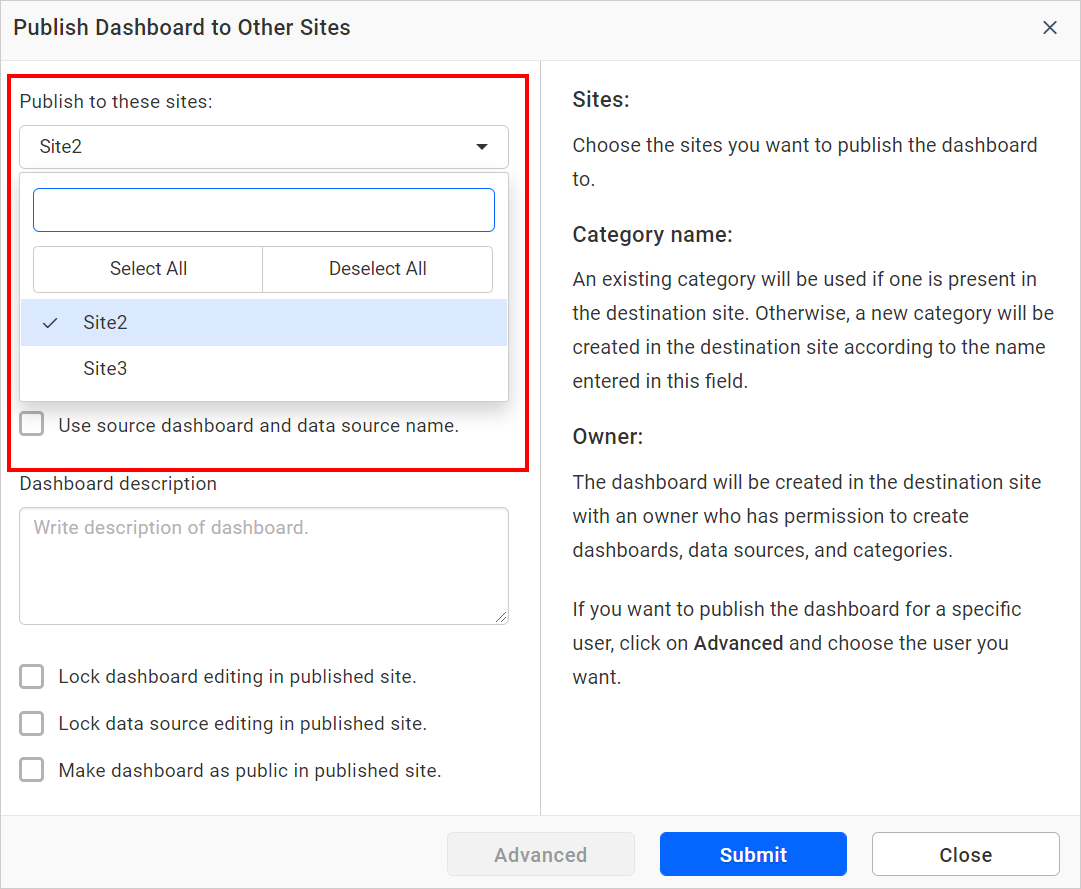
Choose the sites in the drop-down menu where you want to publish the dashboard.
-
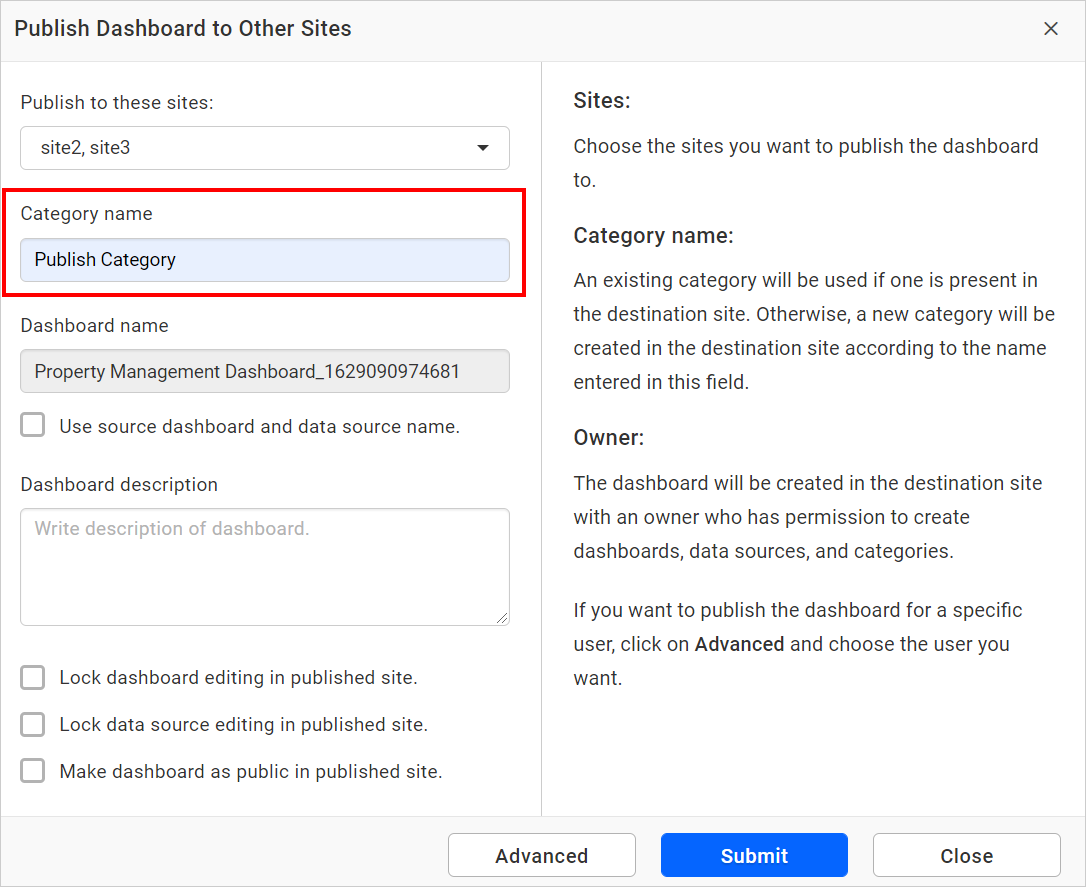
Specify the category name where you want the dashboard to be published on other sites.
-
Select the checkbox
Use source category name.if you want to publish the dashboard with the source category name on the destination sites.
-
Select the checkbox
Use source dashboard and data source nameif you want to publish the dashboard and data source with the source dashboard and data source name in the destination sites.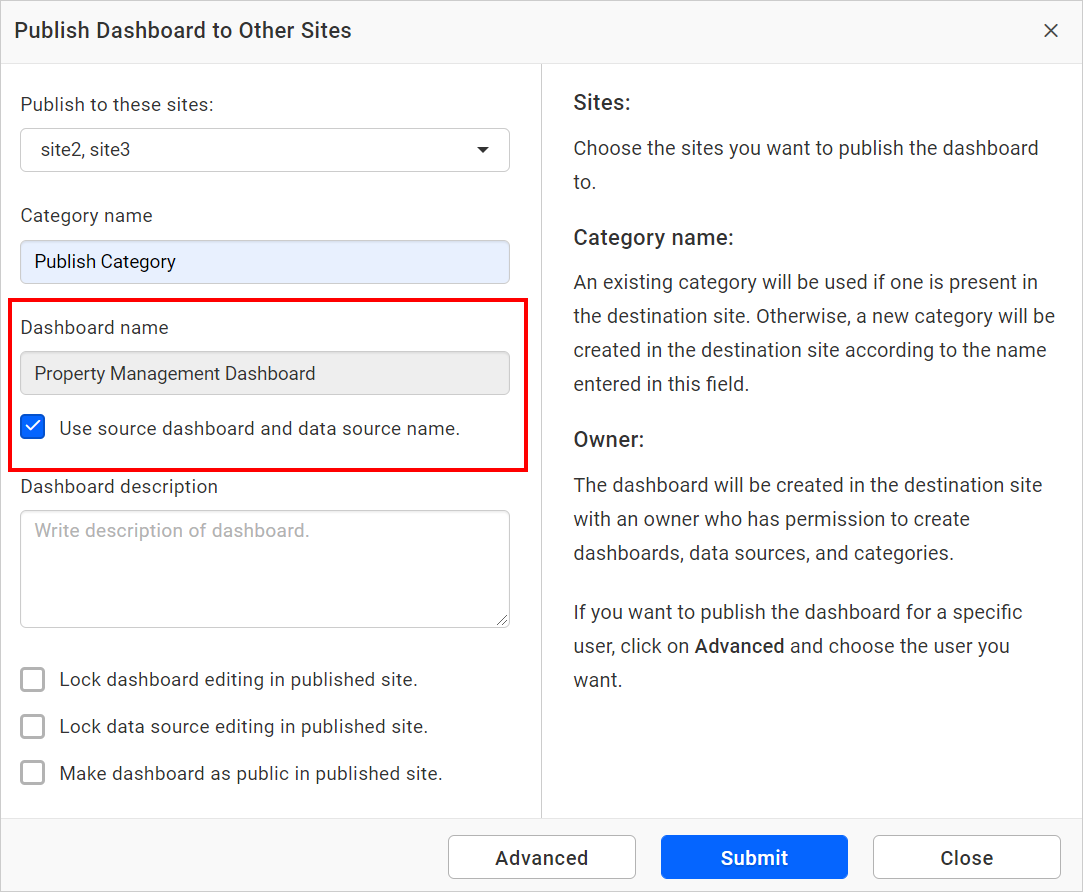
-
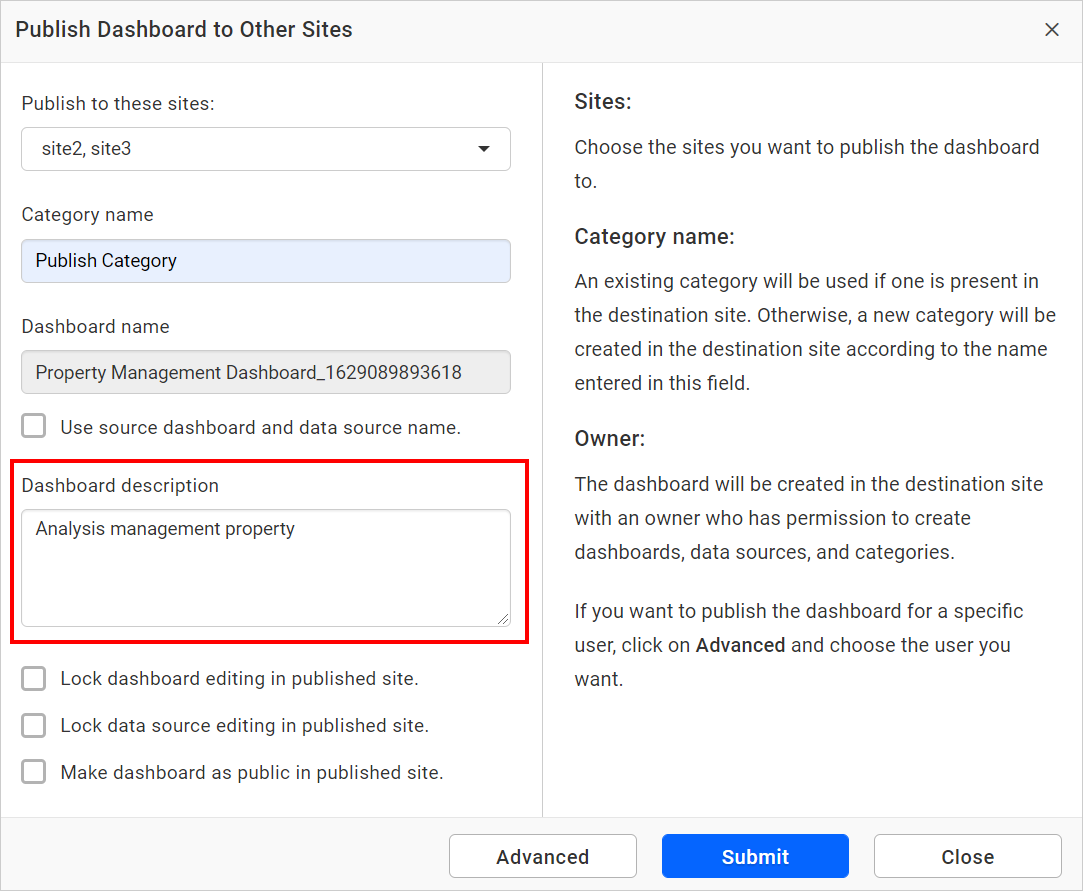
Provide a description for the dashboard if necessary.
-
Select the checkbox
Lock dashboard editing in published siteif you do not want the published dashboard to be edited in the published sites.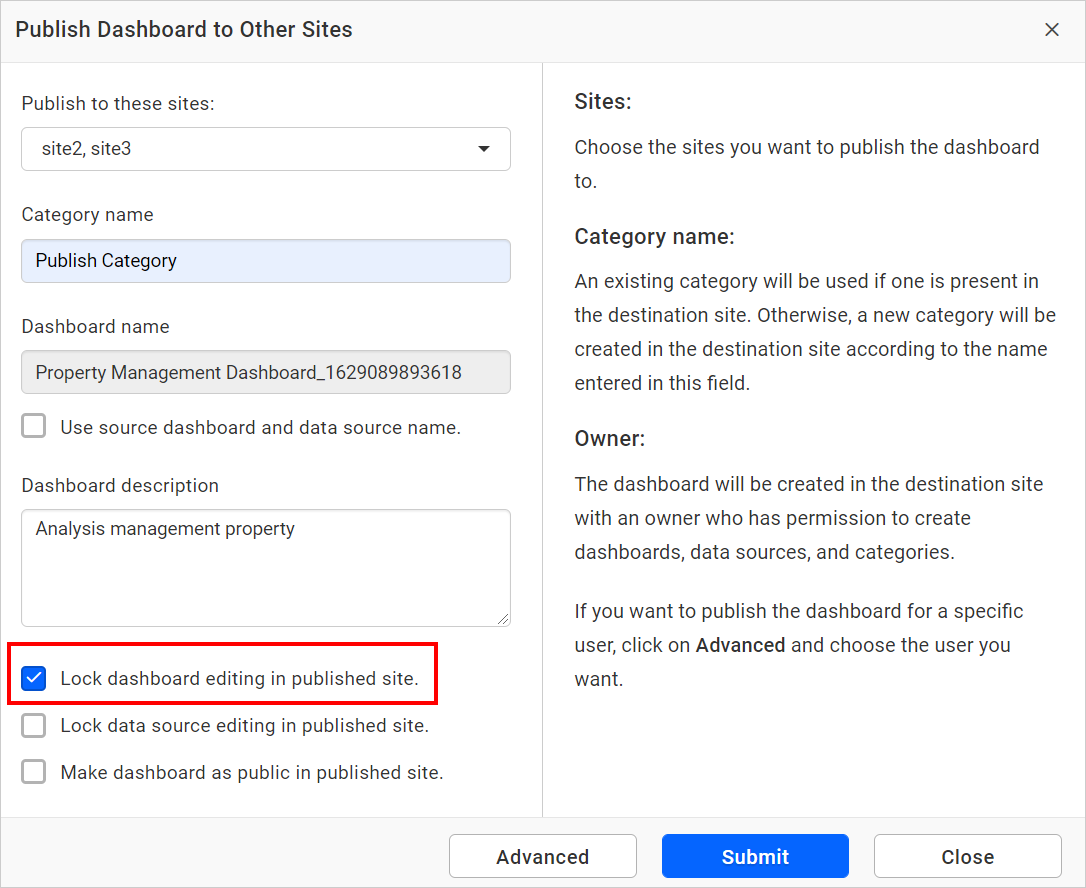
-
Select the checkbox
Lock data source editing in published siteif you do not want the published data source to be edited in the published sites.
-
Select the checkbox
Make dashboard as public in published siteif you want the published dashboard to be public in the published sites.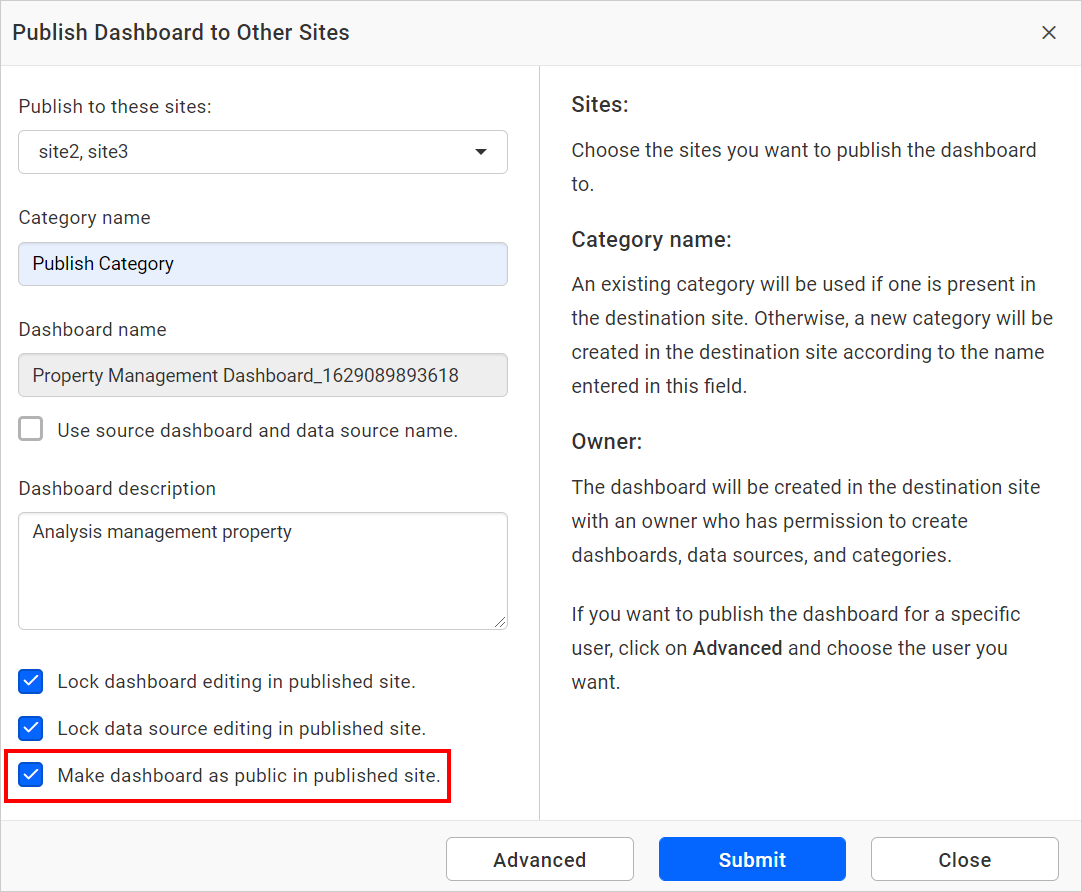
-
Select the
Skip All Data Source Publishing on the Target Site to Use Existing Data Sourcescheckbox to avoid publishing data sources that are already published on the target site.
-
You can choose the owner (who has permission to create a dashboard, data source, and category) of the dashboard in the published site using the
Advancedoption. If you do not, it will publish the dashboard with a random user (who has permission to create the dashboard, data source, and category).
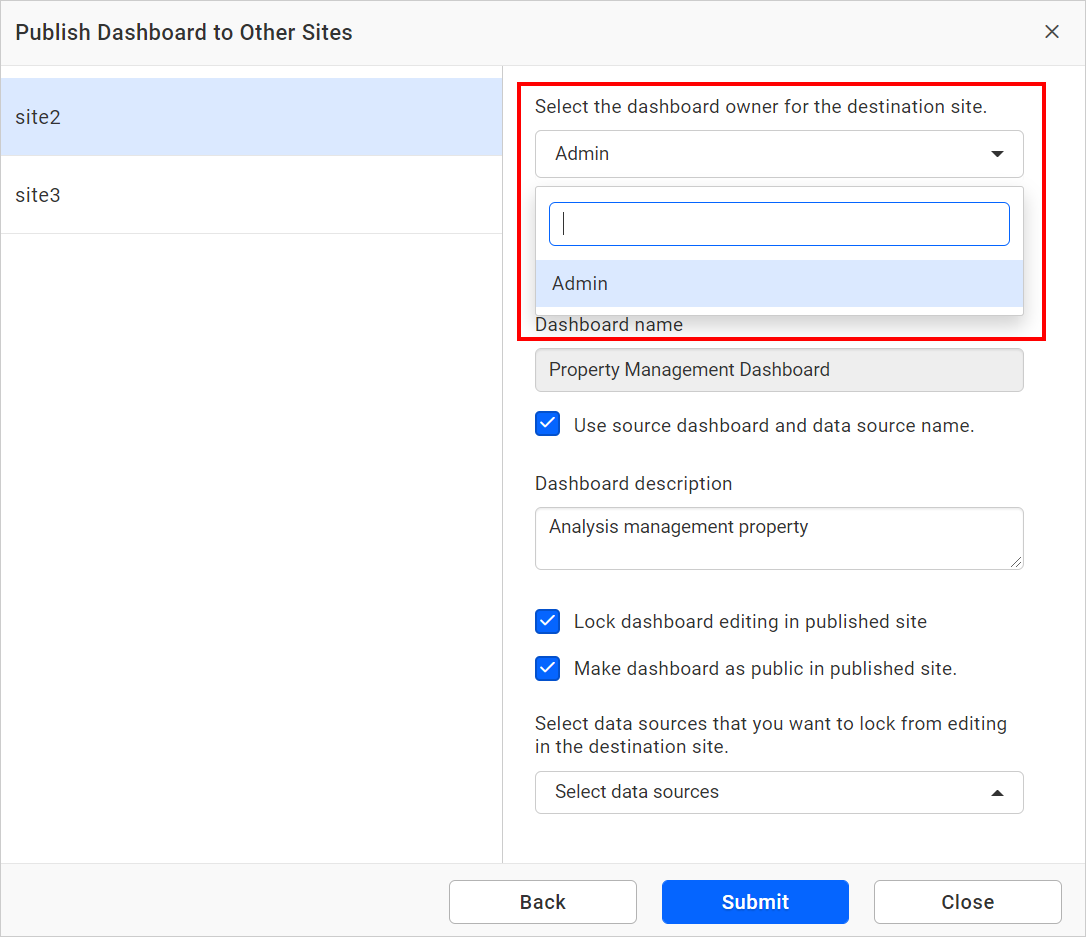
- You can individually configure the fields in the
Advancedwindow.
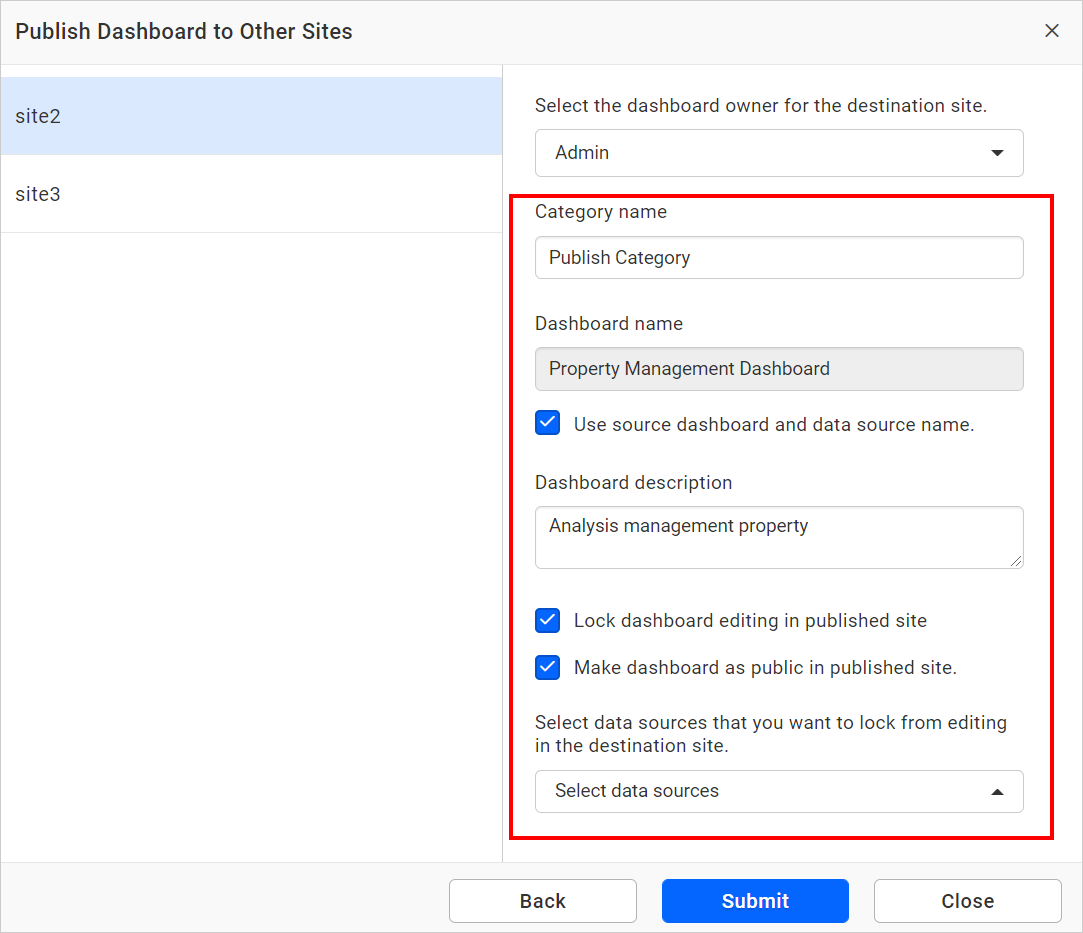
- To publish the dashboard in the same category from the source site to the destination site, check the
Use souce category namebox and select a category from the dropdown menu using theAdvancedoption.

- If you want to publish in a different category, uncheck the box and enter the category name in the text field to which need to be published.

-
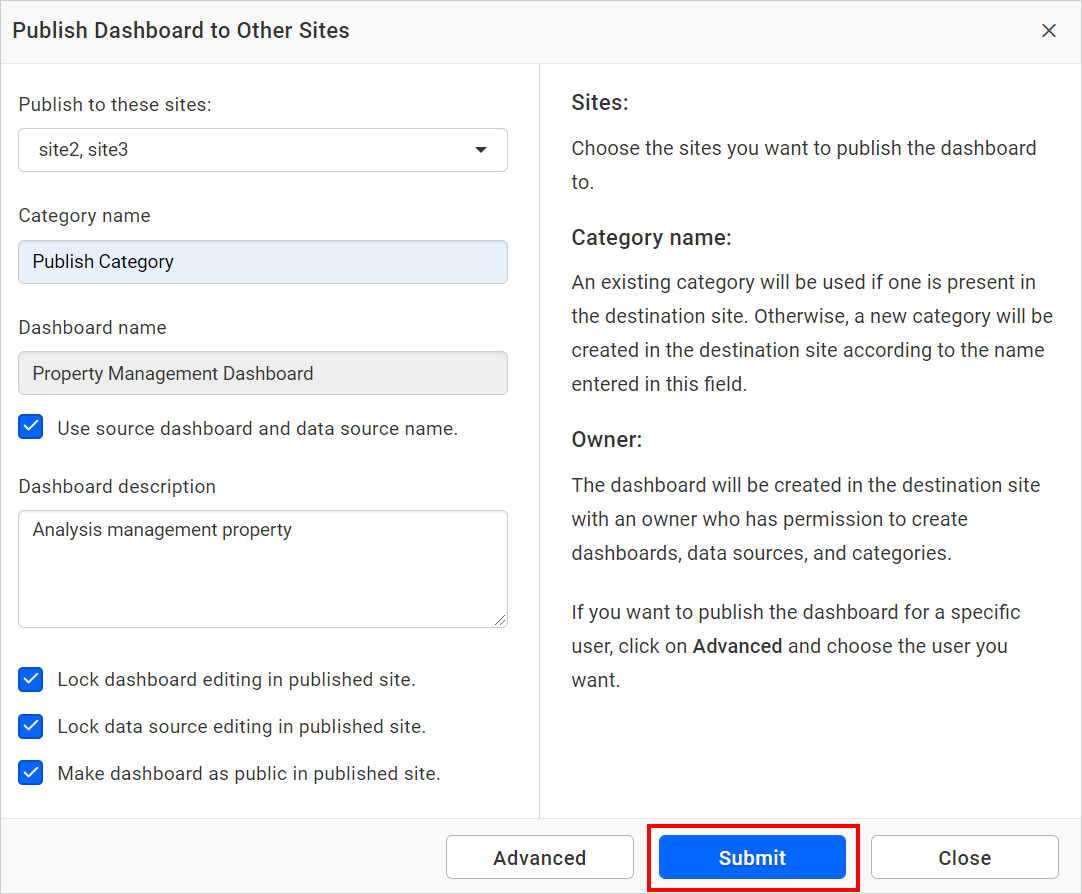
By submitting the form, the publishing process will be started and you can check the status of the publishing in the Published Resources page.
External site
Publish the dashboard to the sites created in other Bold BI servers and to the internal sites created in the same Bold BI server for the non-master sites using the external site publish option.
-
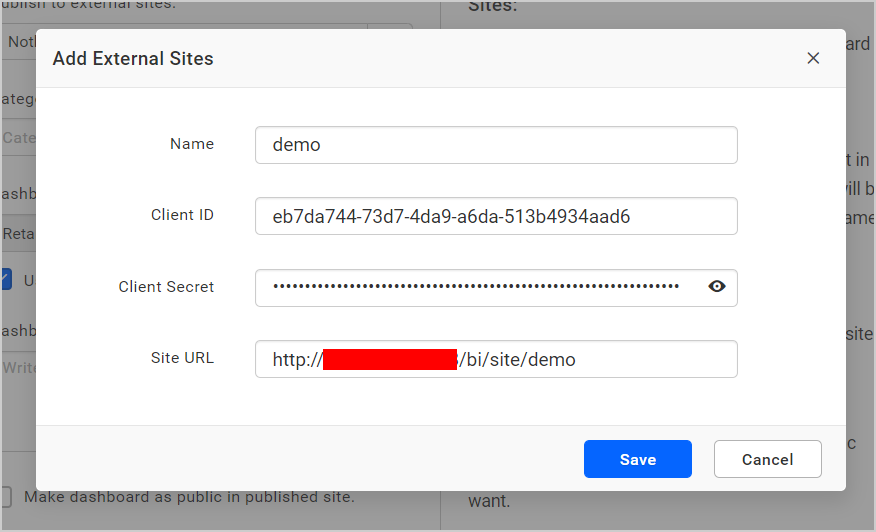
Click on
+to add external site.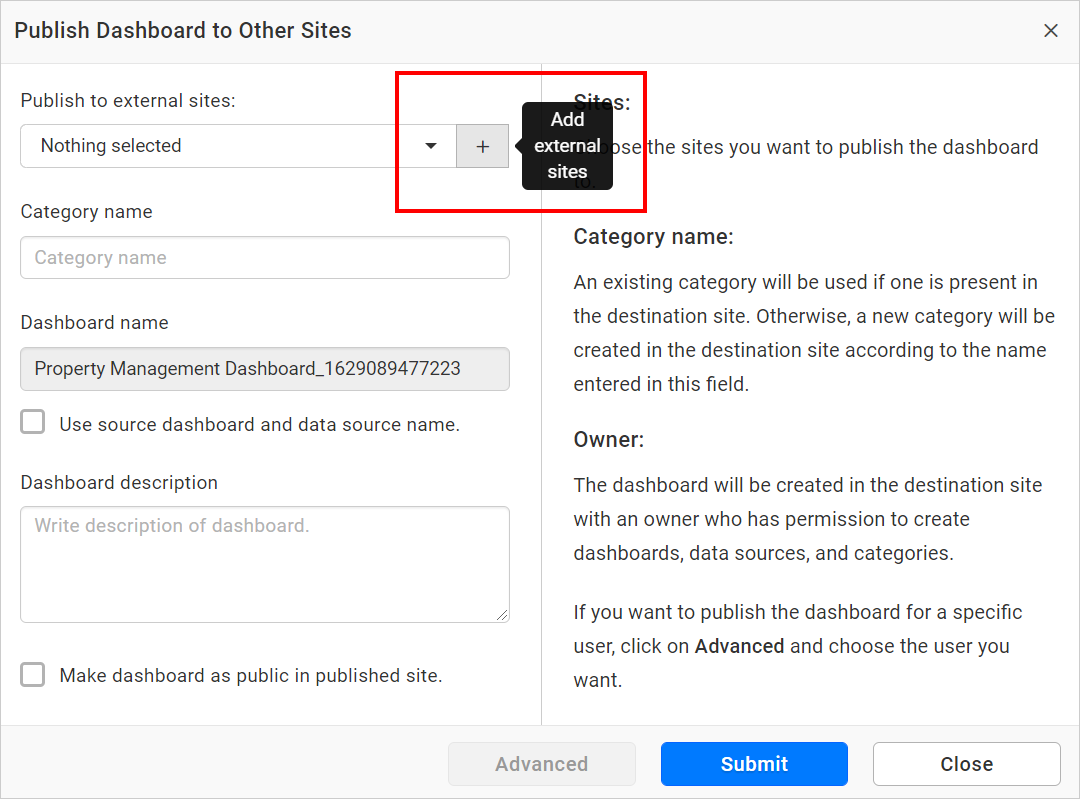
-
Fill in the following details as shown in the following image:
- Name - Enter the name that you want for external site.
- Client ID - Enter the Client Id of the site.
- Client Secret - Enter the Client Secret of the site.
- Site URL - Enter the URL of the site.
You can add both internal and external site’s client ID and client secret here.
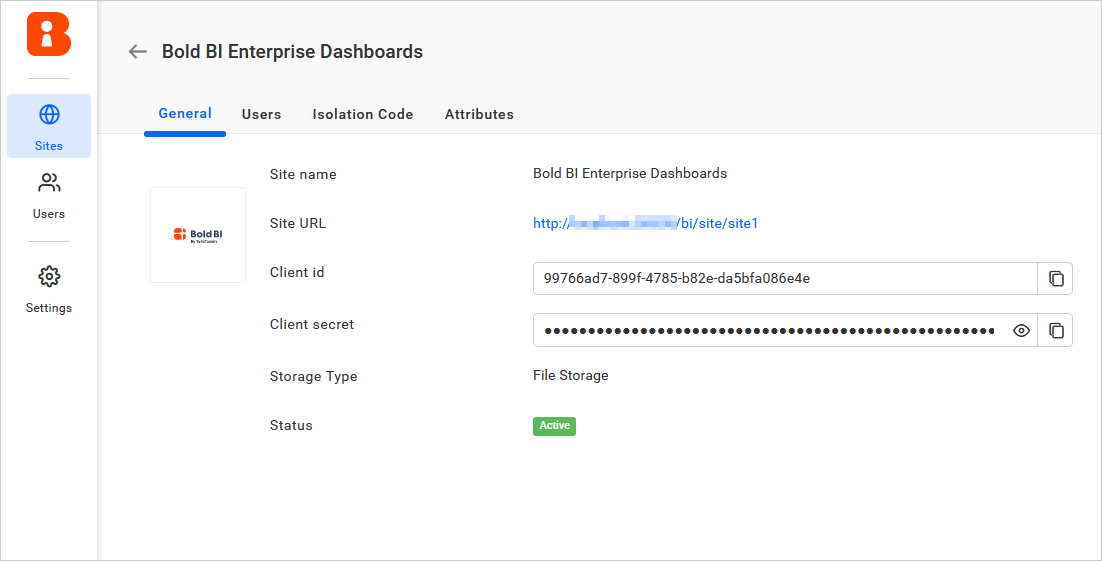
For the Bold BI Server, get the site’s Client Id and Client Secret values from the site details page.
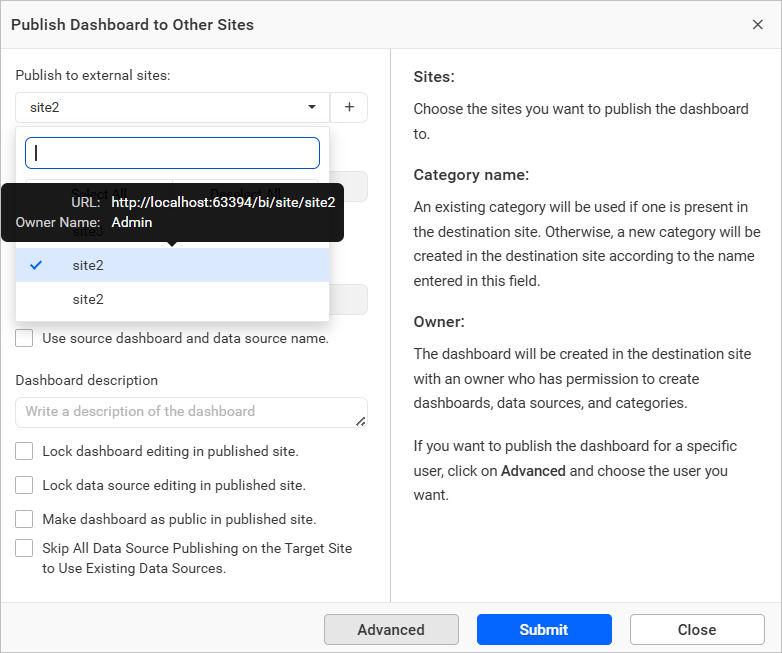
- After the external site is added, choose the external site in the drop-down and follow the same steps mentioned for publishing the dashboard in the internal site.
NOTE:
• The dashboards or the data sources cannot be locked while publishing to the external sites. So, theLock dashboard editing in published siteandLock data source editing in published sitecheck box options will not be shown forExternal Site.
• Admin users can view all the external sites added by any user, which will be listed in the “Select Site” dropdown, since admins can publish any dashboard and data sources.
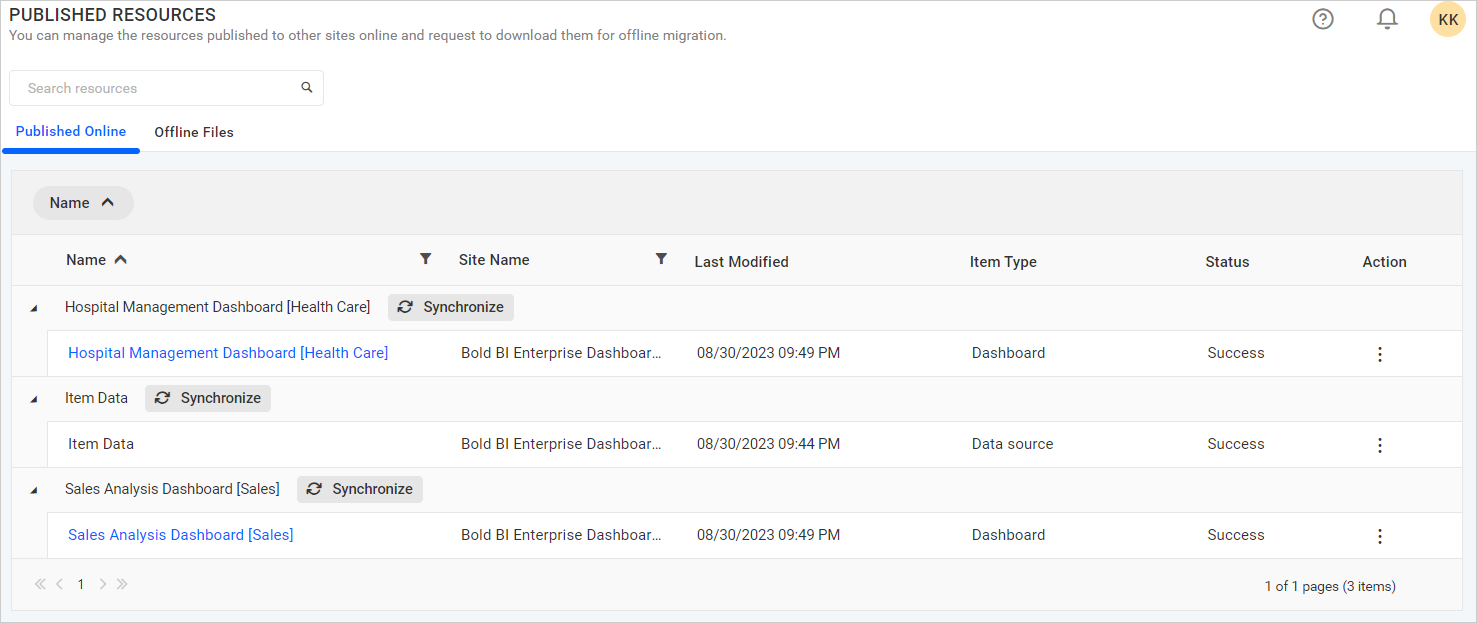
Manage published dashboards
You can view the status of the published dashboards on the Published Resources page. The published resources are listed in the grid and grouped by the dashboard by default.

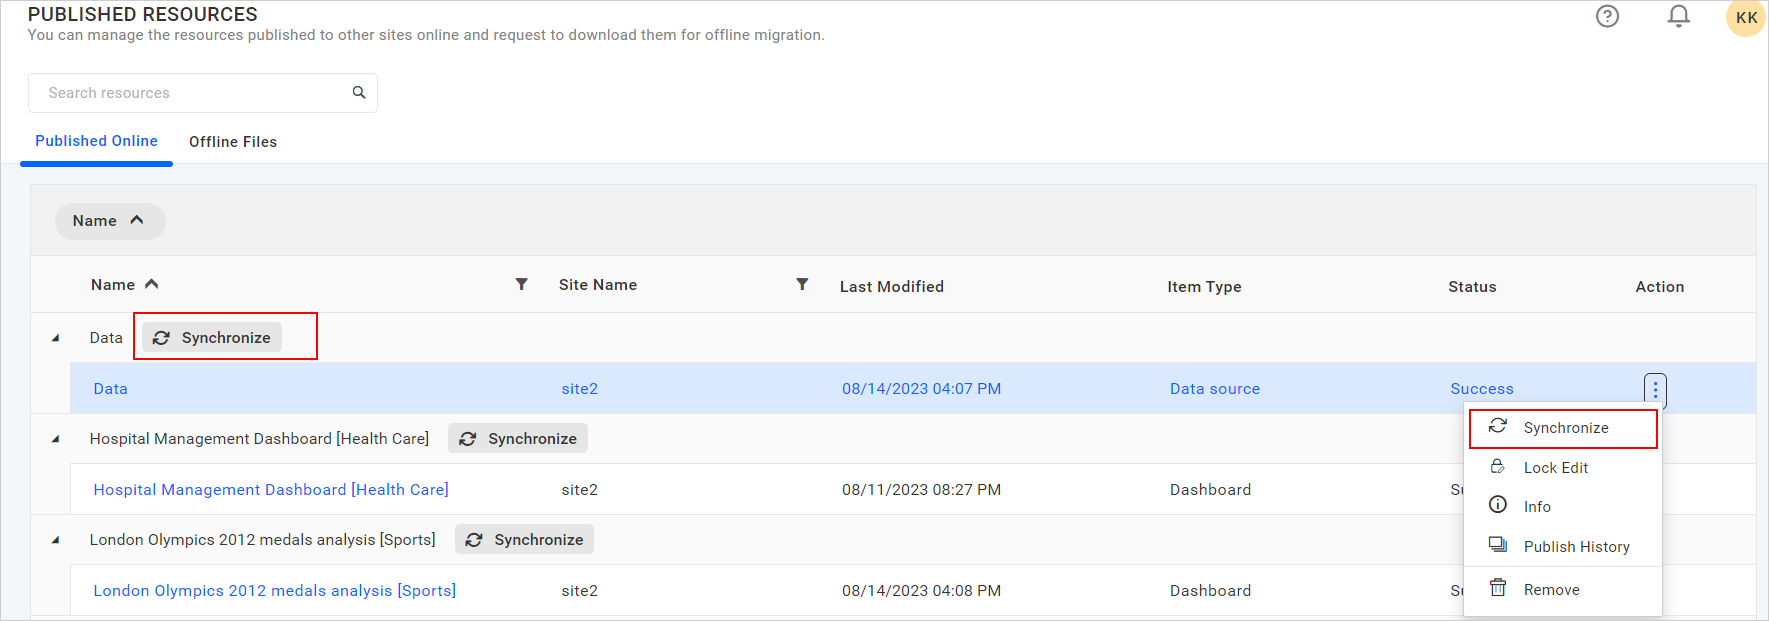
Synchronize dashboard
When you make changes to the original dashboard, you can move the changes to the published site using the synchronize published resource option.
Synchronize dashboard with or without datasource
When changes are made to the original dashboard’s data source, they are automatically reflected to the published site using the Synchronize Published Resource option. This happens by default, without needing to enable any additional settings.

If you want to prevent data source updates on the published site, enable the Ignore Data Source Synchronization option before synchronizing.
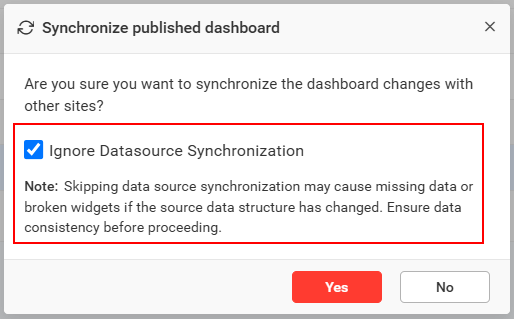
NOTE: This support is not available for bulk dashboard synchronization and data source synchronization.
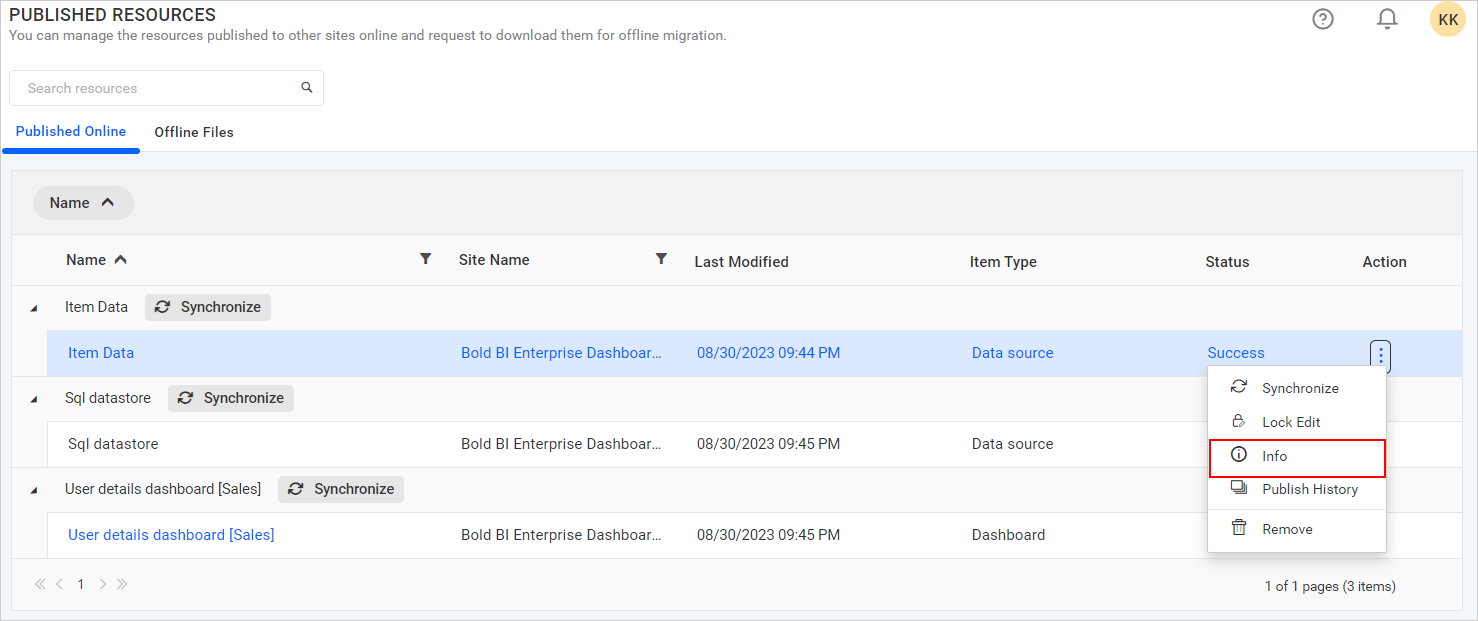
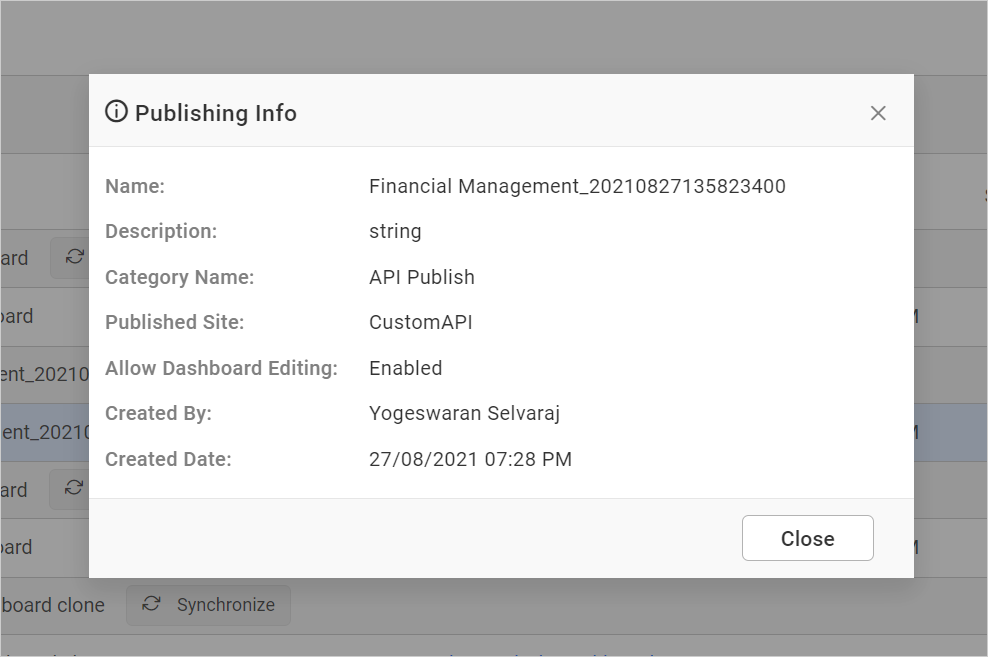
Information of published dashboard
You can see the publishing information of the respective dashboard in the dialog box. Click Actions in the grid context menu and select Info.
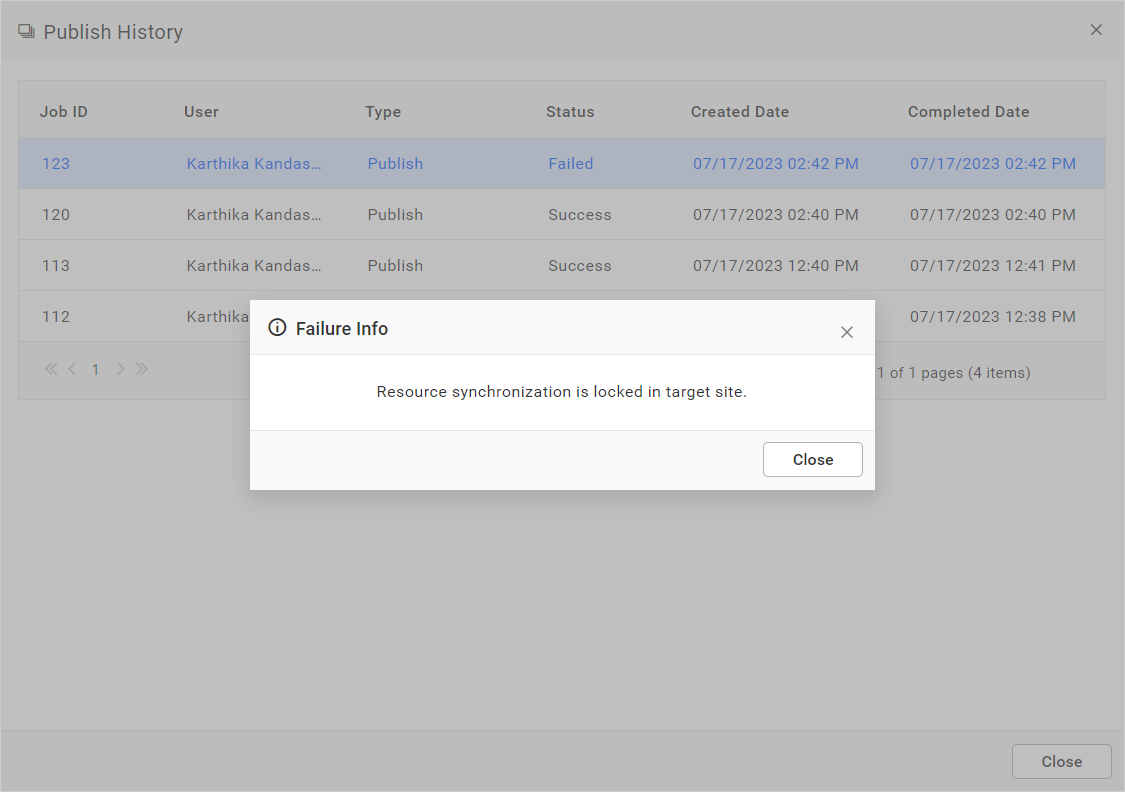
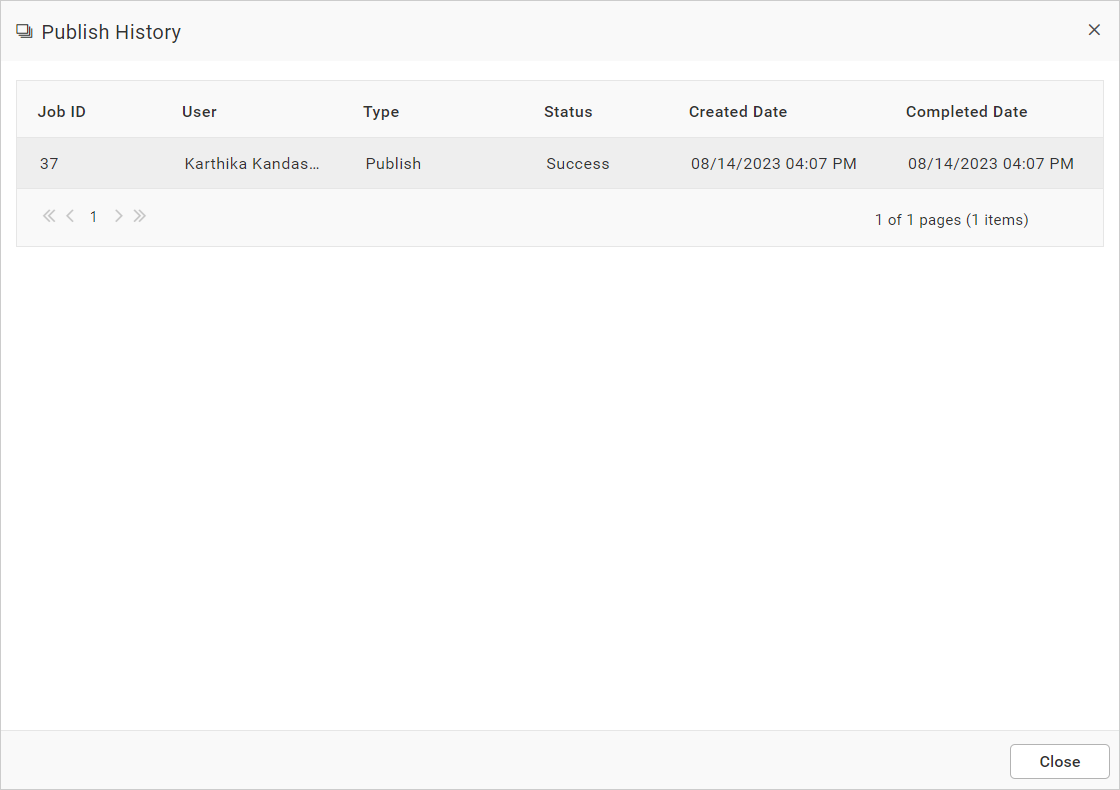
Publish history
You can view the publish history of the corresponding dashboard. Click Actions in the grid context menu and select Publish History.
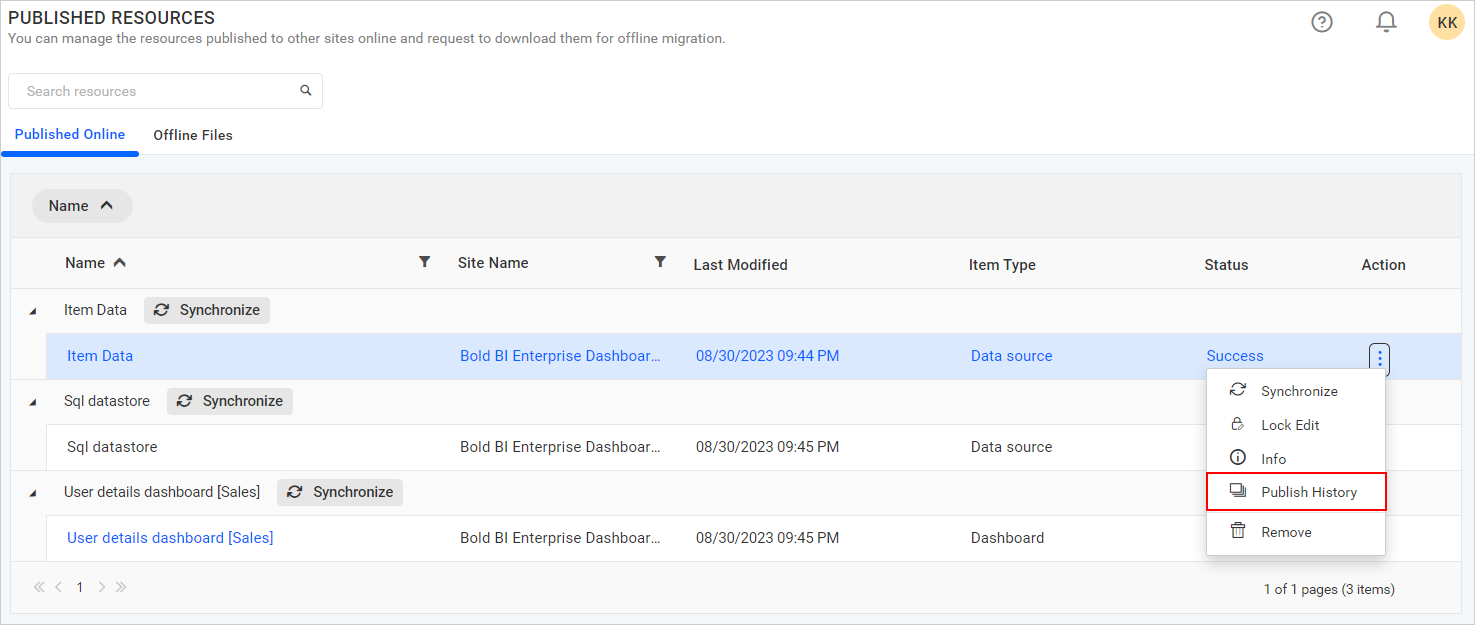
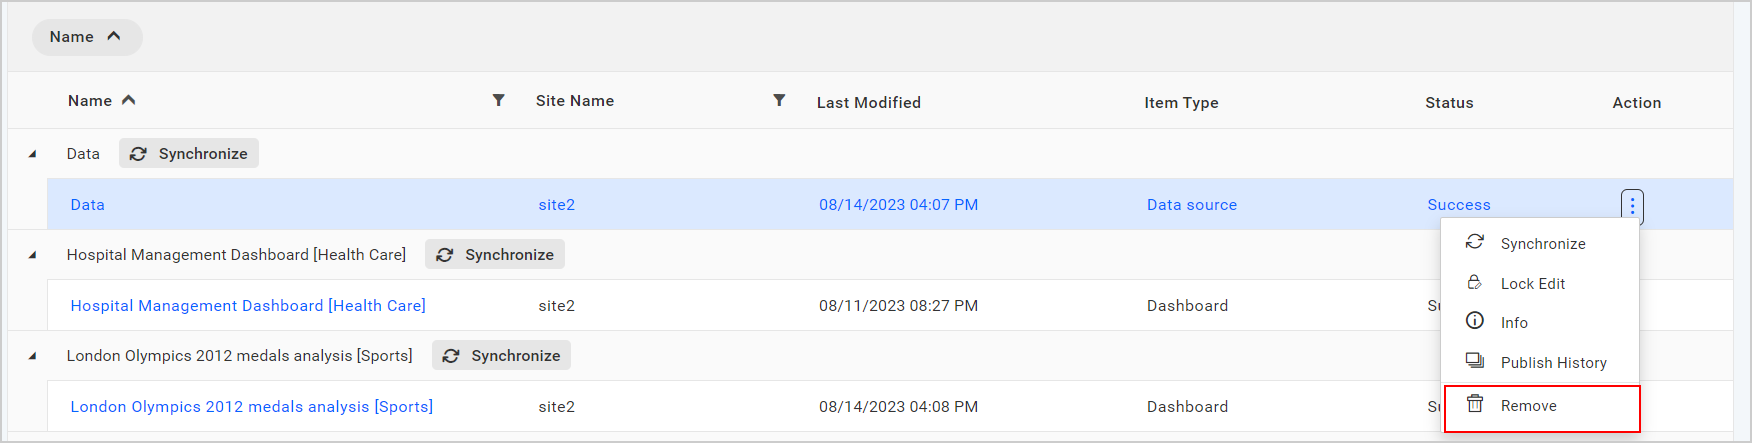
Remove publish dashboard
Published dashboards can also be removed from Bold BI when they are no longer required.
Click Actions in the grid context menu and select Remove to remove the published dashboard from the list.
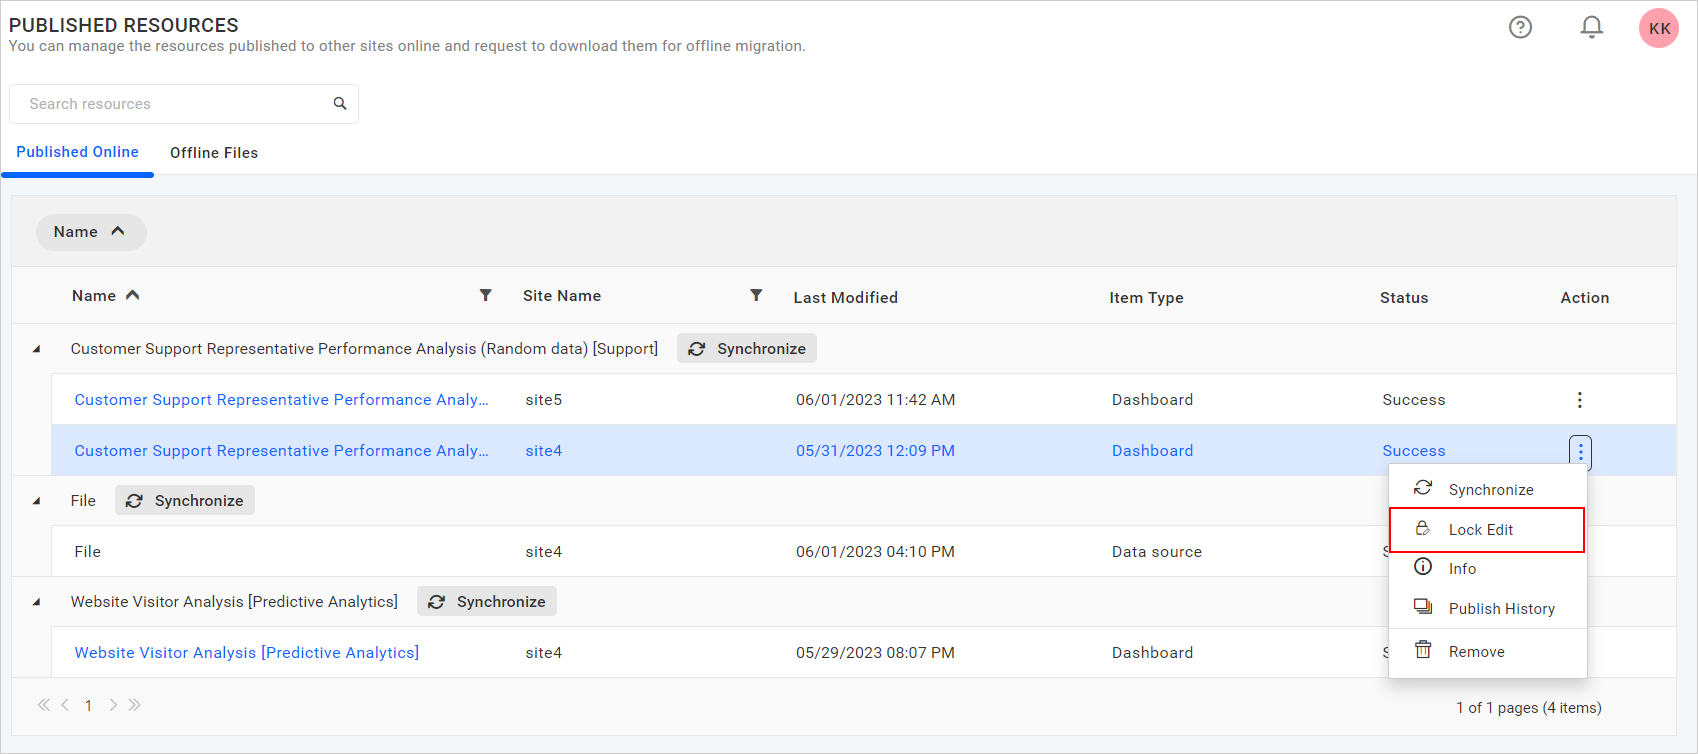
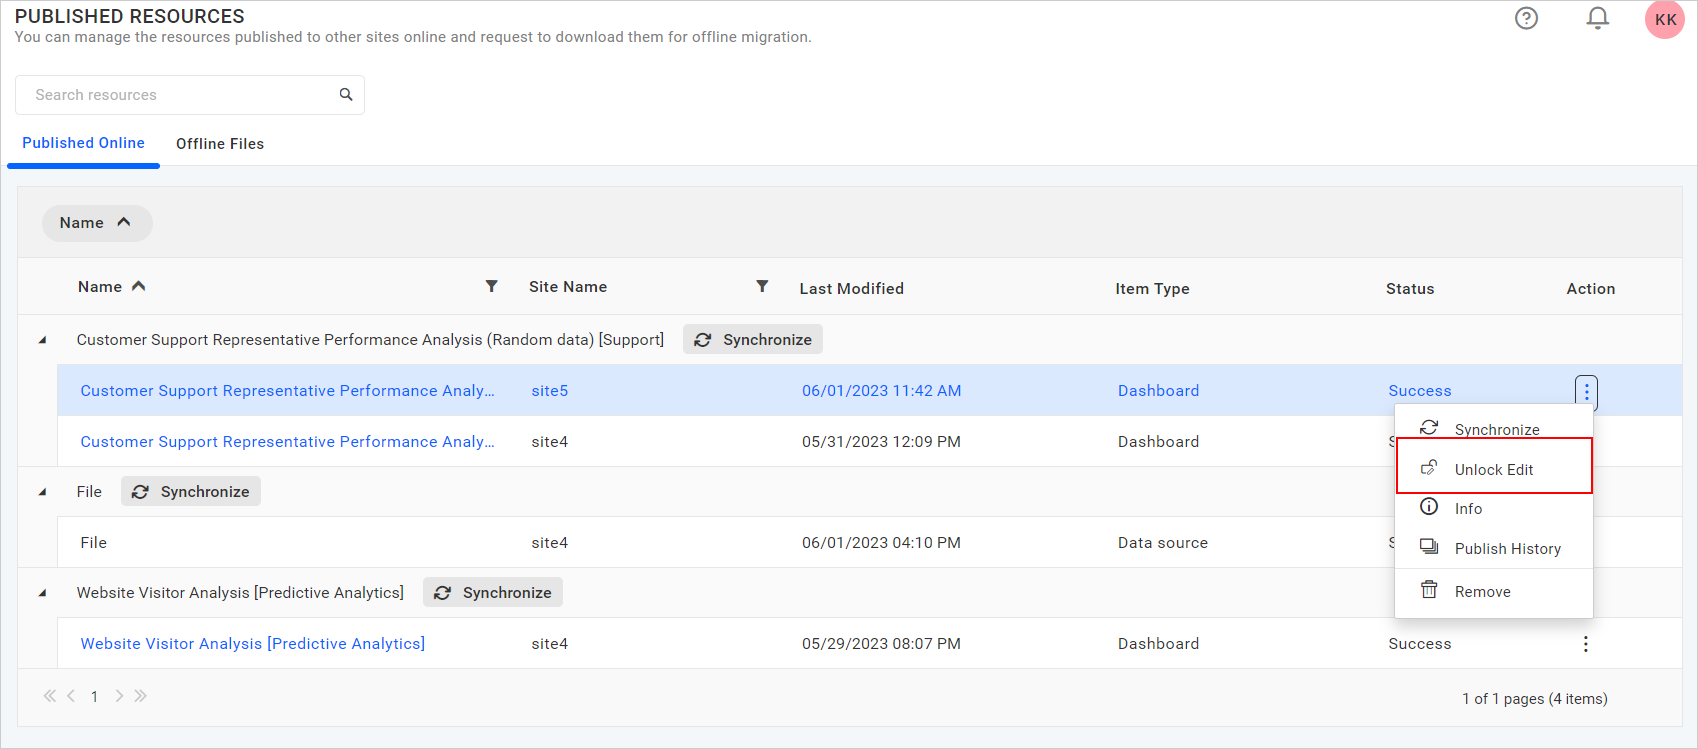
Lock and unlock publish dashboard
The edit option for published dashboards can be locked or unlocked. Unlock previously locked published dashboards and lock them again.
Click Actions in the grid context menu and select Lock Edit to lock the edit support for the published dashboard.
Click Actions in the grid context menu and select Unlock Edit to unlock the edit support for the published dashboard.
Disable Synchronization of publish dashboard
The synchronization of published dashboards from the source site can be disabled by enabling the Lock Resource Synchronization in the dashboard settings on the target site.
Learn how to disable synchronization for the published dashboard in Lock Resource Synchronization.
Once these settings are enabled on the target site, synchronization of the published dashboard from the source site will fail and show the failed status in the grid.
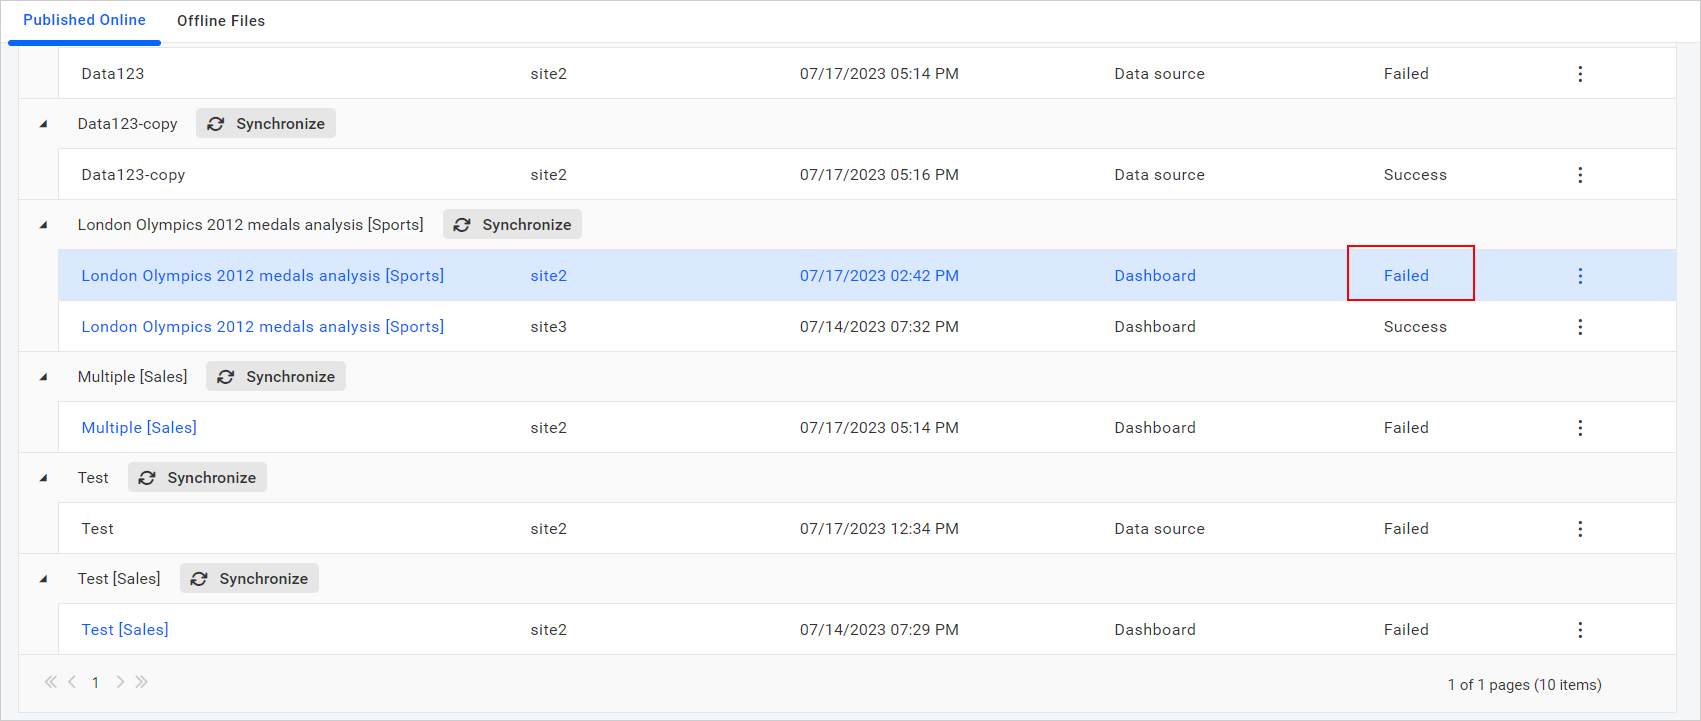
The failure reason will be displayed as Resource synchronization is locked on the target site when clicking on the Failed status in the publish history dialog.