
Connecting Bold BI to Azure Databricks data source
Bold BI Dashboard Designer supports connecting to Azure Databricks Catalog through SQL Live query.
Choose Azure Databricks data source
To configure the Azure Databricks data source, follow these steps:
-
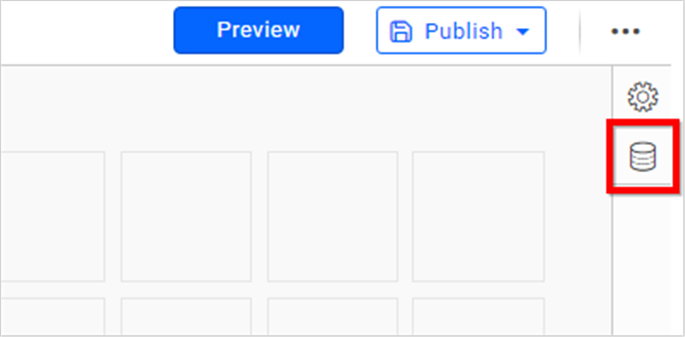
Click on Data Sources in the configuration panel to add a new data connection.
-
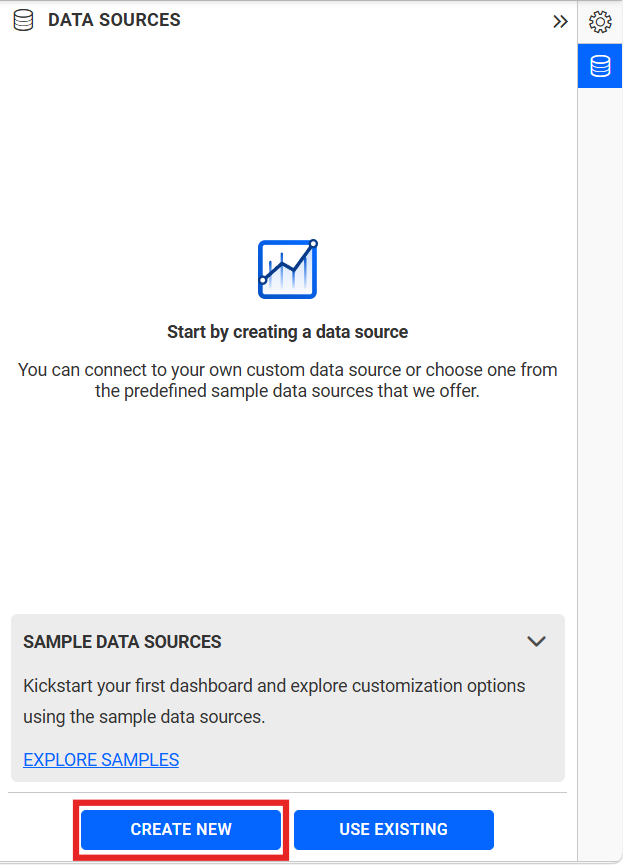
Click on CREATE NEW to launch a new connection from the connection panel.
-
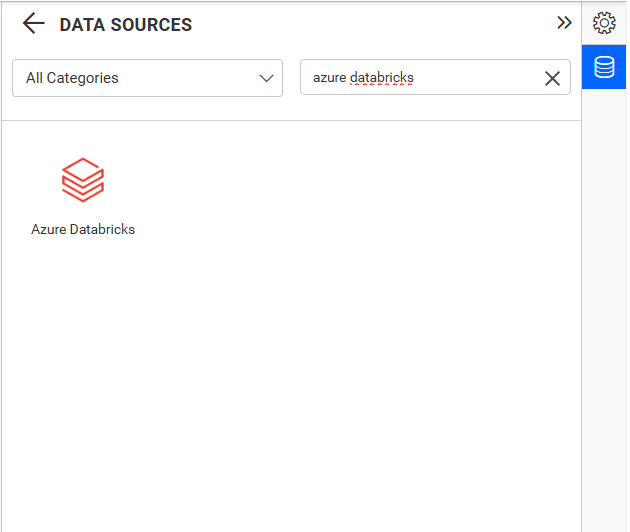
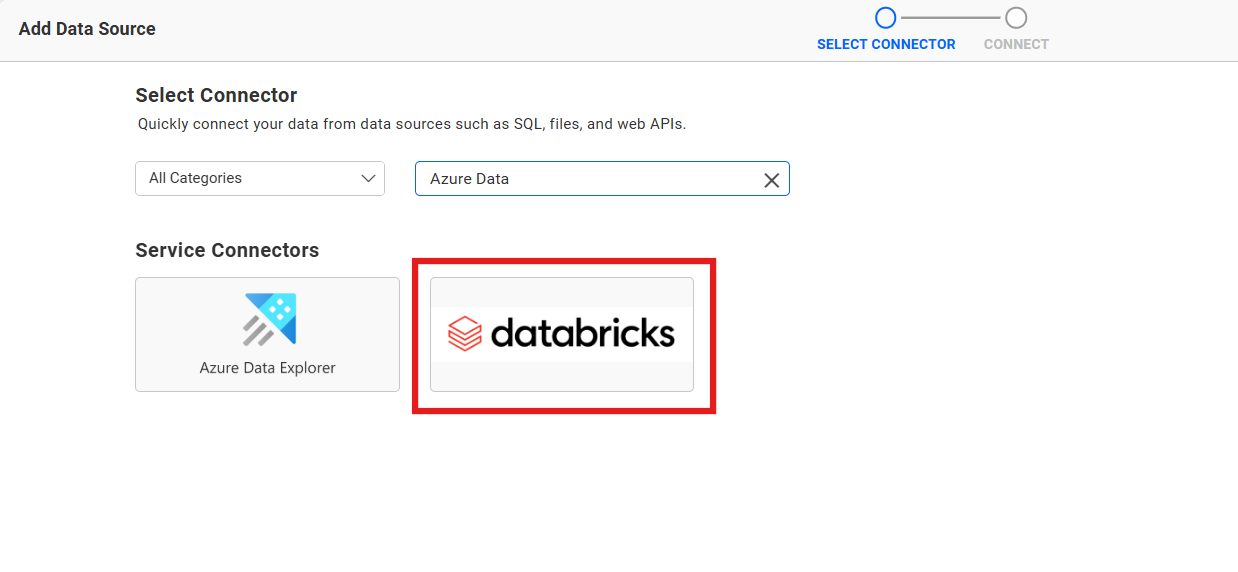
Select the Azure Databricks connection in the connection panel.
NOTE: You can also create a data source from the home page by clicking on the Data Sources menu in the left menu panel and selecting Create Data Source from the data sources page.
Connect to Azure Databricks data Source
Azure Databricks data source can be accessed in Bold BI using the live connection mode.
Create Azure Databricks data source
After clicking the data source, the NEW DATA SOURCE configuration panel opens. Follow the given steps to create an Azure Databricks data source:
-
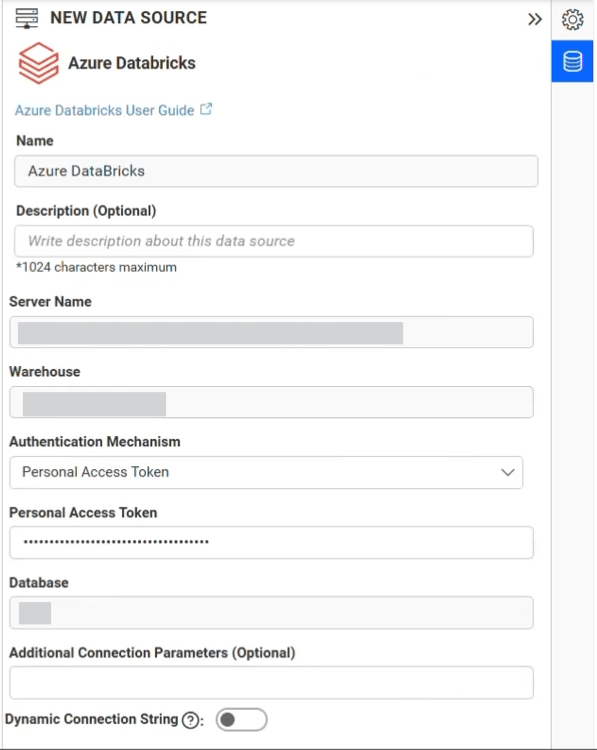
Enter a name and an optional description for the data source.
-
Enter the Workspace URL in the Server Name text box.
-
Enter the Warehouse ID in the Warehouse text box.
-
From the Authentication Type dropdown, select one of the following authentication Mode:
-
Personal Access Token (PAT)
-
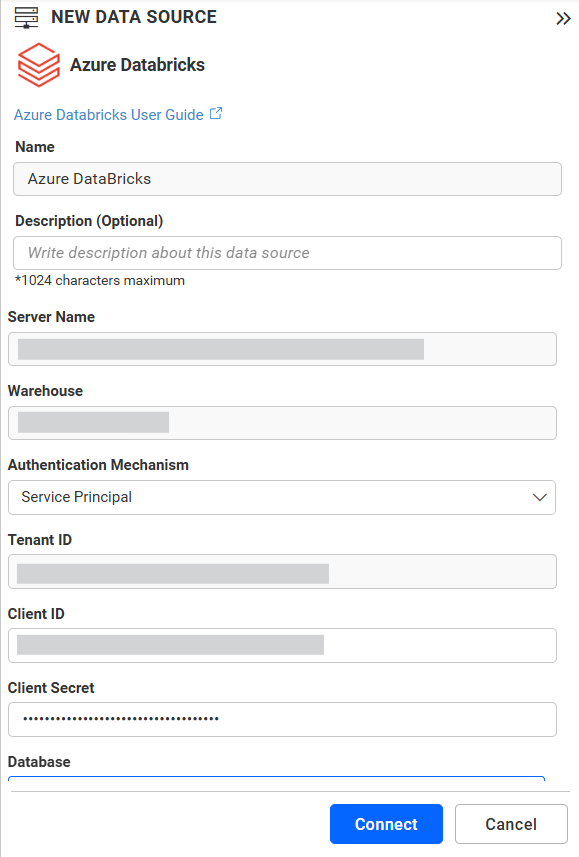
Azure AD Service Principal
-
-
If you select Personal Access Token (PAT) authentication, enter the PAT value in the Personal Access Token text box. Otherwise, select Service Principal as the authentication mode.
-
Enter the Tenant ID (also known as Authority) in the Tenant ID text box.
-
Enter a valid Azure databricks Application Client ID in the Client ID text box.
-
Enter a valid Azure databricks Application Key in the Client Secret text box.
-
Select the database you want to query from the listed databases associated with the Azure databricks server, using the Database combo box.
Data Preview
- Click Connect to connect to the Azure Databricks server with the configured details.
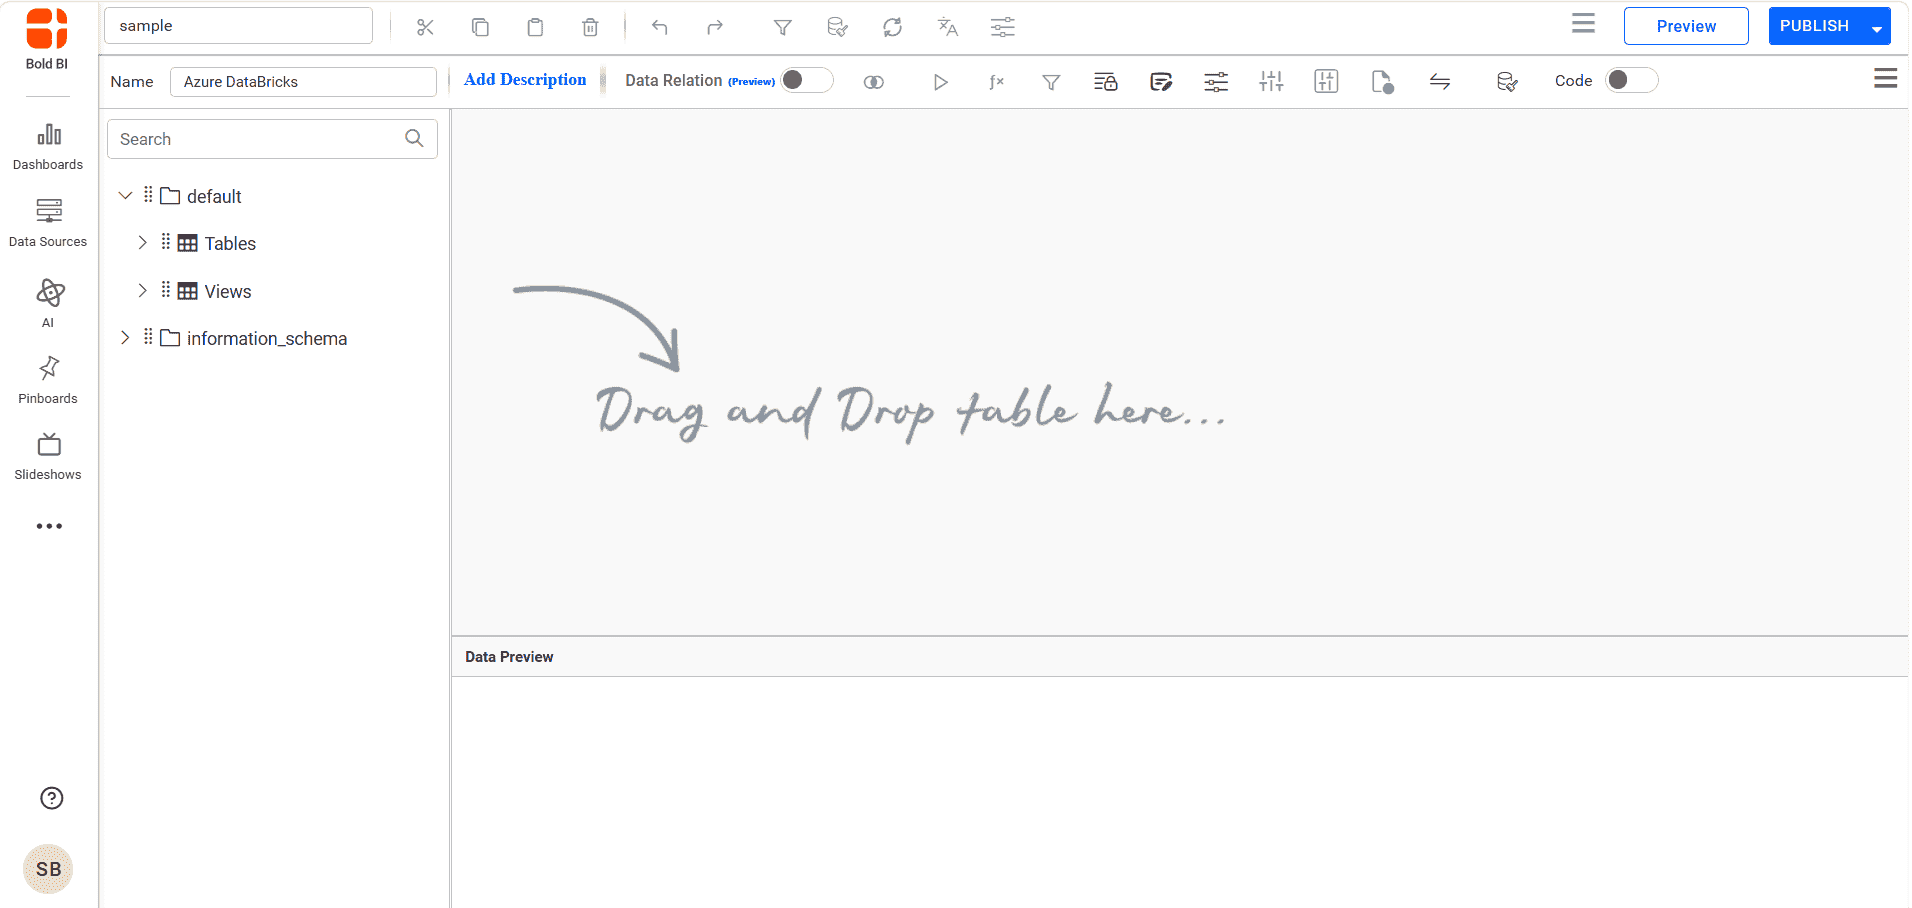
The schema represents the collection list retrieved from the Azure Databricks server. This dialog displays a list of schemas in a treeview along with their corresponding values.
-
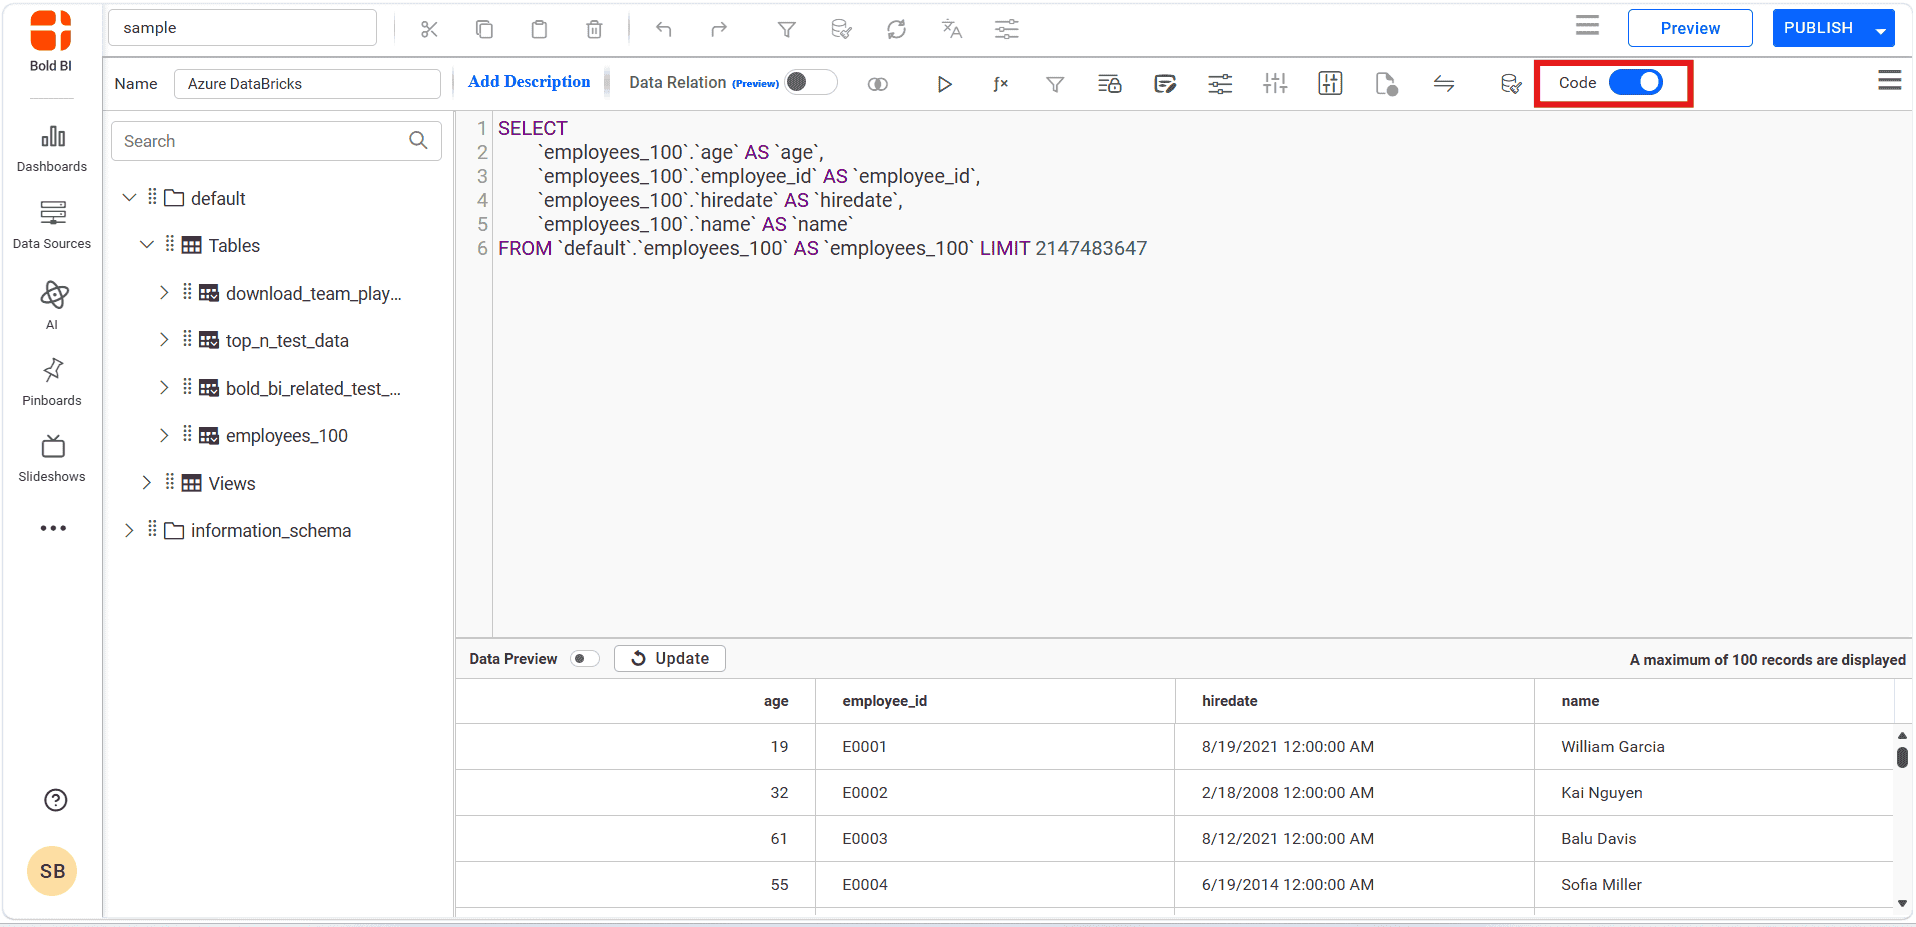
Now, the data design view page with the selected table schema opens. Drag and drop the table.
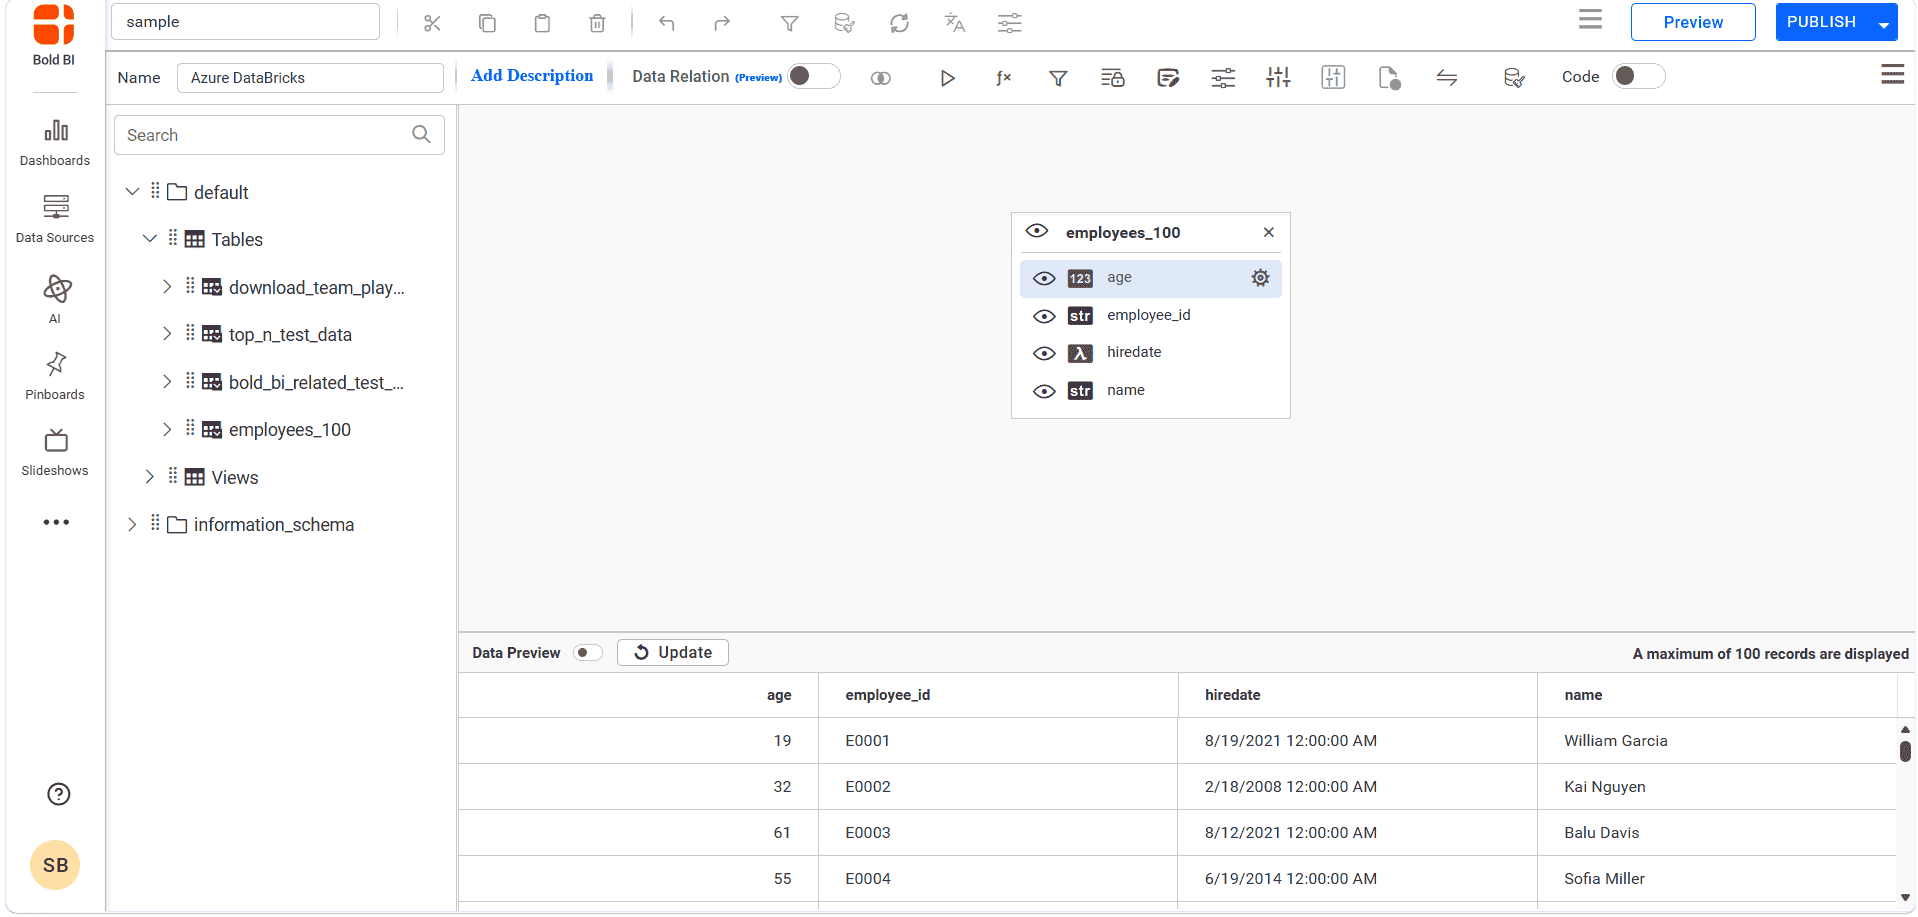
You can use the Code View options to pass queries and display data.
-
Click Save to save the data source with a relevant name.
Connect using custom attribute and dashboard parameter
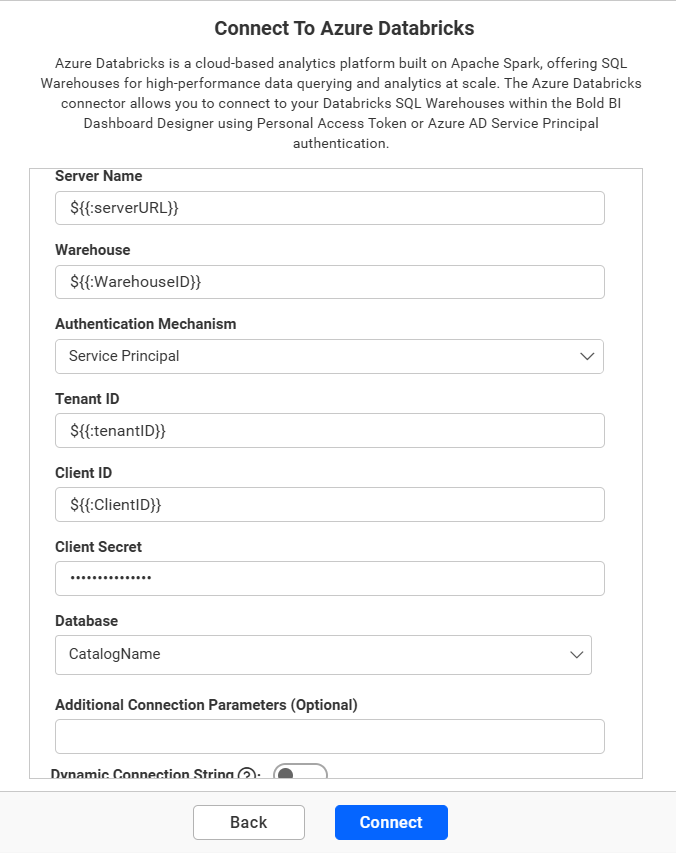
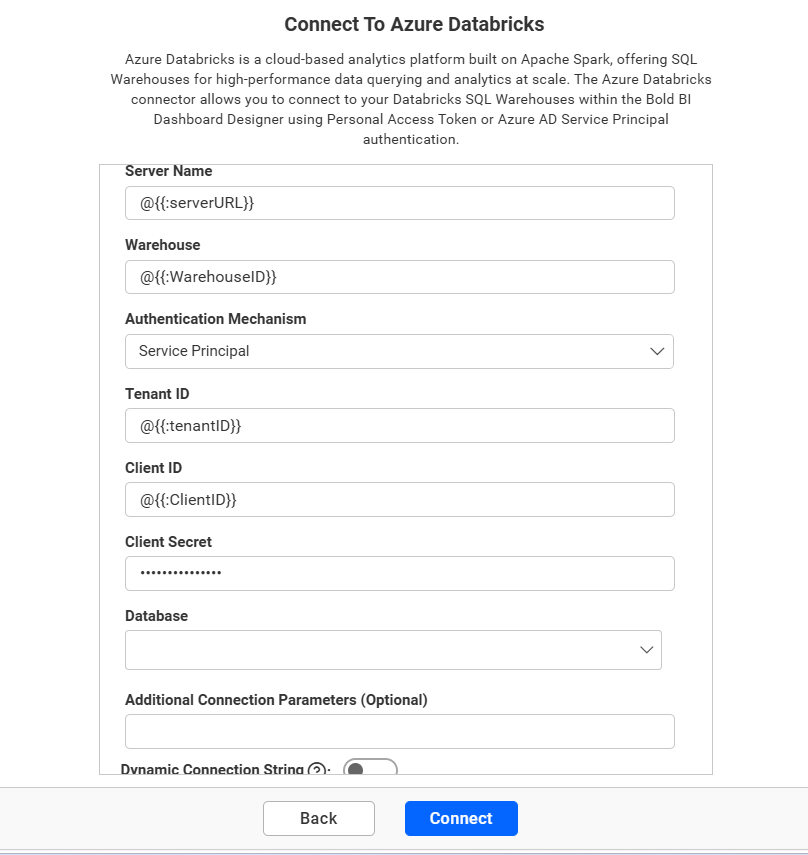
We have added support for custom attributes and dashboard parameters to the data source connection. You can connect to the data source using custom attributes or dashboard parameters.
Note: Refer to the Dashboard Parameter Documentation and Custom Attributes Documentation for more details.
Custom Attribute
A custom attribute is a piece of code that functions as a parameter and can be replaced by users in a query. The attribute name is replaced by the code, which is saved for each user and used to render the dashboard.
Dashboard Parameter
A dashboard parameter is a global placeholder value such as a number, string, or date that can replace a constant value in an expression, stored procedure, code view, and web URL. By default, the dashboard will be rendered with the default parameter value. You can change the parameter dynamically while viewing the dashboard.
Note: Refer to the Dashboard Parameter Documentation and Custom Attributes Documentation for more details.
How to get Azure databricks Credentials
Workspace URL
To find the Azure Databricks Workspace URL, open your Azure Databricks workspace and copy the URL displayed in the browser’s address bar. For example: https://adb-1234567890123456.7.azuredatabricks.net.
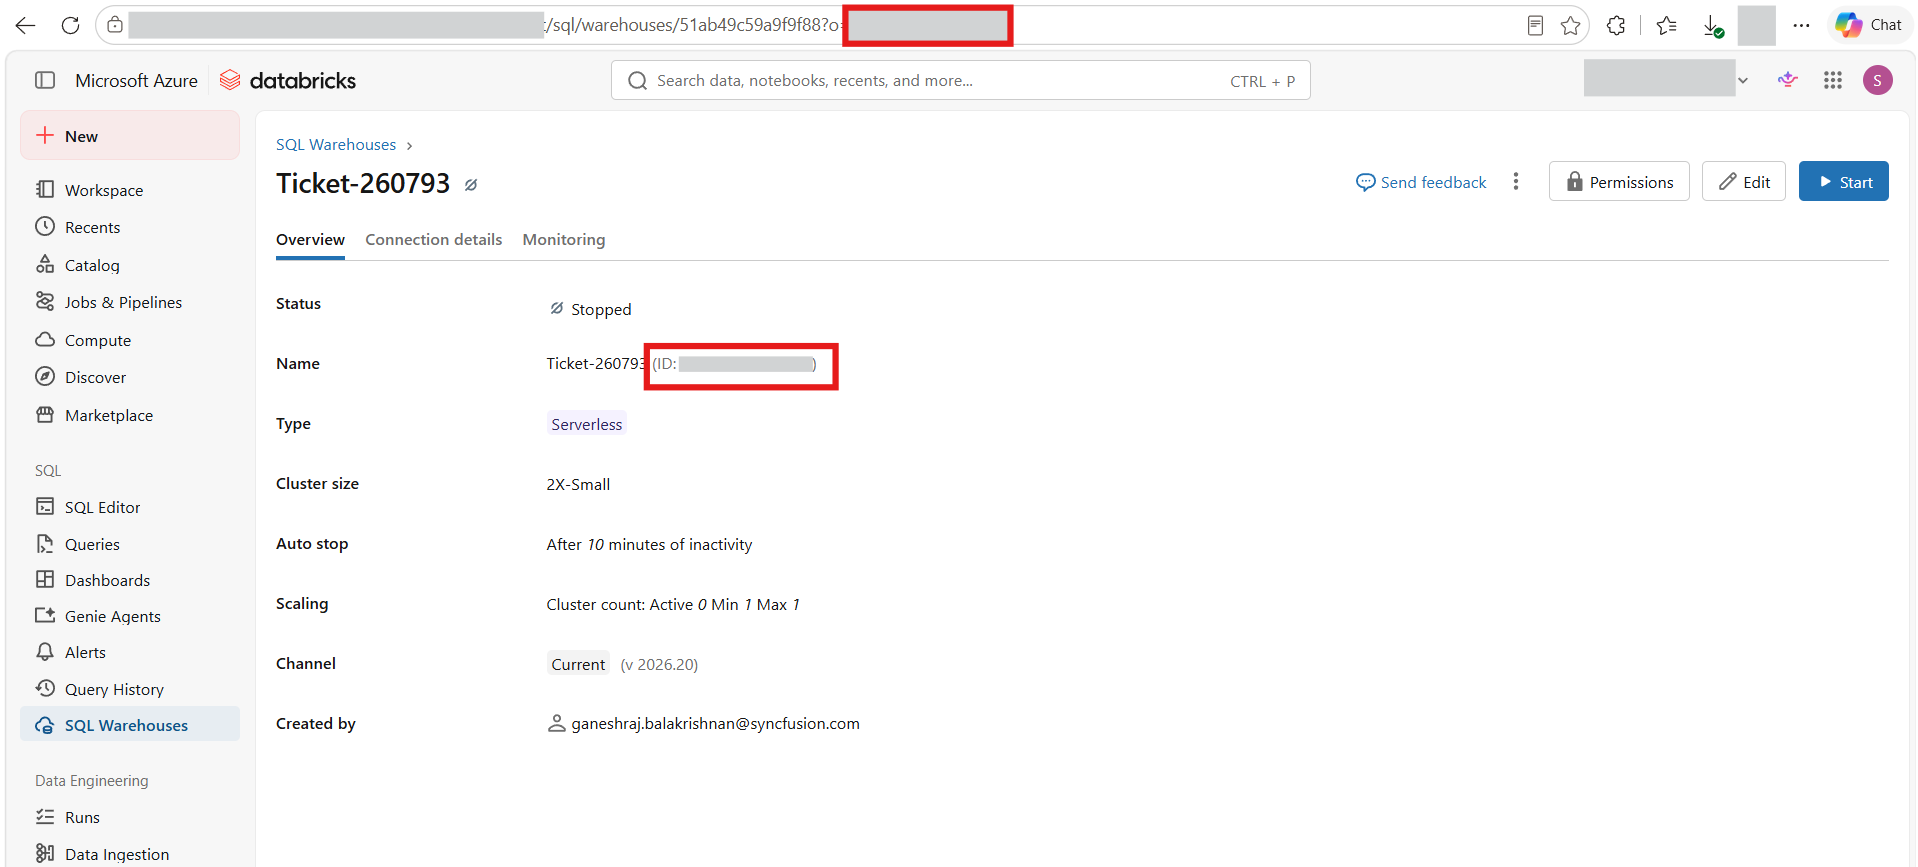
Warehouse ID
To obtain the Azure Databricks SQL Warehouse ID, navigate to Azure Databricks → SQL Warehouses, select the target warehouse, and copy the Warehouse ID from the warehouse details page or from the warehouse URL.
Tenant ID
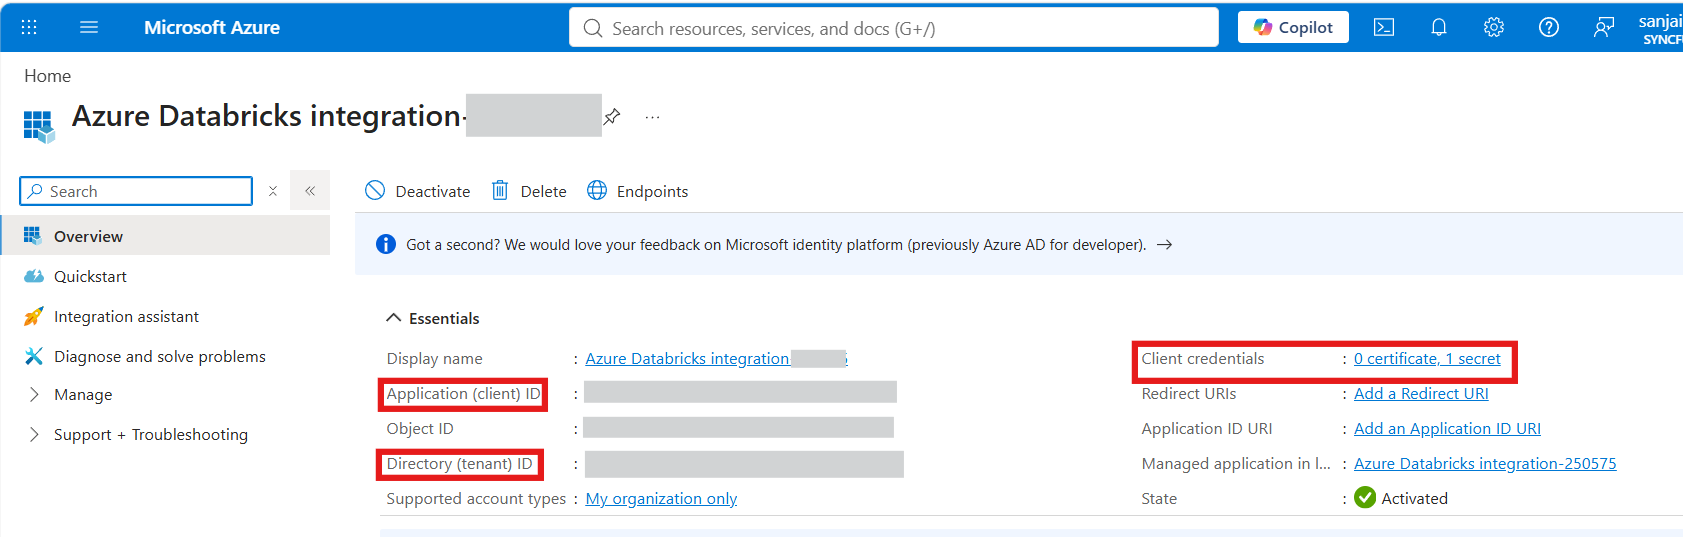
To obtain the Tenant ID from the registered application, navigate to Azure Portal → Microsoft Entra ID → App Registrations, select the application, and copy the Directory (tenant) ID from the application’s Overview page.
Client ID
To obtain the Azure Databricks Client ID, navigate to Azure Portal → Microsoft Entra ID → App Registrations, select the registered application used for authentication, and copy the Application (client) ID from the application’s Overview page.
Application Key
To obtain the Application Key, navigate to Azure Portal → Microsoft Entra ID → App Registrations, select the registered application, go to Certificates & Secrets → Client Secrets, and copy the Secret Value of the generated client secret. This value is used to authenticate the application when connecting to Azure Databricks.
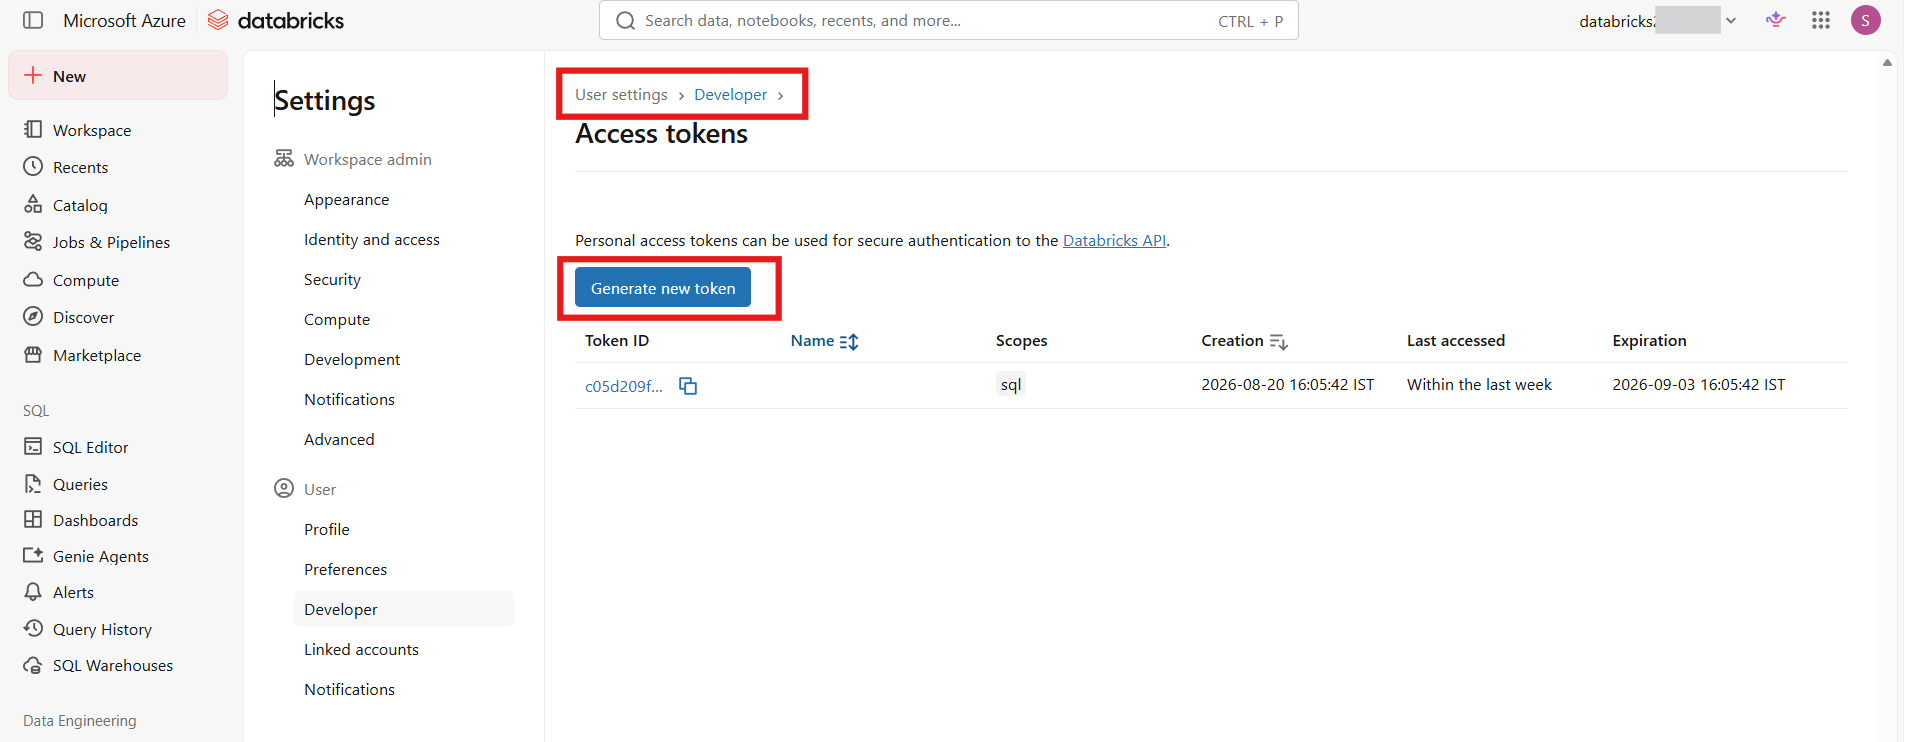
Personal Access Token
To generate a Personal Access Token (PAT) in Azure Databricks, navigate to Profile → Settings → Developer → Access Tokens, generate a new token, and securely copy the generated PAT for later use.
How to get Service Principal credentials in Azure Portal
Follow the below steps to access Azure Databricks data using the Service Principal
-
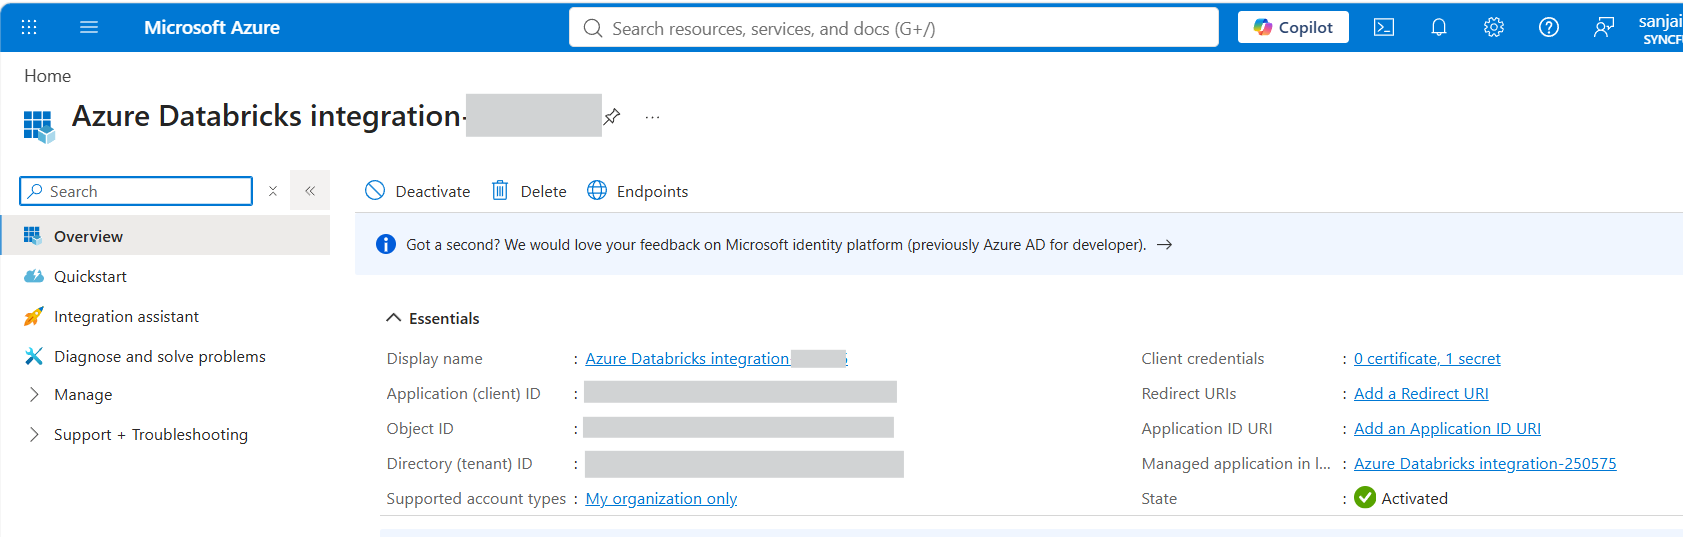
Register an Application in Microsoft Entra (Azure AD)
-
Once the application created you can note the Client ID , Tenant ID and Client Secrets from here
How to Enable Service Principal Access for Azure Databricks and Databricks SQL Warehouse
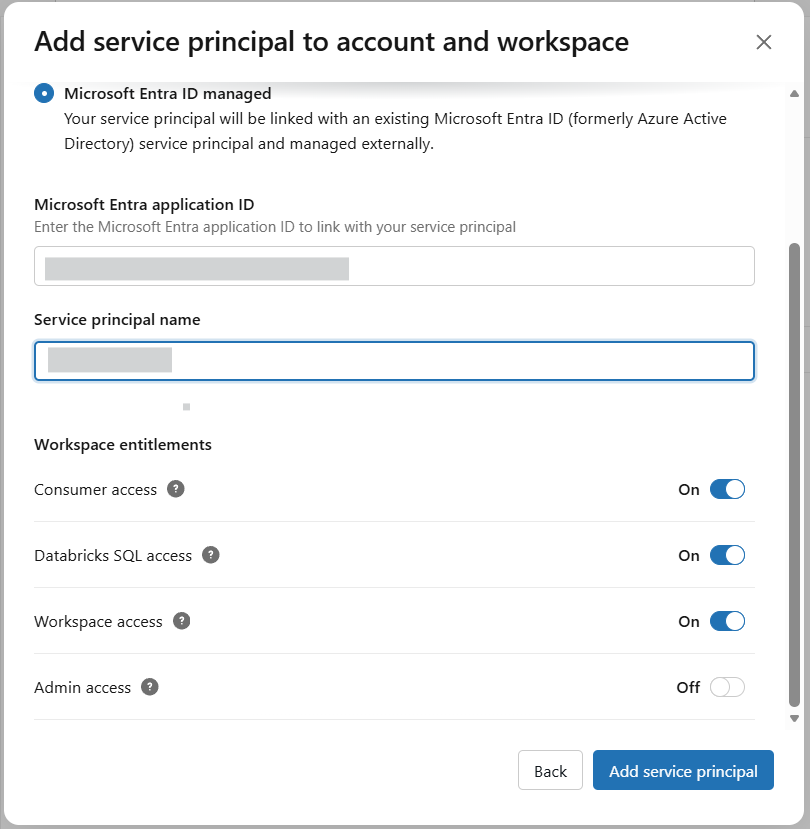
Add the service principal to the Azure Databricks workspace.
-
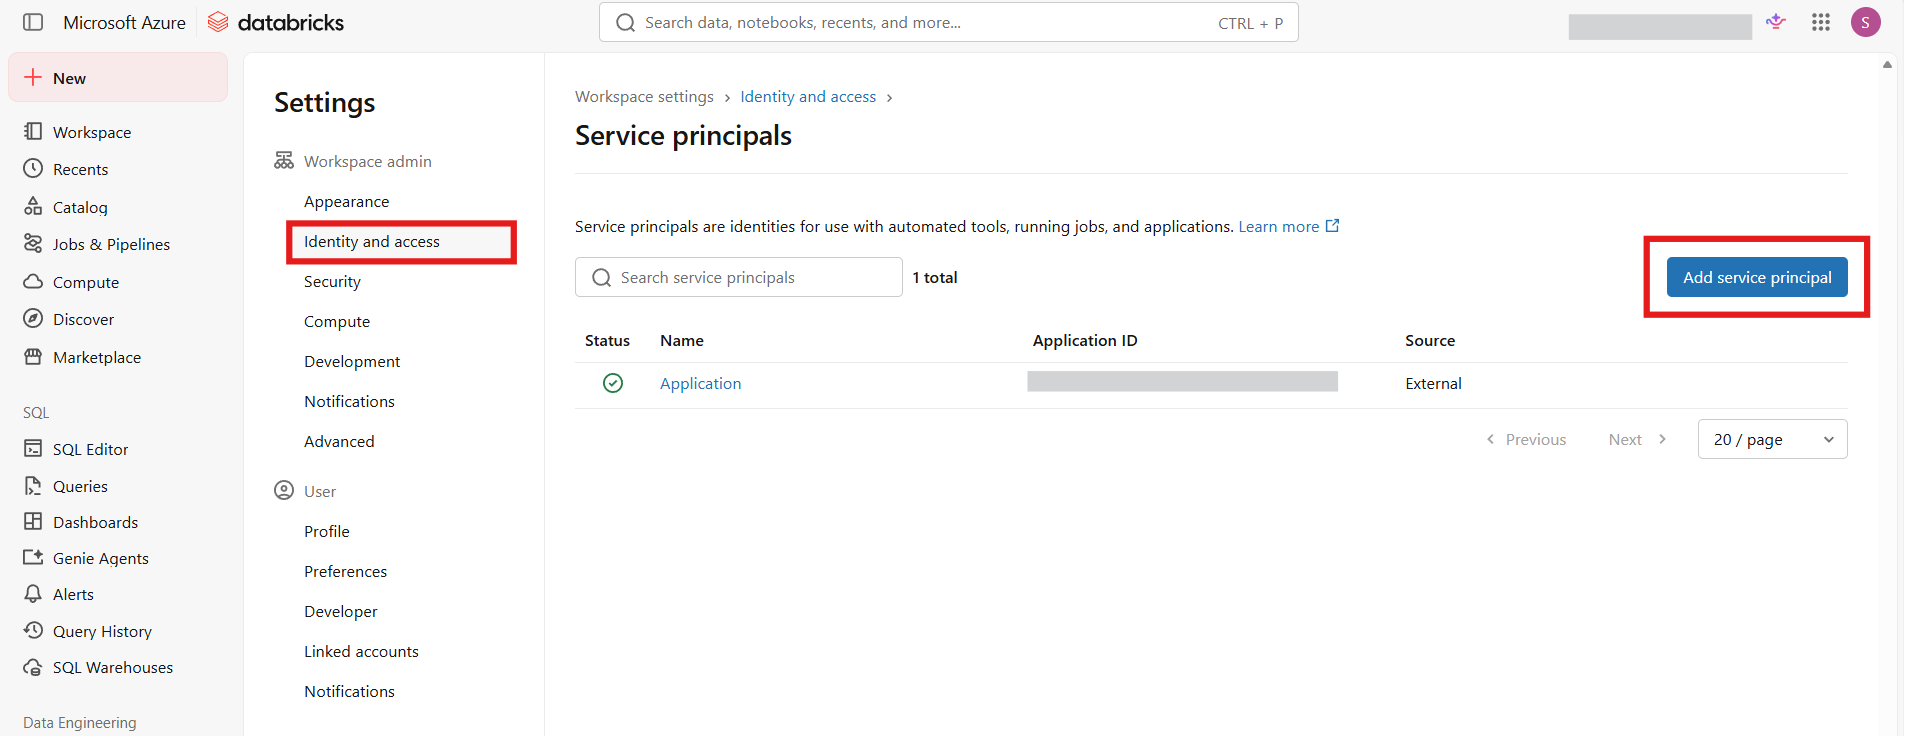
In the Azure Databricks workspace, Navigate to Profile → Settings → Identity and Access → Service Principals → Add Service Principal.
-
Select Add new service principal to account and workspace, choose Microsoft Entra ID Managed as the identity provider, enter the Microsoft Entra Application ID, and then click Add.
-
Assign the required Workspace Permissions to the service principal and save the changes to complete the configuration.
-
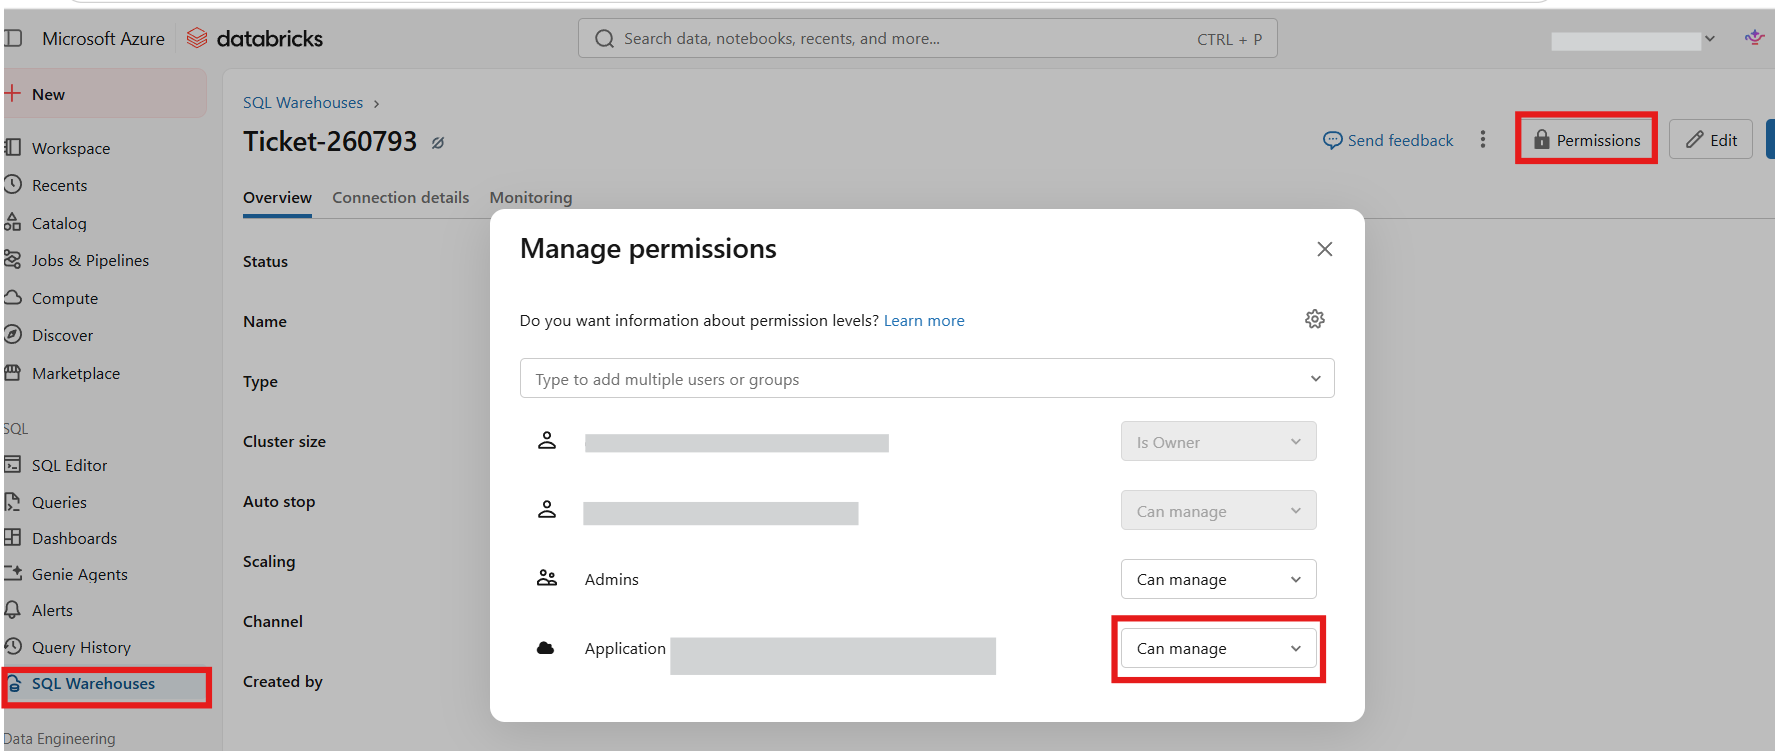
Navigate to SQL Warehouses, select the target warehouse, add the service principal to the warehouse permissions, and grant CAN Manage or the appropriate privileges required for query execution.
How to Enable Service Principal Access to a Catalog in Azure Databricks
-
Navigate to Catalog →
in the Azure Databricks workspace. -
Open the Permissions tab and click Grant.
-
Select the required Service Principal from the list of available principals.
-
Select the Data Reader privilege in the catalog permissions.
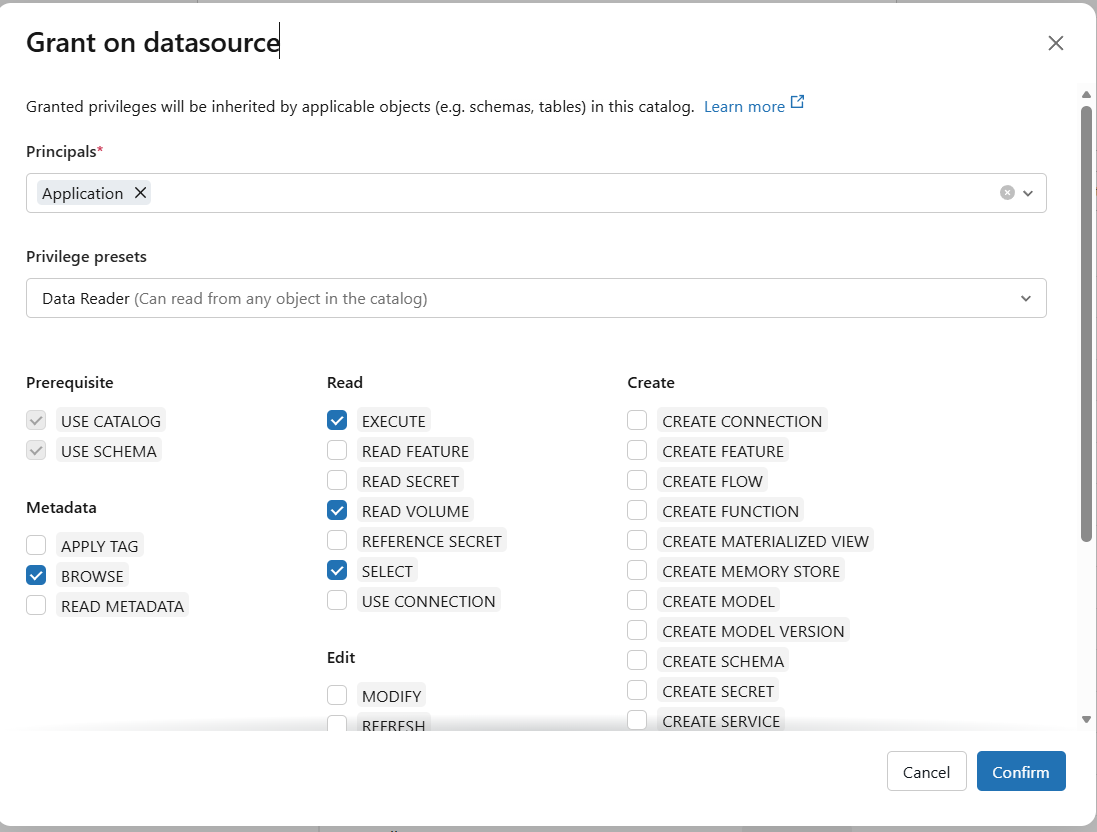
- Click Confirm to apply the permissions.
Note: If you use Personal Access Token (PAT) authentication to connect to Azure Databricks, the user associated with the PAT must have the required permissions in Azure Databricks. Ensure that the user has Can Manage permission on the target SQL Warehouse and Data Reader permission on the required catalog to access and query data successfully.