Connecting Bold BI to ODBC data source
Bold BI Dashboard designer (Server) supports connecting to datasources through Open Database Connectivity (ODBC).
Note: The ODBC Connector is available in On-Premises Deployment but not in the Syncfusion Managed Cloud Server.
Choose an ODBC data source
The Dashboard Designer (Server) supports connecting to ODBC data sources through the following two connection modes.
• Data Source Name (DSN).
• Drivers

Data Source Name (DSN)
Create a DSN using the 32-bit driver architecture and Bold BI will retrieve the 32-bit DSN architecture types from the windows registry.
• If Bold BI is installed in IIS, it will only show the system DSN because all applications hosted in IIS are considered to be running on the system user privilege.
By default, IIS (inetinfo.exe) is configured to run in the system account context. However, you can use the services console to change the identity of various services so that they can run in a user account rather than the system account. The system DSN will only work under the hosted application in IIS.
• If the Bold BI is installed in IIS Express, we will list out the system and user DSN from the installed machine. So that you can connect using both the system and user DSN.

ODBC Drivers
ODBC data sources can also be connected through drivers. If Bold BI is installed in IIS Express, list the drivers from the installed machine so that you can connect using the driver.

To configure the ODBC data source, follow these steps:
-
Click on the Data Sources button in the configuration panel to add a new data connection.

-
Click CREATE NEW to launch a new connection from the connection panel.

-
Select the ODBC connection in the connection panel.

NOTE: You can also create a data source from the home page by clicking on the Data Sources menu on the left menu panel and selecting Create Data Source from the data sources page.

Connect to ODBC
Create an ODBC data source
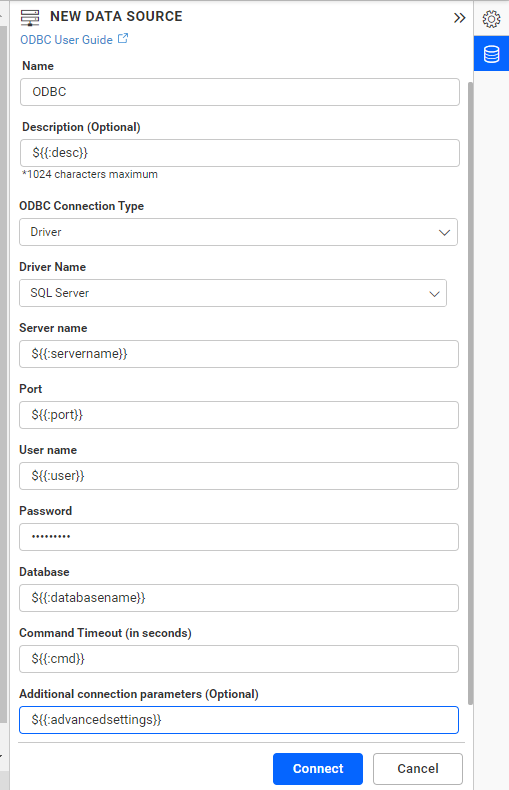
After clicking the data source, the NEW DATA SOURCE configuration panel opens. The following ODBC drivers are supported:
- SQL Server
- PostgreSQL
- MySQL
- Oracle
- Exasol
- DB2
- SAP-HANA
- Vertica
- Microsoft Access
- Elasticsearch
- FileMaker
- Firebird
- Azure Databricks (Supported only in DSN Connection Type)
- Sybase (Supported only in DSN Connection Type)
- ProgressDB
- MongoDB Atlas
- Neo4j
Follow the given steps to create an ODBC data source:
-
Enter a name and description (optional) for the data source.
-
A drop-down box for ODBC Connection Type.
- DSN
- Driver
Connect using the DSN Connection Type
-
Choose a DSN name from the drop-down list.
-
Enter a valid ODBC server username in the UserName text box.
-
Enter a valid ODBC server password in the Password text box.
-
Enter a valid ODBC server database name (optional) in the Database text box.

In future, you can edit the connection information using Edit Connection option.
Connect using the Driver Connection Type
-
Enter a name and description (optional) for the data source.
-
Enter a valid ODBC server or host name in the ServerName text box.
-
Enter the port in which the server is running in Port text box.
-
Enter a valid ODBC username in the UserName text box.
-
Enter a valid ODBC password in the Password text box.
-
Enter a valid ODBC database name in the Database text box.

Data Preview
- Click Connect to connect the ODBC server with configured details.
The schema represents the collection list that is retrieved from the ODBC server. This dialog box displays the list of schemas in a tree view and their corresponding values.

-
Now, the data design view page with selected table schema opens. Drag the table.

You can use the Code View options for passing query to display data.

-
Click Save to save the data source with a relevant name.
Limitations
| ODBC Connector | Limitations |
|---|---|
| Sybase | 1. Stored procedures are not supported in Bold BI. |
Connect using custom attribute and dashboard parameter
We have added support for custom attributes and dashboard parameters in the data source connection. You can now connect to the data source using custom attributes or dashboard parameters.
Custom Attribute
Dashboard Parameter

Note: Refer to the Dashboard Parameter Documentation and Custom Attributes Documentation for more details.
Bold BI hosting with x86 and x64 bit wise for ODBC data source connection
If Bold BI is installed in IIS, we will list the system DSN values from the installed machine. By default, the application will be hosted in 32-bit mode in IIS. Therefore, we will only list the 32-bit System DSN values in the Bold BI ODBC connector.
Following steps to connect the 64-bit values:
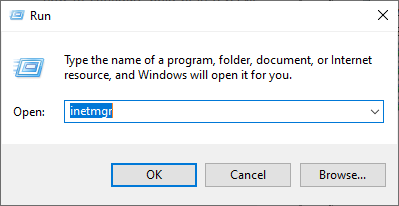
- Open Internet Information Services (IIS) Manager (Start > Run > type ”inetmgr”).
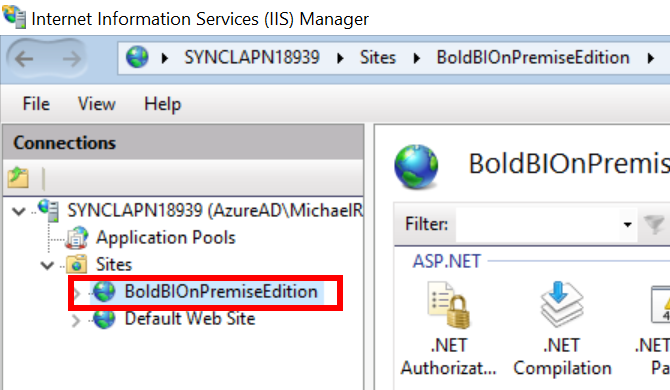
- Using the navigation pane at the left, browse to Sites and select your Bold BI application site (BoldBIOnPremiseEdition).
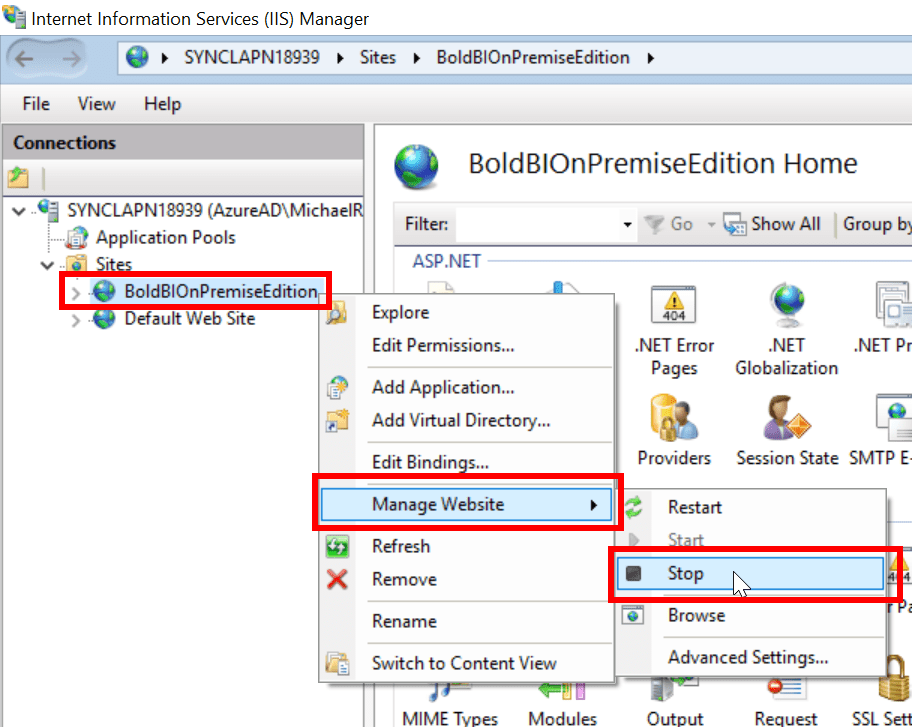
- Right-click the Bold BI application site (BoldBIOnPremiseEdition) and select the Manage Website > Stop.
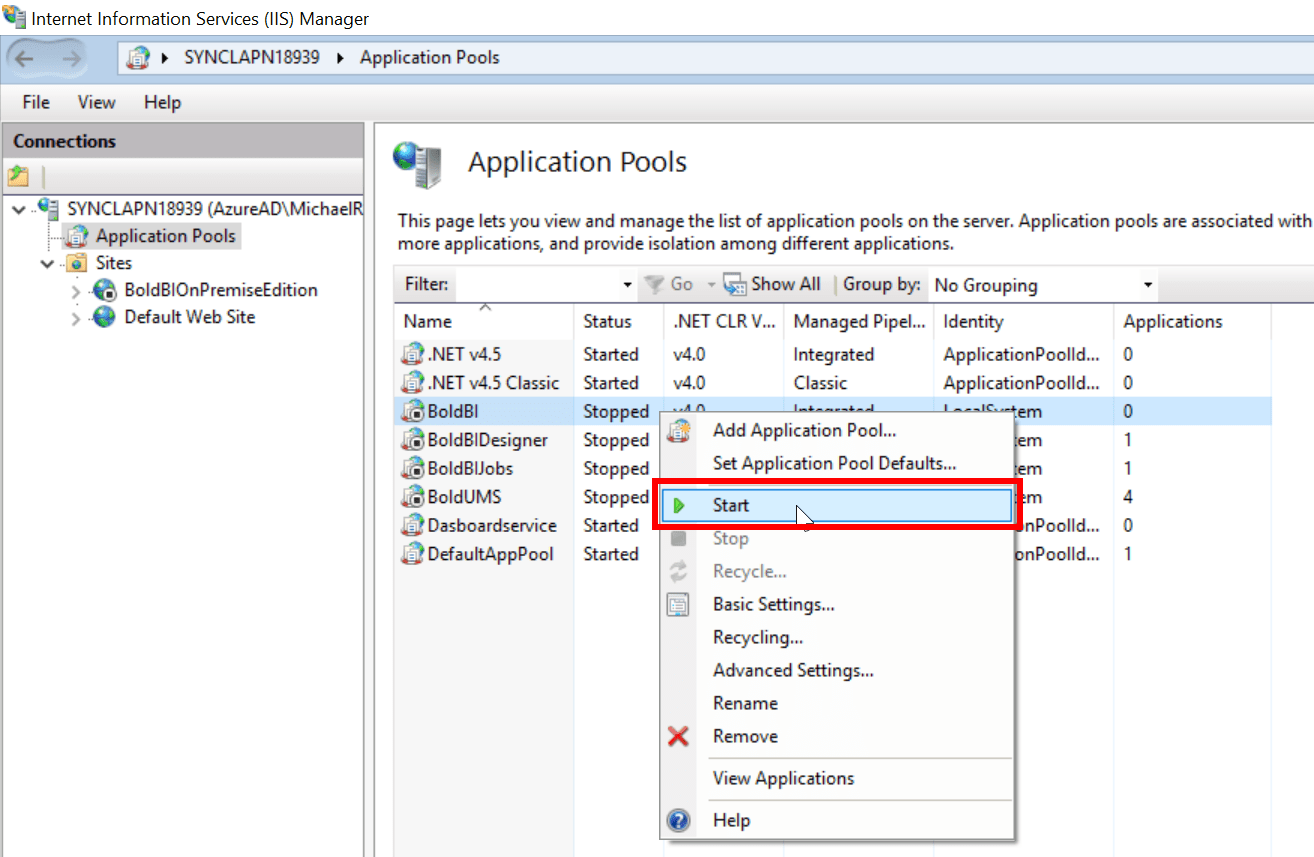
- Select the Application Pools and then select and right click BoldBI > Stop.
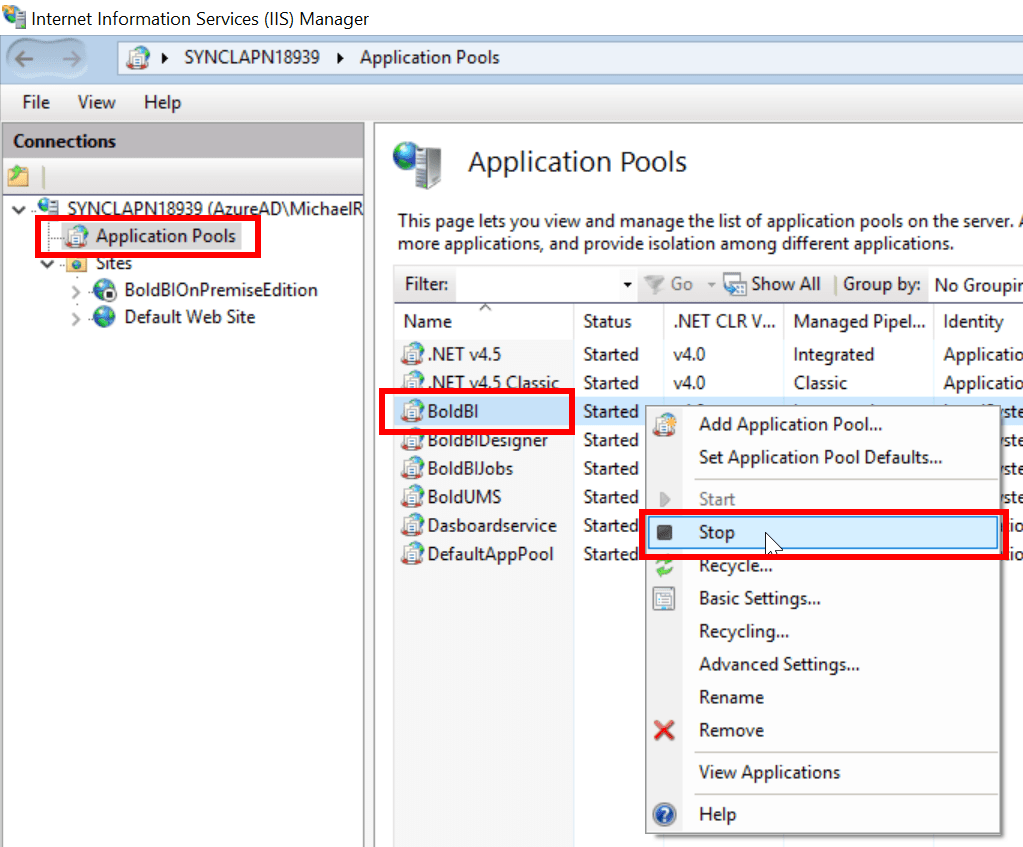
- Repeat the step 4 for all other application pools BoldBIDesigner, BoldBIJobs, and BoldUMS.
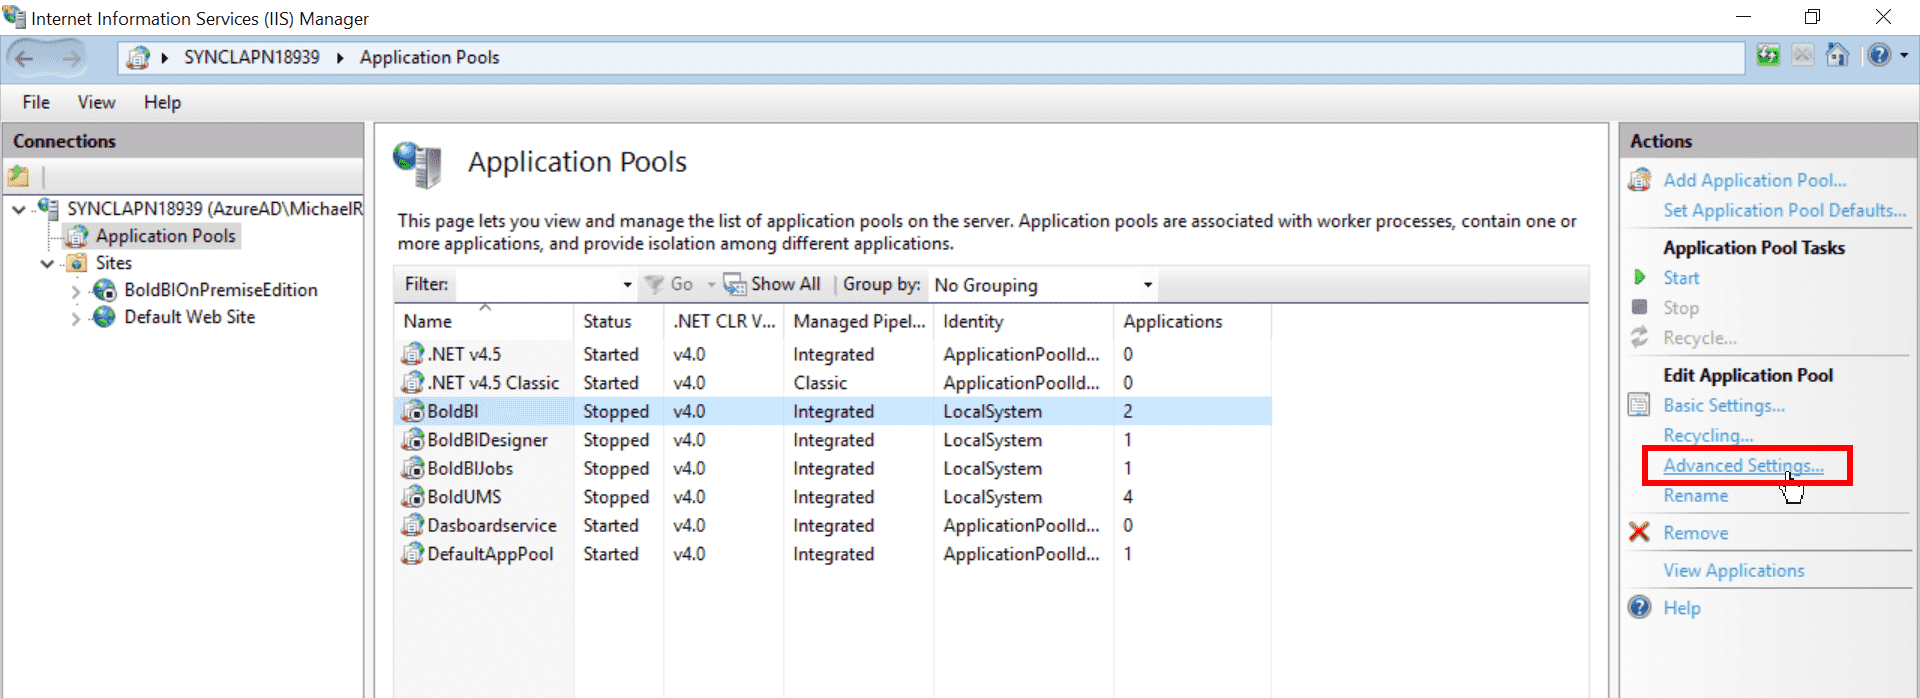
- Select the application pool BoldBI and click the Advanced Settings option.
- Set the “Enable 32- bit Applications” to “False”.
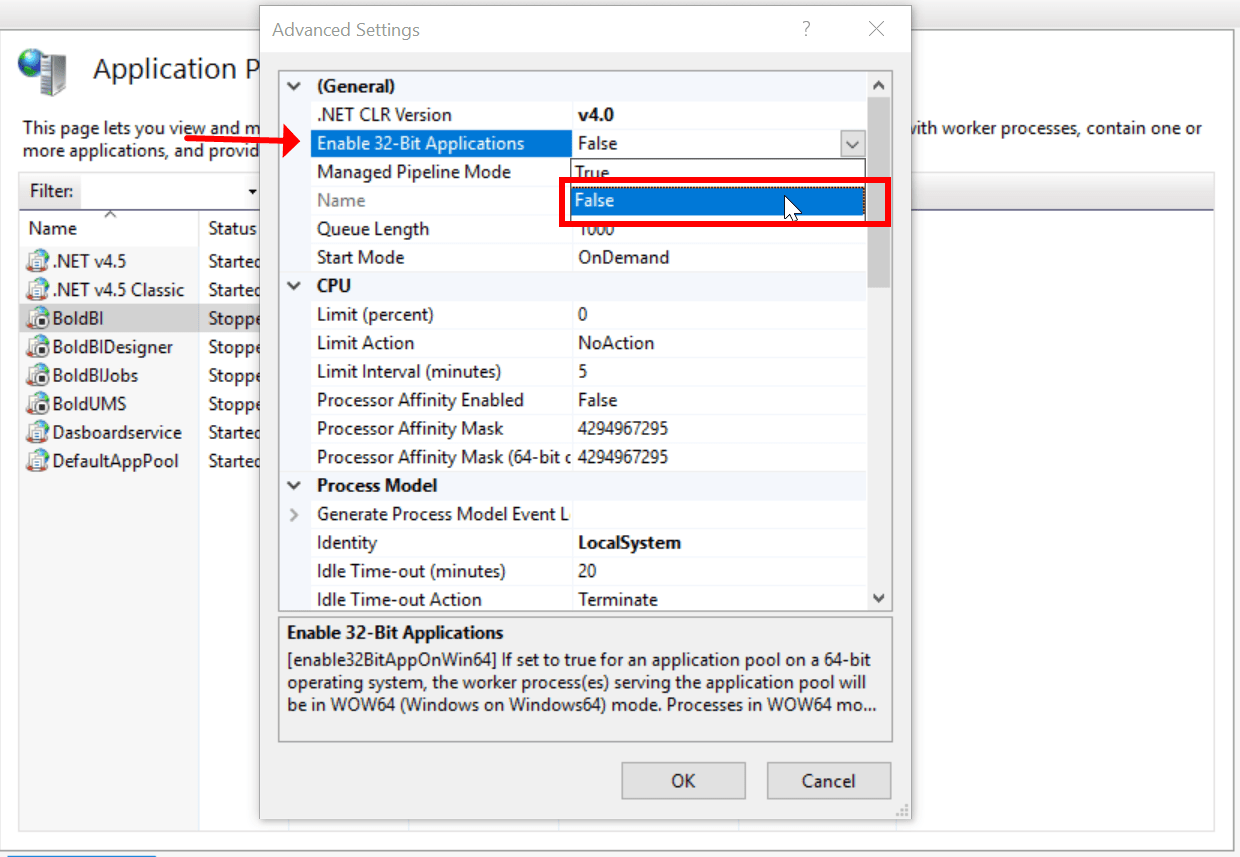
- Set the same property change in other three application pools (BoldBIDesigner, BoldBIJobs, and BoldUMS) also.
- Restart the site (BoldBIOnPremiseEdition) and all application pools (BoldBI, BoldBIDesigner, BoldBIJobs, and BoldUMS).
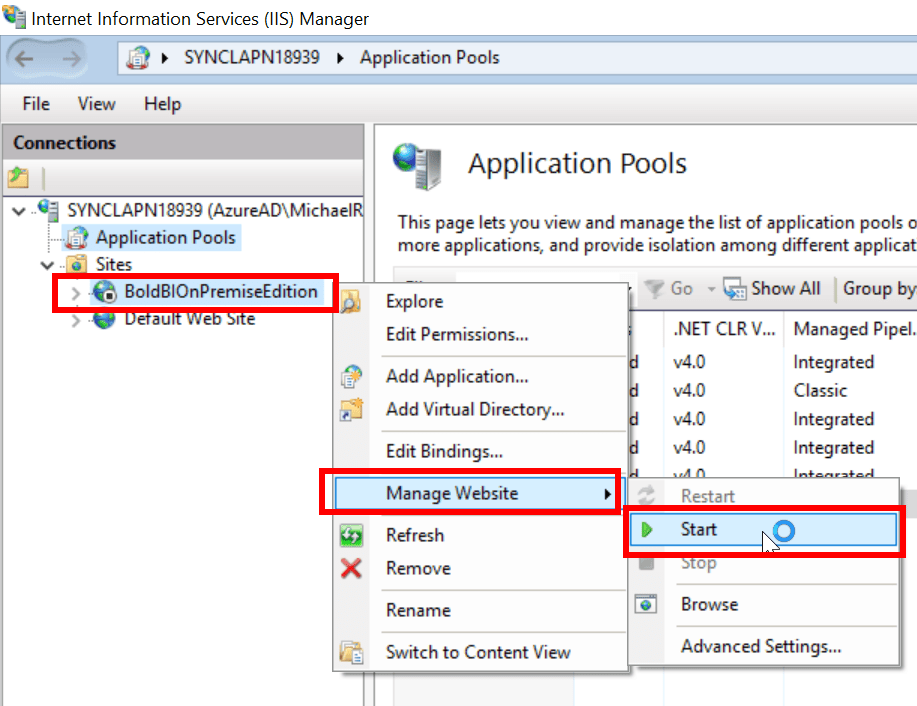
- If the services are restarted, then go to the ODBC data source to list out the System DSN 64-bit values.
Connecting Bold BI to ODBC Data Source via REST API
Prerequisites
Type while creating the data source needs to be ODBC.
Parameters for creating Data Source
NOTE: The ability to provide join support is available only during the creation of a new data source. Join in edit connection mode is not supported.
| Parameters | Details |
|---|---|
| Driver optional | string
ODBC Driver Name. Required for Driver Mode |
| DsnName required | string
ODBC DSN Name. Required for DSN Mode. |
| Servername optional | string
Servername of the connection. Required for Driver Mode. |
| Port optional | string
Port number of the connection. Required for Driver Mode.
|
| Username required | string
A valid username for the connection |
| Password required | string
A valid Password for the connection |
| Database optional | string
database which needs to be connected. Required for Driver Mode. |
| Schemaname required for table mode | string
Enter a valid Schemaname |
| Tablename required for table mode | string
Enter a valid Tablename |
JoinType Required For Join Info | string
Enter a valid JoinType For Example (Inner,Outer) |
| LeftTable Required For Join Info | string
Enter a valid Left Table name |
| RightTable Required For Join Info | string
Enter a valid Right Table name |
| LeftField Required For Join Info | string
Enter a valid Left Table Column Name |
| RightField Required For Join Info | string
Enter a valid Right Table Column Name |
| Condition Required For Join Info | string
Enter a valid Condition For Example (AND,OR) |
| LeftField Required For Join Info | string
Enter a valid Left Table Column Name |
| Operator Required For Join Info | string
Enter a Valid Operator For Example (=,>=) |
| Value Optional For only Join Info | string
Specifically choose the column values. |
| Query required for code view mode | string
Enter a valid Query |
| AdvancedSettings optional | string
Additional optional connection parameters can be provided. By default, it is empty. |
| CommandTimeout optional | string
Enter a valid Timeout for connection. By default, it is 300 |
| Expressions optional | `Array of Objects` |
Parameters for edit the connection while upload the dashboard via API
| Parameters | Details |
|---|---|
| Driver optional | string
ODBC Driver Name. Required for Driver Mode |
| DsnName required | string
ODBC DSN Name. Required for DSN Mode. |
| ServerName required | string
Server name or Host name of the connection |
| Port required | string
Port number used to connect to the postgresql
|
| UserName required | string
A valid username for the connection |
| Password required | string
A valid Password for the connection |
| Database required | string
database which needs to be connected |
| Schema required for table mode | string
Enter a valid Schemaname |
| CommandTimeout optional | string
Enter a valid Timeout for connection. By default, it is 300 |
Parameters for adding expressions when creating Data Source
| Parameters | Details |
|---|---|
| Name required | string
Name of the Expression
|
| Expression required | string
Expression
|
Parameters for editing Data Source
NOTE: To edit a Data Source via API, all parameters are optional. Only the parameter that needs to be changed should be provided.
Parameters for modifying expressions when editing Data Source
| Parameters | Details |
|---|---|
| Name required | string
Name of the Expression
|
| Expression required | string
Expression
|
| Action optional | string
add/delete/edit
By default, it is add.
|
| NewName optional | string
For renaming the expression. This is applicable only if the Action is edit
|
Connection Sample for Table Mode
For creating connection using Driver:
"Connection":
{
"Driver": "string",
"Servername": "string",
"Port": "string",
"Username": "string",
"Password": "string",
"Database": "string",
"Schemaname": "string",
"Tablename": "string",
"AdvancedSettings": "string",
"CommandTimeout": "string",
"Expressions" : [{
"Name": "Expression1",
"Expression" : "SUM(numeric expression)"
    },
    {
"Name": "Expression2",
"Expression" :  "UPPER(string expression)"
}]
}
For creating connection using DSN:
"Connection":
{
"DsnName": "string",
"Username": "string",
"Password": "string",
"Database": "string",
"Schemaname": "string",
"Tablename": "string",
"AdvancedSettings": "string",
"CommandTimeout": "string",
"Expressions" : [{
"Name": "Expression1",
"Expression" : "SUM(numeric expression)"
    },
    {
"Name": "Expression2",
"Expression" :  "UPPER(string expression)"
}]
}
For creating connection with multiple tables :
"Connection":
{
"DsnName": "string",
"Username": "string",
"Password": "string",
"Database": "string",
"Tables": [
            {
                "Tablename": "string",
                "Schemaname": "string"
            },
            {
                "Tablename": "string",
                "Schemaname": "string"
            }
        ],
"JoinInfo": [
            {
                "JoinType": "string",
                "LeftTable": "string",
                "RightTable": "string",
                "JoinFieldInfos": [
                    {
                        "Condition": "string",
                        "LeftField": "string",
                        "Operator": "string",
                        "RightField": "string",
                        "Value": "string"
                    },
                    {
                        "Condition": "string",
                        "LeftField": "string",
                        "Operator": "string",
                        "RightField": "string",
                        "Value": "string"
                    }
                ]
            }
        ],
"AdvancedSettings": "string",
"CommandTimeout": "string",
"Expressions" : [{
"Name": "Expression1",
"Expression" : "SUM(numeric expression)"
    },
    {
"Name": "Expression2",
"Expression" :  "UPPER(string expression)"
}]
}
For editing connection:
"Connection":
{
"Driver": "string",
"Servername": "string",
"Port": "string",
"Username": "string",
"Password": "string",
"Database": "string",
"Schemaname": "string",
"Tablename": "string",
"AdvancedSettings": "string",
"CommandTimeout": "string",
"Expressions" : [{
"Name": "Expression1",
"Expression" : "SUM(numeric expression)",
"NewName" : "Sum",
"Action": "edit"
    },
    {
"Name": "Expression2",
"Expression" :  "UPPER(string expression)"
"Action": "delete"
}]
}
NOTE: Through the Rest API, the data source can be created or edited with only one table. If different table is provided in edit data source, the table will be replaced. The widgets will be retained only if the schema is same as the previous table.
Connection Sample for Code View Mode
"Connection":
{
"Driver": "string",
"Servername": "string",
"Port": "string",
"Username": "string",
"Password": "string",
"Database": "string",
"Query": "string",
"AdvancedSettings": "string",
"CommandTimeout": "string",
"Expressions" : [{
"Name": "Expression1",
"Expression" : "SUM(numeric expression)"
    },
    {
"Name": "Expression2",
"Expression" :  "UPPER(string expression)"
}]
}
Sample connection for editing the connection while uploading the dashboard via API.
"Connection":  {
      "ServerName": "string",
      "Database": "string",
      "Port": "string",
      "UserName": "string",
      "PassWord": "string",
      "DsnName": "string",
      "odbctype": "string",
      "Driver": "string",
      "schema": "string",
      "AdvancedSettings": "string",
      "CommandTimeout": "string"
  }
Driver Installation and Configuration Guide
Neo4j ODBC Connector
1. Download the Neo4j BI Connector
Download the Windows BI connector installation package from Neo4j.
Download link:
https://neo4j.com/download-thanks-bi-connector/?version=1.1.2.1009&flavour=windows
2. Extract the Installation Files
- Locate the file:
Neo4j-BI-Connector-ODBC-1.1.2.1009-windows.zip - Extract the contents.
- Navigate to:
Neo4j-BI-Connector-ODBC-1.1.2.1009-windows\Neo4j-BI-Connector-ODBC-1.1.2.1009-Windows\3. Install the ODBC Driver
- Double-click the MSI installer.
- Follow on-screen instructions to install the Simba Neo4j 1.1 64-bit ODBC Driver.
4. Open ODBC Data Source Administrator
- Open Windows Search → type ODBC.
- Launch:
- ODBC Data Source Administrator (64-bit)
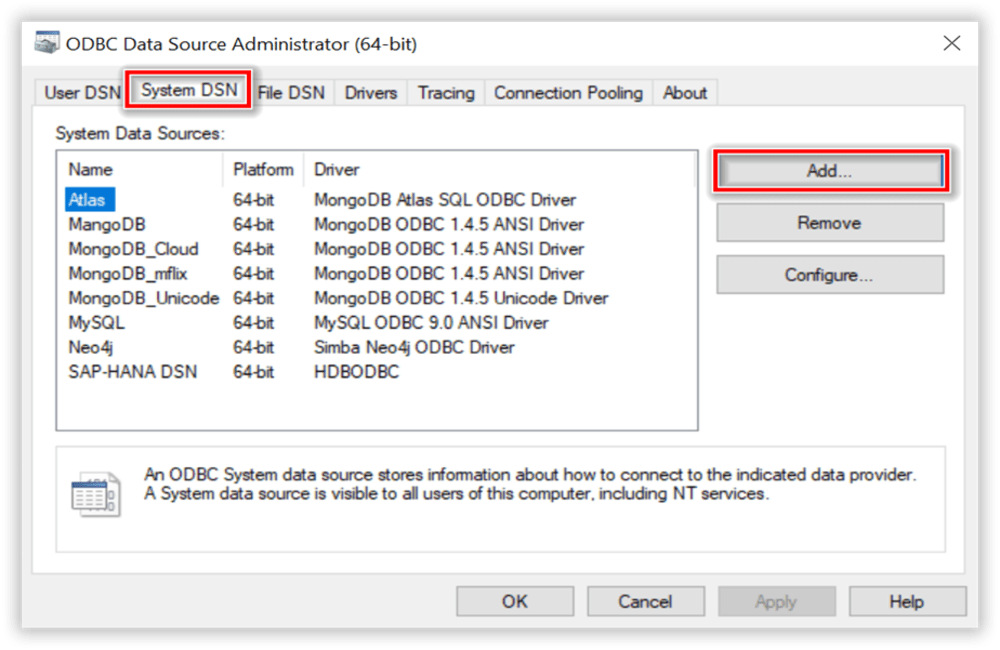
5. Create a System DSN
- Navigate to the System DSN tab.
- Select Add.
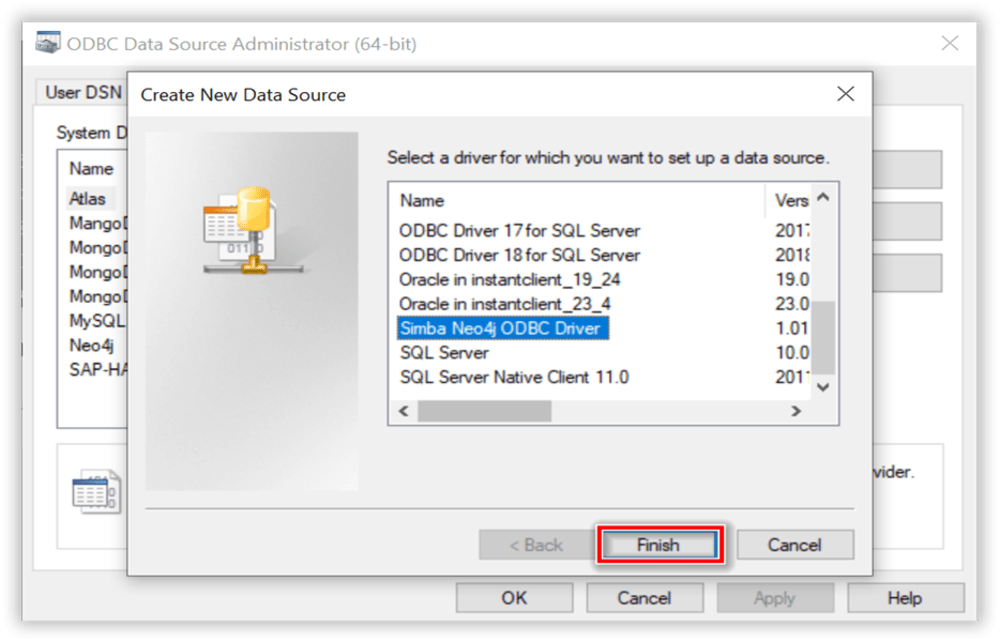
- Choose Simba Neo4j ODBC Driver.
- Click Finish.
6. Enter Connection Configuration
Populate the DSN configuration fields:
- Hostname
- Port
- Username
- Password (optional depending on config)
- Additional authentication/security options as required
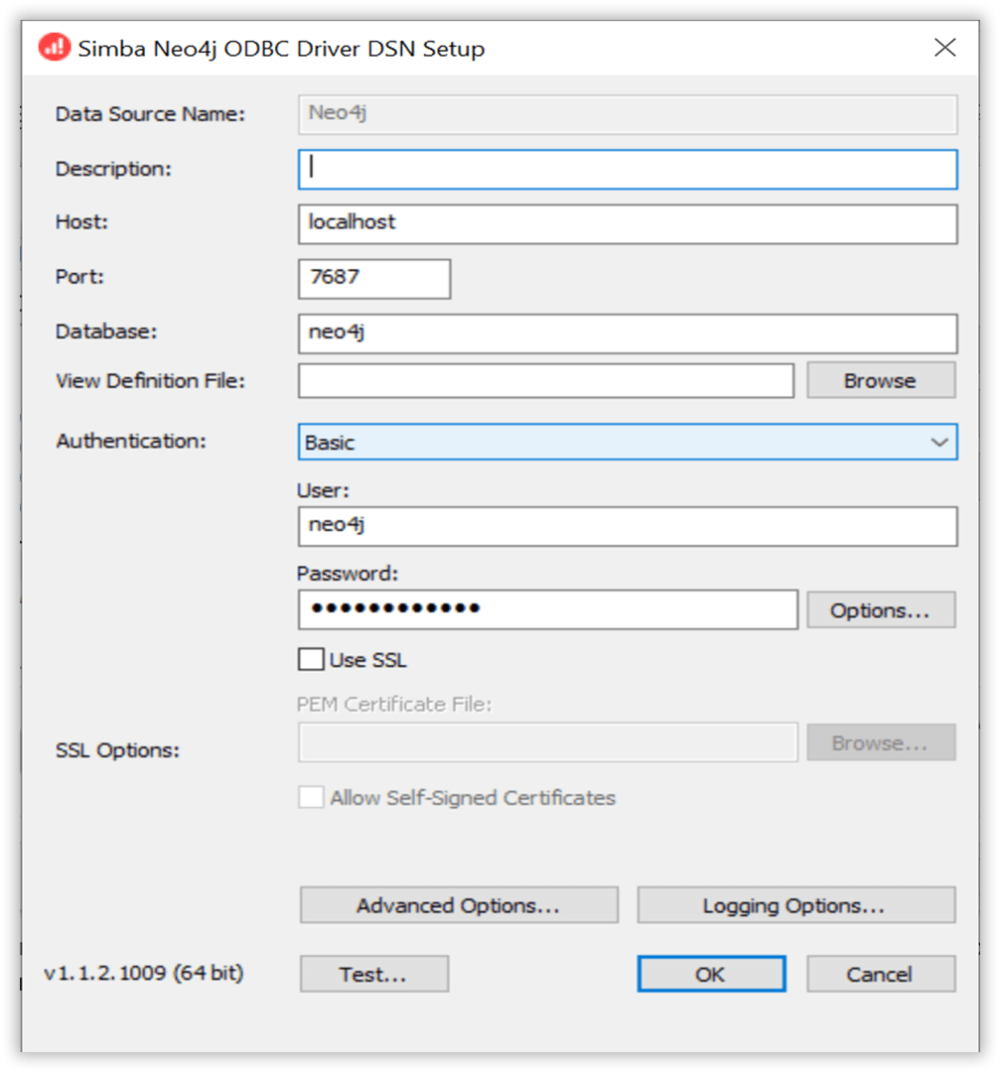
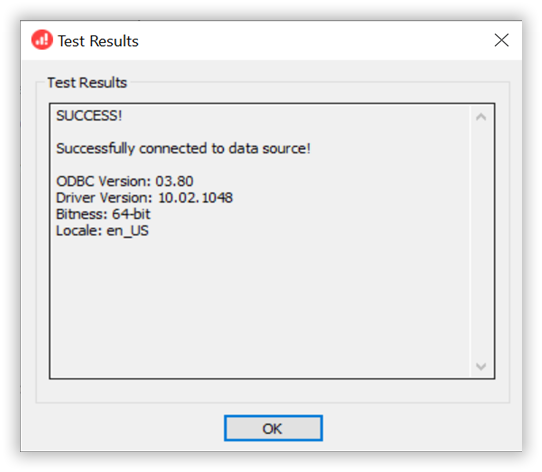
7. Test and Save the DSN
- Click Test to validate the connection.
- Click OK to save DSN if successful.
8. Confirm DSN Availability
Ensure that the new DSN appears in the System DSN list.