Connecting Bold BI to Oracle NetSuite data source
The Bold BI dashboard designer supports connecting to Oracle NetSuite web services through the REST API.
Choose Oracle NetSuite data source
To configure the Oracle NetSuite data source, follow the below steps:
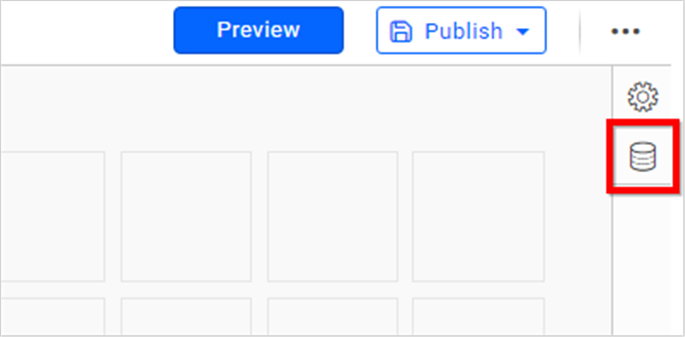
- Click on the Data Sources button in the configuration panel to add a new data connection.
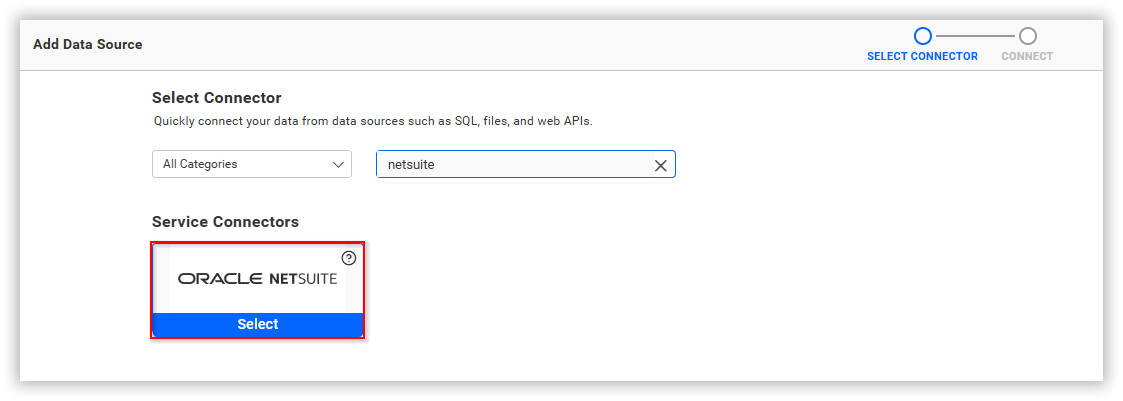
 2. Click CREATE NEW to launch a new connection from the connection panel.
3. Select the Oracle NetSuite connection in the connection panel.
2. Click CREATE NEW to launch a new connection from the connection panel.
3. Select the Oracle NetSuite connection in the connection panel.
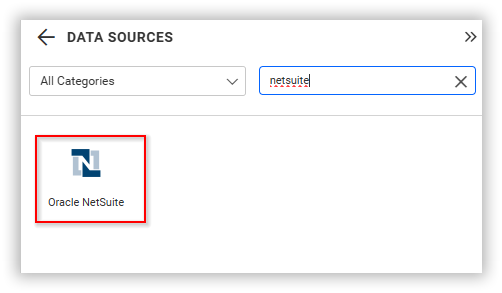
NOTE: You can also create a data source from the home page by clicking on the Data Sources menu on the left menu panel and selecting Create Data Source from the data sources page.
How to Obtain the Oracle NetSuite Client ID and Client Secret
Note: Oracle NetSuite OAuth credentials are required for the On-Premises Deployment but not needed in Syncfusion Managed Cloud Server.
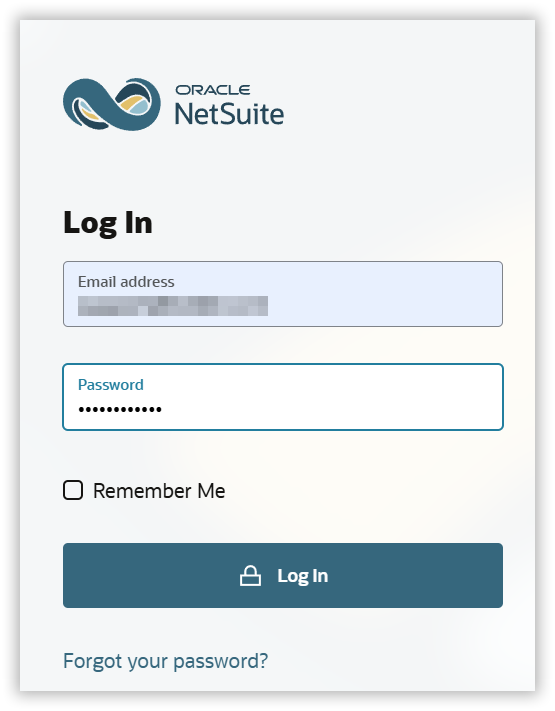
1. Log in to your Oracle NetSuite account Oracle NetSuite Login
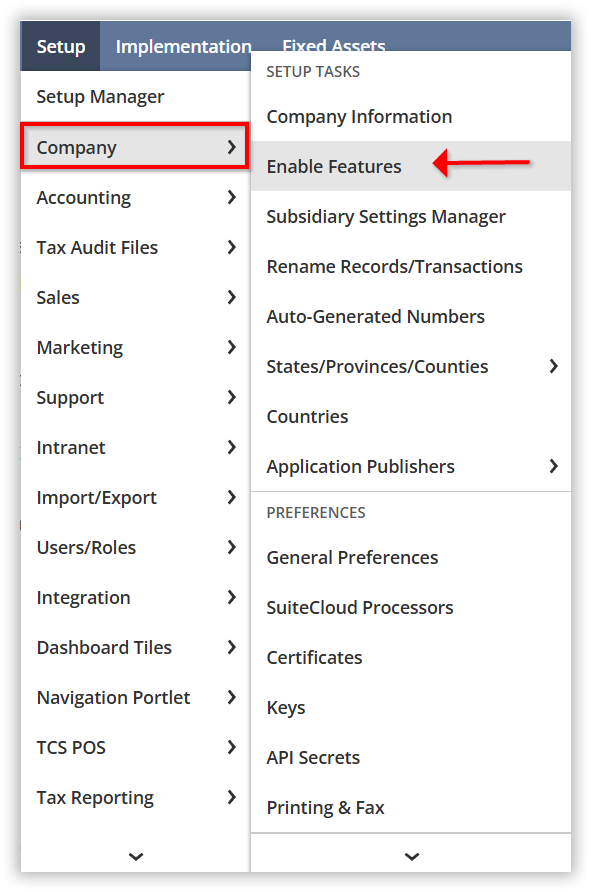
2. Enable Required Features
Navigate to Setup > Company > Enable Features.
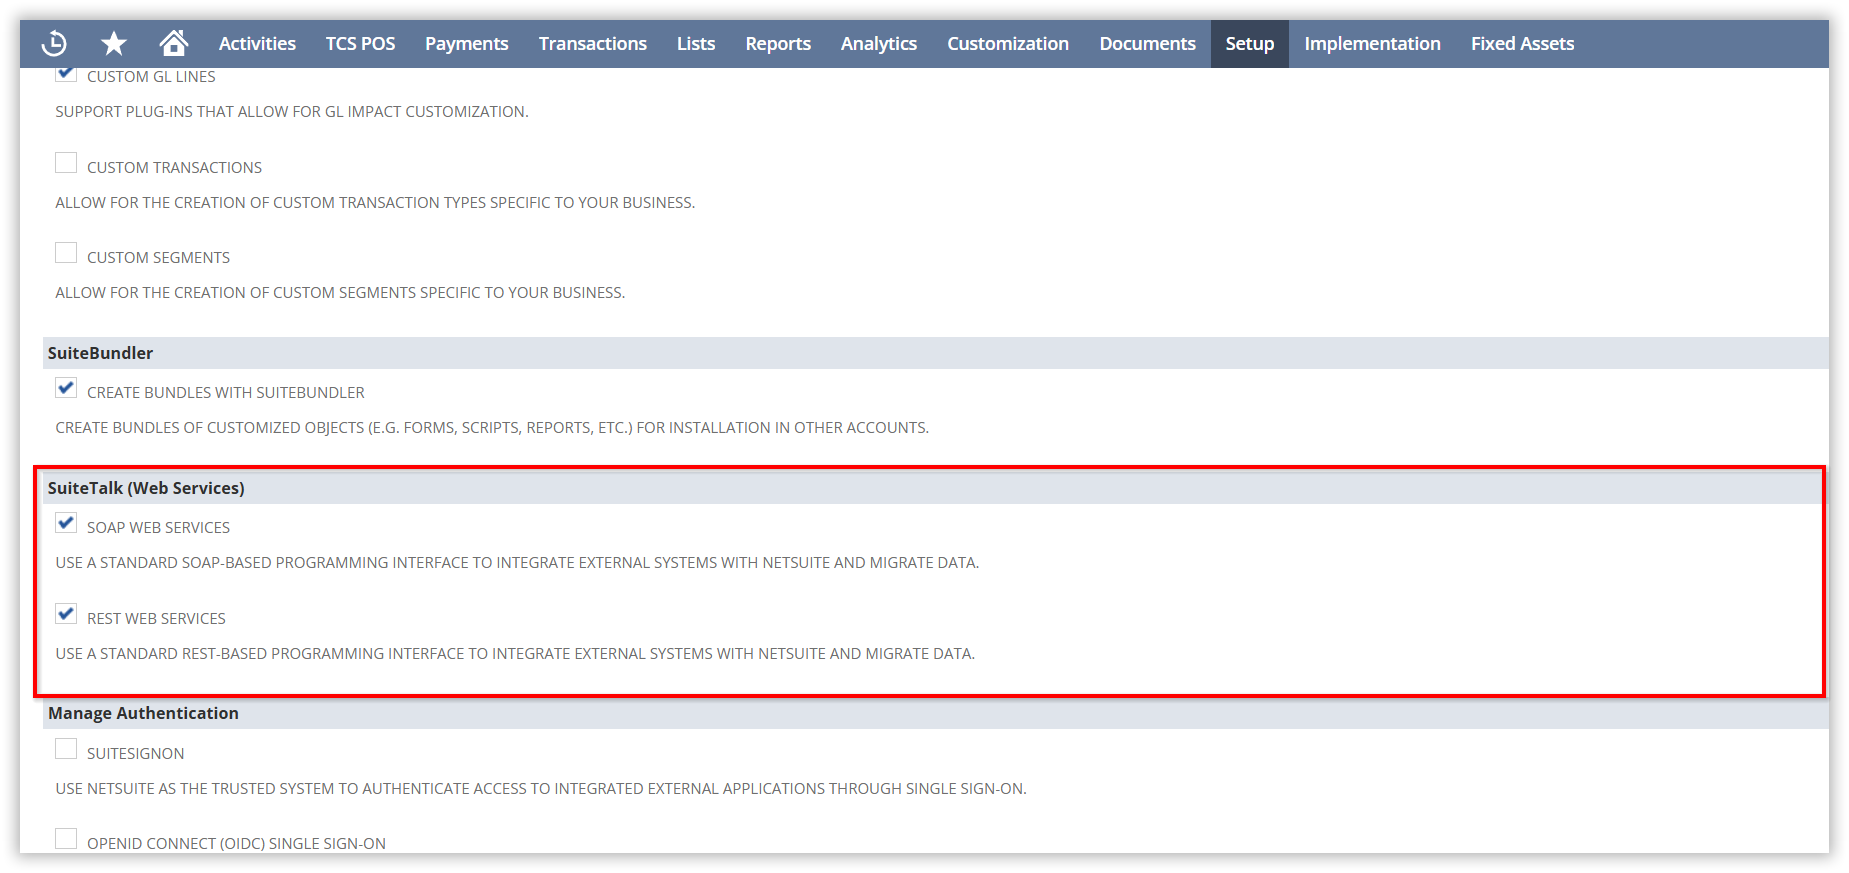
3. Enable SuiteTalk (WebServices)
Under the SuiteCloud section, locate the SuiteTalk (WebServices) section and enable the required features (SOAP Web Services and Rest web Services) as shown in the image.
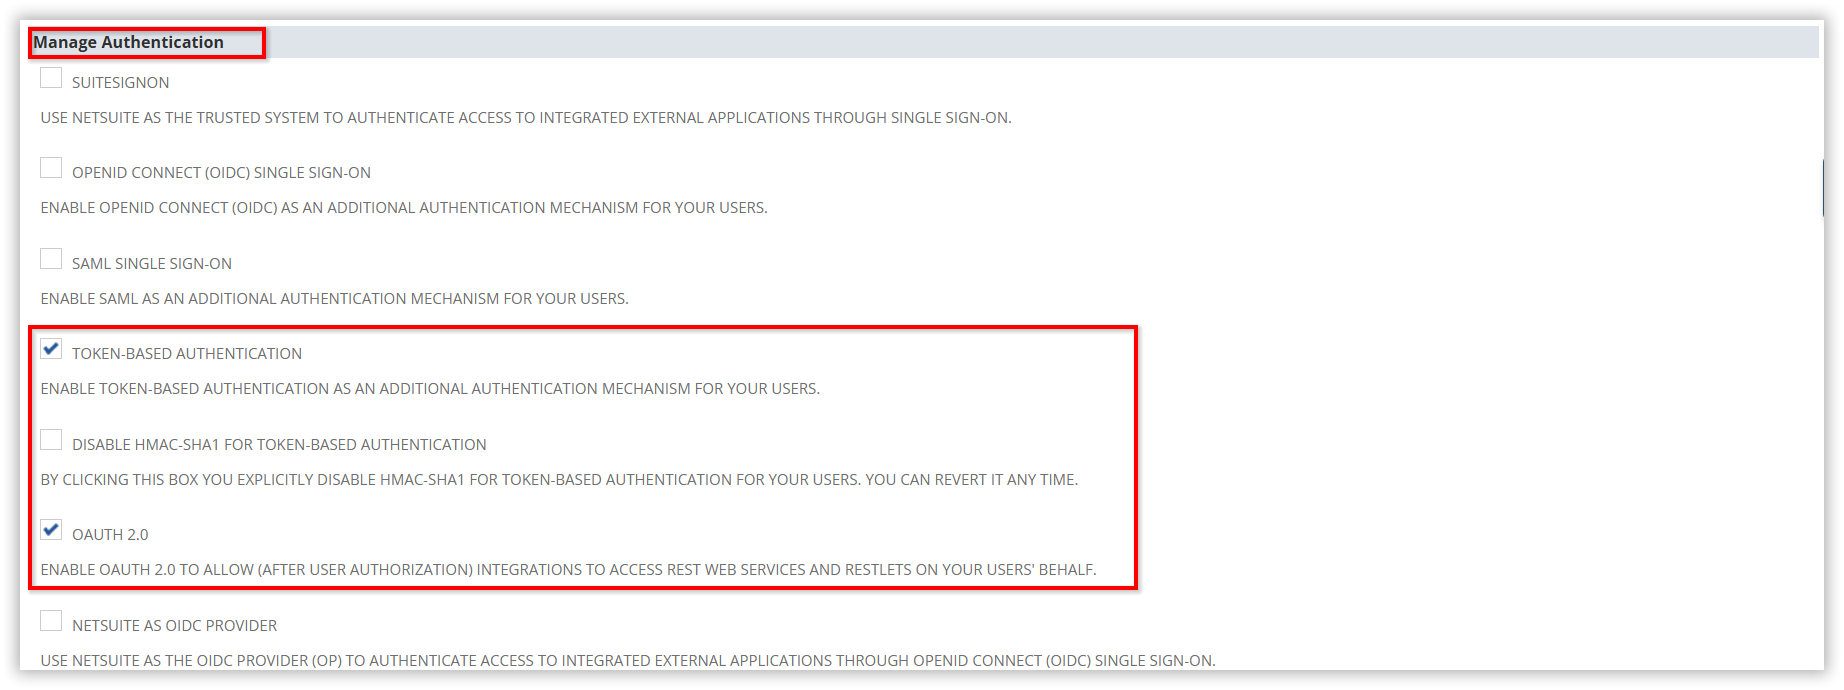
4. Enable Authentication Methods
Under the Manage Authentication section, enable Token-Based Authentication and OAuth 2.0, as shown in the image.
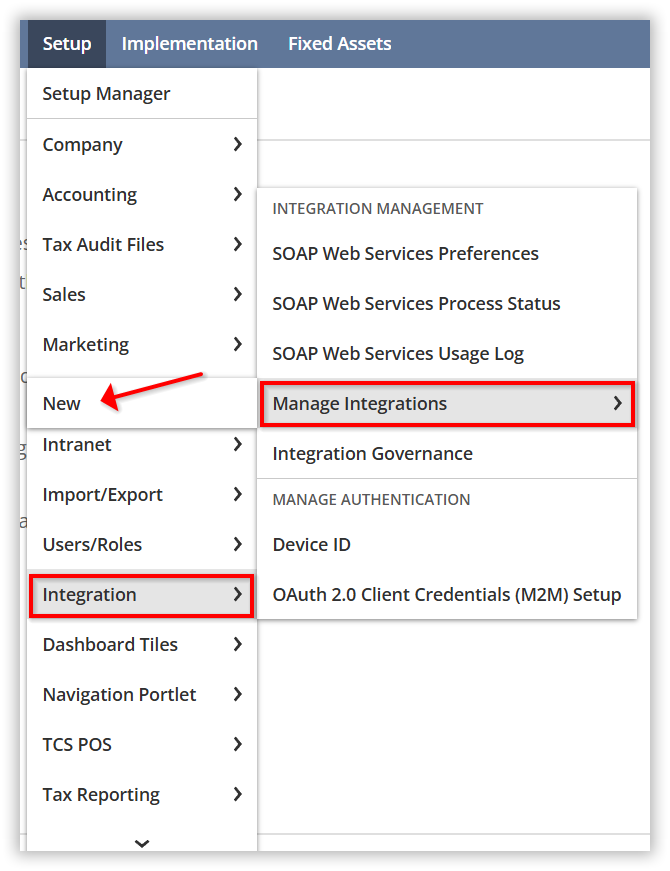
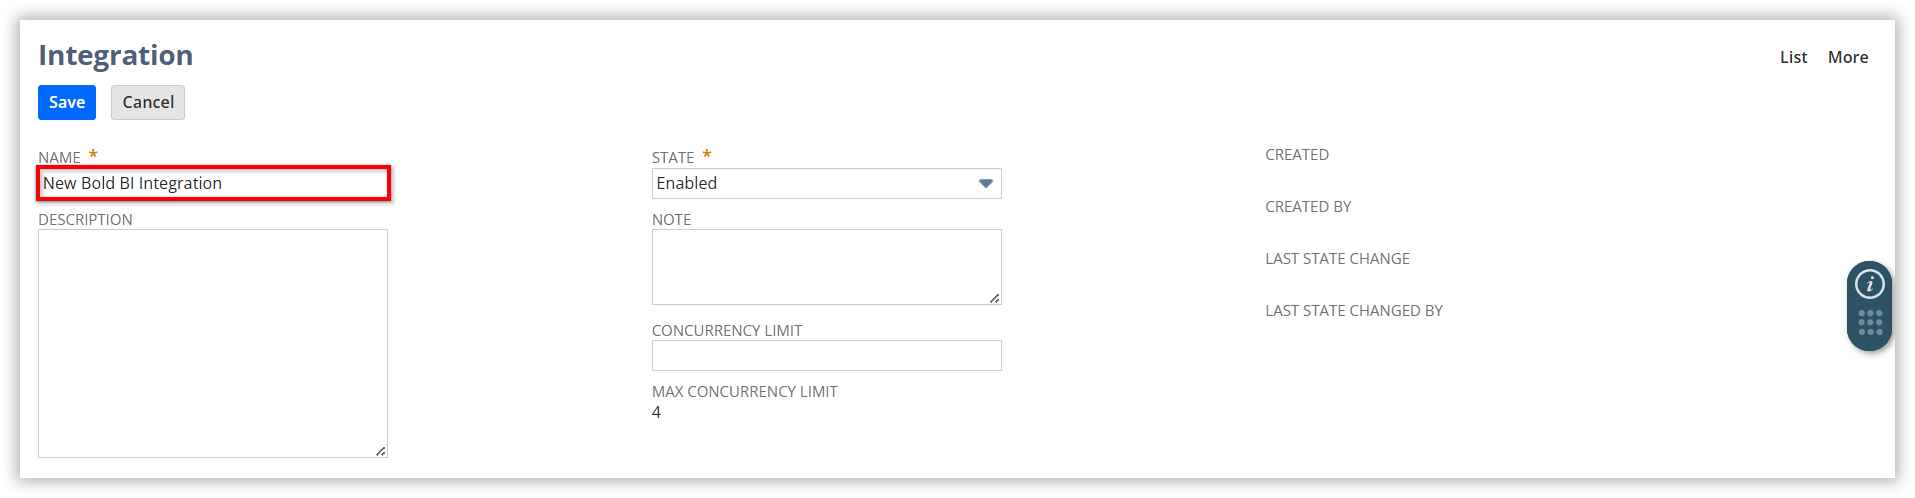
5. Manage Integration
Navigate to Manage Integration.
6. The Name field must be provided and cannot be left empty.
7. Enable the Authorization Code Grant under OAuth 2.0 and enable REST Web Services and RESTLETS.
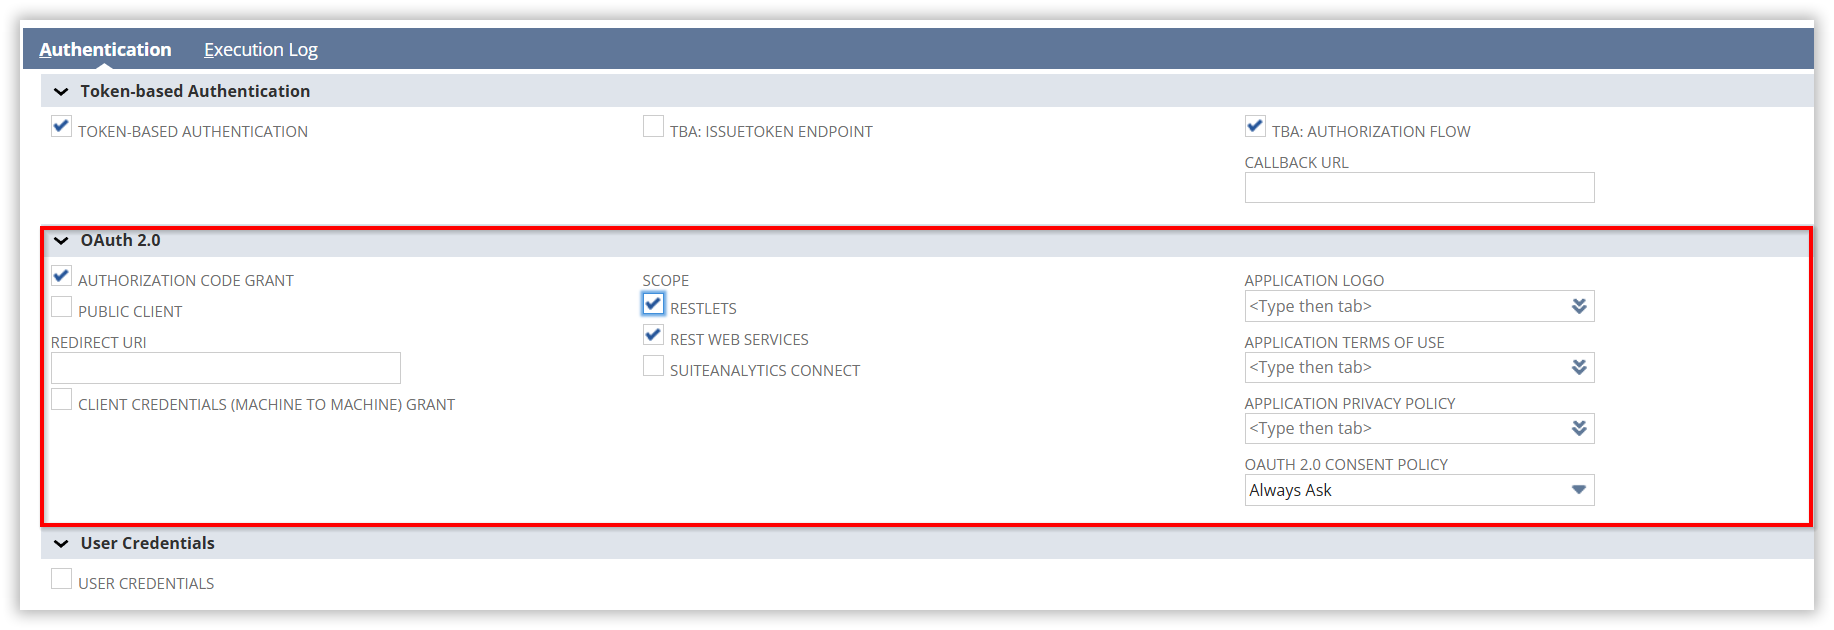
8. Provide the Redirect URL (e.g., https://localhost) as shown in the image.
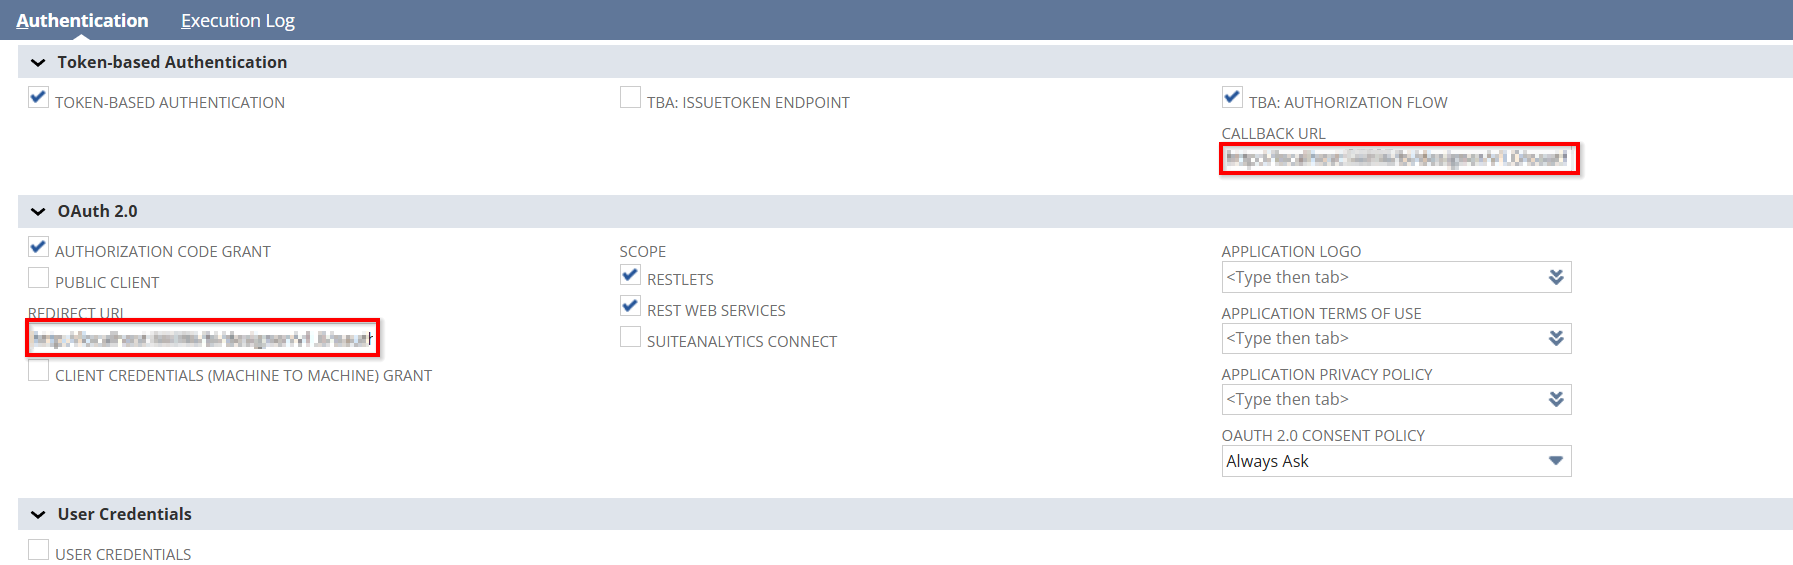
9. Finally Save it.
10. Get Client ID and Client Secret.
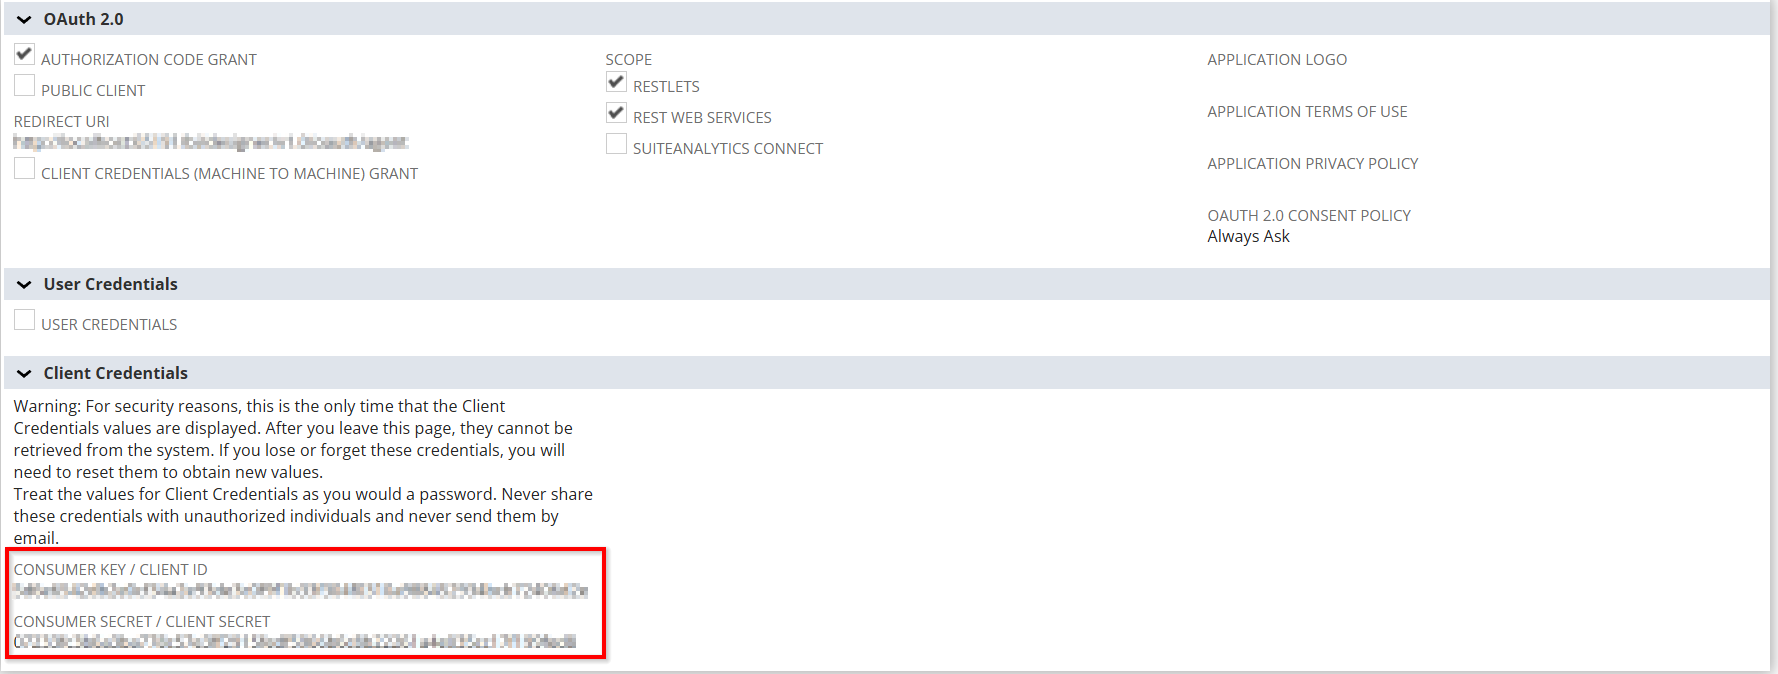
NOTE: Save the client ID and client secret in Bold BI by following the OAuth Configuration guide for more details.
Updating the OAuth Configuration File
a) Navigate to the OAuth Configuration File
- Access the following directory on the server:
BoldServices\bi\dataservice\app_data\OAuthConfiguration.json
b) Update the NetSuite Account ID
- Open the file in a text editor (e.g., Notepad++, VS Code).
- Locate the placeholder: accountID
- Replace it with your actual NetSuite account ID (e.g., “1234567_SB1”).
c) Replace <account_ID> with your actual NetSuite account ID respectively.
 d) Save the Changes
- Ensure the file retains its original .json format after editing.
- Restart the Bold BI service for changes to take effect, if required.
Connect the NetSuite connector in Bold BI.
Note: Oracle NetSuite supports two primary methods for establishing a connection:
-
Resources – Access individual record types through RESTful endpoints.
-
SuiteQL – Execute SQL-like queries to retrieve complex or filtered data across multiple records.
Connect to Oracle NetSuite using Resources
Create Oracle NetSuite data source
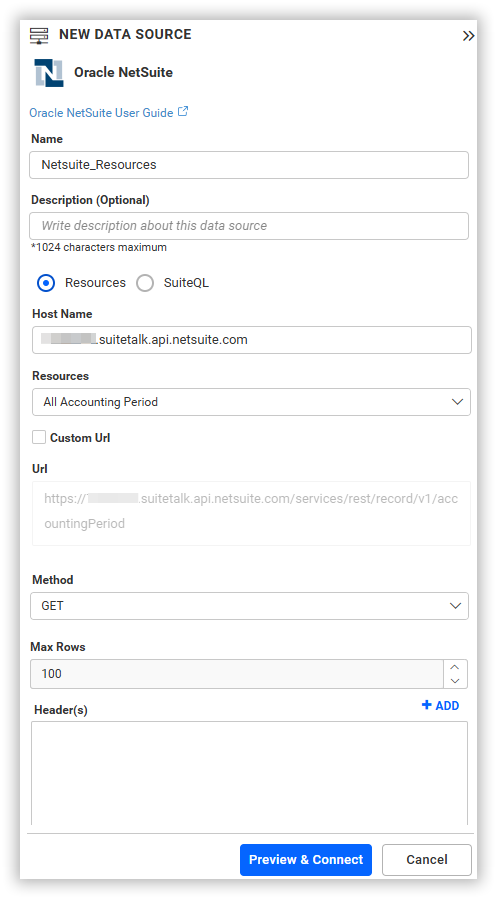
After successful authentication, the NEW DATA SOURCE configuration panel will open. Follow the below steps to create Oracle NetSuite data source.
-
Enter a name and description (optional) for the data source.
-
Click on the Resources radio button to choose the Host Name and the Resources API Endpoints.
-
The Host Name should be in the format: accountid.suitetalk.api.netsuite.com, where accountid is your actual NetSuite Account ID.
-
Choose the Resources from the drop-down list provided.
-
Enter a valid Oracle NetSuite REST API endpoint in the URL textbox Typically, this is:
https://<ACCOUNT_ID>.suitetalk.api.netSuite.com/services/rest/record/v1. Refer to the Oracle NetSuite API documentation for more details. -
Click CUSTOM URL to enter the URL manually.
-
Select the GET method for the REST API in the Method combo box.
-
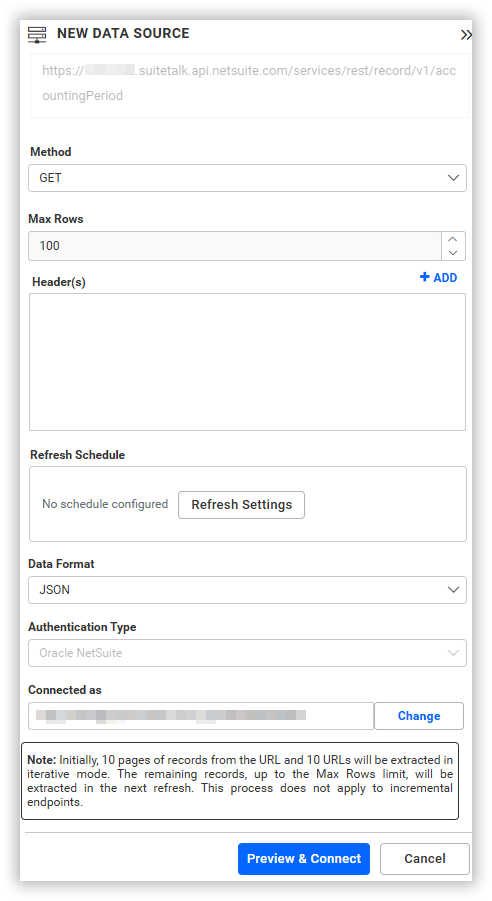
Choose a time interval for the Refresh Settings using the combo box, to periodically trigger the REST API request and keep the data in sync with our dashboard.
-
Select JSON data type in the Data Format combo box.
-
The authentication type will be set to Oracle NetSuite automatically since OAuth is used for authenticating with Oracle NetSuite account.
Connect to Oracle NetSuite using SuiteQL
Create Oracle NetSuite data source
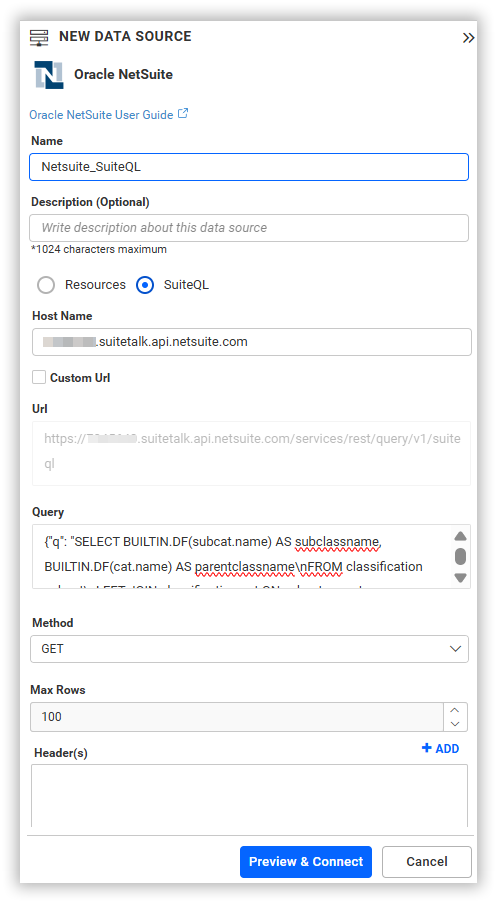
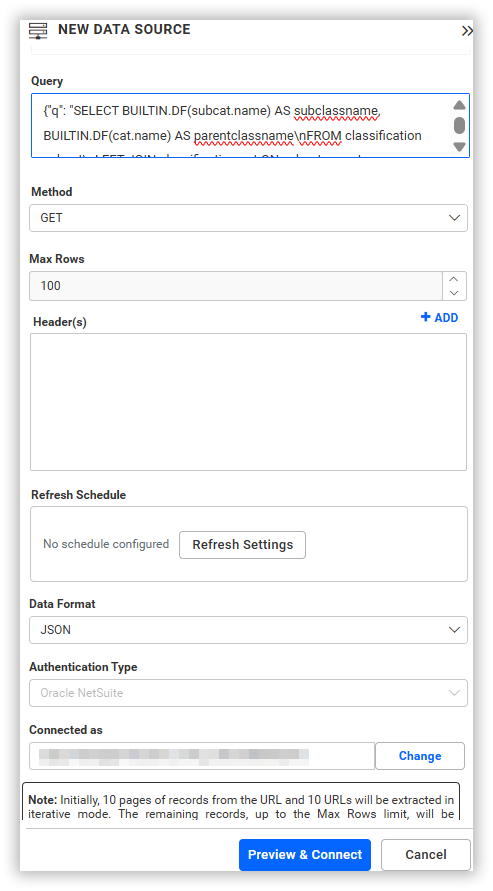
After successful authentication, the NEW DATA SOURCE configuration panel will open. Follow the below steps to create Oracle NetSuite data source.
-
Enter a name and description (optional) for the data source.
-
Click on the SuiteQL radio button to choose the Host Name or to enable the custom URL.
-
The Host Name should be in the format: accountid.suitetalk.api.netsuite.com, where accountid is your actual NetSuite Account ID.
-
Enter the SuiteQL endpoint URL in the URL textbox. Typically, this is:
https://<ACCOUNT_ID>.suitetalk.api.NetSuite.com/services/rest/query/v1/suiteql. Refer to the Getting Started with SuiteQL in Oracle NetSuite for more details. -
Click CUSTOM URL to enter the URL manually.
-
The query body must be passed in JSON format using the q key. For example:
{ "q": "SELECT name FROM customer" } -
Select the GET method for the REST API in the Method combo box.
-
Choose a time interval for the Refresh Settings using the combo box, to periodically trigger the REST API request and keep the data in sync with our dashboard.
-
Select JSON data type in the Data Format combo box.
-
The authentication type will be set to Oracle NetSuite automatically since OAuth is used for authenticating with Oracle NetSuite account.
 You can also edit the connection information set here using the Edit Connection option.
Additional information
| Refresh Settings | The period of time before the next refresh call is triggered. This will automatically trigger a call to the API configured in the data source to keep the data up to date. |
Setting up the URL
Accessing Resource Endpoints
- For instance, to query about the specific daily reach details, query the appropriate Oracle NetSuite REST endpoint with the required parameters, as specified in the Oracle NetSuite Api Documentation.
Replace it in the URL to query for reach details.
https://<accountid>.suitetalk.api.NetSuite.com/services/rest/record/v1
For more information on the API endpoints available for this data source, refer to their official API Documentation
Executing SuiteQL Queries
- For instance, to query specific data using SuiteQL, use the SuiteQL endpoint along with the required SQL query in the Query field, as specified in the Getting Started with SuiteQL in Oracle NetSuite.
Replace it in the URL to query for reach details.
https://<ACCOUNT_ID>.suitetalk.api.NetSuite.com/services/rest/query/v1/suiteql
For complete details on the SuiteQL query endpoint and supported operations, refer to the official NetSuite SuiteTalk REST Web Services documentation
Sample queries
Accessing Resource Endpoints
Account
https://<ACCOUNT_ID>.suitetalk.api.NetSuite.com/services/rest/record/v1/account
Executing SuiteQL Queries
   {
      "q": "SELECT tranid, entity, amount FROM transaction"
   }
Preview and data import
-
Click Preview & Connect to connect with the configurations that have been set.
-
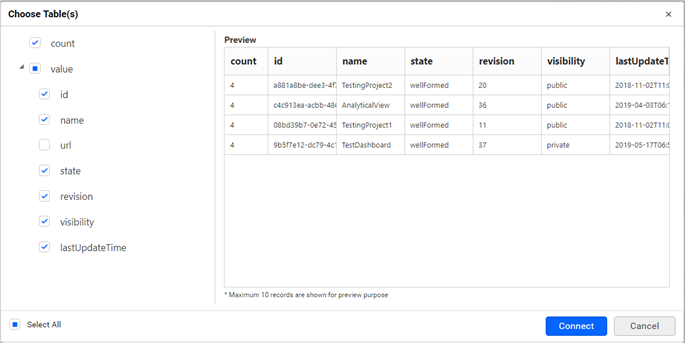
The Choose Schema(s) dialog opens. The schema represents the key fields of JSON data retrieved from Facebook Rest API request. This dialog displays a list of schemas in a treeview and its corresponding values in grid for preview. Select required schema(s) from treeview to use in designer and click Connect.
-
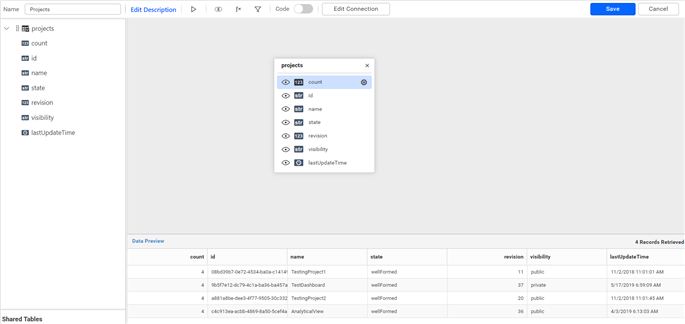
Now, the data design view page with the selected table schema opens. Drag and drop the table.
-
Click Save to save the data source with a relevant name.
Connected accounts for OAuth data sources
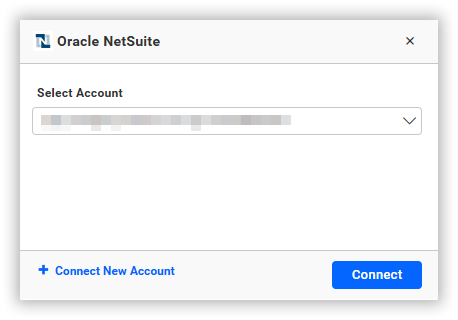
If you have already logged into the account and authenticated with the web data source, the account information will be listed here. You can select one of the accounts or connect to a new account by clicking the Connect New Account button.
You can edit, delete and re-authorize this account from the Connected Accounts page.

Related links
- Choose Oracle NetSuite data source
- Updating the OAuth Configuration File
- Connect the NetSuite connector in Bold BI
- Connected accounts for OAuth data sources
- Related links
Having trouble getting help?
Contact Support- Choose Oracle NetSuite data source
- Updating the OAuth Configuration File
- Connect the NetSuite connector in Bold BI
- Connected accounts for OAuth data sources
- Related links
Having trouble getting help?
Contact Support