Creating a New Site in Bold BI Server
This section briefly explains the steps involved in creating a new site in Bold BI Server multi-tenant application.
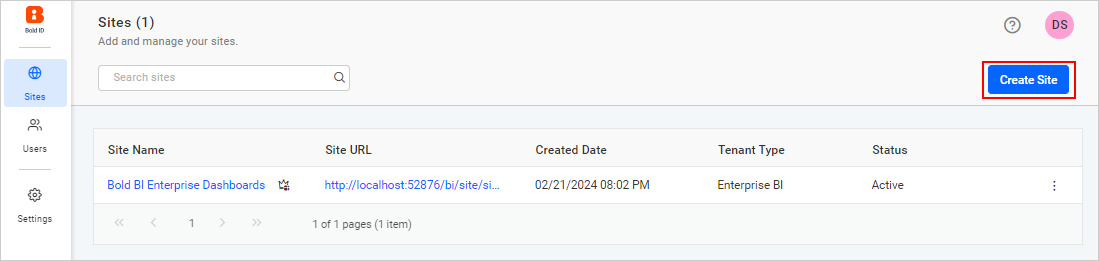
Site creation
You can create another site in the Bold BI Server application by clicking the Create Site button in the site management module.
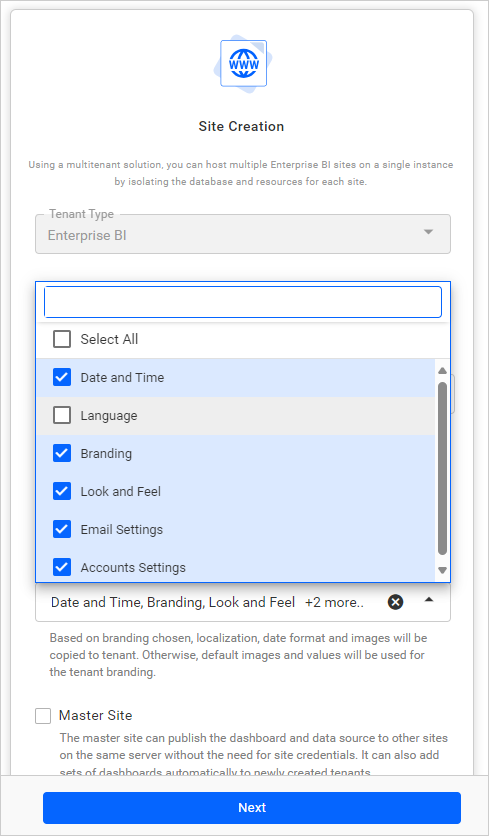
This step includes the site details such as tenant type, name, domain, and identifier. The site identifier should be unique and is a part of your site URL. Custom domains can also be used for site creation. You can enable the Lock site URL and prevent automatic updates from reverse proxy requests option to keep the configured domain fixed during site creation and prevent it from being changed automatically by proxy requests. Additionally, you have the option to inherit settings from UMS to your tenant by using the Inherit Global Settings option.
The site identifier is generated automatically when a site is created. It follows the format siteN, where N is one more than the current number of active sites for that product. The identifier is included in the site URL and applies to both Bold BI and Bold Reports, with numbering maintained separately per product.
NOTE:
- The site identifier is unique within each product (Bold BI and Bold Reports).
- Numbering is determined per product based on the count of active sites.
- Example (Bold BI): If there are 3 active sites, the next identifier will be site4. The identifier appears in the site URL after creation.

To inherit settings, simply click the drop-down menu and select the Select all option to access all global settings from UMS when creating a new site. If you prefer to inherit selected settings from UMS, choose the specific settings you require from the global settings in UMS.
Based on the settings chosen, the following information will be copied to the tenant.
- Date and Time format
- Application Language
- Branding Images
- Look and Feel Settings
- Email Settings
- Account Settings
Otherwise, default branding images and values will be used for the tenant settings.
Please follow this link to learn how to manage Inherit Global Settings for an existing site.
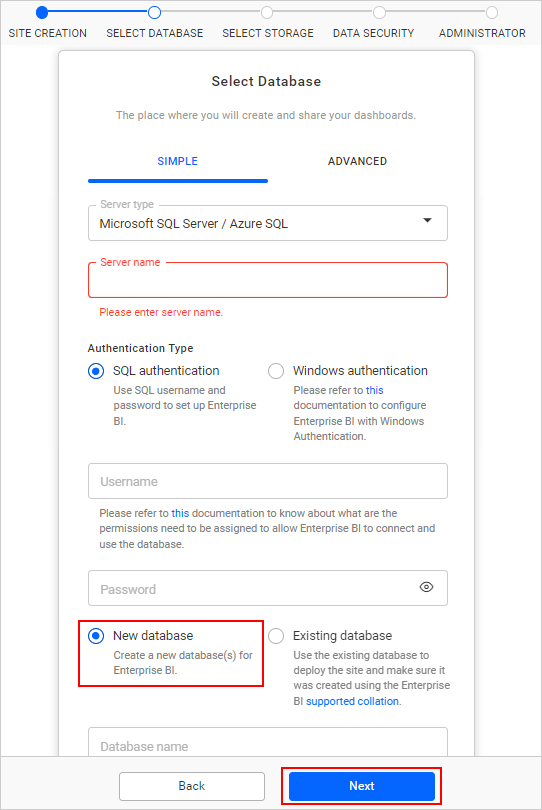
Select database
This step helps you configure a single or individual database for the Bold BI Server and Data Store.
The dashboards, users, and access rights are all stored in the SQL Server Database.
The Data Store database gathers data from over 120 connectors and stores it locally so dashboards can quickly access it.
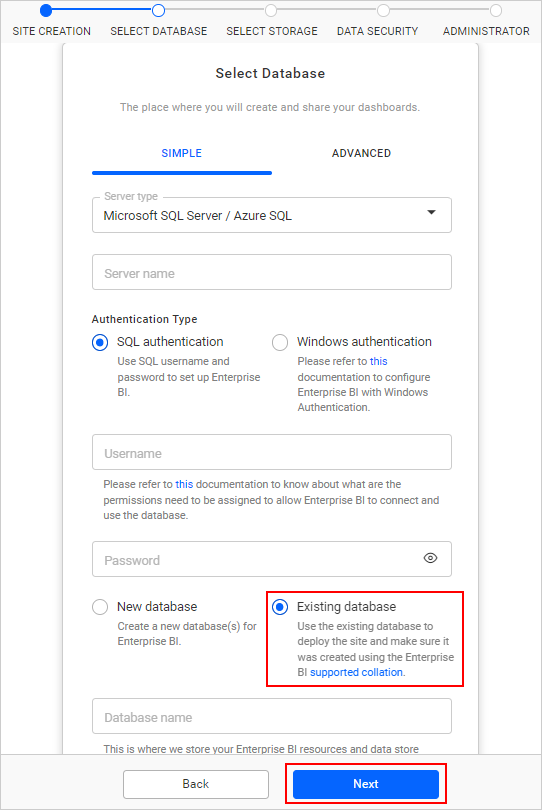
The following options can be used to connect to an existing SQL Server instance:
- By creating a new
Bold Bi Sitedatabase.
- By choosing one of the databases from the
Select a Databasedropdown to create Bold BI Server tables in that database.
NOTE: The credentials given to connect to the SQL Server instance must have permissions.
- Create Database
- Create Table
- Insert
- Update Table
- Alter Table
- Select
- Drop Table
- Drop Database
Here, you can select either the simple or advanced mode for configuration.
Simple mode
Configure a single database for Bold BI and Data Store.
The site’s details, dashboards, data store, users, and their access permissions are all stored in a single database with this configuration.

Advanced mode
Configure individual databases for Bold BI and Data Store.
Dashboards, users, and their access permissions are all stored in the Bold BI database.
The authentication information and data collected from SQL and REST data sources are stored in the Data Store database.

Configure Isolation code and Custom Attribute in site
You can skip this configuration directly by clicking the Next button, or you can configure the isolation code, custom attribute, or both before proceeding with the Next.
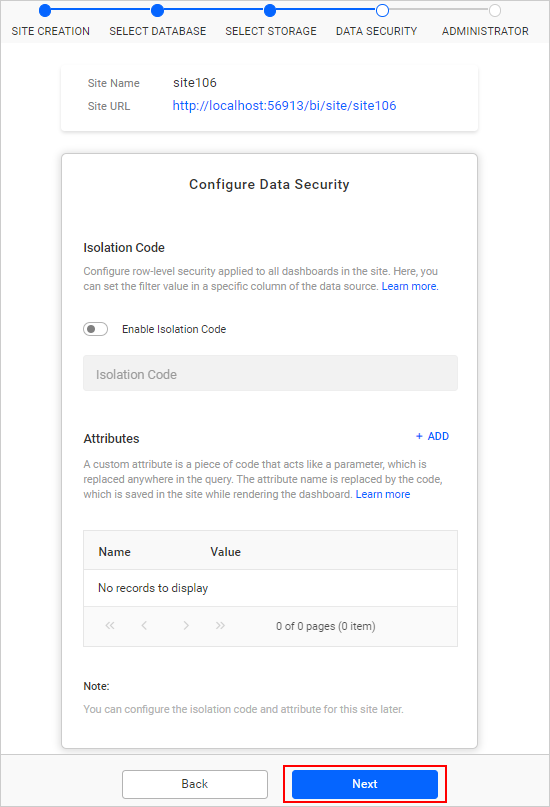
Isolation code
The isolation code feature is used to configure row-level security for the site to apply to all dashboards on the site. Users can set the filter value in a specific column of the data source. The UMS admin can apply the isolation code from the site settings of the UMS site details page. Dashboards will be filtered based on the applied isolation code. If the column in the code does not match the data source level, no data will be displayed in widgets. Learn more about Isolation code.
Custom attribute
This can be set by the UMS admin for a site on the site details page. Learn more about the Configure Custom Attribute.
Attributes are name-value pairs associated with users, groups, and sites (tenants).
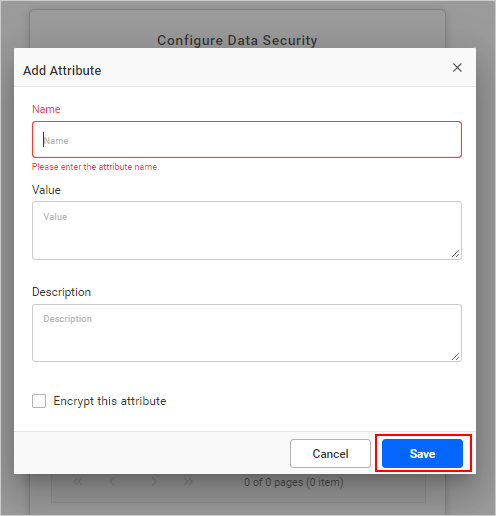
Name – Name of the attribute.
Value – Value of the attribute.
Description – Explaining the purpose for the attribute.
Encrypt – Store it as encrypted one in the database and the value will be shown as dots in the grid.
Select administrator
This step is used to choose a user who will have full control over the site.
The selected user will have the ability to:
- Create Dashboards
- Create Data Sources
- Create Schedules
- Create Slideshows
- Create Users
- Create Groups
- Manage Permissions for users and groups
After selecting the user, proceed with creating and launching the site.
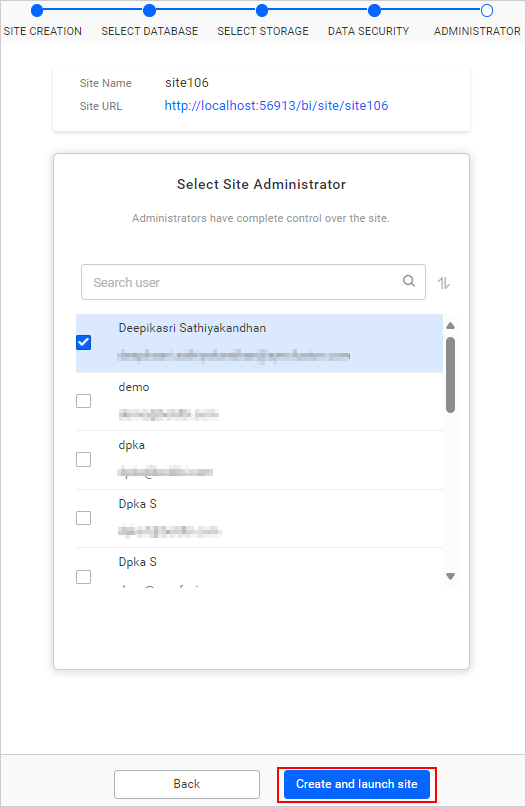
The selected admin user(s) can access the resources and manage users, groups, and their permissions in the corresponding site only.