White labeling in Bold BI
Bold BI can be white-labeled to align with your application’s branding. Your application will be prominently featured, ensuring that your clients enjoy a consistent and integrated experience with every engagement. Site administrators or users with permission to manage the settings can perform white-labeling.
What areas in Bold BI can be white-labeled?
- Site Name
- Site Logo
- Powered by Information
- Copyright Information
- Site Language
- Date and Time Display Formats
- Site Domain
- Theme and Branding Colors
- Site Font
- Use Your Own Credentials for Login
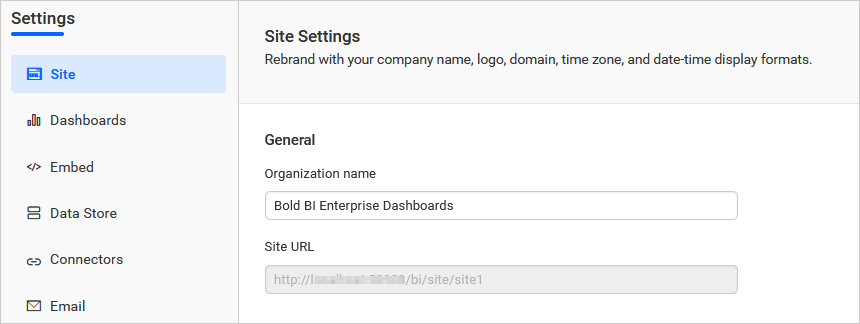
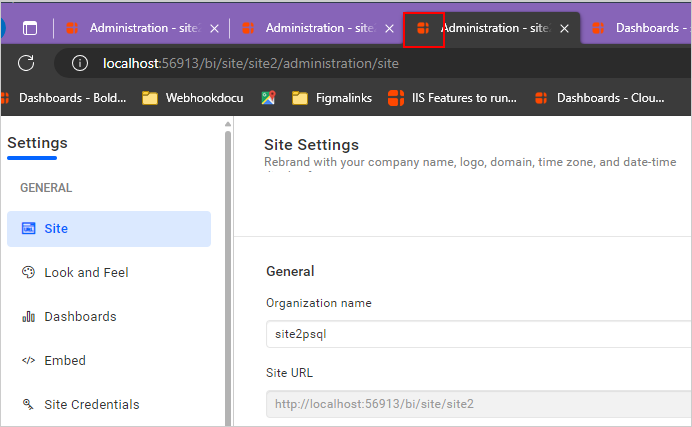
Site Name Customization
Name of the Bold BI site can be changed at any time on the Site Settings page under the General section. This will be shown in the title of the browser and email template content.
Please refer to this link to learn more about customizing the site name in Bold BI.
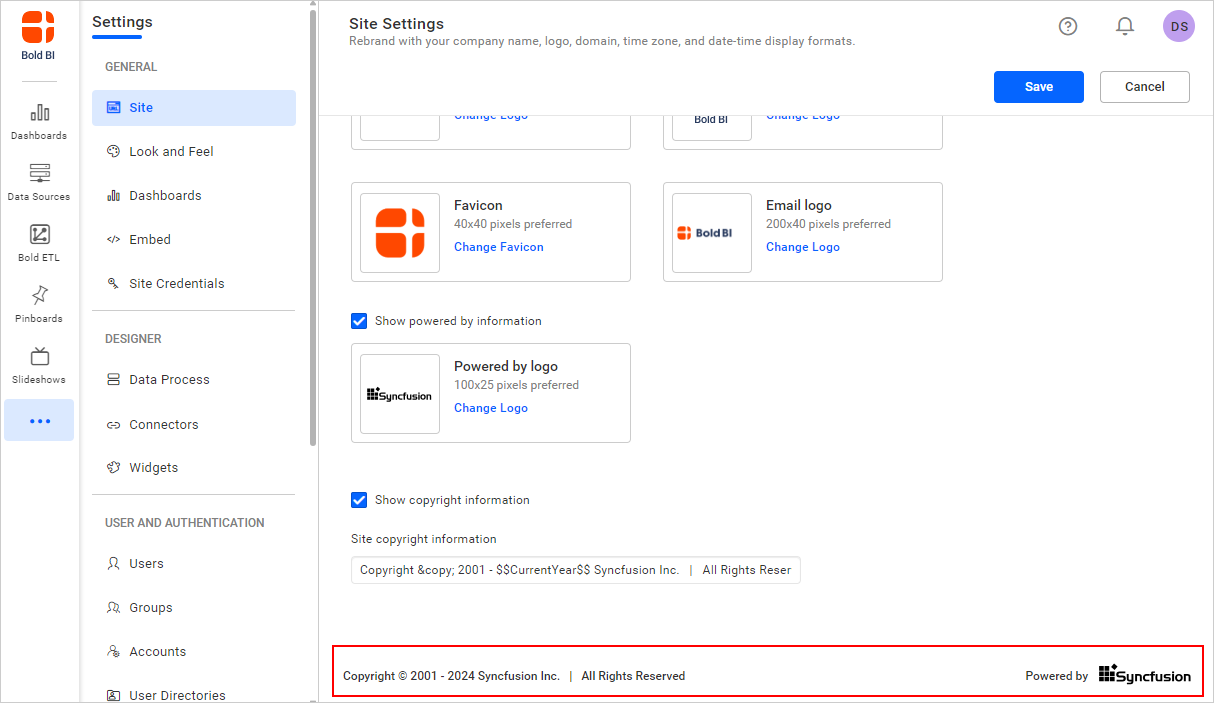
Site Logo Customization
You can customize the Login screen logo, Header logo, Email logo, and Favicon in the Bold BI on the Site Settings page under the Branding section to match your application’s branding. The default Bold BI logos will be displayed on Bold BI sites unless customized.
![]()
Login Screen Logo
The login page logo can be customized (ideal size: 200 x 40). It will be used on the site’s login page, as shown in the following image.
![]()
Header Logo
The header logo can be customized (ideal size: 40 x 40). It will be used at the top of the side navigation menu, as shown in the following image.
![]()
Favicon
Favicon for the Bold BI site can be customized (ideal size: 40 x 40). It will be used in the title of the browser, as shown in the following image.
Email Logo
The email logo can be customized (ideal size: 200 x 40). It will be used in the emails sent from your Bold BI site, as shown in the following image.
![]()
AI Logo
The AI logo can be customized (ideal size: 40 x 40). It will be used on the dashboard rendering page as logo for AI service, as shown in the following image.
![]()
Please refer to this link to learn more about customizing the logo in Bold BI.
Powered by Information Customization
The “Powered by” logo (ideal size: 100x25) can be customized or disabled for Embedded BI on the Site Settings page under the Branding section. Cloud BI users can only hide the logo display.
![]()
Please refer to this link to learn more about customizing the “Powered by” information in Bold BI.
Copyright Information Customization
Copyright details can be changed or disabled for Embedded BI on the Site Settings page under the Branding section. Cloud BI users can only hide this information.
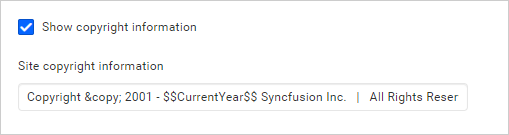
The “Powered by” logo and copyright information will be shown at the bottom of the site pages, as shown in the following image.
Please refer to this link to learn more about customizing the copyright information in Bold BI.
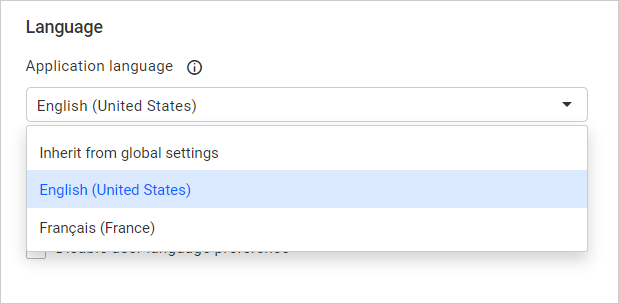
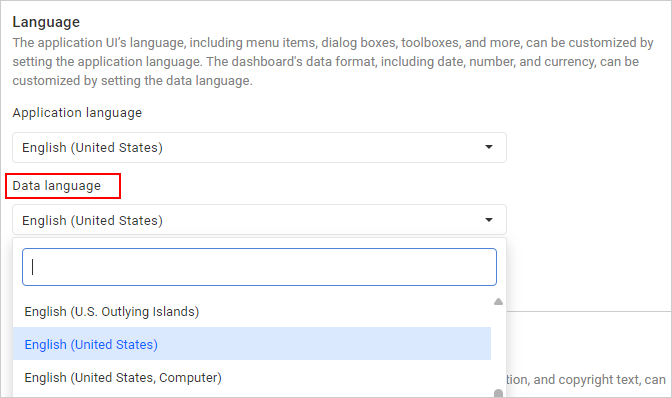
Site Language Customization
You can customize the language settings for application language and data language on the Site settings page under the Language section.
Application Language Customization
You can localize the Bold BI application to any culture by changing the language in the Application language section. Please click on the localization to learn how to add a new localization or edit the existing localization in the Bold BI application. This language will be applied to the application user interface, including menu items, dialog boxes, toolboxes, and more.
Data Language Customization
You can localize the date, number, and currency formats of the dashboards to any culture by changing the language in the Data Language section.
Please refer to this link to learn more about customizing the languages in Bold BI.
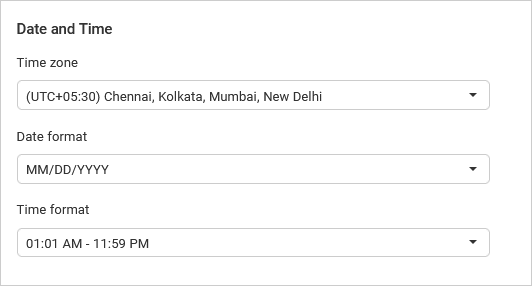
Date and Time Display Formats Customization
You can customize the time zone, date format, and time format of Bold BI on the Site settings page under the Date and Time section.
Time Zone Customization
The time zone for the Bold BI site can be customized. The Bold BI site sets the default time zone based on the time zone of the machine where Bold BI is deployed. By selecting Inherit from browser time zone, the Bold BI site will use the time zone from the browser.
Date Format Customization
The date format of the Bold BI site can be customized. The default date format for the Bold BI site will be MM/DD/YYYY. By selecting Inherit from browser locale, the Bold BI site will use the date format from the browser.
Time Format Customization
The time format of the Bold BI site can be customized. The default time format for the Bold BI site will be 12-hour. By selecting Inherit from browser locale, the Bold BI site will use the time format from the browser.
Please refer to this link to learn more about customizing the date and time display formats in Bold BI.
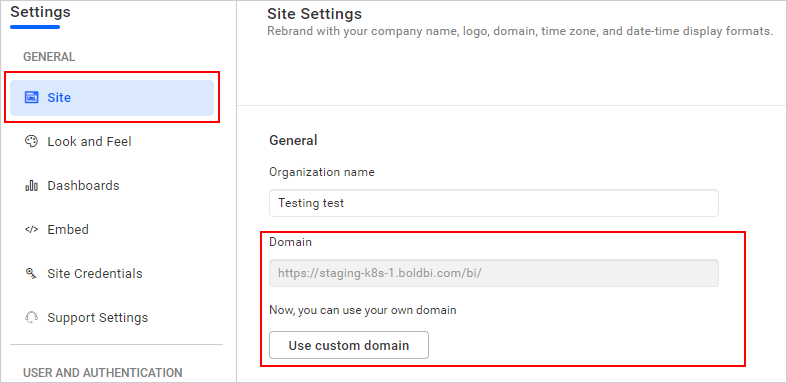
Site Domain Customization
You can customize the domain in Bold BI to align your analytics platform by reinforcing brand recognition and credibility.
Custom Domain in Embedded BI
You can customize your bindings with either an IP address or a domain. Please follow this link to learn how to set up a custom domain in Embedded BI.
Custom Domain in Cloud BI
By default, the domain of the cloud site will be the subdomain of boldbi.com (e.g. https://demo.boldbi.com/). You can customize it on the Site Settings page under the Domain section. To set up the custom vanity domain, you will need a domain from a DNS provider, and Bold BI will provide an SSL certificate for your domain. Please follow the Custom Domain in Cloud Analytics Server to learn how to set up a custom domain in Cloud BI.
Please refer to the Custom Domain in Cloud Analytics Server to learn more about customizing the domain in Bold BI.
Note: The logos, site name, copyright information, “powered by” information, languages, date and time display formats, and domain customizations can be updated on the
Site Settingspage by administrators or users with permission to manage the site settings.
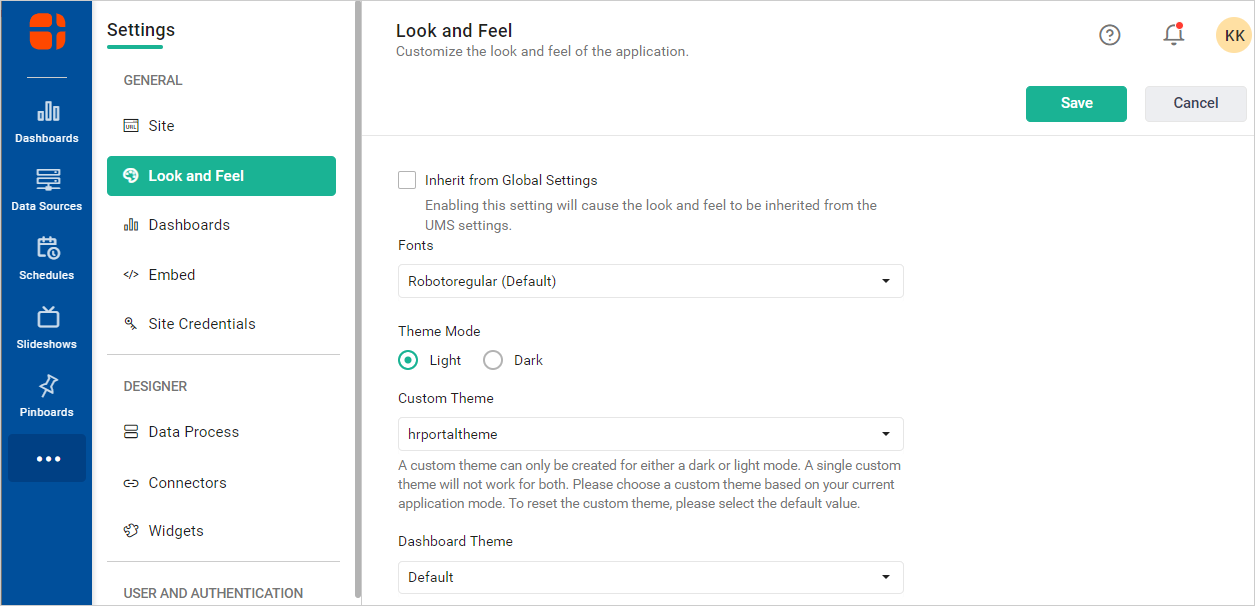
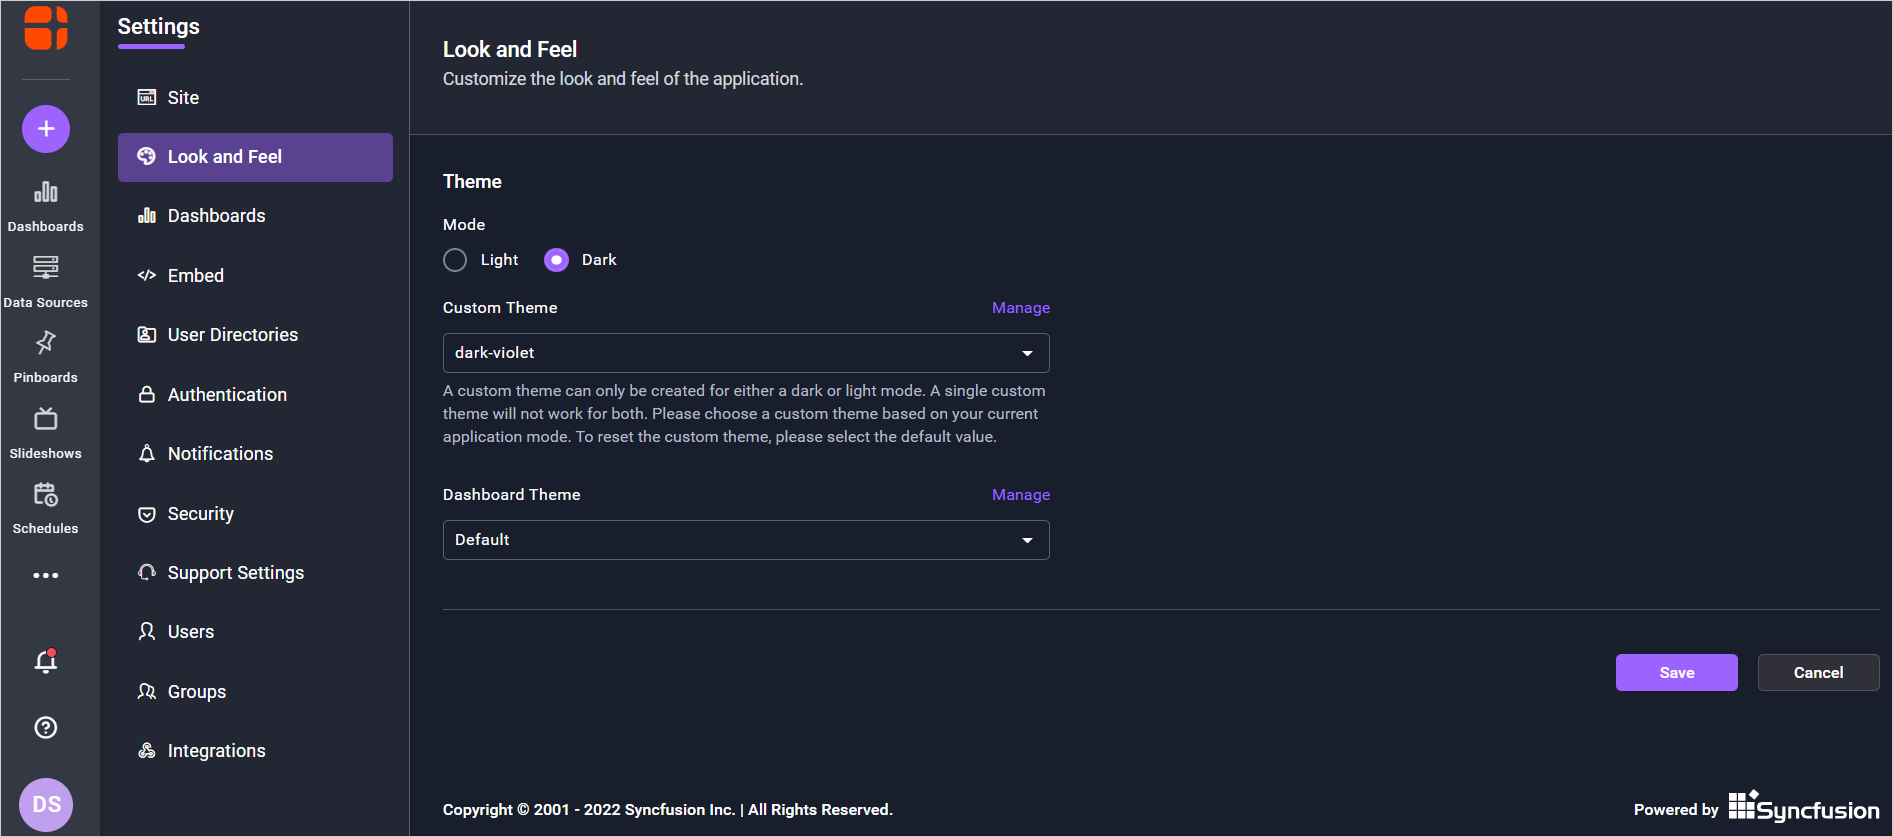
Theme and Branding Colors Customization
You can switch the application and dashboard theme from light to dark mode and vice versa, under the Look and Feel settings. Additionally, you can change the text color, active state, and hover state background color. Furthermore, you can also customize components like switches, radio buttons, check boxes, and numeric text boxes by using branding color to align with your application’s interface.
Here is a sample image after customizing theme branding color using a green variant in light mode.
Here is a sample image after customizing theme branding color using a violet variant in dark mode.
Please find the links below to learn more about custom themes.
How to create custom application theme
How to create custom dashboard theme
How to upload custom theme files for Embedded BI on the UMS site settings page
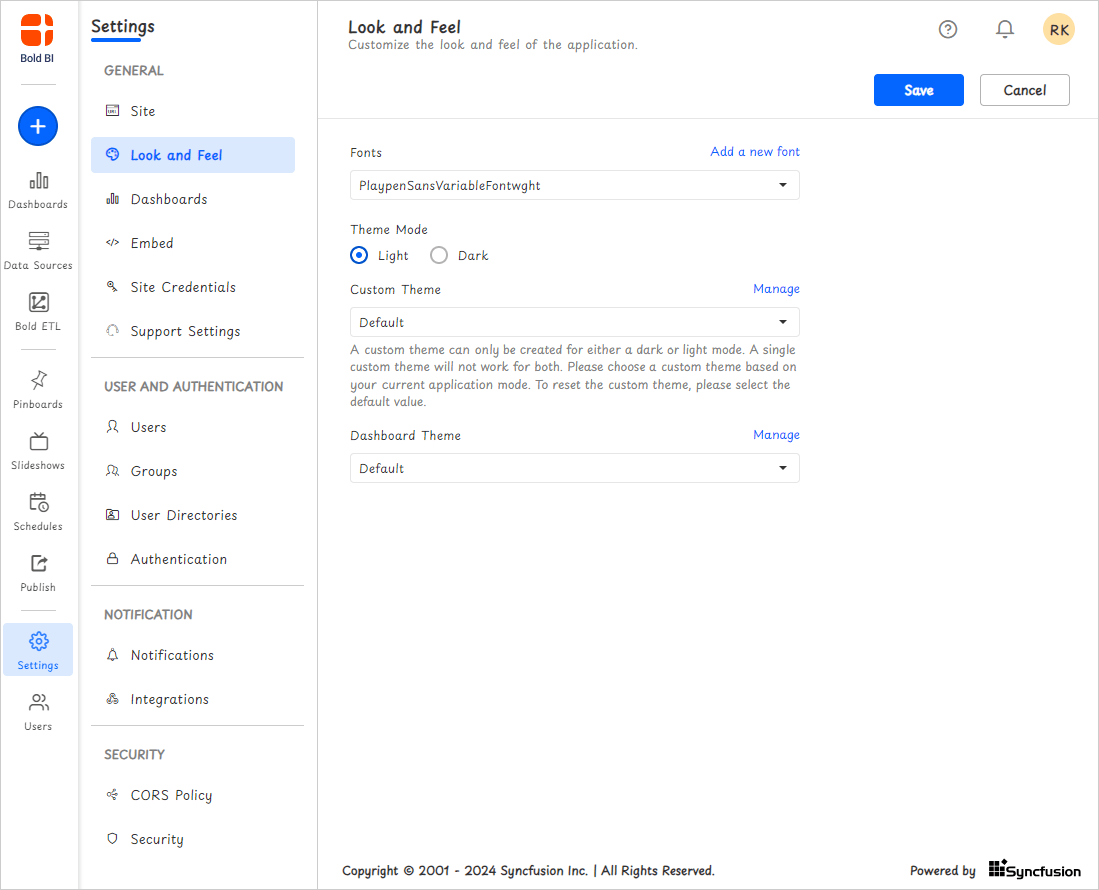
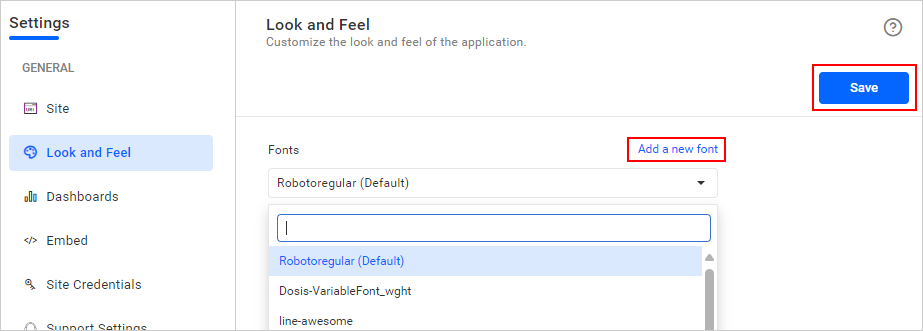
Site Font Customization
You can customize the font style to match your application’s interface under the Look and Feel settings in the Bold BI.
Here is the sample image after applying the font.
Font Customization in Embedded BI
The font styles uploaded in UMS site settings will be listed in the Fonts drop-down list. The selected font style will be applied throughout your site.

Please click on the Font to learn how to upload font styles on the UMS site settings page.
Font Customization in Cloud BI
You can upload your preferred font styles in Look and Feel settings and it will be listed in the Fonts drop-down list. The selected font style will be applied throughout your site.
Please find the links below to learn more about custom fonts.
Look and Feel Settings in Cloud Analytics Server
Look and Feel Settings in Embedded Analytics
Note: The font and theme customizations can be updated on the
Look And Feelsettings page by administrators or users with permission to manage the look and feel settings.
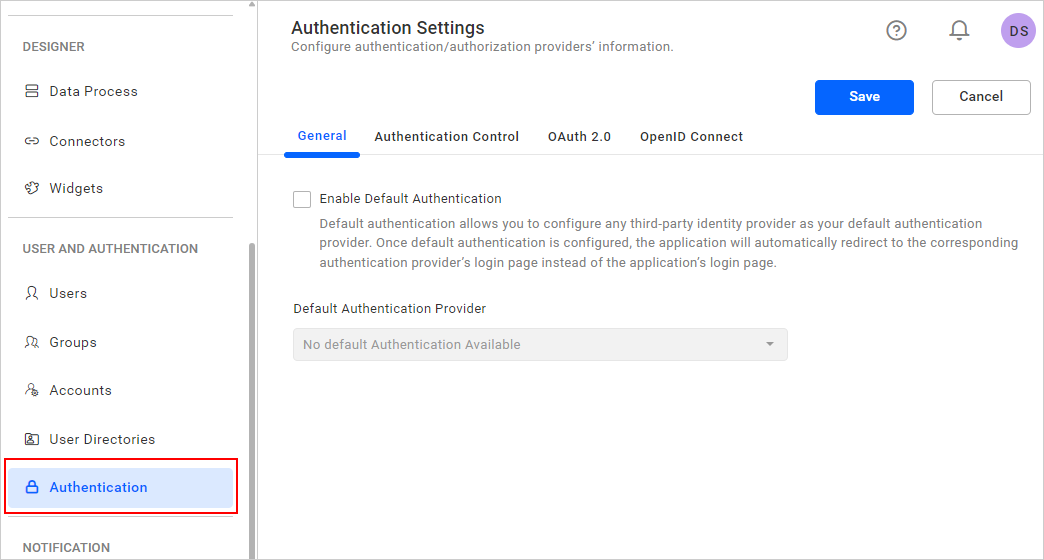
Use Your Own Credentials for Login
You have the option to configure third-party identity providers within the site and select one as the default authentication provider for logging in to the BI site. Once the default authentication is established, the Bold BI application will automatically redirect users to the login page of the selected authentication provider instead of the default Bold BI login page. This way, you can use your own credentials for login.
To configure default authentication, it is necessary to set up a provider and enable one of the following identity providers. Otherwise, you will see a “No default Authentication Available” message in the drop-down.
You can configure and choose any of the following providers as the default authentication provider:
NOTE: If you want to skip default authentication after setting it, then use ’
use_default_authentication=false’ in the login URL. (ex:https://{yourdomain}/{site}/{site_identifier}login?use_default_authentication=false).
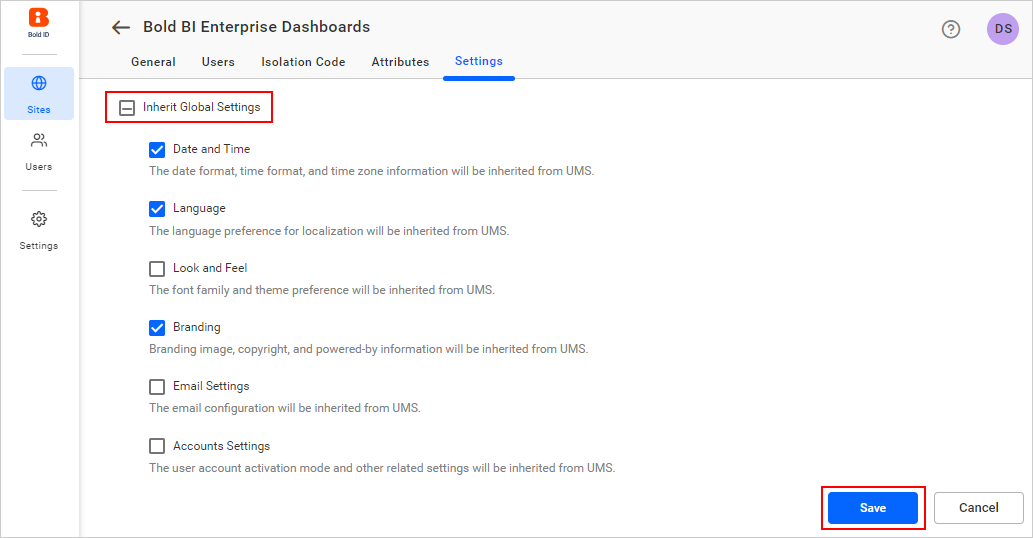
Common branding for multi-tenants
You can inherit the branding and settings configured in UMS for your BI sites using the Inherit Global Settings option. This allows you to maintain common branding and settings across your multi-tenant application.
Please follow this link to learn how to manage Inherit Global Settings for an existing site.